


"actions": [
    {"id": "option1", "features": [{"feature1": "value1"}]},
    {"id": "option2", "features": [{"feature1": "value2"}]},
    {"id": "option3", "features": [{"feature1": "value3"}]}
]
}
发送请求获取个性化建议
response = requests.post(endpoint, json=body, headers=headers)
result = response.json()
输出个性化建议
print("Personalized suggestion: ", result[“rewardActionId”])
在这个示例中,您需要替换 `<your_personalizer_endpoint>` 和 `<your_personalizer_key>` 为您在Azure门户中创建Personalizer服务时获得的终结点和API密钥。然后,根据用户的上下文和历史数据,发送请求给Personalizer服务获取个性化建议,并根据返回结果提供相应的建议。
通过使用Personalizer服务,系统可以根据用户的需求和偏好提供个性化的决策建议,帮助用户更好地理解数据和信息,提升用户体验和决策效果。
### 五、风险管理示例代码

Azure Cognitive Services中的Anomaly Detector服务可以帮助企业评估和管理潜在的风险,通过检测异常数据点来提供风险管理支持。以下是一个简单示例代码,演示如何使用Azure Cognitive Services中的Anomaly Detector服务进行风险管理:
1. 在Azure门户中创建一个Anomaly Detector服务。
2. 使用Anomaly Detector服务的API来检测异常数据点并评估风险。
下面是一个简单的Python示例代码,演示如何使用Anomaly Detector服务进行风险管理:
import requests
Anomaly Detector服务的终结点和API密钥
endpoint = “<your_anomaly_detector_endpoint>”
key = “<your_anomaly_detector_key>”
请求头
headers = {
“Content-Type”: “application/json”,
“Ocp-Apim-Subscription-Key”: key
}
请求体,包含时间序列数据
body = {
“granularity”: “daily”,
“series”: [
{“timestamp”: “2023-01-01T00:00:00Z”, “value”: 100},
{“timestamp”: “2023-01-02T00:00:00Z”, “value”: 120},
{“timestamp”: “2023-01-03T00:00:00Z”, “value”: 90},
{“timestamp”: “2023-01-04T00:00:00Z”, “value”: 110}
]
}
发送请求检测异常数据点
response = requests.post(endpoint, json=body, headers=headers)
result = response.json()
输出异常数据点
print("Detected anomalies: ", result[“isAnomaly”])
在这个示例中,您需要替换 `<your_anomaly_detector_endpoint>` 和 `<your_anomaly_detector_key>` 为您在Azure门户中创建Anomaly Detector服务时获得的终结点和API密钥。然后,通过提供时间序列数据,发送请求给Anomaly Detector服务来检测异常数据点,并根据返回结果评估风险。
通过使用Anomaly Detector服务,企业可以及时发现潜在的风险并采取相应的措施,从而减少决策带来的负面影响,提升风险管理效果。
### 六、自动化决策流程示例代码
实现自动化决策流程可以结合Azure Cognitive Services中的多个服务,如Azure Machine Learning和Azure Logic Apps等。以下是一个简单示例代码,演示如何使用Azure Cognitive Services实现自动化决策流程:
1. 创建Azure Machine Learning模型来预测决策结果。
2. 使用Azure Logic Apps来触发并执行自动化决策流程。
下面是一个简单的Python示例代码,演示如何结合Azure Machine Learning和Azure Logic Apps实现自动化决策流程:
import requests
Azure Machine Learning模型的终结点和API密钥
endpoint = “<your_azure_ml_endpoint>”
key = “<your_azure_ml_key>”
请求头
headers = {
“Content-Type”: “application/json”,
“Authorization”: "Bearer " + key
}
请求体,包含需要预测的数据
data = {
“data”: [
[0.2, 0.3, 0.4, 0.5]
]
}
发送请求给Azure Machine Learning模型进行预测
response = requests.post(endpoint, json=data, headers=headers)
prediction = response.json()
获取预测结果
predicted_label = prediction[“result”]
在此可以根据预测结果执行相应的自动化决策流程,比如触发Azure Logic App来执行后续操作
代码示例略,可以在Azure Logic Apps中设置触发器和操作来实现自动化决策流程
在这个示例中,您需要替换 `<your_azure_ml_endpoint>` 和 `<your_azure_ml_key>` 为您在Azure Machine Learning中创建模型时获得的终结点和API密钥。然后,通过发送请求给Azure Machine Learning模型进行预测,获取预测结果后可以根据预测结果触发相应的自动化决策流程。
在Azure Logic Apps中,您可以设置触发器和操作来根据预测结果执行后续的自动化决策流程,比如发送通知、更新数据库等操作,从而实现自动化决策流程,减少人为干预的需要,提高效率和准确性。
### 七、可视化展示示例代码
要实现Azure Cognitive Services的可视化展示,您可以结合使用Azure服务中的Azure Cognitive Services、Power BI等工具来创建直观的图表和报告,帮助用户更好地理解数据和分析结果。以下是一个简单示例代码,演示如何结合Azure Cognitive Services和Power BI来实现可视化展示:
1. 使用Azure Cognitive Services中的服务进行数据分析和处理。
2. 将处理后的数据导入到Power BI中,创建图表和报告展示数据和分析结果。
下面是一个简单的示例代码,演示如何结合Azure Cognitive Services和Power BI来实现可视化展示:
假设您已经使用Azure Cognitive Services进行数据分析和处理,并获得了处理后的数据
将处理后的数据导出到CSV文件
import pandas as pd
data = {
“Category”: [“A”, “B”, “C”, “D”],
“Value”: [100, 200, 150, 300]
}
df = pd.DataFrame(data)
df.to_csv(“processed_data.csv”, index=False)
在Power BI中导入CSV文件,并创建图表和报告展示数据和分析结果
可以使用Power BI的图表功能来创建各种类型的图表,如柱状图、折线图、饼图等
还可以创建交互式报告,让用户根据需要进行数据探索和分析
Power BI示例代码略,您可以在Power BI中导入数据并创建图表和报告来展示数据和分析结果
在这个示例中,您首先使用Azure Cognitive Services进行数据分析和处理,然后将处理后的数据导出到CSV文件中。接着,您可以在Power BI中导入这个CSV文件,利用Power BI的图表功能来创建各种类型的图表,如柱状图、折线图、饼图等,还可以创建交互式报告,让用户根据需要进行数据探索和分析。
通过结合Azure Cognitive Services和Power BI,您可以实现直观的数据可视化展示,帮助用户更好地理解复杂的信息,从而提升决策支持系统的效果和用户体验。
### 八、多源数据整合示例代码
要实现Azure Cognitive Services对多源数据的整合,您可以结合使用Azure的多个服务,如Azure Cognitive Search、Azure Data Factory等,来整合内部数据、外部数据、结构化数据和非结构化数据。以下是一个简单示例代码,演示如何使用Azure服务实现多源数据整合:
1. 使用Azure Cognitive Search对多个数据源进行搜索和整合。
2. 使用Azure Data Factory将不同数据源中的数据整合到一个统一的数据存储中。
下面是一个简单的示例代码,演示如何使用Azure Cognitive Search和Azure Data Factory实现多源数据整合:
假设您已经设置了Azure Cognitive Search和Azure Data Factory服务
使用Azure Data Factory将不同数据源中的数据整合到一个统一的数据存储中
这里以两个数据源为例,一个是SQL数据库,一个是Blob存储
Azure Data Factory示例代码略,您可以在Azure Data Factory中设置数据流来整合不同数据源中的数据
使用Azure Cognitive Search对整合后的数据进行搜索和查询
假设您已经创建了Azure Cognitive Search服务并建立了索引
from azure.core.credentials import AzureKeyCredential
from azure.search.documents import SearchClient
Azure Cognitive Search服务的终结点和API密钥
endpoint = “<your_azure_search_endpoint>”
key = “<your_azure_search_key>”
创建Azure Cognitive Search客户端
credential = AzureKeyCredential(key)
client = SearchClient(endpoint=endpoint, index_name=“your_index_name”, credential=credential)
查询数据
results = client.search(search_text=“your_query_here”)
for result in results:
print(result)
在这里,您可以根据查询结果进行进一步的数据分析和决策支持
在这个示例中,您首先使用Azure Data Factory将不同数据源中的数据整合到一个统一的数据存储中,然后使用Azure Cognitive Search对整合后的数据进行搜索和查询。您需要替换 `<your_azure_search_endpoint>`、`<your_azure_search_key>` 和 `your_index_name` 为您在Azure Cognitive Search中设置的相应信息。
通过结合Azure Cognitive Search和Azure Data Factory,您可以实现多源数据的整合,包括内部数据、外部数据、结构化数据和非结构化数据,为决策过程提供更全面的信息支持。这样的系统可以帮助您更好地理解数据、发现关联性,并支持更准确的决策过程。
### 九、情境感知示例代码
要实现Azure Cognitive Services的情境感知,您可以结合使用Azure Cognitive Services中的不同服务,如Azure Text Analytics、Azure Computer Vision等,来根据不同的情境和业务需求调整决策建议。以下是一个简单示例代码,演示如何使用Azure Cognitive Services实现情境感知:
1. 使用Azure Text Analytics服务分析文本情绪。
2. 使用Azure Computer Vision服务分析图像内容。
3. 根据文本情绪和图像内容调整决策建议。
下面是一个简单的示例代码,演示如何使用Azure Cognitive Services实现情境感知:
from azure.ai.textanalytics import TextAnalyticsClient
from azure.core.credentials import AzureKeyCredential
from azure.cognitiveservices.vision.computervision import ComputerVisionClient
from msrest.authentication import CognitiveServicesCredentials
Azure Text Analytics服务的终结点和密钥
text_endpoint = “<your_text_analytics_endpoint>”
text_key = “<your_text_analytics_key>”
Azure Computer Vision服务的终结点和密钥
vision_endpoint = “<your_computer_vision_endpoint>”
vision_key = “<your_computer_vision_key>”
创建Azure Text Analytics客户端
text_credential = AzureKeyCredential(text_key)
text_client = TextAnalyticsClient(endpoint=text_endpoint, credential=text_credential)
创建Azure Computer Vision客户端
vision_credential = CognitiveServicesCredentials(vision_key)
vision_client = ComputerVisionClient(vision_endpoint, vision_credential)
示例文本和图像
sample_text = “This product is amazing! I love it.”
sample_image_url = “https://example.com/sample_image.jpg”
分析文本情绪
response = text_client.analyze_sentiment([sample_text])
sentiment = response[0].sentiment
分析图像内容
image_analysis = vision_client.describe_image(sample_image_url)
image_description = image_analysis.captions[0].text
根据文本情绪和图像内容调整决策建议
if sentiment == “positive” and “amazing” in image_description:
decision = “Highly recommend this product!”
else:
decision = “Further analysis is needed.”
print(“Decision:”, decision)
在这个示例中,您首先使用Azure Text Analytics服务分析示例文本的情绪,然后使用Azure Computer Vision服务分析示例图像的内容。根据文本情绪和图像内容,您可以调整决策建议。在实际情境中,您可以根据不同的情境和业务需求定制更复杂的决策逻辑。
通过结合Azure Cognitive Services的文本分析和图像分析功能,您可以实现系统根据不同情境和业务需求调整决策建议,从而更好地适应不同的决策场景。这样的系统可以帮助您根据实时情境做出更智能和准确的决策。
### 十、智能推荐系统示例代码
要实现Azure Cognitive Services的智能推荐系统,您可以结合使用Azure Cognitive Services中的不同服务,如Azure Personalizer服务,来基于用户的历史数据和偏好提供智能推荐。以下是一个简单示例代码,演示如何使用Azure Cognitive Services实现智能推荐系统:
1. 使用Azure Personalizer服务来提供个性化推荐。
2. 根据用户的历史数据和偏好,获取推荐结果。
下面是一个简单的示例代码,演示如何使用Azure Personalizer服务实现智能推荐系统:
from azure.cognitiveservices.personalizer import PersonalizerClient
from azure.cognitiveservices.personalizer.models import RankableAction, RewardRequest
from msrest.authentication import CognitiveServicesCredentials
Azure Personalizer服务的终结点和密钥
personalizer_endpoint = “<your_personalizer_endpoint>”
personalizer_key = “<your_personalizer_key>”
创建Azure Personalizer客户端
credentials = CognitiveServicesCredentials(personalizer_key)
personalizer_client = PersonalizerClient(personalizer_endpoint, credentials)
用户的历史数据和偏好
user_id = “user123”
context_features = [{“weather”: “sunny”}, {“time_of_day”: “morning”}]
定义可推荐的动作
actions = [RankableAction(id=‘action1’, features=[{“category”: “food”}, {“price”: “low”}]),
RankableAction(id=‘action2’, features=[{“category”: “shopping”}, {“price”: “high”}])]
获取推荐结果
rank_request = personalizer_client.rank(Actions=actions, ContextFeatures=context_features, UserId=user_id)
recommended_action = rank_request.reward_action_id
用户对推荐结果的反馈(奖励)
reward_request = RewardRequest(value=1) # 可根据用户实际反馈进行调整
personalizer_client.reward(reward_request, user_id, recommended_action)
print(“Recommended action:”, recommended_action)
在这个示例中,您首先创建Azure Personalizer客户端,并定义用户的历史数据和偏好以及可推荐的动作。然后,您使用Azure Personalizer服务来获取推荐结果,并根据用户的反馈(奖励)来不断优化推荐结果。用户的反馈可以帮助系统更好地理解用户的偏好,从而提供更加个性化和准确的推荐。
在实际情境中,您可以根据用户的实时行为和反馈不断调整推荐结果,使推荐系统能够更好地适应用户的需求和偏好变化。通过结合Azure Personalizer服务和用户反馈机制,您可以构建一个智能推荐系统,帮助用户更快地找到最佳决策方案,并提升用户体验。
通过不断优化推荐结果,您可以提高系统的准确性和用户满意度,从而实现更加智能和个性化的推荐服务。这样的智能推荐系统可以应用于各种场景,如电子商务、内容推荐等,为用户提供更加个性化和优质的体验。
### 十一、协作和沟通工具示例代码
要实现Azure Cognitive Services的协作和沟通工具,您可以结合使用Azure的不同服务,如Azure Text Analytics和Azure Speech服务,来构建支持团队成员合作和信息共享的工具。以下是一个简单示例代码,演示如何使用Azure Cognitive Services实现协作和沟通工具:
1. 使用Azure Text Analytics服务来分析文本内容,提取关键信息。
2. 使用Azure Speech服务来实现语音识别和合成,支持语音交流。
下面是一个简单的示例代码,演示如何使用Azure Cognitive Services实现协作和沟通工具:
from azure.cognitiveservices.textanalytics import TextAnalyticsClient
from azure.cognitiveservices.textanalytics.models import DetectLanguageInput
from azure.cognitiveservices.textanalytics.models import TextDocumentInput
from msrest.authentication import CognitiveServicesCredentials
Azure Text Analytics服务的终结点和密钥
text_analytics_endpoint = “<your_text_analytics_endpoint>”
text_analytics_key = “<your_text_analytics_key>”
创建Azure Text Analytics客户端
credentials = CognitiveServicesCredentials(text_analytics_key)
text_analytics_client = TextAnalyticsClient(text_analytics_endpoint, credentials)
分析文本内容
text = “Let’s discuss the project progress in the meeting tomorrow.”
language = text_analytics_client.detect_language(documents=[DetectLanguageInput(id=“1”, text=text)])
language_code = language.documents[0].detected_languages[0].iso6391_name
提取关键信息
key_phrases = text_analytics_client.key_phrases(documents=[TextDocumentInput(id=“1”, language=language_code, text=text)])
key_phrases_list = key_phrases.documents[0].key_phrases
print(“Detected language:”, language_code)
print(“Key phrases:”, key_phrases_list)
在这个示例中,您可以使用Azure Text Analytics服务来分析文本内容,检测文本语言并提取关键信息。这可以帮助团队成员更好地理解和处理文本信息,促进信息共享和合作。
除了文本分析,您还可以使用Azure Speech服务实现语音识别和合成,从而支持团队成员之间的语音交流。通过结合这些服务,您可以构建一个综合的协作和沟通工具,帮助团队成员更高效地合作、共享信息,并最终实现更好的决策协同效应。
### 十二、持续优化和学习示例代码
要实现Azure Cognitive Services的持续优化和学习,您可以利用Azure的自动化机器学习服务(Azure AutoML)来训练和优化模型,并使用Azure的模型管理服务来管理和部署这些模型。以下是一个简单示例代码,演示如何使用Azure Cognitive Services实现持续优化和学习:
1. 使用Azure AutoML服务来训练模型并持续优化。
2. 使用Azure模型管理服务来管理和部署模型。
下面是一个简单的示例代码,演示如何使用Azure Cognitive Services实现持续优化和学习:
from azureml.core import Workspace, Dataset
from azureml.train.automl import AutoMLConfig
from azureml.core.model import Model
Azure机器学习工作区
ws = Workspace.from_config()
加载数据集
dataset = Dataset.get_by_name(ws, name=‘<dataset_name>’)
配置自动化机器学习
automl_config = AutoMLConfig(task=‘classification’,
primary_metric=‘accuracy’,
training_data=dataset,
label_column_name=‘label’,
iterations=10,
max_concurrent_iterations=4)
运行自动化机器学习
run = experiment.submit(automl_config, show_output=True)
获取最佳模型
best_run, fitted_model = run.get_output()
best_model = best_run.register_model(model_name=‘best_model’, model_path=‘outputs/model.pkl’)
部署模型
model = Model(ws, ‘best_model’)
service = Model.deploy(ws, ‘myservice’, [model])
service.wait_for_deployment(show_output=True)
在这个示例中,您可以使用Azure AutoML服务来配置自动化机器学习,训练和优化模型。通过持续运行自动化机器学习实验,系统可以不断学习并优化模型,以提供更准确的决策支持。
最后,您可以使用Azure模型管理服务来管理和部署最佳模型。通过部署模型为服务,系统可以随着时间的推移不断改进性能,并提供即时的决策支持。这样的持续优化和学习机制可以帮助系统适应不断变化的数据和环境,提高决策支持的准确性和效率。
### 十三、安全和隐私保护示例代码
要确保Azure Cognitive Services的安全和隐私保护,您可以采取一系列措施来保护数据的安全性和隐私性,包括数据加密、访问控制、数据脱敏等。以下是一个简单示例代码,演示如何在使用Azure Cognitive Services时保护数据的安全和隐私:
1. 使用Azure Key Vault来安全存储和管理密钥。
2. 使用Azure Role-Based Access Control (RBAC)来管理对Azure资源的访问权限。
3. 对敏感数据进行加密和脱敏处理。
下面是一个简单的示例代码,演示如何在使用Azure Cognitive Services时保护数据的安全和隐私:
from azure.identity import DefaultAzureCredential
from azure.keyvault.secrets import SecretClient
from azure.cognitiveservices.textanalytics import TextAnalyticsClient
from msrest.authentication import CognitiveServicesCredentials
Azure Key Vault的终结点和密钥
key_vault_endpoint = “<your_key_vault_endpoint>”
key_vault_secret_name = “<your_key_vault_secret_name>”
从Azure Key Vault获取密钥
credential = DefaultAzureCredential()
secret_client = SecretClient(vault_url=key_vault_endpoint, credential=credential)
text_analytics_key = secret_client.get_secret(key_vault_secret_name).value
创建Azure Text Analytics客户端
text_analytics_endpoint = “<your_text_analytics_endpoint>”
credentials = CognitiveServicesCredentials(text_analytics_key)
text_analytics_client = TextAnalyticsClient(text_analytics_endpoint, credentials)
现在能在网上找到很多很多的学习资源,有免费的也有收费的,当我拿到1套比较全的学习资源之前,我并没着急去看第1节,我而是去审视这套资源是否值得学习,有时候也会去问一些学长的意见,如果可以之后,我会对这套学习资源做1个学习计划,我的学习计划主要包括规划图和学习进度表。
分享给大家这份我薅到的免费视频资料,质量还不错,大家可以跟着学习
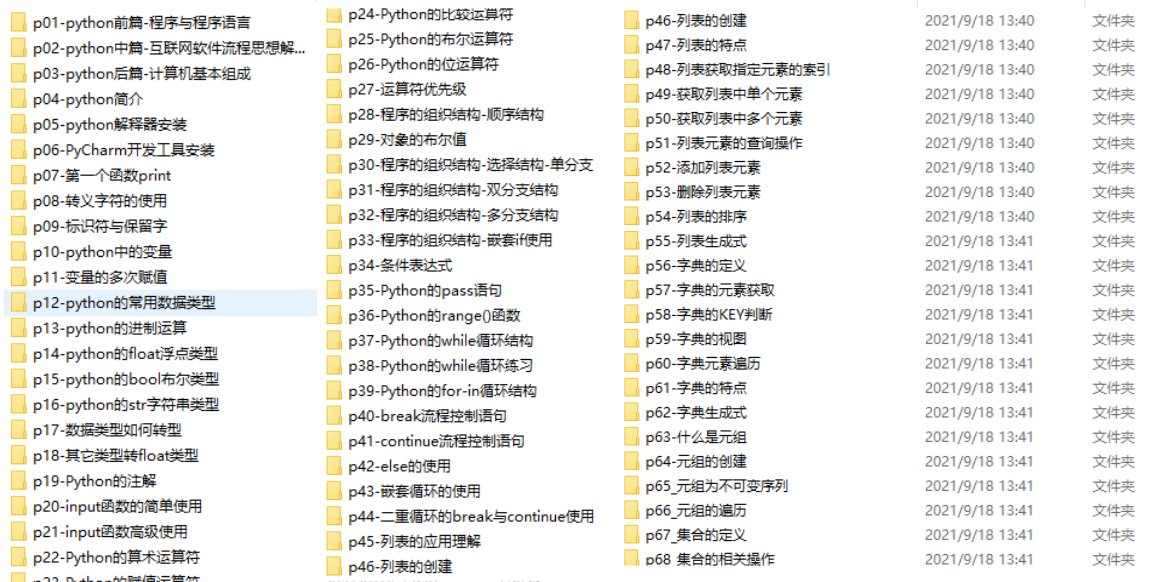
网上学习资料一大堆,但如果学到的知识不成体系,遇到问题时只是浅尝辄止,不再深入研究,那么很难做到真正的技术提升。
一个人可以走的很快,但一群人才能走的更远!不论你是正从事IT行业的老鸟或是对IT行业感兴趣的新人,都欢迎加入我们的的圈子(技术交流、学习资源、职场吐槽、大厂内推、面试辅导),让我们一起学习成长!


 2150
2150


 被折叠的 条评论
为什么被折叠?
被折叠的 条评论
为什么被折叠?
 到【灌水乐园】发言


