


目录
一、项目简介
个人博客系统采用前后端分离的方式,后端使用Servlet进行编写,数据存储在MySQL数据库中,使用Tomcat进行部署。
前端主要有7个页面:
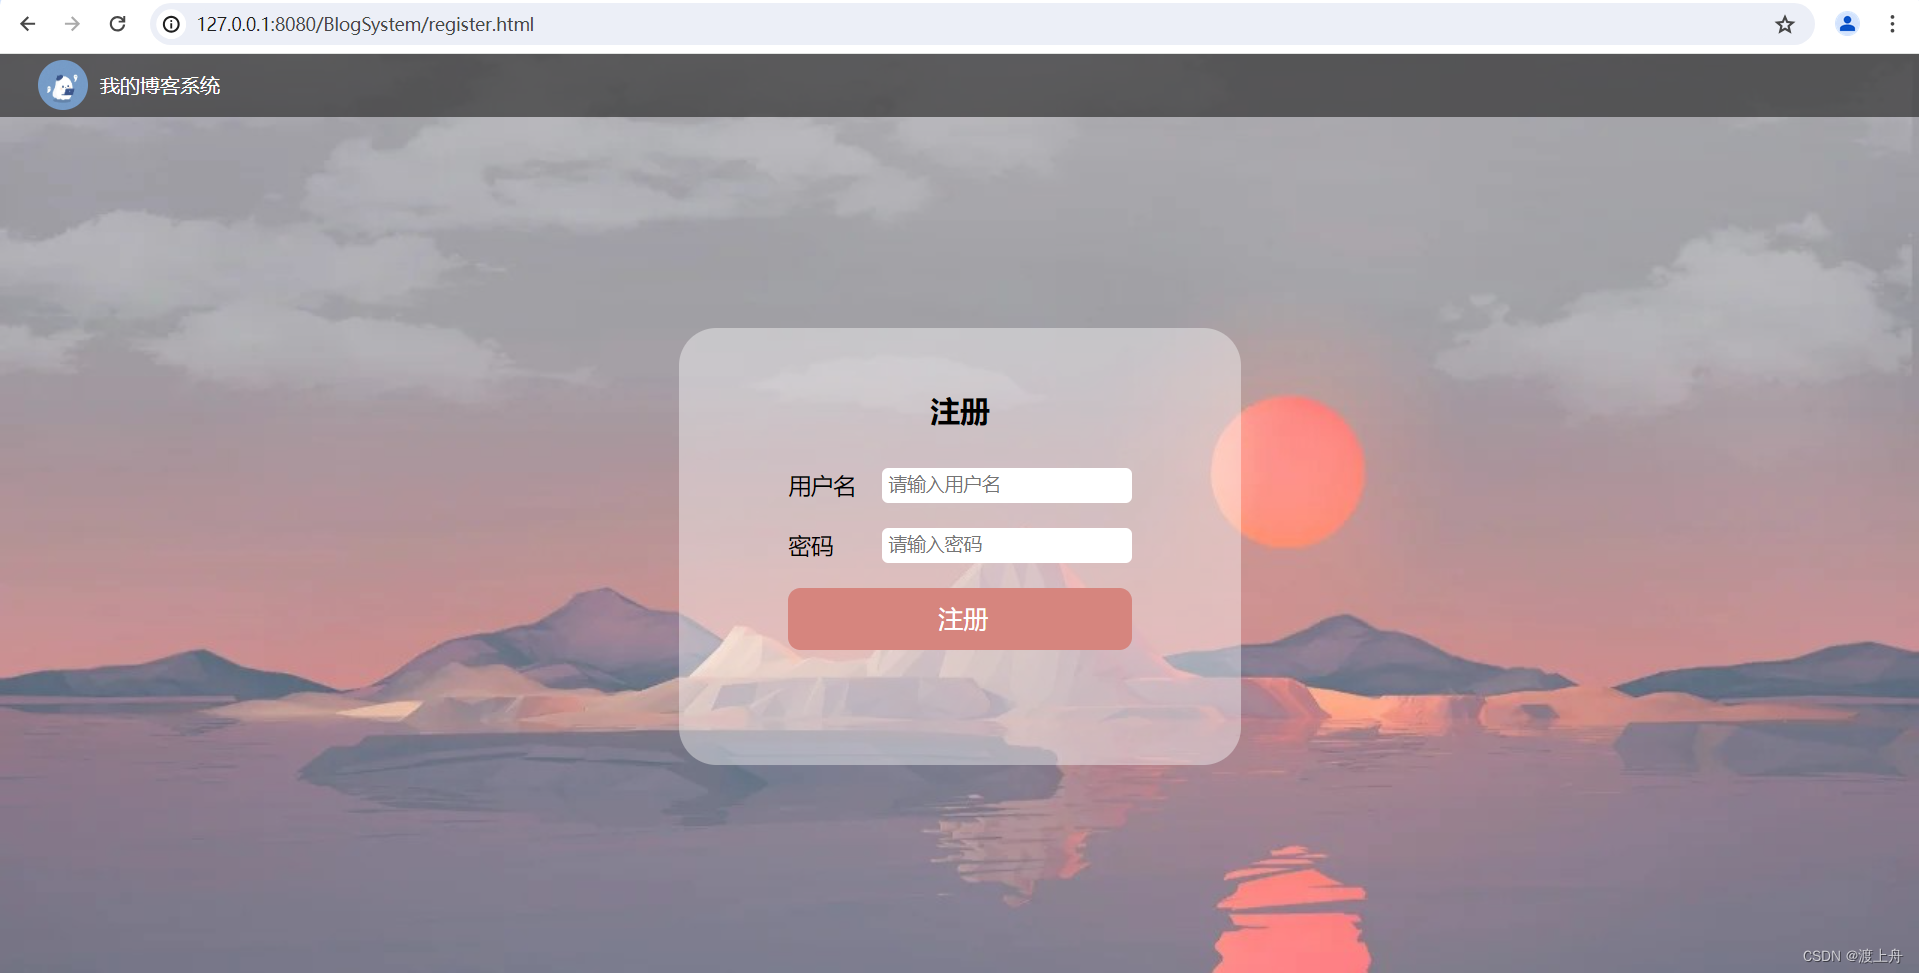
- 注册页(register.html)
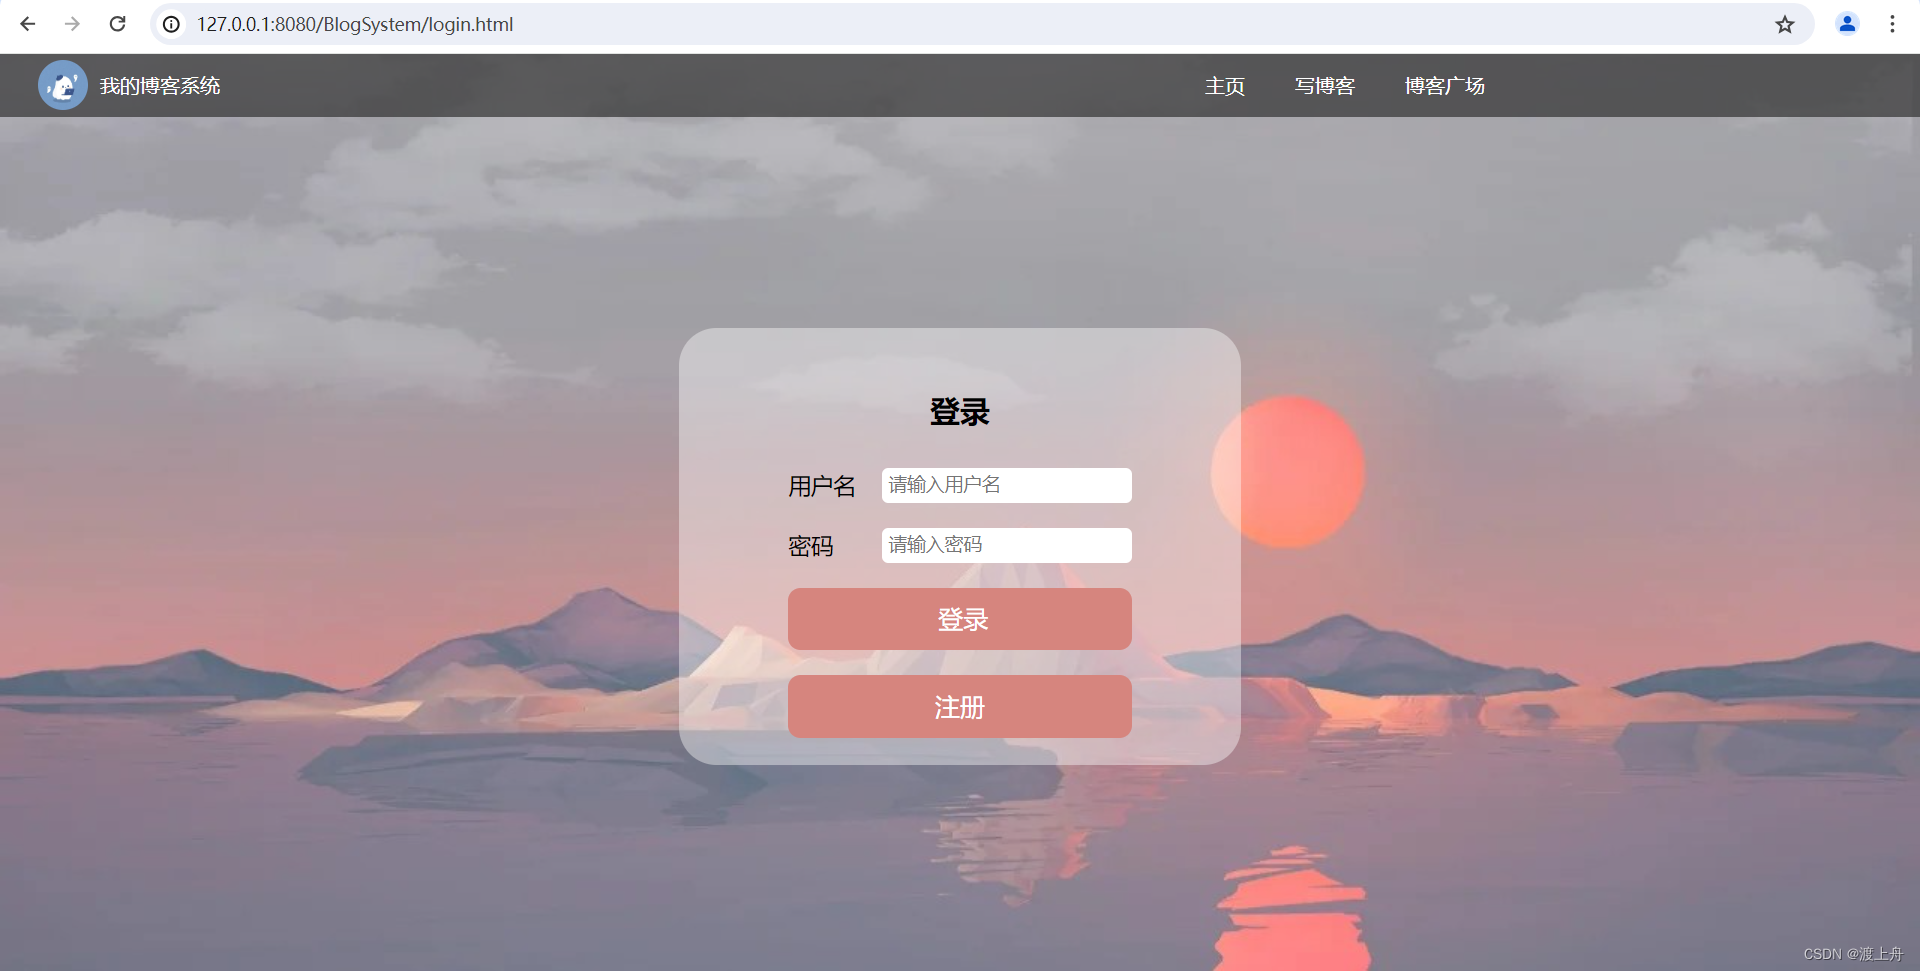
- 登录页(login.html)
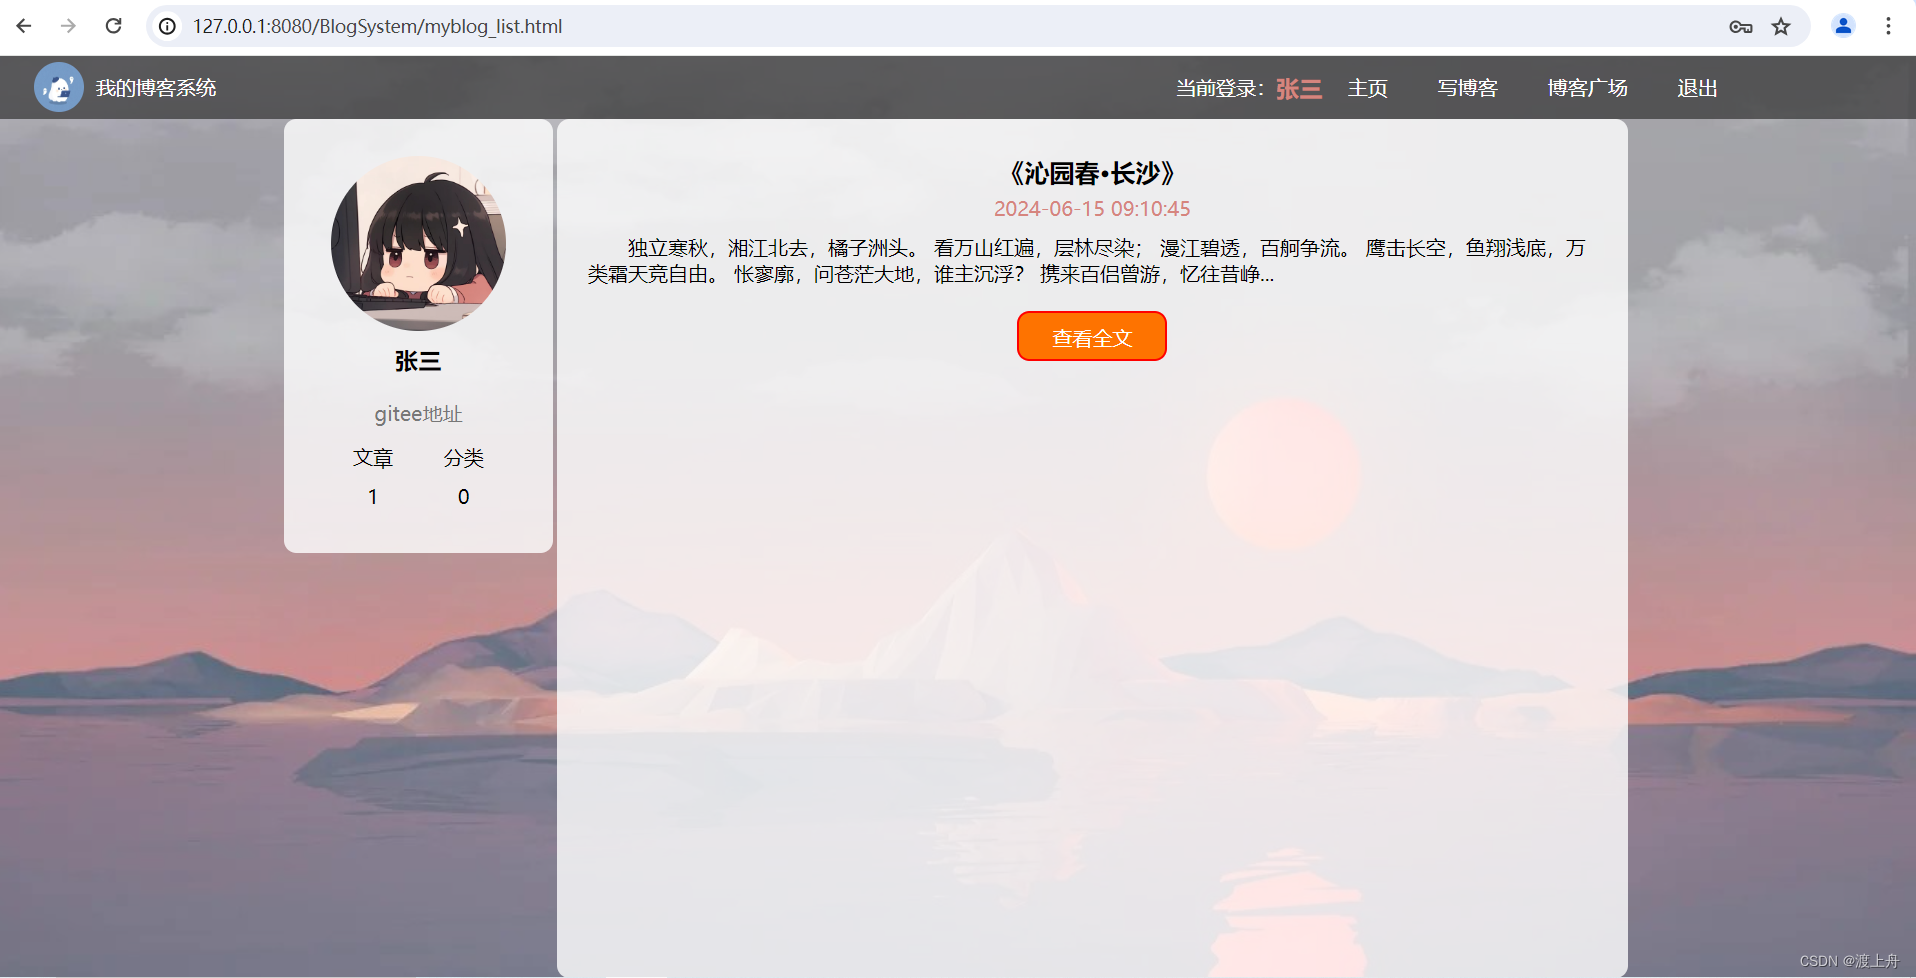
- 我的博客列表页(myblog_list.html):显示当前登录用户的所有博客,
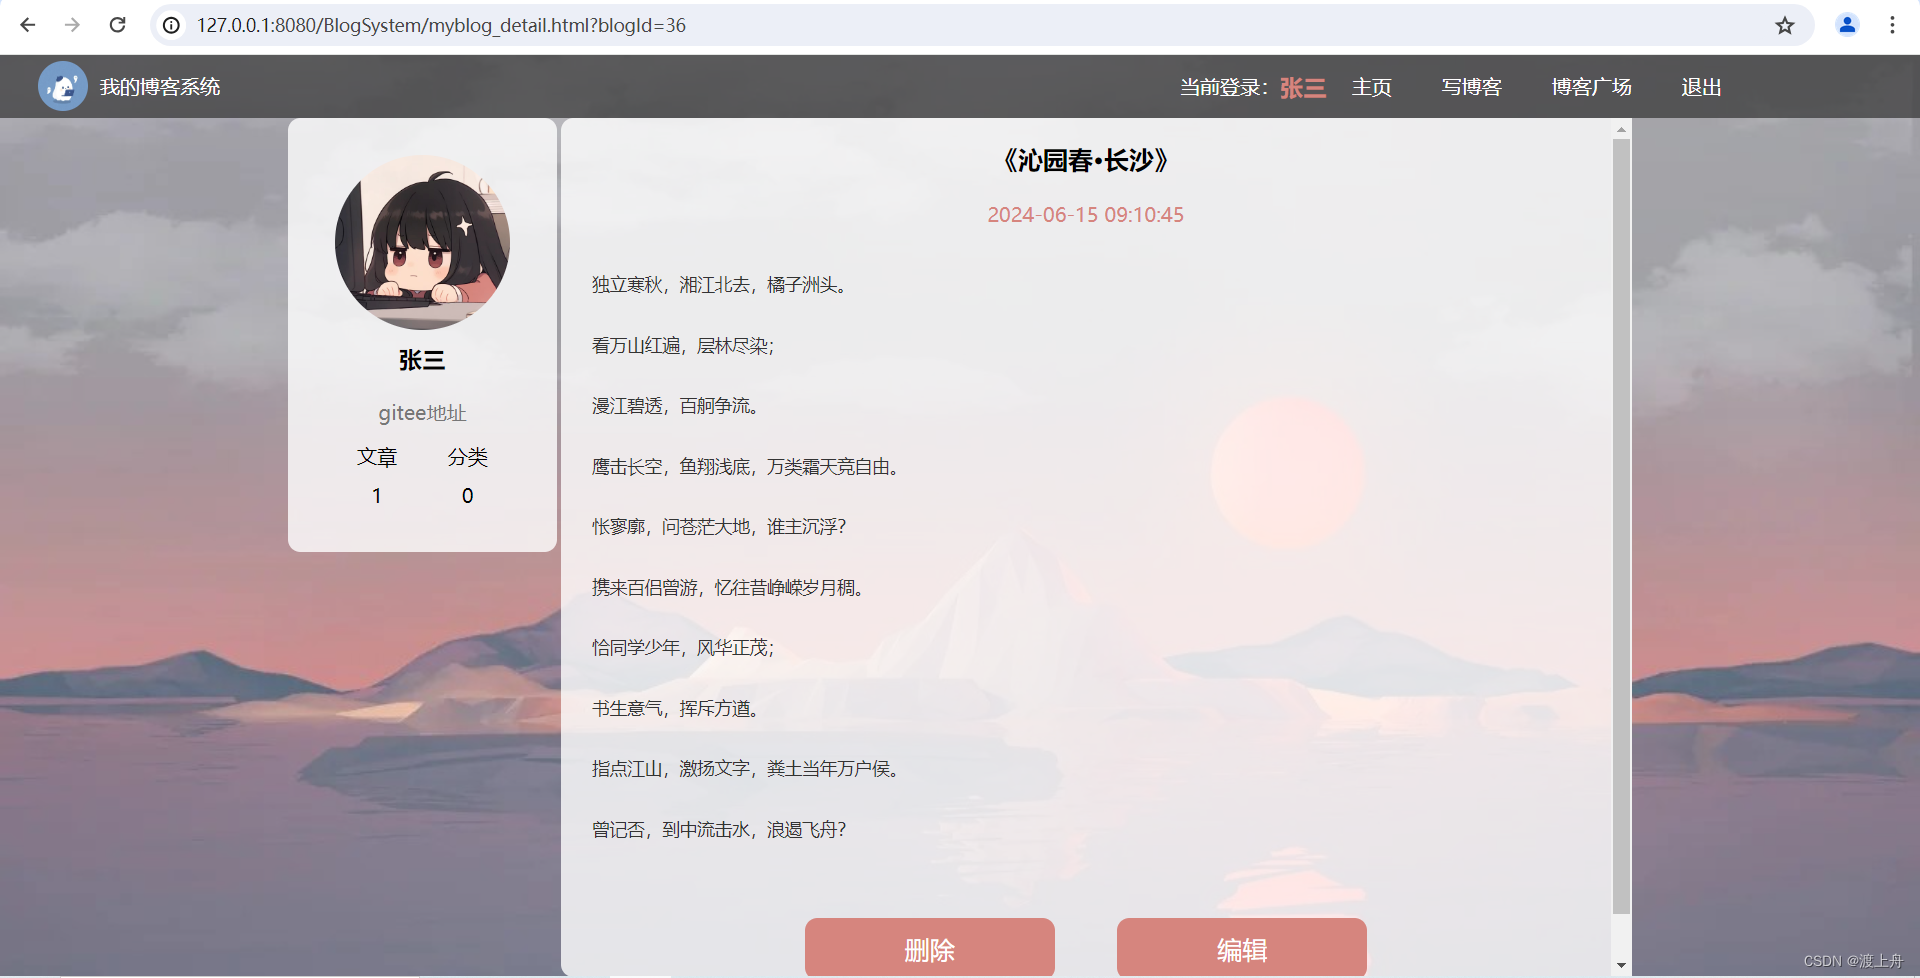
- 我的博客详情页(myblog_detail.html):点击某个博客下方的 “查看全文” 按钮,就能进入对应详情页,显示出该篇博客的具体内容,在我的博客详情页还能进行博客的删除和编辑
- 博客编辑页(blog_edit.html):内置了markdown编辑器,填写博客标题和内容,用来编辑和发布博客
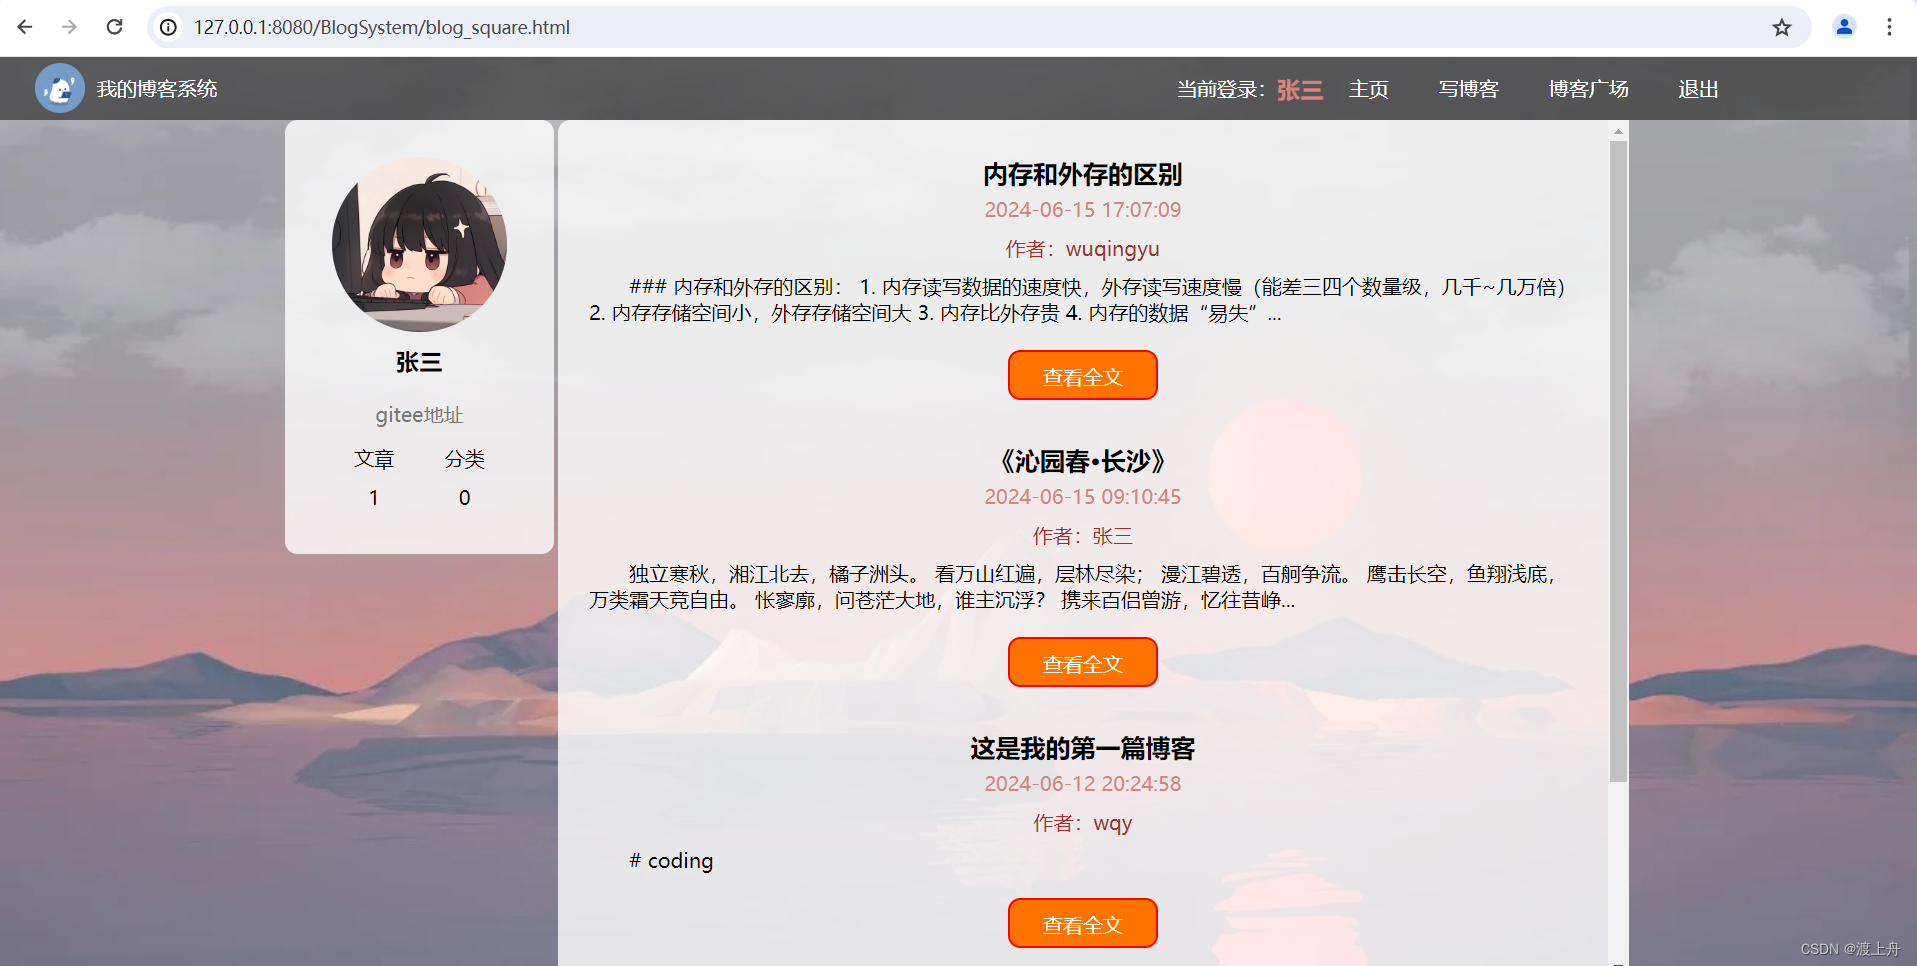
- 博客广场页(blog_square.html):显示所有用户的所有博客,可以看到自己和其它用户的所有博客
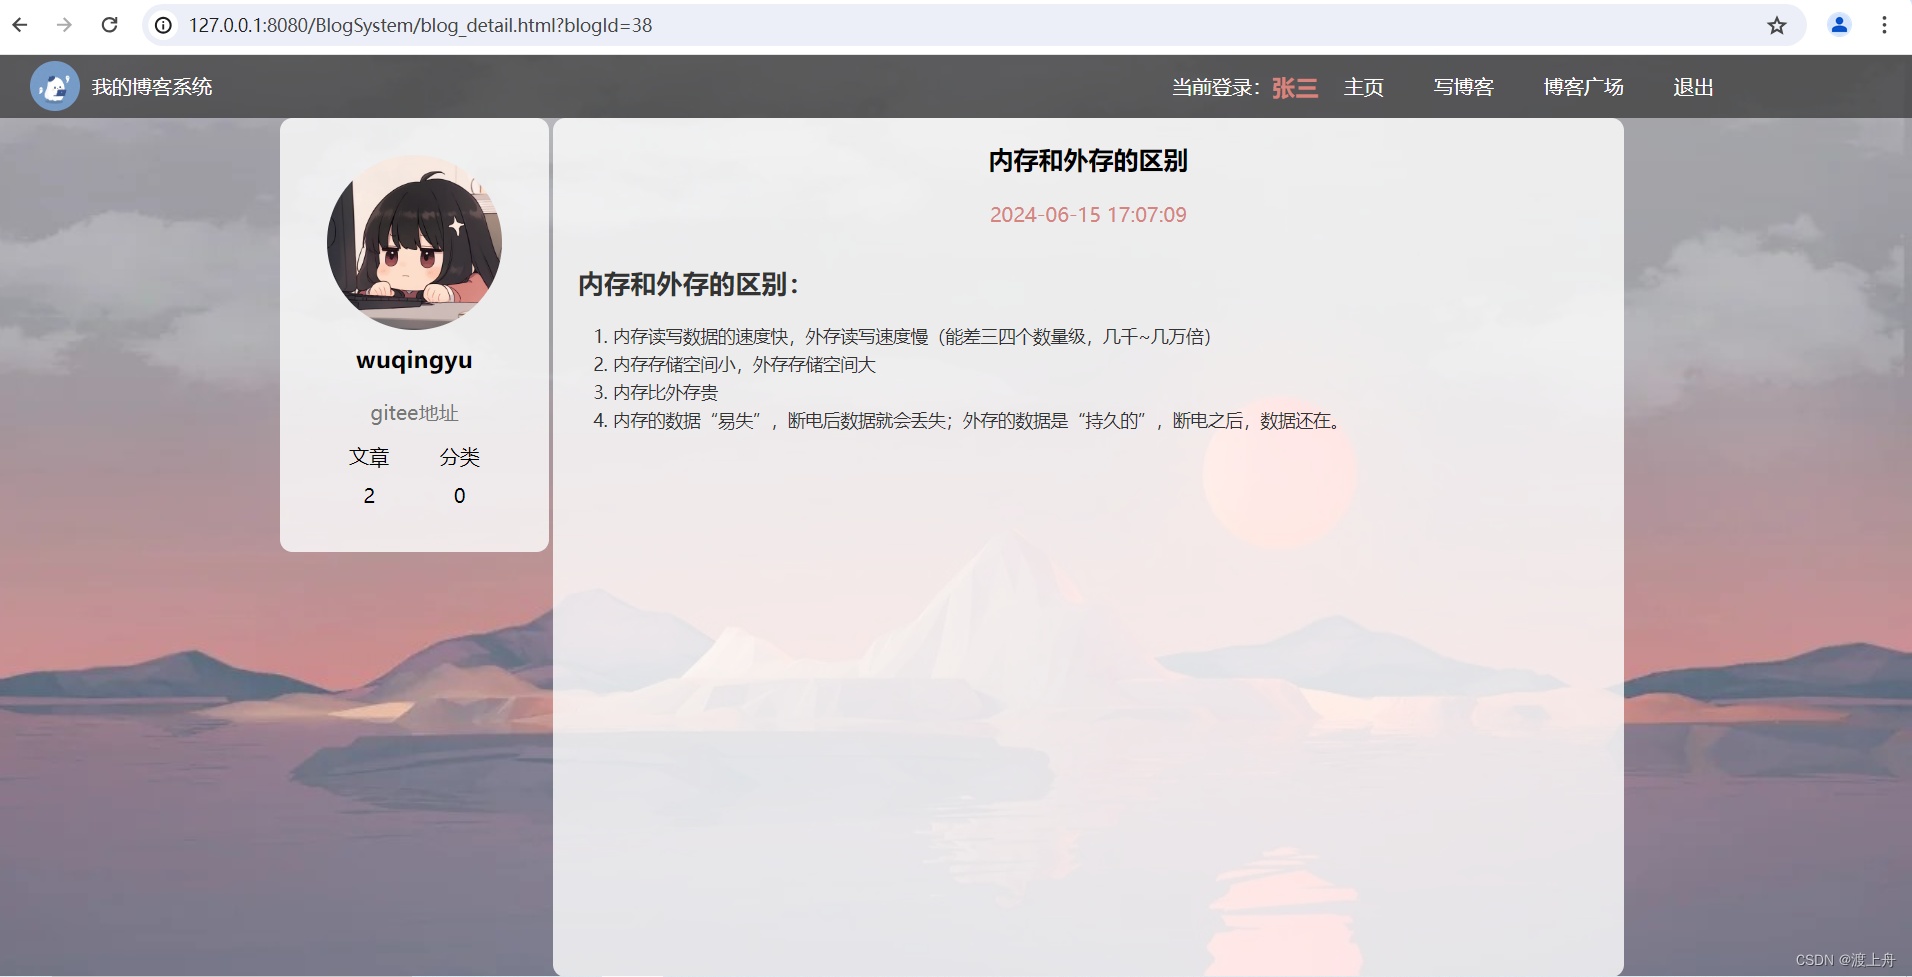
- 博客详情页(blog_detai.htmll):在博客广场页点击某个博客,能进入到对应的详情页,显示出该篇博客的具体内容
根据上述页面,主要实现了以下功能:注册功能,登录功能,我的博客列表页的显示功能,博客广场页的显示功能,博客详情页的显示功能,强制要求登录功能,显示用户信息和作者信息,获取博客文章数,删除博客,编辑博客,发布博客,退出登录
二、页面效果
1、注册页(register.html)
2、登录页(login.html)
3、我的博客列表页(myblog_list.html)
4、我的博客详情页(myblog_detail.html)
5、博客编辑页(blog_edit.html)

6、博客广场页(blog_square.html)
7、博客详情页(blog_detai.htmll)
三、涉及的知识点
form表单 a标签 和 ajax 的区别和联系:
1、行为:
form表单:提交后页面会整体刷新,并根据请求的结果进行页面跳转(例如,重定向到另一个页面)(form表单被提交时,浏览器会执行一个完整的页面请求(通常是POST或GET),然后将表单数据发送到服务器。服务器处理请求后,会返回一个完整的HTML页面作为响应。这个响应通常会导致浏览器加载一个新的页面,替换掉当前页面。)
a标签:点击链接后,浏览器会跳转到链接指向的URL,页面会整体刷新。
ajax:发送请求时页面不会整体刷新,而是实现局部更新。
2、关于重定向
服务器都可以返回302重定向状态码,但是,
form表单:服务器返回302重定向状态码,并在响应头中指定了Location字段,浏览器会自动跟随这个重定向,加载并显示新URL的内容(因为form表单是由浏览器接收服务器的响应的,浏览器收到重定向响应,会主动发起一个新的请求,请求这个重定向页面,然后接收新的响应,加载新的页面)
a标签:如果服务器返回一个重定向的HTTP响应,浏览器会自动跟随这个重定向,加载并显示Location头部中指定的新URL(和form表单处理方式一样)
ajax:服务器可以返回重定向响应,但浏览器不会自动跟随这个重定向。因为,服务器返回的响应是由ajax请求的回调函数接收并处理的,不是浏览器。需要我们在回调函数中手动处理重定向逻辑,比如使用 location.assign()来更改浏览器的url。(也就是说,使用ajax的话,在服务器返回重定向根本没作用,你想返回也行,也不会报错,只是不会起到你想要的效果,还是需要在回调函数中更改url)
3、使用场景:
form表单:适用于需要用户输入数据并提交到服务器的情况,如登录、注册等。
a标签:适用于创建超链接,方便用户在不同页面之间导航。
ajax:适用于需要实现异步通信、实时更新和交互性强的功能模块。(因为ajax是异步的,ajax可以通过回调函数对服务器返回的响应进行任意想要的处理,可以在不刷新页面的情况下与服务器交换数据,实现实时更新和反馈,交互性极强)
四、准备工作
1、创建maven项目,引入依赖
引入 servlet,mysql,jackson 的依赖
后端使用Servlet进行编写。Servlet API 是 Tomcat 给 Java 提供的原生的进行 web后端开发的API,是第三方库,Java标准库中没有,使用前需要先引入。
数据需要存到MySQL数据库中。通过JDBC操作MySQL数据库,由于JDBC这套API已经是Java标准库的一部分了,所以我们只需要安装MySQL驱动包(API的具体实现),即需要引入MySQL驱动包,作为库使用。
我们约定前后端通过json的格式传递数据,需要用到 jackson来处理json格式的数据,jackson是第三方库(Java标准库中没有),使用jackson也需要先引入。
在pom.xml中写入下面代码,于是就从maven中央仓库上获取了依赖包,下载到本地并导入当前的项目中,于是依赖就被引入了。(依赖就是指一个项目为了运行或编译而需要的其他库、框架、模块或组件。)
<dependencies>
<!-- https://mvnrepository.com/artifact/javax.servlet/javax.servlet-api -->
<dependency>
<groupId>javax.servlet</groupId>
<artifactId>javax.servlet-api</artifactId>
<version>3.1.0</version>
<scope>provided</scope>
</dependency>
<!-- https://mvnrepository.com/artifact/mysql/mysql-connector-java -->
<dependency>
<groupId>mysql</groupId>
<artifactId>mysql-connector-java</artifactId>
<version>5.1.49</version>
</dependency>
<!-- https://mvnrepository.com/artifact/com.fasterxml.jackson.core/jackson-databind -->
<dependency>
<groupId>com.fasterxml.jackson.core</groupId>
<artifactId>jackson-databind</artifactId>
<version>2.16.1</version>
</dependency>
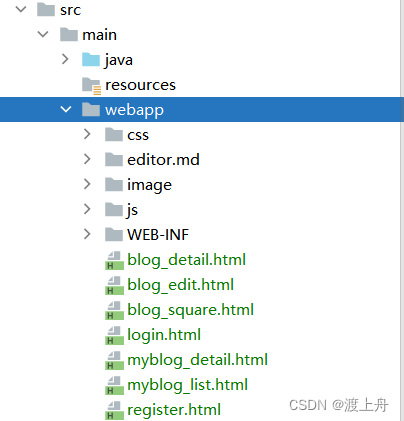
</dependencies>2、将前端代码粘贴到webapp目录下
3、设计数据库
1)先确定实体:
分析个人博客系统需要实现的功能,可知,需要存储用户信息和博客信息。
于是确定有两个实体,用户和博客
2)实体之间有啥关系:
一对多,一个用户有多篇博客,一篇博客只能属于一个用户
3)设计表(表中有哪些字段):
user表和blog表
user(userId,username,password)
blog(blogId,title,content,postTime,userId)
4、编写数据库代码 以及 封装数据库连接操作
1)编写数据库代码
-- 记录一下的数据库的建表语句
create database if not exists blog_system;
use blog_system;

drop table if exists user;
drop table if exists blog;

create table user(
        userId int primary key auto_increment,
        username varchar(16) unique, -- 要求用户名和别人不能重复
        password varchar(16)
);
create table blog(
        blogId int primary key auto_increment,
        title varchar(128),
        content varchar(4096),
        postTime datetime,
        userId int,
        foreign key (userId) references user(userId) -- 设置外键
);
2)封装数据库连接操作
采用JDBC编程,由于每次操作数据库都是 从创建数据源,与数据库建立连接 到关闭连接,释放资源这一流程,所以我将与数据库连接相关的操作封装成一个类(DBUtil.java)。之后使用,直接调用即可,就不需要每次都编写一遍了。
public class DBUtil {

    //创建数据源,描述数据库服务器在哪
    private static DataSource dataSource = new MysqlDataSource();
    static{
        ((MysqlDataSource)dataSource).setUrl("jdbc:mysql://127.0.0.1:3306/blog_system?characterEncoding=utf8&&useSSL=false");
        ((MysqlDataSource)dataSource).setUser("root");
        ((MysqlDataSource)dataSource).setPassword("123456");
    }
    //和数据库建立连接
    public static Connection getConnection() throws SQLException {
        return dataSource.getConnection();
    }
    //断开连接,释放资源
    public static void close(Connection connection, PreparedStatement statement, ResultSet resultSet){
        if(resultSet != null){
            try {
                resultSet.close();
            } catch (SQLException e) {
                throw new RuntimeException(e);
            }
        }
        if(statement != null){
            try {
                statement.close();
            } catch (SQLException e) {
                throw new RuntimeException(e);
            }
        }
        if(connection != null){
            try {
                connection.close();
            } catch (SQLException e) {
                throw new RuntimeException(e);
            }
        }
    }
    //为什么不用下面这种写法?
    //为了防止try代码块中某一行代码出错,导致该出错行下面的代码无法被执行到
//    public void close2(Connection connection,PreparedStatement preparedStatement,ResultSet resultSet){
//        try {
//            if(resultSet != null){
//                resultSet.close();
//            }
//            if(preparedStatement != null){
//                preparedStatement.close();
//            }
//            if(connection != null){
//                connection.close();
//            }
//        } catch (SQLException e) {
//            throw new RuntimeException(e);
//        }
//    }

}
5、创建实体类 以及 封装对数据库的增删查改操作
1)创建实体类
实体类中的属性,对应表中的字段(对应一个表中的字段,或多表查询后的字段)
前面已经设计好了user表和blog表
user(userId,username,password)
blog(blogId,title,content,postTime,userId)
分析系统需要实现的功能,结合数据库表,可知
我们需要2个实体类User.java和Blog.java
User.java
public class User {
    private int userId;
    private String username;
    private String password;

    public int getUserId() {
        return userId;
    }

    public void setUserId(int userId) {
        this.userId = userId;
    }

    public String getUsername() {
        return username;
    }

    public void setUsername(String username) {
        this.username = username;
    }

    public String getPassword() {
        return password;
    }

    public void setPassword(String password) {
        this.password = password;
    }
}
Blog.java
public class Blog {
    private int blogId;
    private String title;
    private String content;
    private Timestamp postTime;
    private int userId;

    private String username;

    public String getUsername() {
        return username;
    }

    public void setUsername(String username) {
        this.username = username;
    }

    public int getBlogId() {
        return blogId;
    }

    public void setBlogId(int blogId) {
        this.blogId = blogId;
    }

    public String getTitle() {
        return title;
    }

    public void setTitle(String title) {
        this.title = title;
    }

    public String getContent() {
        return content;
    }

    public void setContent(String content) {
        this.content = content;
    }

    public Timestamp getPostTimeStamp() {
        return postTime;
    }
    public String getPostTime(){
        SimpleDateFormat simpleDateFormat = new SimpleDateFormat("yyyy-MM-dd HH:mm:ss");
        return simpleDateFormat.format(postTime);
    }

    public void setPostTime(Timestamp postTime) {
        this.postTime = postTime;
    }

    public int getUserId() {
        return userId;
    }

    public void setUserId(int userId) {
        this.userId = userId;
    }
}
2)封装对数据库的增删查改操作
创建 UserDao.java 和 BlogDao.java ,(与实体类 User.java 和 Blog.java 一一对应)
之后想操作数据库,只需调用类中的方法即可。
每个功能涉及到的数据库操作如下:
注册功能:通过 username 来查用户信息,新增一个用户
登录功能:通过 username 来查用户信息
我的博客列表页的显示功能:通过 userId 查找指定用户的所有博客
博客广场页的显示功能:查询数据库中的所有博客
博客详情页的显示功能:通过 blogId 查询指定博客
显示用户和作者信息:通过 blogId 查询博客信息,通过 userId 查询用户信息
获取博客文章数:通过 blogId 查询博客信息,通过userId查询博客数目
删除博客:通过 blogId删除指定博客
编辑博客:通过 blogId 查询博客信息
发布博客:根据userId新增一篇博客,通过blogId更新博客
部分代码如下:
UserDao.java:
public class UserDao {

    //1、根据 username 来查用户信息(注册,登录的时候)
    public User selectByUsername(String username){

    }
    //2、新增一个用户 (注册时)
    public void add(User user){

    }
    //3、根据 userId 来查用户信息 (显示用户和作者信息时)
    public User selectById(int userId){

    }
}
BlogDao.java:
public class BlogDao {

    //1、通过userId查询指定用户的所有博客(用于我的博客列表页)
    public List<Blog> selectByUserId(int userId){

    }

    //2、查询出数据库中所有博客(用于博客广场页)
    public List<Blog> selectAll(){

    }

    //3、根据blogId来查询指定博客(在博客详情页中)
    public Blog selectById(int blogId){

    }

    //4、通过userId查询博客数目(获取博客文章数)
    public int selectBlogCount(int userId){

    }

    //5、根据blogId删除指定博客 (删除博客)
    public void delete(int blogId){

    }

    //6、通过userId新增一篇博客 (发布博客)
    public void add(Blog blog){

    }

    //7、通过blogId更新博客 (发布博客)
    public void edit(Blog blog){

    }
}
五、功能实现
1、注册功能
逻辑:
在登录页面,点击 “注册” 按钮,跳转到注册页面;在注册页面输入用户名和密码,点击“注册” 按钮,注册成功,跳转到登录页(login.html)。
浏览器干了啥:
点击 “注册” 按钮,通过form表单发送了一个POST(/register)请求,连带着用户输入的用户名和密码作为请求的body
服务器干了啥:
服务器接收到请求,从请求中读取用户名和密码,进行校验(1、校验用户名或密码是否为空或空字符串;2、校验用户名是否已经在数据库中存在了),校验不通过,注册失败,返回一个text/html 格式的响应(弹框提示错误信息,跳转到注册页面);校验通过,构造User对象(将从请求中读取的用户名和密码设置到对象的属性中),插入到user表中,注册成功,重定向到登录页面。
接着浏览器就会根据重定向的url自己发送一条请求,请求登录页面,于是就实现了跳转。
1)约定前后端交互接口
请求:
POST /register
Content-Type: application/x-www-form-urlencoded
username=wuqingyu&password=123
响应:
HTTP/1.1 302
Location:login.html
2)编写前端代码
<!-- 注册框 -->
        <div class="dialog">
           <form action="register" method="post">
                <h2>注册</h2>
                <div class="row">
                    <span class="username">用户名</span>
                    <input type="text" id="username" placeholder="请输入用户名" name="username">
                </div>
                <div class="row">
                    <span class="password">密码</span>
                    <input type="password" id="password" placeholder="请输入密码" name="password">
                </div>
                <div class="row">
                    <input type="submit" class="submit"  value="注册"></input>
                </div>
           </form>
        </div>
3)编写后端代码
RegisterServlet.java
@WebServlet("/register")
public class RegisterServlet extends HttpServlet {
    ObjectMapper objectMapper = new ObjectMapper();
    @Override
    protected void doPost(HttpServletRequest req, HttpServletResponse resp) throws ServletException, IOException {
        //注册
        //设置字符编码,告诉 servlet 以何种格式解释请求
        req.setCharacterEncoding("utf8");
        //读取rep中的用户名和密码
        String username = req.getParameter("username");
        String password = req.getParameter("password");

        //如果username或password为空或空字符串,注册不成功
        if(username == null || username.equals("") || password == null || password.equals("")){
            //注册失败
            //设置编码方式和字符集
            resp.setContentType("text/html;charset=utf8");

            //下面这种做法,其实使用ajax,在客户端进行构造更合适,
            // 这里是因为前端使用的是form表单,无法处理返回的响应,所以就在服务器写了弹窗信息和跳转页面
            resp.getWriter().write("<script>" +
                    "alert('注册失败!缺少用户名或密码!');" +
                    "location.assign('register.html');"+
                    "</script>");
            return;
        }
        //如果用户名已经存在
        UserDao userDao = new UserDao();
        User user = userDao.selectByUsername(username);
        if(user != null){
            resp.setContentType("text/html;charset=utf8");
            resp.getWriter().write("<script>" +
                    "alert('用户名已存在!');" +
                    "location.assign('register.html');"+
                    "</script>");
            return;
        }
        //构造 user对象
        user = new User();
        user.setUsername(username);
        user.setPassword(password);
        //插入数据库
        userDao.add(user);
        //跳转到登录页面
        resp.sendRedirect("login.html");
    }
}
2、登录功能
逻辑:
在登录页面,输入用户名和密码,点击 “登录” 按钮,登录成功,跳转到我的博客列表页(myblog_list.html)
浏览器干了啥:
点击 “登录” 按钮,通过form表单发送了一个POST(/login)请求,连带着用户输入的用户名和密码作为请求的body
服务器干了啥:
服务器接收到请求,从请求中读取用户名和密码,进行校验(1、校验用户名或密码是否为空或空字符串;2、校验用户名是否在数据库中存在;3、校验密码是否正确),校验不通过,登录失败,返回一个text/html 格式的响应(弹框提示错误信息,跳转到登录页面);校验通过,登录成功,创建会话,在会话中设置数据(用来保存当前登录的用户信息),重定向到我的博客列表页。
接着浏览器就会根据重定向的url自己发送一条请求,请求我的博客列表页面,于是就实现了跳转。
1)约定前后端交互接口
请求:
POST /login
Content-Type: application/x-www-form-urlencoded
username=wuqingyu&password=123
响应:
HTTP/1.1 302
Location: myblog_list.html
2)编写前端代码
请求body中的key 就是name的值,请求body中的value 就是 用户输入的值
比如:上述请求body username=wuqingyu&password=123,username 和 password就是name 的值,wuqingyu 和 123 就是 用户输入的值
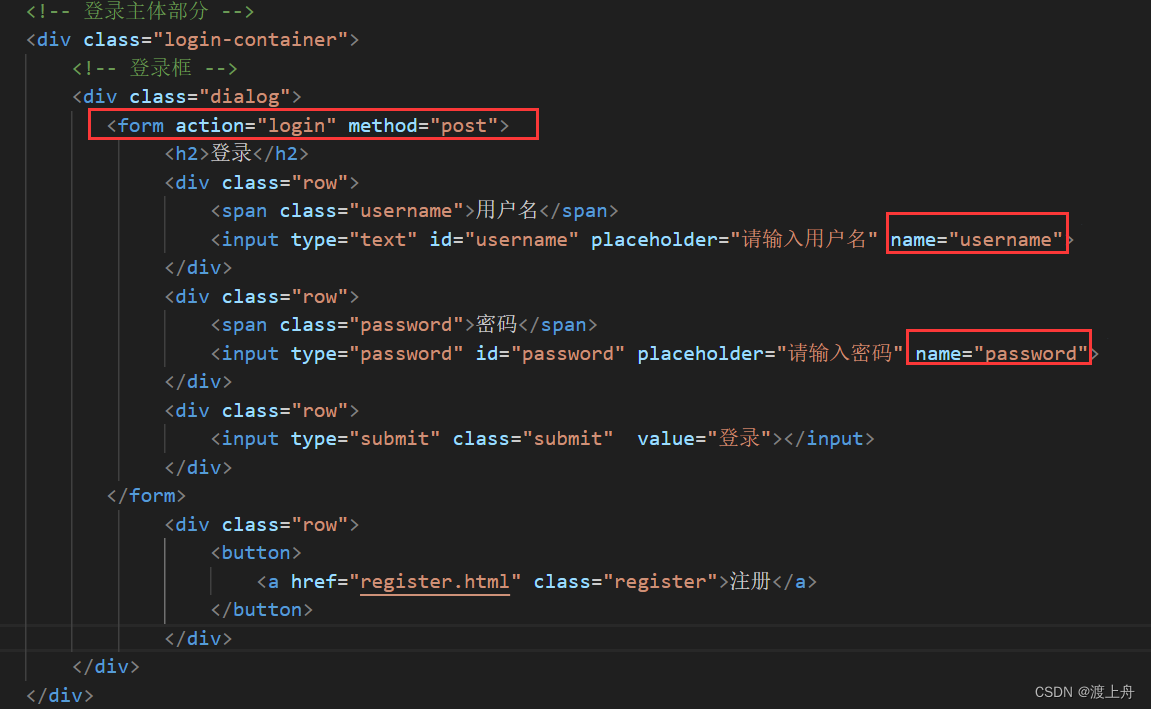
<!-- 登录主体部分 -->
    <div class="login-container">
        <!-- 登录框 -->
        <div class="dialog">
           <form action="login" method="post">
                <h2>登录</h2>
                <div class="row">
                    <span class="username">用户名</span>
                    <input type="text" id="username" placeholder="请输入用户名" name="username">
                </div>
                <div class="row">
                    <span class="password">密码</span>
                    <input type="password" id="password" placeholder="请输入密码" name="password">
                </div>
                <div class="row">
                    <input type="submit" class="submit"  value="登录"></input>
                </div>
           </form>
                <div class="row">
                    <button>
                        <a href="register.html" class="register">注册</a>
                    </button>
                </div>
        </div>
    </div>
3)编写后端代码
1、req.getParameter("xxx"); 从req中获取名为 "xxx" 的参数的值
如:String username = req.getParameter("username");从req中获取username的值2、req.getSession(true);获取会话,会话不存在就创建一个
如:HttpSession httpSession = req.getSession(true);
3、httpSession.setAttribute(“xxx”,xxx); 往会话里设置一些程序员自定义的数据,数据是键值对格式的,键的名字是程序员自己起的
如:httpSession.setAttribute("user",user);
LoginServlet.java
     @Override
    protected void doPost(HttpServletRequest req, HttpServletResponse resp) throws ServletException, IOException {
        //给req设置字符编码,告诉 servlet 用何种编码来理解请求
        req.setCharacterEncoding("utf8");
        //给resp设置字符编码,告诉 servlet 用何种方式构造响应
        resp.setContentType("text/html;charset=utf8");

        //1、获取req中的用户名和密码
        String username = req.getParameter("username");
        String password = req.getParameter("password");//获取req中password的值

        //如果用户名或密码为空或空字符串,弹窗提示登录失败
        if(username == null || username.equals("") || password == null || password.equals("")){
            resp.getWriter().write("<script>"+
                    "alert('登录失败!缺少用户名或密码!');"+
                    "location.assign('login.html');"+
                    "</script>");
            return;
        }

        //2、查数据库,看用户名和密码是否存在,是否匹配
        UserDao userDao = new UserDao();
        User user = userDao.selectByUsername(username);
        //用户名错误
        if(user == null){
            resp.getWriter().write("<script>"+
                    "alert('登录失败!用户名或密码错误!');"+
                    "location.assign('login.html');"+
                    "</script>");
            return;
        }
        //密码错误
        if(!password.equals(user.getPassword())){
            resp.getWriter().write("<script>"+
                    "alert('登录失败!用户名或密码错误!');"+
                    "location.assign('login.html');"+
                    "</script>");
            return;
        }
        //用户名和密码都正确,登录成功,接下来要创建会话,使用会话来保存用户信息
        //获取会话,会话不存在就创建一个
        //此处第一次登录,肯定要创建会话
        HttpSession httpSession = req.getSession(true);
        //往会话里设置数据,httpSession也是键值对格式的,这里的数据是程序员自定义的,"user"这个名字也是程序员自己起的
        httpSession.setAttribute("user",user);
        //跳转到博客列表页(是从/login跳转的)
        resp.sendRedirect("myblog_list.html");
    }
3、我的博客列表页的显示功能
逻辑:
登录之后,跳转到我的博客列表页,显示当前登录用户的所有博客
浏览器干了啥:
1、在加载我的博客列表页时,通过ajax构造一个GET(/myBlog)请求发送给服务器
2、在收到服务器返回的响应之后,调用该ajax请求的回调函数,jQuery会自动识别,将响应body中的字符串数组转成js对象数组,所以回调函数中的参数body就是js对象数组。遍历 js对象数组,把数组中的每个元素(Blog对象)取出来,结合div,a,image等标签构造页面内容(即进行渲染)。
服务器干了啥:
服务器接收到请求,首先判断用户是否已经登录(1、是否获取到session会话;2、是否获取到设置在会话中的用户信息),用户没登录,返回一个text/html 格式的响应(提示参未登录);用户是登录状态,从session中获取之前设置的用户信息,通过userId在数据库中查询该用户的所有博客,存储到List<Blog>集合中,将List集合转成json格式的字符串数组,写到响应body中。然后将resp转成http响应字符串,通过网卡返回给浏览器
1)约定前后端交互接口
json中,每个数据项都是一个键值对。其中,键必须是字符串(json中字符串必须是双引号),值必须是(字符串、数字、json对象、数组、布尔、null)其中之一。
[ ]:表示数组
{}:表示对象
请求:
GET /myBlog
响应:
HTTP/1.1 200 OK
Content-Type: application/json;charset=utf8(使用json格式来组织数据,返回的是json格式的字符串)
[
    {
        "blogId":25,
        "title":"helloworld",
        "content":"hello 第一次更改",
        "postTime":"2024-06-10 18:09:27",
        "userId":1,
        "username":null,
        "postTimeStamp":1718014167000
    },
    {
        "blogId":24,
        "title":"你好",
        "content":"你好",
        "postTime":"2024-06-10 18:09:13",
        "userId":1,
        "username":null,
        "postTimeStamp":1718014153000
    }
]
转成js对象数组如下:
[
    {
        blogId:25,
        title:"helloworld",
        content:"hello 第一次更改",
        postTime:"2024-06-10 18:09:27",
        userId:1,
        username:null,
        postTimeStamp:1718014167000
    },
    {
        blogId:24,
        title:"你好",
        content:"你好",
        postTime:"2024-06-10 18:09:13",
        userId:1,
        username:null,
        postTimeStamp:1718014153000
    }
]
2)编写后端代码
MyBlogServlet.java
@WebServlet("/myBlog")
public class MyBlogServlet extends HttpServlet {
    private ObjectMapper objectMapper = new ObjectMapper();
    @Override
    protected void doGet(HttpServletRequest req, HttpServletResponse resp) throws ServletException, IOException {
        //我的博客
        //判断是否已经登录
        //获取会话
        HttpSession session = req.getSession(false);
        if(session == null){
            resp.setContentType("text/html;charset=utf8");
            resp.getWriter().write("请先进行登录!");
            return;
        }
        User user = (User)session.getAttribute("user");
        if(user == null){
            resp.setContentType("text/html;charset=utf8");
            resp.getWriter().write("请先进行登录!");
            return;
        }
        //从数据库中取出该用户的所有博客,构造响应
        BlogDao blogDao = new BlogDao();
        List<Blog> blogs = blogDao.selectByUserId(user.getUserId());
        //把 blogs对象 转成 json格式的字符串数组
        String respJson = objectMapper.writeValueAsString(blogs);
        resp.setContentType("application/json;charset=utf8");
        resp.getWriter().write(respJson);
    }
}
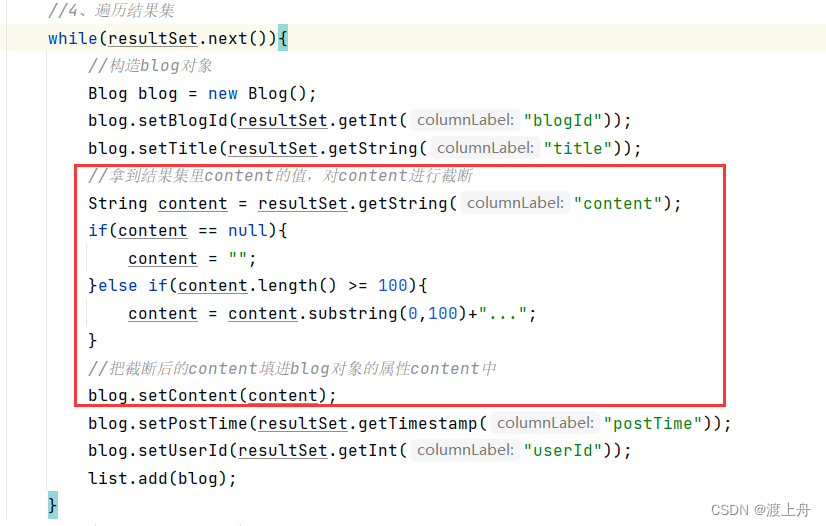
另外,在我的博客列表页面,我们不需要展示博客的所有内容,只需要展示一部分。所以,在BlogDao类的selectByUserId(int userId)方法中,遍历结果集进行构造Blog对象时,先对content进行截断,然后再设置进Blog对象的content属性中,于是写到响应body中的就是截断后的content了。(数据库中存的是完整的content,在查询过程中进行了截断)
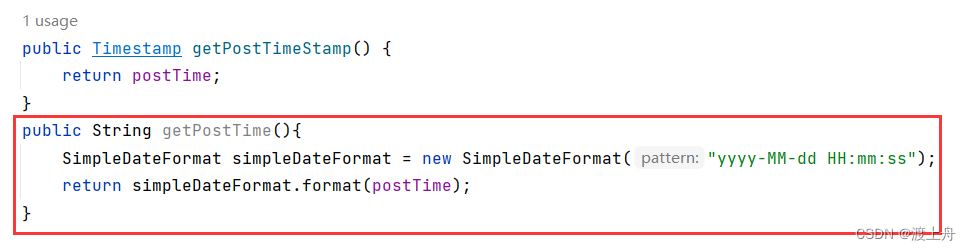
此外,在页面中博客发布时间,不应该显示时间戳,而应该显示格式化时间。
在编写Blog实体类时,我将博客发布时间的类型设置成了Timestamp,提供的getter方法返回的类型也是Timestamp,而Timestamp是一个时间戳。页面显示的就是时间戳。
那该如何让页面显示格式化时间呢?
可以从Jackson 转json格式字符串入手。
Jackson 在将对象 转成 json格式的字符串时,通过调用 getter 方法 获取对象的属性值,然后把获取到的值设置进字符串对应key的value中。
那么我们修改一下发布时间(postTime)的getter方法,返回值设为String,在方法中通过 SimpleDateFormat 类将时间戳转成格式化时间。让Jackson 调用这个返回值是格式化时间的getter方法,那么设置进字符串对应key的value中的就是格式化时间了。
3)编写前端代码
getBlogs();

        function getBlogs() {
            $.ajax({
                type: 'get',
                url: 'myBlog',
            // 服务器返回的是json格式的字符串,但是jQuery的ajax能够自动识别,自动把json字符串转成js对象数组
            //于是,此时拿到的body就是一个 js 对象数组
            //接下来,遍历这个数组,把数组中的每个元素(blog对象)取出来,构造到页面中即可
                success: function(body){
                    // 选中页面元素
                    let containerRight = document.querySelector('.container-right');
                    // 遍历 js对象数组,数组中的每个元素都是一个blog对象
                    for (let blog of body){
                        //构造页面内容
                        //构造整个博客 div(新增元素)
                        let blogDiv = document.createElement('div');
                        blogDiv.className = 'blog';
                        //构造标题
                        let titleDiv = document.createElement('div');
                        titleDiv.className = 'title';
                        // js中访问对象的属性通过 . 来访问。
                        titleDiv.innerHTML = blog.title;
                        blogDiv.appendChild(titleDiv);
                        //构造发布时间
                        let dateDiv = document.createElement('div');
                        dateDiv.className = 'date';
                        dateDiv.innerHTML = blog.postTime;
                        blogDiv.appendChild(dateDiv);
                        //构造博客摘要
                        let descDiv = document.createElement('div');
                        descDiv.className = 'desc';
                        descDiv.innerHTML = blog.content;
                        blogDiv.appendChild(descDiv);
                        //构造查看全文按钮
                        let a = document.createElement('a');
                        a.innerHTML = '查看全文';
                        // 点击之后能跳转到博客详情页
                        // 并且需要告诉博客详情页我们点的是哪篇博客,即将blogId传过去(此处是通过query string传递的)
                        a.href = 'myblog_detail.html?blogId=' + blog.blogId;
                        blogDiv.appendChild(a);
                        // 把 blogDiv 加到父元素中
                        containerRight.appendChild(blogDiv);
                    }
                }
            });
        }
4、博客广场页的显示功能
逻辑:
登录之后,点击导航栏的 “博客广场”,跳转到博客广场页面(blog_square.html),显示所有用户的所有博客,登录用户可以看到自己和其它用户的所有博客
浏览器干了啥:
1、在加载博客广场页时,通过ajax构造一个GET(/blog)请求发送给服务器
2、在收到服务器返回的响应之后,调用该ajax请求的回调函数,jQuery会自动识别,将响应body中的字符串数组转成js对象数组,所以回调函数中的参数body就是js对象数组。遍历 js对象数组,把数组中的每个元素(Blog对象)取出来,结合div,a,image等标签构造页面内容(即进行渲染)。
服务器干了啥:
服务器接收到请求,(由于之后会实现强制登录的功能,并且此处不需要从session中获取之前设置的用户信息,所以这里不写判断用户是否登录的代码了)在数据库中查询所有博客,存储到List<Blog>集合中,将List集合转成json格式的字符串数组,写到响应body中。然后将resp转成http响应字符串,通过网卡返回给浏览器。
1)约定前后端交互接口
请求:
GET /blog
响应:
HTTP/1.1 200 OK
Content-Type: application/json;charset=utf8(使用json格式来组织数据,返回的是json格式的字符串)
body是json格式的字符串数组(格式可以参考我的博客列表页的body)
2)编写后端代码
BlogServlet.java
@Override
    protected void doGet(HttpServletRequest req, HttpServletResponse resp) throws ServletException, IOException {
       //查询blog表,返回表中所有博客
       List<Blog> blogs = blogDao.selectAll();
       //把 blogs对象 转成 json格式的字符串
       String respJson = objectMapper.writeValueAsString(blogs);
       //显示告诉浏览器,响应数据是json格式的,字符集是utf8的
       resp.setContentType("application/json;charset=utf8");
       //将 字符串respJson 以流的方式 写到响应对象resp的body中
       resp.getWriter().write(respJson);
}
3)编写前端代码
//调用方法
getBlogs();
function getBlogs() {
$.ajax({
type: 'get',
url: 'blog',
// 服务器返回的是json格式的字符串,但是jQuery的ajax能够自动识别,自动把json字符串转成js对象数组
//于是,此时拿到的body就是一个 js 对象数组
//接下来,遍历这个数组,把数组中的每个元素(blog对象)取出来,构造到页面中即可
success: function(body){
// 选中页面元素
let containerRight = document.querySelector('.container-right');
// 遍历 js对象数组,数组中的每个元素都是一个blog对象
for (let blog of body){
//构造页面内容
//构造整个博客 div(新增元素)
let blogDiv = document.createElement('div');
blogDiv.className = 'blog';
//构造标题
let titleDiv = document.createElement('div');
titleDiv.className = 'title';
// js中访问对象的属性通过 . 来访问。
titleDiv.innerHTML = blog.title;
blogDiv.appendChild(titleDiv);
//构造发布时间
let dateDiv = document.createElement('div');
dateDiv.className = 'date';
dateDiv.innerHTML = blog.postTime;
blogDiv.appendChild(dateDiv);
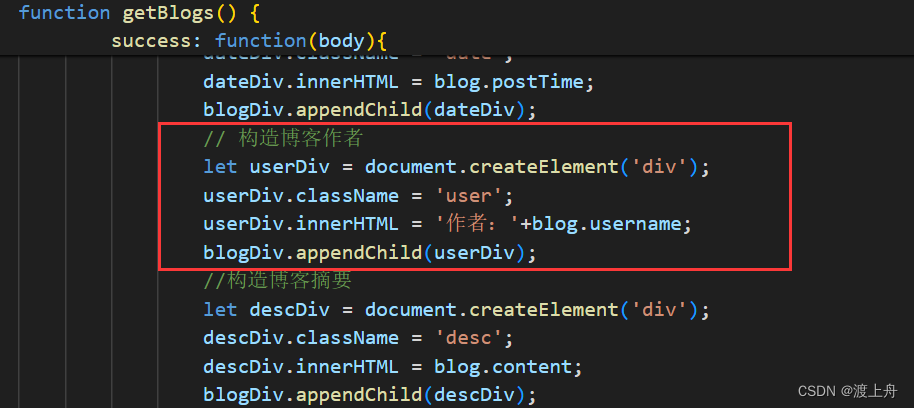
// 构造博客作者
let userDiv = document.createElement('div');
userDiv.className = 'user';
userDiv.innerHTML = '作者:'+blog.username;
blogDiv.appendChild(userDiv);
//构造博客摘要
let descDiv = document.createElement('div');
descDiv.className = 'desc';
descDiv.innerHTML = blog.content;
blogDiv.appendChild(descDiv);
//构造查看全文按钮
let a = document.createElement('a');
a.innerHTML = '查看全文';
// 点击之后能跳转到博客详情页
// 并且需要告诉博客详情页我们点的是哪篇博客,即将blogId传过去(此处是通过query string传递的)
a.href = 'blog_detail.html?blogId=' + blog.blogId;
blogDiv.appendChild(a);
// 把 blogDiv 加到父元素中
containerRight.appendChild(blogDiv);
}
}
});
}
5、博客详情页的显示功能
逻辑:
登录之后,在我的博客列表页 / 博客广场页,点击某个博客下方的 “查看全文” 按钮,跳转到博客详情页,显示出该篇博客的具体内容
浏览器干了啥:
1、在我的博客列表页 / 博客广场页,点击某个博客下方的 “查看全文” 按钮时,会通过a标签跳转到博客详情页,并将blogId作为 query string传过去,告诉博客详情页点的是哪篇博客。于是博客详情页的url是带有query string的。
在加载博客详情页时,会通过ajax构造一个GET(/blog?blogId=29)请求(会带上从博客详情页的url中获取的blogId 作为该请求的 query string)发送给服务器
2、在收到服务器返回的响应之后,调用该ajax请求的回调函数,jQuery会自动识别,将响应body中的字符串转成js对象,所以回调函数中的参数body就是js对象(Blog对象),结合div,a,image等标签构造页面内容(即进行渲染)。【如果回调函数的参数body接收的不是Blog对象,而是HTML字符串,不进行处理】
服务器干了啥:
服务器接收到请求,(由于之后会实现强制登录的功能,并且此处不需要从session中获取之前设置的用户信息,所以这里不写判断用户是否登录的代码了)首先,从请求中获取blogId的值,根据是否有blogId,判断该请求是请求的博客广场页还是请求的博客详情页(因为这两个请求路径都是 GET /blog,区别在有没有blogId这个query string)。如果blogId为空,则请求的是博客广场页;如果blogId是空字符串,则返回一个text/html 格式的响应(提示参数非法);如果blogId不为空且不是空字符串,则请求的是博客详情页。根据blogId在数据库中查询博客信息,若查询到,存储到Blog对象中,将Blog对象转成json格式的字符串,写到响应body中。然后将resp转成http响应字符串,通过网卡返回给浏览器。
1)约定前后端交互接口
请求:
GET /blog?blogId=29
响应:
HTTP/1.1 200 OK
Content-Type: application/json;charset=utf8
{
    "blogId":29,
    "title":"这是我的第一篇博客",
    "content":"# coding",
    "postTime":"2024-06-12 20:24:58",
    "userId":10,
    "username":null,
    "postTimeStamp":1718195098000
}
2)编写后端代码
BlogServlet.java
@Override
    protected void doGet(HttpServletRequest req, HttpServletResponse resp) throws ServletException, IOException {

        //获取 query string 中string的值,即获取 req中blogId对应的值
        String blogId = req.getParameter("blogId");
        BlogDao blogDao = new BlogDao();

        if(blogId == null){
            /**
             * 1、响应:返回博客广场页所有博客的数据
             */
            //说明没有 query string,请求的是所有博客

            //查询blog表,返回表中所有博客
            List<Blog> blogs = blogDao.selectAll();
            //把 blogs对象 转成 json格式的字符串
            String respJson = objectMapper.writeValueAsString(blogs);
            //显示告诉浏览器,响应数据是json格式的,字符集是utf8的
            resp.setContentType("application/json;charset=utf8");
            //将 字符串respJson 以流的方式 写到响应对象resp的body中
            resp.getWriter().write(respJson);
        }else if(blogId.equals("")){
            resp.setContentType("text/html;charset=utf8");
            resp.getWriter().write("<h3>参数非法</h3>");
        }else{
            /**
             * 2、响应:返回blogId对应的那篇博客数据
             */
            //说明存在 query string,请求的是blogId对应的那篇博客
            Blog blog = blogDao.selectById(Integer.parseInt(blogId));
            if(blog == null){
                resp.setContentType("text/html;charset=utf8");
                resp.getWriter().write("<h3>blogId="+blogId +"不存在</h3>");
                return;
            }
            //把 blog对象 转成 json格式的字符串
            String respJson = objectMapper.writeValueAsString(blog);
            //显示告诉浏览器,响应数据是json格式的,字符集是utf8的
            resp.setContentType("application/json;charset=utf8");
            //将 字符串respJson 以流的方式 写到响应对象resp的body中
            resp.getWriter().write(respJson);
        }

    }
3)编写前端代码
$.ajax({
        type: 'get',
        url: 'blog' + location.search,
        success: function(body){
            // 如果 响应是 Blog对象 进行处理
            if (typeof body === 'object' && body !== null) {
                // 设置标题
                let titleDiv = document.querySelector('.title');
                titleDiv.innerHTML = body.title;
                // 设置发布时间
                let dateDiv = document.querySelector('.date');
                dateDiv.innerHTML = body.postTime;//这里的postTime是格式化的时间
                //设置内容,要显示渲染后的内容
                // 第一个参数:转换后要放到哪个元素里
                // 第二个参数:要转的是哪个数据
                editormd.markdownToHTML('content',{ markdown: body.content});
            }
            // 如果 响应是参数非法或者blogId不存在,不进行处理
        }
    });
在我的博客列表页 和 博客广场页,展示的是原本的markdown格式的博客内容;在博客详情页里,我们需要展示渲染后的博客内容。
如果通过 选中元素,更改元素的innerHTML = body.content,我们得到的还是原本的markdown格式的博客内容。就需要进行更改。
此处使用editor.md这个库来完成渲染。
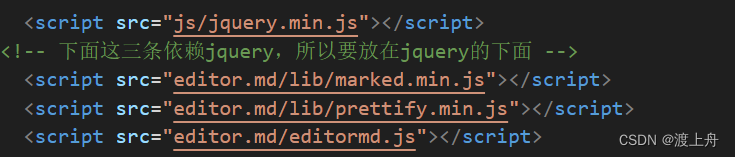
1、引入editor.md的依赖
2、使用editormd中提供的一个方法editormd.markdownToHTML,这个方法的效果,就是把 blog.content 这里的 markdowm格式 的原始数据,渲染成 html,放到 id 为 content 的 div 中

6、强制要求登录功能
逻辑:
用户想访问个人博客系统中的页面,必须是已经登录的状态。如果没有登录,就会强制跳转到登录页面(login.html)。
浏览器干了啥:
1、浏览器通过ajax构造一个GET(/login)请求发送给服务器
2、浏览器在收到服务器返回的响应之后,调用该ajax请求的回调函数,jQuery会自动识别,将响应body中的字符串转成js对象,所以回调函数中的参数body就是js对象(User对象),根据userId是否大于0,区分是否是登录状态。userId>0,是登录状态;userId不大于0,未登录状态,跳转到登录页面
服务器干了啥:
服务器收到请求之后,首先验证用户是否是登录状态(1、是否获取到session会话;2、是否获取到设置在会话中的用户信息),如果有任意一个没有获取到,说明未登录,将空的User对象转成json格式字符串,写到响应body中返回;如果已经登录了,将会话中存的User对象转成json格式字符串,写到响应body中。然后将resp转成http响应字符串,通过网卡返回给浏览器。
1)约定前后端交互接口
请求:
GET /login
响应:
HTTP/1.1 200
Content-Type: application/json;charset=utf8
{
    "userId":1,
    "username":"wuqingyu",
    "password":"123"
}
2)编写后端代码
LoginServlet.java
 @Override
    protected void doGet(HttpServletRequest req, HttpServletResponse resp) throws ServletException, IOException {
        //设置响应的格式
        resp.setContentType("application/json;charset=utf8");
        //获取会话,若会话不存在,说明没登录,new 一个user对象并返回(空对象)
        HttpSession session = req.getSession(false);
        if(session == null){
            User user = new User();
            String respJson = objectMapper.writeValueAsString(user);
            resp.getWriter().write(respJson);
            return;
        }
        //会话存在,则取出会话中之前设置的 "user"的值user对象
        User user = (User)session.getAttribute("user");
        //
        if(user == null){
            user = new User();
            String respJson = objectMapper.writeValueAsString(user);
            resp.getWriter().write(respJson);
            return;
        }
        //确实取出了 user对象,直接返回
        String respJson = objectMapper.writeValueAsString(user);
        resp.getWriter().write(respJson);
    }
3)编写前端代码
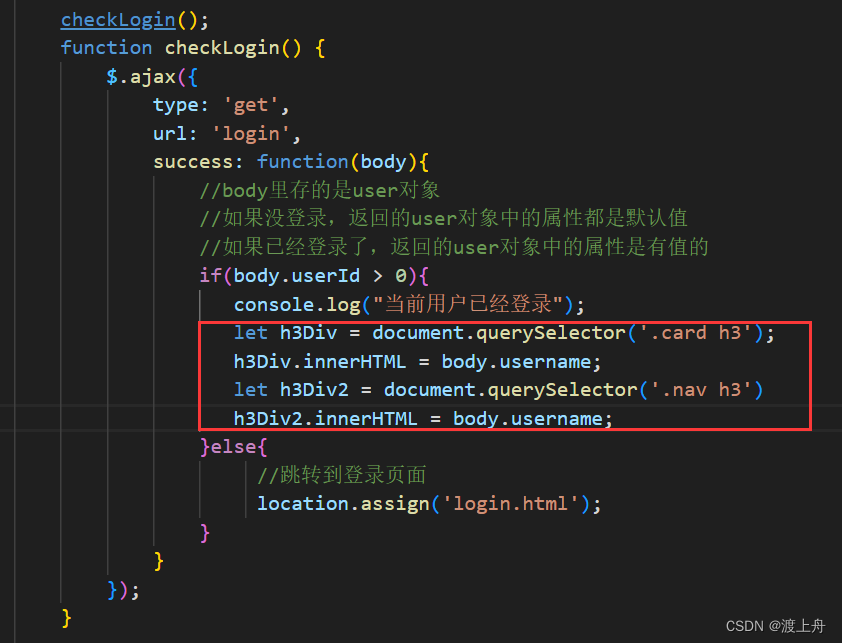
checkLogin();
function checkLogin() {
    $.ajax({
        type: 'get',
        url: 'login',
        success: function(body){
            //body里存的是User对象
            //如果没登录,返回的User对象中的属性都是默认值
            //如果已经登录了,返回的User对象中的属性是有值的
            if(body.userId > 0){
                console.log("当前用户已经登录");
                let h3Div = document.querySelector('.card h3');
                h3Div.innerHTML = body.username;
                let h3Div2 = document.querySelector('.nav h3')
                h3Div2.innerHTML = body.username;
            }else{
                    //跳转到登录页面
                    location.assign('login.html');
            }
        }
    });
}
7、显示用户信息和作者信息
逻辑:
登录之后,1、导航栏 “当前登录”后面显示登录用户的用户名;2、我的博客列表页,我的博客详情页,博客广场页,左边显示登录用户的用户名;3、博客广场页,每篇博客中显示该篇博客的作者;4、在博客广场页,点击 “查看全文”,跳转到博客详情页,左边显示该篇博客的作者。
获取当前登录用户的用户名:(
导航栏的 “当前登录”后面显示登录用户的用户名 和
我的博客列表页,我的博客详情页,博客广场页,左边显示登录用户的用户名
)
步骤:
复用 强制要求登录功能 的前后端接口(GET /login)。
在 强制要求登录功能 中,服务器返回的是User对象,浏览器在回调函数中,根据参数body,分别对已经登录和未登录2个分支进行后续处理。于是,我们可以在已经登录分支,加上获取登录用户用户名的代码(body.username)
获取博客的作者:(博客广场页,每篇博客中显示该篇博客的作者)
步骤:
复用 博客广场页的显示功能 的前后端交互接口(GET /blog)。
但是在 博客广场页的显示功能 中,服务器返回的是List<Blog>集合,里面的Blog对象只有userId,没有username。所以需要修改Blog实体类 和 BlogDao中的selectAll方法。在Blog实体类中增加一个username属性,在selectAll方法中更改sql语句为多表查询(select blogId,title,content,postTime,blog.userId,username from blog,user where blog.userId=user.userId order by postTime desc)。遍历结果集,构造Blog对象时,将username列的值设置进去。
浏览器在收到服务器返回的响应之后,调用该ajax请求的回调函数,参数body中就有username属性了,可以进行后续操作。
获取博客的作者:(博客广场页,点击 “查看全文”,跳转到博客详情页,左边显示该篇博客的作者)
有2种做法:
第一种,复用 博客详情页的显示功能 的前后端交互接口( GET /blog?blogId=29) ,改一下sql语句,因为博客详情页的显示功能,服务器返回的是Blog对象,查询的是blog表,blog表中没有username字段,需要进行多表查询。
第二种,重新约定一个前后端交互接口,专门用来获取博客作者。
我采用的是第二种做法。
逻辑:
登录之后,在博客广场页,点击某个博客下方的 “查看全文” 按钮,跳转到博客详情页,左边显示该篇博客的作者。
浏览器干了啥:
1、在博客广场页,点击某个博客下方的 “查看全文” 按钮时,会通过a标签跳转到博客详情页,并将blogId作为 query string传过去,告诉博客详情页点的是哪篇博客。于是博客详情页的url是带有query string的。
在加载博客详情页时,会通过ajax构造一个GET(/author?blogId=29)请求(会带上从博客详情页的url中获取的blogId 作为该请求的 query string)发送给服务器
2、在收到服务器返回的响应之后,调用该ajax请求的回调函数,jQuery会自动识别,将响应body中的字符串转成js对象,所以回调函数中的参数body就是js对象(User对象),结合div等标签构造页面内容(即进行渲染)。【如果回调函数的参数body接收的不是Blog对象,而是HTML字符串,不进行处理】
服务器干了啥:
服务器接收到请求,(已经实现了强制登录的功能)首先,从请求中获取blogId的值,如果为null或为空字符串,则返回一个text/html 格式的响应(提示参数非法);如果blogId不为空且不是空字符串,根据blogId在数据库中查询博客信息,若查询到,则根据blog中的userId在数据库中查询对应作者信息,存储到User对象中,将User对象转成json格式的字符串,写到响应body中。然后将resp转成http响应字符串,通过网卡返回给浏览器。
1)约定前后端交互接口
请求:
GET /author?blogId=29
响应:
HTTP/1.1 200 OK
Content-Type: application/json;charset=utf8
{
    "userId":1,
    "username":"wuqingyu",
    "password":"123"
}
2)编写后端代码
AuthorServlet.java
@WebServlet("/author")
public class AuthorServlet extends HttpServlet {
    private ObjectMapper objectMapper = new ObjectMapper();
    @Override
    protected void doGet(HttpServletRequest req, HttpServletResponse resp) throws ServletException, IOException {
        //拿到 query string 中string的值
        String blogId = req.getParameter("blogId");
        //blogId 是空的
        if(blogId == null || blogId.equals("")){
            resp.setContentType("text/html;charset=utf8");
            resp.getWriter().write("<h3>参数非法,缺少blogId</h3>");
            return;
        }
        //根据blogId 查找对应博客
        BlogDao blogDao = new BlogDao();
        Blog blog = blogDao.selectById(Integer.parseInt(blogId));
        //博客不存在
        if(blog == null){
            resp.setContentType("text/html;charset=utf8");
            resp.getWriter().write("<h3>blogId="+blogId +"不存在</h3>");
            return;
        }
        //博客存在,根据blog中的userId找到对应作者信息,填充进响应body
        UserDao userDao = new UserDao();
        User user = userDao.selectById(blog.getUserId());
        String respJson = objectMapper.writeValueAsString(user);
        resp.setContentType("application/json;charset=utf8");
        resp.getWriter().write(respJson);
    }
}
3)编写前端代码
 // 发送请求获取博客作者信息
getAuthor();
function getAuthor() {
    $.ajax({
        type: 'get',
        url: 'author'+location.search,
        success: function(body){
            // 如果 响应是User对象进行处理
            if (typeof body === 'object' && body !== null) {

                let h3Div = document.querySelector('.card h3');
                h3Div.innerHTML = body.username; // 访问对象的username属性
            }
            // 如果 响应是参数非法或者blogId不存在,不进行处理
        }
    });
}
8、获取博客文章数
逻辑:
登录之后,1、我的博客列表页、我的博客详情页、博客广场页,左边显示登录用户的博客文章数;2、在博客广场页,点击 “查看全文”,跳转到博客详情页,左边显示该篇博客的作者的博客文章数
显示登录用户的博客文章数:
思路:
可以从会话中获取到当前登录的用户,根据userId在数据库查询中该用户的博客数
浏览器干了啥:
1、加载页面时,通过ajax构造一个GET(/blogCount)请求发送给服务器
2、在收到服务器返回的响应之后,调用该ajax请求的回调函数,jQuery会自动识别,将响应body中的字符串转成js对象,所以回调函数中的参数body就是js对象,结合div等标签构造页面内容(即进行渲染)。
服务器干了啥:
服务器接收到请求,首先判断用户是否已经登录(1、是否获取到session会话;2、是否获取到设置在会话中的用户信息),如果有任意一个没有获取到,说明未登录,返回一个text/html 格式的响应(提示未登录);用户是登录状态,从session中获取之前设置的用户信息,通过userId在数据库中查询该用户的博客数,转成json格式的字符串数组,写到响应body中。然后将resp转成http响应字符串,通过网卡返回给浏览器。
1)约定前后端交互接口
请求:
GET /blogCount
响应:
HTTP/1.1 200 OK
Content-Type: application/json;charset=utf8
2)编写后端代码(和下面的放一起了)
3)编写前端代码
getBlogCount();
function getBlogCount() {
    $.ajax({
        type: 'get',
        url: 'blogCount',
        success: function(body){
            let spanDiv = document.querySelector('.counter .count');
            spanDiv.innerHTML = body;
        }
    });
}
显示该篇博客的作者的博客文章数:
思路:
需要将blogId传过去,根据blogId查询到Blog对象,然后根据Blog对象中的userId查询数据库中该用户的博客文章数
浏览器干了啥:
1、在博客广场页,点击某个博客下方的 “查看全文” 按钮时,会通过a标签跳转到博客详情页,并将blogId作为 query string传过去,告诉博客详情页点的是哪篇博客。于是博客详情页的url是带有query string的。
在加载博客详情页时,会通过ajax构造一个GET(/blogCount?blogId=29)请求(会带上从博客详情页的url中获取的blogId 作为该请求的 query string)发送给服务器
2、在收到服务器返回的响应之后,调用该ajax请求的回调函数,jQuery会自动识别,将响应body中的字符串转成js对象,所以回调函数中的参数body就是js对象,结合div等标签构造页面内容(即进行渲染)。
服务器干了啥:
服务器接收到请求,(已经实现了强制登录的功能)首先,从请求中获取blogId的值,根据是否有blogId,判断该请求是请求的登录用户的博客文章数还是请求的该篇博客的作者的博客文章数(因为这两个请求路径都是 GET /blogCount,区别在有没有blogId这个query string)。如果blogId为空,则请求的是登录用户的博客文章数;如果blogId是空字符串,则返回一个text/html 格式的响应(提示参数非法);如果blogId不为空且不是空字符串,则请求的是该篇博客的作者的博客文章数。根据blogId在数据库中查询博客信息,若查询到,存储到Blog对象中,然后根据Blog对象中的userId查询数据库中该用户的博客文章数,转成json格式的字符串数组,写到响应body中。然后将resp转成http响应字符串,通过网卡返回给浏览器。
1)约定前后端交互接口
请求:
GET /blogCount?blogId=29
响应:
HTTP/1.1 200 OK
Content-Type: application/json;charset=utf8
2)编写后端代码
BlogCountServlet.java
@WebServlet("/blogCount")
public class BlogCountServlet extends HttpServlet {
    ObjectMapper objectMapper = new ObjectMapper();
    @Override
    protected void doGet(HttpServletRequest req, HttpServletResponse resp) throws ServletException, IOException {

        //从请求中获取session
        HttpSession session = req.getSession(false);
        //如果没有获取到session,说明没有登录
        if(session == null){
            resp.setContentType("text/html;charset=utf8");
            resp.getWriter().write("当前未登录!");
            return;
        }
        //从session中拿到属性
        User user = (User)session.getAttribute("user");
        //如果没有获取到user,说明没登录
        if(user == null){
            resp.setContentType("text/html;charset=utf8");
            resp.getWriter().write("当前未登录!");
            return;
        }
        //走到这,说明是登录状态
        //获得blogId的值
        String blogId = req.getParameter("blogId");
        if(blogId == null){
            //没有 query string,blogId不存在
            BlogDao blogDao = new BlogDao();
            //通过userId查询博客文章数
            int count = blogDao.selectBlogCount(user.getUserId());

            //告诉servlet以何种方式构造响应
            resp.setContentType("application/json;charset=utf8");
            //转成json格式字符串
            String respJson = objectMapper.writeValueAsString(count);
            resp.getWriter().write(respJson);

        }else if (blogId.equals("")){
            resp.setContentType("text/html;charset=utf8");
            resp.getWriter().write("");
            System.out.println("参数非法!");
        } else{
            //有 query string
            BlogDao blogDao = new BlogDao();
            //根据blogId查找到对应博客
            Blog blog = blogDao.selectById(Integer.parseInt(blogId));
            if(blog == null){
                resp.setContentType("text/html;charset=utf8");
                resp.getWriter().write("<h3>blogId="+blogId +"不存在</h3>");
                return;
            }
            //获得这篇博客的userId
            int userId = blog.getUserId();
            //通过userId 查找博客文章数
            int count = blogDao.selectBlogCount(userId);

            //告诉servlet以何种方式构造响应
            resp.setContentType("application/json;charset=utf8");
            //转成json格式字符串
            String respJson = objectMapper.writeValueAsString(count);
            resp.getWriter().write(respJson);

        }

    }
}
3)编写前端代码
getBlogCount();
function getBlogCount() {
    $.ajax({
        type: 'get',
        url: 'blogCount'+location.search,
        success: function(body){
            let spanDiv = document.querySelector('.counter .count');
            spanDiv.innerHTML = body;
        }
    });
}
9、删除博客
逻辑:
登录之后,在我的博客列表页,点击 “查看全文” 按钮,跳转到我的博客详情页,在我的博客详情页,点击 “删除” 按钮,删除成功,跳转到我的博客列表页(myblog_list.html),刚刚那条博客记录没了。
浏览器干了啥:
1、在我的博客列表页,点击某个博客下方的 “查看全文” 按钮时,会通过a标签跳转到博客详情页,并将blogId作为 query string传过去,告诉博客详情页点的是哪篇博客。于是博客详情页的url是带有query string的。
在我的博客详情页,点击 “删除” 按钮,会通过ajax构造一个GET(/delete?blogId=29)请求(会带上从博客详情页的url中获取的blogId 作为该请求的 query string)发送给服务器
2、在收到服务器返回的响应之后,调用该ajax请求的回调函数,在回调函数中编写代码,手动处理重定向逻辑,跳转到我的博客列表页面
服务器干了啥:
服务器接收到请求,(已经实现了强制登录的功能)首先,从请求中获取blogId的值,如果为null或为空字符串,则返回一个text/html 格式的响应(提示参数非法);如果blogId不为空且不是空字符串,根据blogId在数据库中删除该篇博客,删除成功。(即使blogId在数据库中不存在,也不影响,也是删除成功)
补充:
除了通过ajax构造一个GET请求发送给服务器,还可以使用a标签构造GET请求发送给服务器。(<a href="delete" class="delete"></a>)
使用a标签可以在服务器中直接返回重定向,浏览器会自动跟随这个重定向,加载并显示新URL的内容。而ajax还得在回调函数中手动处理重定向逻辑。
不过,使用a标签,还得在页面加载的时候通过js代码稍微修改一下href属性中的内容,使url中带上blogId。
function deleteBlog(){
    let deleteDiv = document.querySelector(".delete");
    deleteDiv.href = "delete" +location.search;
}
总之,两种方式都可以。
1)约定前后端交互接口
请求:
GET /delete?blogId=29
响应:
HTTP/1.1 200 OK
2)编写后端代码
DeleteBlogServlet.java
@WebServlet("/delete")
public class DeleteBlogServlet extends HttpServlet {
    @Override
    protected void doGet(HttpServletRequest req, HttpServletResponse resp) throws ServletException, IOException {

        //拿到query string中的blogId的值
        String blogId = req.getParameter("blogId");
        //这是为了防止通过浏览器地址栏直接访问出现问题
        //如果blogId 是空的
        if(blogId == null || blogId.equals("")){
            resp.setContentType("text/html;charset=utf8");
            resp.getWriter().write("<h3>参数非法</h3>");
            return;
        }
        //删除指定blogId的博客
        BlogDao blogDao = new BlogDao();
        blogDao.delete(Integer.parseInt(blogId));
    }
}
3)编写前端代码
let deleteDiv = document.querySelector('.container-right .row .delete');
deleteDiv.onclick = function() {
    $.ajax({
        type: 'get',
        url: 'delete'+location.search,
        success: function(body){
            location.assign("myblog_list.html");
        }
    });
}
10、编辑博客
逻辑:
登录之后,1、点击导航栏上的 “写博客” ,跳转到博客编辑页 2、在我的博客列表页,点击 “查看全文” 按钮,跳转到我的博客详情页, 在我的博客详情页,点击 “编辑” 按钮,跳转到博客编辑页(blog_edit.html),并将博客内容填充进博客编辑页中。
点击导航栏上的 “写博客” ,跳转到博客编辑页:
浏览器干了啥:
1、点击导航栏上的 “写博客”,浏览器通过a标签构造了一个GET(<a href="blog_edit.html">写博客</a>)请求发送给服务器。
2、浏览器结合标签构造页面内容(即进行渲染)
服务器干了啥:
服务器接收到请求,(已经实现了强制登录的功能),返回了博客详情页面。
点击 “编辑” 按钮,跳转到博客编辑页,并将博客内容填充进博客编辑页中:
浏览器干了啥:
1、在我的博客列表页,点击某个博客下方的 “查看全文” 按钮时,会通过a标签跳转到我的博客详情页,并将blogId作为 query string传过去,告诉博客详情页点的是哪篇博客。于是我的博客详情页的url是带有query string的。
在我的博客详情页,点击 “编辑” 按钮,跳转到博客编辑页,并带上从博客详情页的url中获取的blogId 作为该请求的 query string。于是博客编辑页的url是带有query string的。
在加载博客编辑页时,会通过ajax构造一个GET(/edit?blogId=29)请求(会带上从博客编辑页的url中获取的blogId 作为该请求的 query string)发送给服务器
2、在收到服务器返回的响应之后,调用该ajax请求的回调函数,jQuery会自动识别,将响应body中的字符串转成js对象,所以回调函数中的参数body就是js对象(Blog对象),结合div,a,image等标签构造页面内容(即进行渲染)。【如果回调函数的参数body接收的不是Blog对象,1、HTML字符串,不进行处理;2、是null,说明用户请求的是原始的博客编辑页,也不进行处理】
服务器干了啥:
服务器接收到请求,(已经实现了强制登录的功能)首先,从请求中获取blogId的值,根据是否有blogId,判断该请求是请求的原始的博客编辑页还是请求的将原本博客内容填进编辑页。如果blogId为空,则请求的是原始的博客编辑页,不进行处理;如果blogId是空字符串,则返回一个text/html 格式的响应(提示参数非法);如果blogId不为空且不是空字符串,根据blogId在数据库中查询博客信息,若查询到,存储到Blog对象中,将Blog对象转成json格式的字符串,写到响应body中。然后将resp转成http响应字符串,通过网卡返回给浏览器。
补充:
点击导航栏 “写博客”,跳转到博客编辑页;在我的博客详情页,点击 “编辑” 按钮,跳转到博客编辑页。跳转后的页面是同一个页面。
代码对比如下:
<a href="blog_edit.html">写博客</a>let editDiv = document.querySelector('.container-right .row .edit'); editDiv.onclick = function() { //跳转到另一个页面 location.assign("blog_edit.html"+location.search); }根据博客编辑页的url是否带有query string,判断是 显示原始的博客详情页 还是 把服务器返回的原始博客内容添加到编辑器中,然后显示出来。
如果 服务器从接收的请求中,没有获取到blogId,说明博客编辑页的url没有 query string,说明用户是通过点击 “写博客”,跳转到的博客详情页,请求的是原始的博客编辑页。
1)约定前后端交互接口
请求:
GET /edit?blogId=29
响应:
HTTP/1.1 200 OK
Content-Type: application/json;charset=utf8
{
    "blogId":29,
    "title":"这是我的第一篇博客",
    "content":"# coding",
    "postTime":"2024-06-12 20:24:58",
    "userId":10,
    "username":null,
    "postTimeStamp":1718195098000
}
2)编写后端代码
//编辑博客
@WebServlet("/edit")
public class EditBlogServlet extends HttpServlet {
    ObjectMapper objectMapper = new ObjectMapper();
    @Override
    protected void doGet(HttpServletRequest req, HttpServletResponse resp) throws ServletException, IOException {
        //通过blogId,拿到该博客的原始内容
        String blogId = req.getParameter("blogId");
        //如果没有获取到blogId,说明博客编辑页的url没有 query string,说明用户是通过点击 “写博客”,跳转到的博客详情页。
        //用户请求的是原始的博客编辑页
        if(blogId == null){
            //用户请求的是原始的博客编辑页
            //不进行处理
        }else if(blogId.equals("")){
            resp.setContentType("text/html;charset=utf8");
            resp.getWriter().write("<h3>参数非法</h3>");
        }else{
            //通过blogId查找对应博客
            BlogDao blogDao = new BlogDao();
            Blog blog = blogDao.selectById(Integer.parseInt(blogId));
            //
            if(blog == null){
                resp.setContentType("text/html;charset=utf8");
                resp.getWriter().write("<h3>blogId="+blogId +"不存在</h3>");
                return;
            }
            //把对象转成json格式的字符串,写到响应body中,返回给浏览器
            String respJson = objectMapper.writeValueAsString(blog);
            resp.setContentType("application/json;charset=utf8");
            resp.getWriter().write(respJson);
        }

    }
}
3)编写前端代码
//拿到服务器的原始内容,添加到现有得编辑器中
$.ajax({
    type: 'get',
    url: 'edit'+location.search,
    success: function(body) {
        //如果服务器 返回的是 参数非法,不进行处理
        //如果服务器 返回的 body是null,说明用户请求的是原始的博客编辑页,也不进行处理
        if (typeof body === 'object' && body !== null) {
            //把服务器返回的原始博客内容添加到编辑器中
            let titleDiv = document.querySelector('#title');
            // 设置标题输入框的值
            titleDiv.value = body.title;
            // 使用 editormd 提供的 setValue 方法来设置编辑器的内容
            // 设置编辑器的内容

            //更改该 <textarea> 的值,
            //由于 editor.md 会自动同步 <textarea> 和编辑器的内容,所以更改 <textarea> 的值将会导致编辑器内容的更新。
            // 获取用于初始化 editor.md 的 <textarea> 元素
            let textareaDiv = document.querySelector('#my-markdown');
            // 更新 <textarea> 的值
            textareaDiv.value = body.content;

            // 注意:由于 editor.md 会自动同步内容,所以这里不需要额外的步骤来更新编辑器
            // 编辑器的内容现在应该已经更新了
        }
    }
});
11、发布博客
逻辑:
登陆之后,1、点击 “写博客” 按钮,跳转到博客编辑页,在博客编辑页写博客,点击 “发布” 按钮,发布成功,跳转到我的博客列表页,我的博客列表页新增了一条博客记录 2、 在我的博客详情页,点击某一篇博客底下的 “编辑” 按钮,跳转到博客编辑页,在博客编辑页编辑博客,点击 “发布” 按钮,发布成功,跳转到我的博客列表页,刚刚编辑的博客发生了修改。
发布一篇新博客:
浏览器干了啥:
在博客编辑页,点击 “发布” 按钮,通过form表单发送了一个POST(/blog)请求,连带着用户输入的博客标题和内容作为请求的body
服务器干了啥:
服务器接收到请求,首先判断用户是否已经登录(1、是否获取到session会话;2、是否获取到设置在会话中的用户信息),如果有任意一个没有获取到,说明未登录,返回一个text/html 格式的响应(提示未登录);用户是登录状态,从session中获取之前设置的用户信息(因为新增博客要知道userId),接着从请求中读取博客标题和内容,进行校验(校验博客标题和内容是否为空或空字符串),校验不通过,发布失败,返回一个text/html 格式的响应(弹框提示错误信息,跳转到博客编辑页面);校验通过,构造Blog对象(将从请求中读取的博客标题和内容,从会话中获取的userId,以及生成的发布时间设置到对象的属性中),插入到blog表中,发布成功,重定向到我的博客列表页面。
接着浏览器就会根据重定向的url自己发送一条请求,请求我的博客列表页面,于是就实现了跳转。
1)约定前后端交互接口
请求:
POST /blog
Content-Type: application/x-www-form-urlencoded
title=xxx&blogId=&content=xxx
响应:
HTTP/1.1 302
Location:myblog_list.html
2)编写前端代码(和下面的放一起了)
3)编写后端代码(和下面的放一起了)
编辑原有博客,然后发布:
思路:
需要将blogId传过去,根据blogId确定要更改的是哪一篇博客
准备:
在form表单中新增一个隐藏字段用于存储 blogId,并在JavaScript中 将从当前页面(博客编辑页)url中获取blogId的值,设置进字段的value值中。
代码如下:
window.onload = function() {
    // 从 URL 中获取 blogId
    let urlParams = new URLSearchParams(location.search);
    let blogIdFromUrl = urlParams.get('blogId');

    //如果找到了 blogId,则将其设置为隐藏字段的值
    if (blogIdFromUrl) {
         let blogIdDiv = document.querySelector('#blogId');
         blogIdDiv.value = blogIdFromUrl;
    }
};
【在我的博客列表页,点击某个博客下方的 “查看全文” 按钮时,会通过a标签跳转到我的博客详情页,并将blogId作为 query string传过去,告诉博客详情页点的是哪篇博客。于是我的博客详情页的url是带有query string的。
在我的博客详情页,点击 “编辑” 按钮,跳转到博客编辑页,并带上从博客详情页的url中获取的blogId 作为该请求的 query string。于是博客编辑页的url是带有query string的。】
浏览器干了啥:
在博客编辑页,点击 “发布” 按钮, 通过form表单发送了一个POST(/blog)请求,连带着用户输入的博客标题和内容,以及隐藏字段blogId的值,作为请求的body
服务器干了啥:
服务器接收到请求,(已经实现了强制登录的功能)首先,从请求中读取博客标题和内容,进行校验(校验博客标题和内容是否为空或空字符串),校验不通过,发布失败,返回一个text/html 格式的响应(弹框提示错误信息,跳转到博客编辑页面);校验通过,从请求中读取blogId,若blogId是空字符串,说明隐藏字段blogId的值是空的,说明博客编辑页的url没有 query string,则请求的是 发布一篇新博客;若blogId不是空字符串,说明请求的是更新博客,构造Blog对象(将从请求中读取的博客标题、内容和blogId设置到对象的属性中),通过blogId更新博客,发布成功,重定向到我的博客列表页面。
接着浏览器就会根据重定向的url自己发送一条请求,请求我的博客列表页面,于是就实现了跳转。
1)约定前后端交互接口
请求:
POST /blog
Content-Type: application/x-www-form-urlencoded
title=xxx&blogId=29&content=xxx
响应:
HTTP/1.1 302
Location:myblog_list.html
2)编写前端代码
<!-- 页面主体部分 -->
    <div class="blog_edit_container">
        <form action="blog" method="post" style="height: 100%">
            <div class="title">
              <input type="text" id="title" placeholder="请输入文章标题" name="title">
              <input type="submit" id="submit" value="发布文章"></input>
            </div>
            <!-- 隐藏字段用于存储 blogId  -->
            <input type="hidden" id="blogId" name="blogId">
            <!-- 博客编辑器, 这里用 id 是为了和 markdown 编辑器对接, 而设置的 -->
            <div id="editor">
              <textarea name="content" style="display: none" id="my-markdown"></textarea>
            </div>
        </form>
    </div>
3)编写后端代码
 //发布博客
    //分两种情况:1、query string中没有blogId写博客发布(在blog表中新增博客) 2、有 blogId,编辑原有博客发布(在blog表中更新博客)
    @Override
    protected void doPost(HttpServletRequest req, HttpServletResponse resp) throws ServletException, IOException {
        //获取session
        HttpSession session = req.getSession(false);

        if(session == null){
            resp.setContentType("text/html;charset=utf8");
            resp.getWriter().write("当前未登录,无法发布博客!");
            return;
        }
        User user = (User)session.getAttribute("user");
        if(user == null){
            resp.setContentType("text/html;charset=utf8");
            resp.getWriter().write("当前未登录,无法发布博客!");
            return;
        }
        //走到这,说明是登录状态,登录状态才能拿到博客作者

        //告诉servlet按照什么格式来读请求
        req.setCharacterEncoding("utf8");
        //拿到 body 中的值,即标题和内容
        String title = req.getParameter("title");
        String content = req.getParameter("content");
        //如果标题为空
        if(title == null || title.equals("")){
            //设置编码和字符集
            resp.setContentType("text/html;charset=utf8");
            resp.getWriter().write("<script>" +
                    "alert('发布失败!缺少标题!');" +
                    "location.assign('blog_edit.html');"+
                    "</script>");
            return;
        }
        //如果内容为空
        if(content == null || content.equals("")){
            resp.setContentType("text/html;charset=utf8");
            resp.getWriter().write("<script>" +
                    "alert('发布失败!缺少内容!');" +
                    "location.assign('blog_edit.html');"+
                    "</script>");
            return;
        }
        String blogId = req.getParameter("blogId");
        System.out.println(blogId);
        Blog blog = new Blog();
        if(blogId.equals("")){
            //query string 中没有 blogId,即新增博客发布
            //构造博客
            blog.setTitle(title);
            blog.setContent(content);
            //发布时间,在 java 中生成 或 在数据库中生成 都行
            blog.setPostTime(new Timestamp(System.currentTimeMillis()));
            blog.setUserId(user.getUserId());
            //插入数据库
            BlogDao blogDao = new BlogDao();
            blogDao.add(blog);
            //跳转到 博客列表页
        }else{
            //query string 有 blogId,编辑原有博客发布
            blog.setBlogId(Integer.parseInt(blogId));
            blog.setTitle(title);
            blog.setContent(content);
            //更新博客
            BlogDao blogDao = new BlogDao();
            blogDao.edit(blog);
            //跳转到 博客列表页
        }
        resp.sendRedirect("myblog_list.html");
    }
12、退出登录
逻辑:
登录之后,点击导航栏的 “退出”,退出登录状态,跳转到登录页面(login.html)
浏览器干了啥:
通过 a标签构造一个GET请求发送给服务器
服务器干了啥:
服务器接收到请求,首先检查是否是登录状态(获取会话),如果没有获取到会话,说明当前还未登录,返回一个text/html格式的响应(提示还未登录);如果会话存在,删除会话中存的user,重定向到登录页。
接着浏览器就会根据重定向的url自己发送一条请求,请求登录页面,于是就实现了跳转。
1)约定前后端交互接口
请求:
GET /logout
响应:
HTTP/1.1 200 OK
Location:login.html
2)编写后端代码
@WebServlet("/logout")
public class LogoutServlet extends HttpServlet {
    @Override
    protected void doGet(HttpServletRequest req, HttpServletResponse resp) throws ServletException, IOException {
        //获取会话
        HttpSession session = req.getSession(false);
        //如果会话不存在
        if(session == null){
            resp.setContentType("text/html;charset=utf8");
            resp.getWriter().write("还没登录哦");
            return;
        }
        //删除之前放进会话中的user
        session.removeAttribute("user");
        //重定向到 登录页
        resp.sendRedirect("login.html");
    }
}
3)编写前端代码
<a href="logout">退出</a>


 1127
1127

 被折叠的 条评论
为什么被折叠?
被折叠的 条评论
为什么被折叠?
 到【灌水乐园】发言


