


存取Bean的五种注解
先给大家看看我的命名规范
存储Bean对象两种方式
1.添加一行bean
在spring-config.xml中添加一个bean 把对象注册给spring。
这种方法在有多个对象的时候 也得一行一行的存进去。
<?xml version="1.0" encoding="UTF-8"?>
<beans xmlns="http://www.springframework.org/schema/beans"
       xmlns:xsi="http://www.w3.org/2001/XMLSchema-instance"
       xmlns:content="http://www.springframework.org/schema/context"
       xsi:schemaLocation="http://www.springframework.org/schema/beans http://www.springframework.org/schema/beans/spring-beans.xsd http://www.springframework.org/schema/context https://www.springframework.org/schema/context/spring-context.xsd">
    <bean id="user" class="User"></bean>
</beans>
2.使用注解的方式(5大注解)
2.第二种方法是使用注解 在有很多个对象需要存储的时候就不用一行一行注册了,使用前需要先在xml中配置一下扫描路径,这样注解才能识别出来类并存储到spring。
<?xml version="1.0" encoding="UTF-8"?>
<beans xmlns="http://www.springframework.org/schema/beans"
       xmlns:xsi="http://www.w3.org/2001/XMLSchema-instance"
       xmlns:content="http://www.springframework.org/schema/context"
       xsi:schemaLocation="http://www.springframework.org/schema/beans http://www.springframework.org/schema/beans/spring-beans.xsd http://www.springframework.org/schema/context https://www.springframework.org/schema/context/spring-context.xsd">
    <content:component-scan base-package="com.demo.component"></content:component-scan>
</beans>
@Controller(控制器存储)
表示的是业务逻辑层,会判断前端发来的请求是否符合规范。
@Service(服务存储)
表示的是服务层,用来分配用户需要使用的功能。
@Repository(仓库存储)
表示的是持久层,直接和数据库交互,一张表一个@Repository。
@Component(组件存储)
表示的是公共工具层,用来添加一些公共的方法。
@Configuration(配置存储)
表示的是配置层,用来配置一些项目信息。
方法注解 @Bean
演示:
(配置了扫描路径可以使用@Bean)
package com.demo.component;

import com.demo.model.Student;
import org.springframework.context.annotation.Bean;
import org.springframework.stereotype.Controller;

@Controller
public class BController {//只是我的包装类 目的是
    //获取bean 注释一下 使用Bean注解 需要配合5大注解一起用。
    //可以加入name参数 重新命名 因为如果有多个包装类都要使用这个Bean对象就有问题 名字都一样 到底拿哪一个Bean

    @Bean
    public Student student() {
        Student student = new Student();
        student.setId(1);
        student.setAge(18);
        student.setName("zyz");
        return student;
    }
}
使用@Bean注解来把Bean中的对象。 但是使用Bean注解的时候配合这五大注解来用。
在@Bean中 还有命名规范的问题。
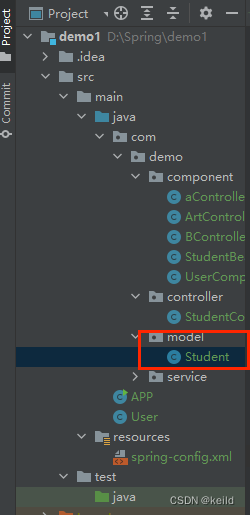
Student类
package com.demo.model;

public class Student {
    private  int id;
    private  String name;
    private  int age;

    public int getId() {
        return id;
    }

    @Override
    public String toString() {
        return "Student{" +
                "id=" + id +
                ", name='" + name + '\'' +
                ", age=" + age +
                '}';
    }

    public void setId(int id) {
        this.id = id;
    }

    public String getName() {
        return name;
    }

    public void setName(String name) {
        this.name = name;
    }

    public int getAge() {
        return age;
    }

    public void setAge(int age) {
        this.age = age;
    }
}
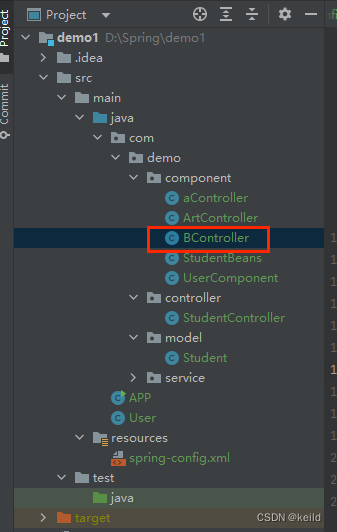
BController类
package com.demo.component;

import com.demo.model.Student;
import org.springframework.context.annotation.Bean;
import org.springframework.stereotype.Controller;

@Controller
public class BController {
    //获取bean 注释一下 使用Bean注解 需要配合5大注解一起用。
    //可以加入name参数 重新命名 因为如果有多个包装类都要使用这个Bean对象就有问题 名字都一样 到底拿哪一个Bean

    @Bean
    public Student student() {
        //构造对象的 伪代码
        Student student = new Student();
        student.setId(1);
        student.setAge(18);
        student.setName("zyz");
        return student;
    }
}
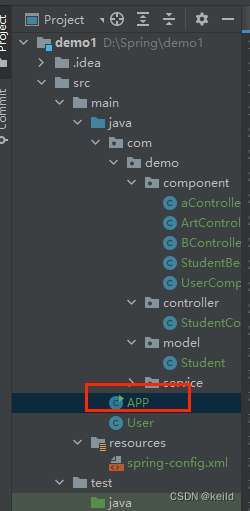
App类
我们需要在APP类中启动Spring然后在BController类中拿到Bean对象(Student)。
ApplicationContext context = new ClassPathXmlApplicationContext("spring-config.xml");
Student student = context.getBean("student",Student.class);//拿的是BController中的对象
System.out.println(student);
- 需要注意的是Bean的命名规则是默认为类名的小写
- 如果类首字母大写/小写,那么命名就需要是小写的,比如类是Student 那么命名就要是student。
- 如果类 首字母和第二个字母都是大写的话,命名就不变。
- 如果@Bean方法注解 加入了name 那么就需要按照name来命名,不能使用原来默认的名字。代码如下👇
package com.demo.component;
import com.demo.model.Student;
import org.springframework.context.annotation.Bean;
import org.springframework.stereotype.Controller;

@Controller
public class StudentBeans {//只是一个包装类 我目的是拿到Student对象
//获取bean 注释一下 使用Bean注解 需要配合5大注解一起用。
    //可以加入name参数 重新命名 因为如果有多个包装类都要使用这个Bean对象就有问题 名字都一样 到底拿哪一个Bean
    @Bean(name = {"s1","s2"})//s1s2命名 使用哪个都可以
    public Student st() {
        //构造对象的 伪代码
        Student student = new Student();
        student.setId(1);
        student.setAge(18);
        student.setName("zyz");
        return student;
    }
}
ApplicationContext context = new ClassPathXmlApplicationContext("spring-config.xml");

        //默认的命名是将类的首字母小写
        //1.如果类名首字母是大写或者小写 则都是小写 2.如果类名前两个字母是小写 则命名不变 这是JVM来规定的 不是Spring进行规定的 源码下在rt.jar包里 可以说明
        ArtController artController = context.getBean("artController",ArtController.class);
        System.out.println(artController.Say());

        Student student = context.getBean("s1",Student.class);//拿的是StudentBeans中的对象
        Student student1 = context.getBean("student",Student.class);//拿的是BController中的对象
        //如果对Bean注解 加入了name 那就只能使用那个name 不能使用原来的名字
        System.out.println(student);
获取Bean对象(三种)
获取Bean对象也叫对象装配,把对象拿出来放到类中,所以也叫对象注入,ApplicationContext 中getBean是在main把对象从Spring上下文中拿出来需要运行使用,
如果我们需要把一个类注入到另一个类中 就需要使用对象注入。
下面的例子是将StudentService类注入到StudentController类中
1.属性注入
使用@Autowired
package com.demo.controller;

import com.demo.service.StudentService;
import org.springframework.beans.factory.annotation.Autowired;
import org.springframework.stereotype.Controller;

@Controller
public class StudentController {
    //1.使用属性注入的方法来获取Bean 从Spring中 获取Bean
    //另一种获取Bean对象的方法(对象装配)
    @Autowired
    private StudentService studentService;


    public void Say() {
        //调用 service的方法
        studentService.Say();
    }
}
2.setter注入
package com.demo.controller;

import com.demo.service.StudentService;
import org.springframework.beans.factory.annotation.Autowired;
import org.springframework.stereotype.Controller;

@Controller
public class StudentController {
    //1.使用属性注入的方法来获取Bean 从Spring中 获取Bean
    //另一种获取Bean对象的方法(对象装配)
//    @Autowired
//    private StudentService studentService;

    //2.构造方法注入
    private StudentService studentService;

    @Autowired
    public  StudentController (StudentService studentService) {
        this.studentService = studentService;
    }


    public void Say() {
        //调用 service的方法
        studentService.Say();
    }
}
3.构造方法注入
是Spring推荐的使用方法 其中只有一个构造方法的时候@Autowired可以省略
package com.demo.controller;

import com.demo.service.StudentService;
import org.springframework.beans.factory.annotation.Autowired;
import org.springframework.stereotype.Controller;

@Controller
public class StudentController {
    //1.使用属性注入的方法来获取Bean 从Spring中 获取Bean
    //另一种获取Bean对象的方法(对象装配)
//    @Autowired
//    private StudentService studentService;

    //2.构造方法注入
    private StudentService studentService;

    @Autowired
    public  StudentController (StudentService studentService) {
        this.studentService = studentService;
    }


    public void Say() {
        //调用 service的方法
        studentService.Say();
    }
}
三种注入的优缺点(面试)
- 属性注入:
- 优点:使用方便,简单。
- 缺点:1.不能注入final修饰的不可变对象。2.只用用于Ioc容器。3.更加不符合单一设计原则(类)
- setter注入:
- 优点:更加符合单一设计原则(方法)
- 缺点:不能注入final修饰的不可变对象,注入的对象可以修改,因为set是一个普通方法,调用的时候就可以修改。
- 构造方法注入(Spring4开始 官方的推荐):
- 优点:可以注入不final修饰的不可变对象,意味着对象是不可被修改的, 通用性好,对象完全被初始化。
- 缺点:不是那么方便。
在开发中使用属性注入比较多。
@Resource 和 @Autowired区别
相同点:都是依赖注入
不同点:1.@Resource是JDK提供的,@Autowired是Spring框架中的。2.@Resource源码中 有更多的参数和方法,@Autowired中只有一个required参数。2.@Resource不支持构造方法注入。4.同一类型多个Bean要返回的时候 可以使用@Resource中可以加入name @Resource(name=" “) 或者 使用@Qualifier(value=” ")
代码如下👇
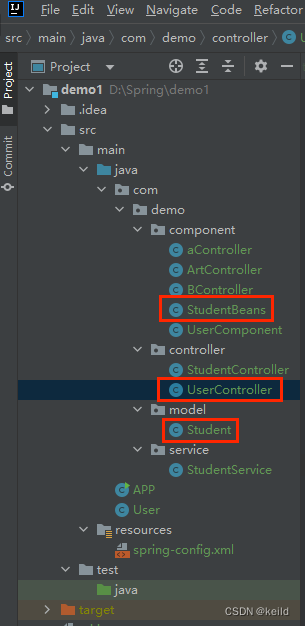
StudentBeans类注入到UserController中
package com.demo.component;
import com.demo.model.Student;
import org.springframework.context.annotation.Bean;
import org.springframework.stereotype.Controller;

@Controller
public class StudentBeans {//只是一个包装类 我目的是拿到Student对象
        @Bean
    public Student st1() {

        Student student = new Student();
        student.setId(1);
        student.setAge(18);
        student.setName("zyz");
        return student;
    }

        @Bean
    public Student st2() {

        Student student = new Student();
        student.setId(1);
        student.setAge(18);
        student.setName("李四");
        return student;
    }

}
UserController类
package com.demo.controller;

import com.demo.model.Student;
import org.springframework.beans.factory.annotation.Autowired;
import org.springframework.beans.factory.annotation.Qualifier;
import org.springframework.stereotype.Controller;

import javax.annotation.Resource;

@Controller
public class UserController {
    //将StudentBeans中的对象注入到这个类中 因为查找的时候先通过类型查找
    //StudentBeans中的Bean对象有两个 是相同类型的 这时候就分不清应该取哪个
    //就要使用@Resource 或者 @Qualifier来写入名称

    //1.
//    @Resource(name = "st1")
//    private Student student;
//
//    public Student getStudent() {
//        return student;
//    }

    //2.
    @Autowired
    @Qualifier(value = "st1")
    private Student student;

    public Student getStudent() {
        return student;
    }
}
在2个Bean对象类型相同的时候,对象注入的时候获取对象 就不知道应该拿哪一个对象,这时候就使用@Resource 或者 @Qualifier 可以添加想要获取的Bean对象的名称,这里拿的是st1。


 427
427


 被折叠的 条评论
为什么被折叠?
被折叠的 条评论
为什么被折叠?
 到【灌水乐园】发言


