


一、前言
- 学习概述:使用JFrame,JPanel,JTextField,JButton等完成功能
- 学习目标:按钮的监听器、向面板中添加组件等
二、上传下载图片例题
1.概述
通过GUI上传和下载图片,在例题中,我是写死的,如果需要联合数据库,需要自己去解决哦
2.编码实现
package Student.view;
import java.awt.BorderLayout;
import java.awt.Dimension;
import java.awt.FlowLayout;
import java.awt.Toolkit;
import java.awt.event.ActionEvent;
import java.awt.event.ActionListener;
import java.io.*;
import javax.swing.*;
public class View {
private JFrame jf=new JFrame();
private JPanel total=new JPanel(new BorderLayout());
private JPanel pUpload=new JPanel(new FlowLayout(FlowLayout.LEFT));
private JLabel lFileName=new JLabel("选择要添加的路径");
private JTextField tFileName=new JTextField(15);
private JButton bBrowse=new JButton("浏 览");
private JFileChooser uploadChooser=new JFileChooser();
private JButton bUpload=new JButton("上 传");
private JPanel pDownLoad=new JPanel(new FlowLayout(FlowLayout.LEFT));
private JLabel lDownload=new JLabel("下载图片");
private JFileChooser downloadChooser=new JFileChooser();
private JButton bDownload=new JButton("下载");
private JPanel pIcon=new JPanel(new FlowLayout(FlowLayout.LEFT));
private ImageIcon icon=new ImageIcon(new ImageIcon(
""
).getImage().getScaledInstance(320,320,0));
private JLabel lIcon=new JLabel(icon);
Dimension faceSize=new Dimension(500,200);
Dimension screenSize=Toolkit.getDefaultToolkit().getScreenSize();
public void init(){
pUpload.add(lFileName);
pUpload.add(tFileName);
pUpload.add(bBrowse);
pUpload.add(bUpload);
bBrowse.addActionListener(new ActionListener() {
@Override
public void actionPerformed(ActionEvent e) {
downloadChooser.setCurrentDirectory(new File("."));
int result=downloadChooser.showOpenDialog(jf);
if (result==JFileChooser.APPROVE_OPTION){
String path=downloadChooser.getSelectedFile().getPath();
tFileName.setText(path);
}
}
});
bUpload.addActionListener(new ActionListener() {
@Override
public void actionPerformed(ActionEvent e) {
String fromFileName=tFileName.getText();
String toFileName="src/Courseimage/image/"+System.currentTimeMillis()+".jpg";
write(fromFileName,toFileName);
JOptionPane.showMessageDialog(jf,"上传成功!","提示",JOptionPane.WARNING_MESSAGE);
}
});
pDownLoad.add(lDownload);
pDownLoad.add(bDownload);
bDownload.addActionListener(new ActionListener() {
@Override
public void actionPerformed(ActionEvent e) {
downloadChooser.setCurrentDirectory(new File("."));
int result=uploadChooser.showOpenDialog(jf);
if (result==JFileChooser.APPROVE_OPTION){
String path=uploadChooser.getSelectedFile().getPath();
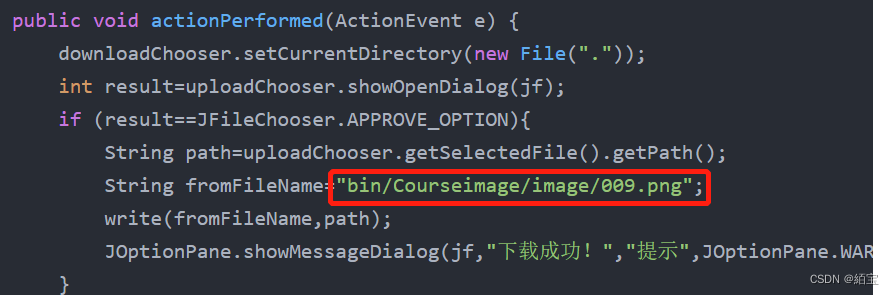
String fromFileName="bin/Courseimage/image/009.png";
write(fromFileName,path);
JOptionPane.showMessageDialog(jf,"下载成功!","提示",JOptionPane.WARNING_MESSAGE);
}
}
});
pIcon.add(lIcon);
total.add(pUpload,BorderLayout.NORTH);
total.add(pDownLoad,BorderLayout.CENTER);
total.add(pIcon,BorderLayout.SOUTH);
jf.add(total);
jf.setSize(faceSize);
jf.setLocation((int)(screenSize.width-faceSize.getWidth())/2,(int)(screenSize
.height-faceSize.getHeight())/2);
jf.setResizable(false);
jf.setDefaultCloseOperation(JFrame.EXIT_ON_CLOSE);
jf.setVisible(true);
}
public void write(String fromFile,String toFile){
FileInputStream fis=null;
FileOutputStream fos=null;
try {
fis=new FileInputStream(fromFile);
fos=new FileOutputStream(toFile);
byte[] buf=new byte[1024];
int hasRead=0;
while ((hasRead=fis.read(buf))>0){
fos.write(buf,0,hasRead);
}
}catch (FileNotFoundException e){
e.printStackTrace();
}catch (IOException e){
e.printStackTrace();
}finally {
try {
fis.close();
fos.close();
}catch (IOException e){
e.printStackTrace();
}
}
}
public static void main(String[] args) {
new View().init();
}
}
4.输出结果
运行:
上传:
点击浏览:
点击打开 后 ,点击上传,上传在src/Courseimage/image/中,这里的地址需要自己去更改,是用来存放上传图片的地址
下载:
下载的图片我是写死的,需要下载的图片的地址是bin/Courseimage/image/009.png
需要自行更改。
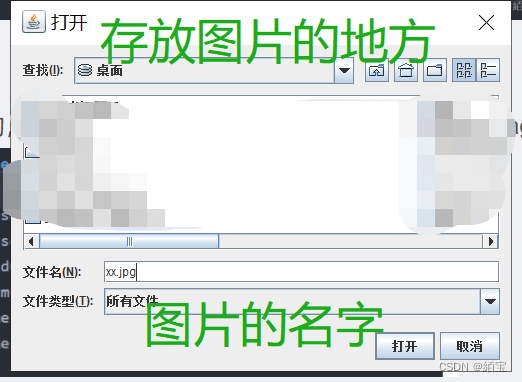
点击下载:
点击打开,就能完成下载图片


我觉得如果出问题,那主要问题应该就是在路径上,路径是可以写相对地址和绝对地址的,这个去理解一下吧。
记得点赞哦


 575
575


 被折叠的 条评论
为什么被折叠?
被折叠的 条评论
为什么被折叠?
 到【灌水乐园】发言


