


系列文章目录
前言
一、自定义监控MYSQL主从状态
| 主机 | ip |
|---|---|
| server | 192.168.146.128 |
| agent | 192.168.146.5 |
| master | 192.168.146.101 |
二、使用步骤
1.准备工作
#server主机安装 zabbix_server zabbix_agentd
#agent主机安装zabbix_agent  //上述两步之前的文章已经安装了不做演示
#在master和agent安装mysql  //之前文章有完整安装的步骤


#关闭主从端的防火墙和selinux
[root@localhost ~]# systemctl status firewalld.service
● firewalld.service - firewalld - dynamic firewall daemon
   Loaded: loaded (/usr/lib/systemd/system/firewalld.service; disabled; vendor preset: enabled)
   Active: inactive (dead)
     Docs: man:firewalld(1)


[root@agent ~]# systemctl status firewalld.service
● firewalld.service - firewalld - dynamic firewall daemon
   Loaded: loaded (/usr/lib/systemd/system/firewalld.service; disabled; vendor preset: enabled)
   Active: inactive (dead) since Thu 2022-07-10 16:04:09 CST; 4 days ago
     Docs: man:firewalld(1)
 Main PID: 978 (code=exited, status=0/SUCCESS)
2.搭建mysql主从
配置主库
#在主库创建用户repl授权给从库使用
mysql> CREATE USER 'repl'@'192.168.146.5' IDENTIFIED BY 'repl123';
Query OK, 0 rows affected (0.00 sec)

mysql> GRANT REPLICATION SLAVE ON *.* TO 'repl'@'192.168.146.5';
Query OK, 0 rows affected (0.00 sec)

mysql> FLUSH PRIVILEGES;
Query OK, 0 rows affected (0.00 sec)
配置主库文件
[root@localhost ~]# cat /etc/my.cnf
[mysqld]
basedir = /usr/local/mysql
datadir = /opt/data
socket = /tmp/mysql.sock
port = 3306
pid-file = /opt/data/mysql.pid
user = mysql
skip-name-resolve

server-id=10
log-bin=mysql_bin

[root@localhost ~]# systemctl restart mysqld.service

mysql> show master status;  //里面的参数后续会用到
+------------------+----------+--------------+------------------+-------------------+
| File             | Position | Binlog_Do_DB | Binlog_Ignore_DB | Executed_Gtid_Set |
+------------------+----------+--------------+------------------+-------------------+
| mysql_bin.000001 |      154 |              |                  |                   |
+------------------+----------+--------------+------------------+-------------------+
1 row in set (0.00 sec)
配置从库文件
[root@agent ~]# cat /etc/my.cnf
[mysqld]
basedir = /usr/local/mysql
datadir = /opt/data
socket = /tmp/mysql.sock
port = 3306
pid-file = /opt/data/mysql.pid
user = mysql
skip-name-resolve

server-id=20
relay-log=mysql-relay-bin


[root@agent ~]# systemctl restart mysqld.service
#连接到从数据库配置主从
mysql> CHANGE MASTER TO
    -> MASTER_HOST= '192.168.146.101',
    -> MASTER_USER='repl',
    -> MASTER_PASSWORD='repl123',
    ->  MASTER_LOG_FILE='mysql_bin.000001',
    -> MASTER_LOG_POS=154;
Query OK, 0 rows affected, 2 warnings (0.03 sec)

mysql> start slave;   //启动主从

mysql> show slave status \G
*************************** 1. row ***************************
               Slave_IO_State: Waiting for master to send event
                  Master_Host: 192.168.146.101
                  Master_User: repl
                  Master_Port: 3306
                Connect_Retry: 60
              Master_Log_File: mysql_bin.000001
          Read_Master_Log_Pos: 154
               Relay_Log_File: mysql-relay-bin.000003
                Relay_Log_Pos: 320
        Relay_Master_Log_File: mysql_bin.000001
             Slave_IO_Running: Yes  //此处为双yes 就是成功开启了
            Slave_SQL_Running: Yes
              Replicate_Do_DB:
          Replicate_Ignore_DB:
           Replicate_Do_Table:
       Replicate_Ignore_Table:
      Replicate_Wild_Do_Table:
  Replicate_Wild_Ignore_Table:
                   Last_Errno: 0
                   Last_Error:
                 Skip_Counter: 0
          Exec_Master_Log_Pos: 154
              Relay_Log_Space: 693
              Until_Condition: None
               Until_Log_File:
                Until_Log_Pos: 0
           Master_SSL_Allowed: No
           Master_SSL_CA_File:
           Master_SSL_CA_Path:
              Master_SSL_Cert:
            Master_SSL_Cipher:
               Master_SSL_Key:
        Seconds_Behind_Master: 0
Master_SSL_Verify_Server_Cert: No
                Last_IO_Errno: 0
                Last_IO_Error:
               Last_SQL_Errno: 0
               Last_SQL_Error:
  Replicate_Ignore_Server_Ids:
             Master_Server_Id: 10
                  Master_UUID: 32748ca6-00f6-11ed-a5ea-000c29972037
             Master_Info_File: /opt/data/master.info
                    SQL_Delay: 0
          SQL_Remaining_Delay: NULL
      Slave_SQL_Running_State: Slave has read all relay log; waiting for more updates
           Master_Retry_Count: 86400
                  Master_Bind:
      Last_IO_Error_Timestamp:
     Last_SQL_Error_Timestamp:
               Master_SSL_Crl:
           Master_SSL_Crlpath:
           Retrieved_Gtid_Set:
            Executed_Gtid_Set:
                Auto_Position: 0
         Replicate_Rewrite_DB:
                 Channel_Name:
           Master_TLS_Version:
1 row in set (0.00 sec)
测试
[root@localhost ~]# mysql -uroot -p'runtime123!' -e  'create database abc;'
mysql: [Warning] Using a password on the command line interface can be insecure.
[root@localhost ~]# mysql -uroot -p'runtime123!' -e  'show databases;'
mysql: [Warning] Using a password on the command line interface can be insecure.
+--------------------+
| Database           |
+--------------------+
| information_schema |
| abc                |
| mysql              |
| performance_schema |
| sys                |
| test               |
+--------------------+
从库查看
[root@agent ~]# mysql -uroot -p'runtime123!' -e 'show databases;'
mysql: [Warning] Using a password on the command line interface can be insecure.
+--------------------+
| Database           |
+--------------------+
| information_schema |
| abc                |
| mysql              |
| performance_schema |
| sys                |
| test               |
+--------------------+
自定义监控mysql主从状态
编写脚本
[root@agent scropts]# cat mysqlms.sh
#!/bin/bash

count=$( mysql -uroot -pruntime123! -e "show slave status\G" 2>/dev/null | grep -v grep | grep -c 'Yes')

if [ $count -ne 2 ];then   //当count不等于2打印1 反之打印0
    echo '1'
else
    echo '0'
fi

//  2>dev/null 去掉告警信息
// grep -v grep 将grep本身的进程去掉
// grep -c 'Yes'  //将匹配yes的行数取出来
测试脚本
[root@agent scropts]# chmod +x mysqlms.sh   //赋予执行权限
[root@agent scropts]# ll
总用量 12
-rwxr-xr-x. 1 root root  124 7月   10 11:17 check_process.sh
-rwxr-xr-x. 1 root root 1854 7月   10 16:15 log.py
-rwxr-xr-x. 1 root root  178 7月  11 17:40 mysqlms.sh

[root@agent scropts]# bash mysqlms.sh    //打印0 因为主从没问题所以是正常的
0
[root@agent scropts]#
配置文件
[root@agent ~]# vim zabbix_agentd.conf
UserParameter=check_mysqlms,/bin/bash /scropts/mysqlms.sh   //添加自定义监控
[root@agent ~]# pkill zabbix_agentd
[root@agent ~]# zabbix_agentd   //杀掉进程 重新启动让其生效


#服务器测试
[root@server ~]# zabbix_get -s 192.168.146.5 -k check_mysqlms
0
配置zabbix网页
添加监控项
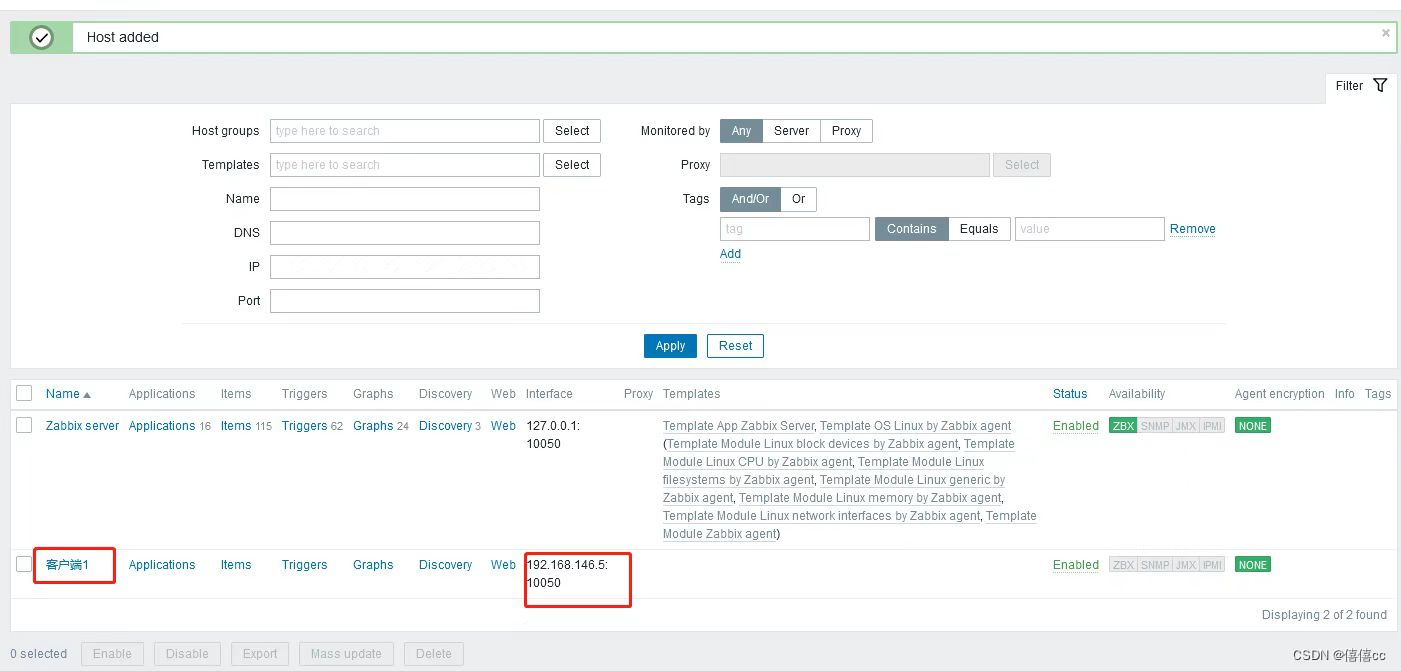
 添加监控参数
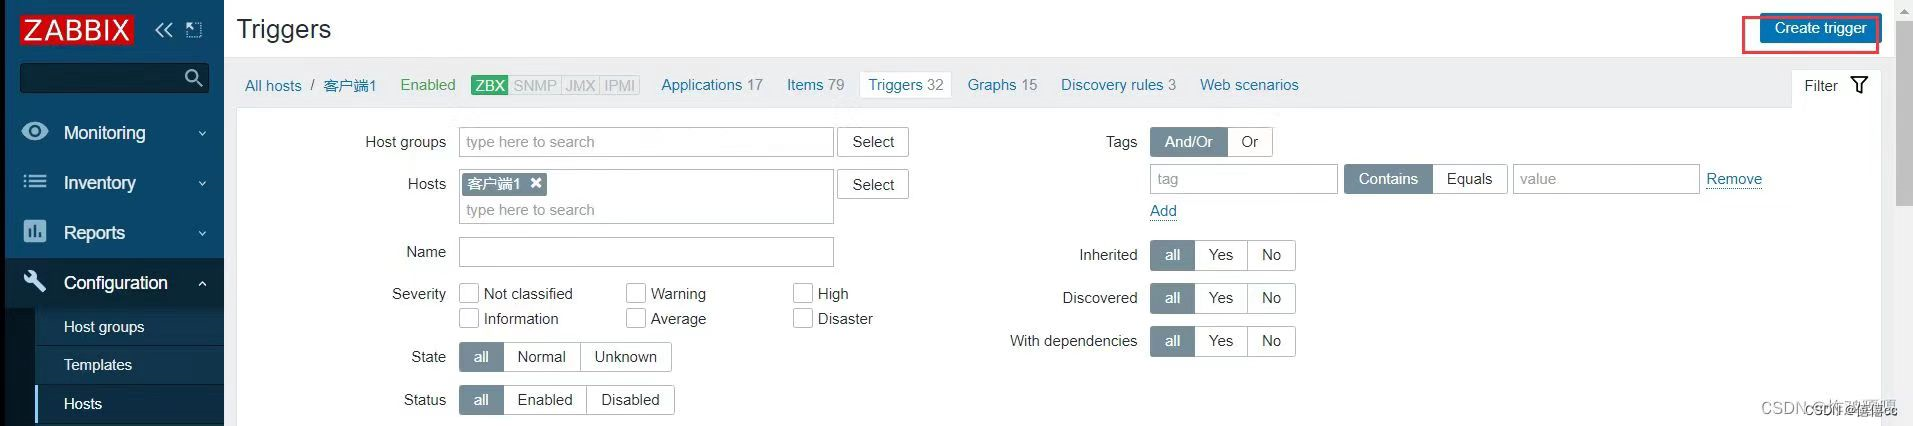
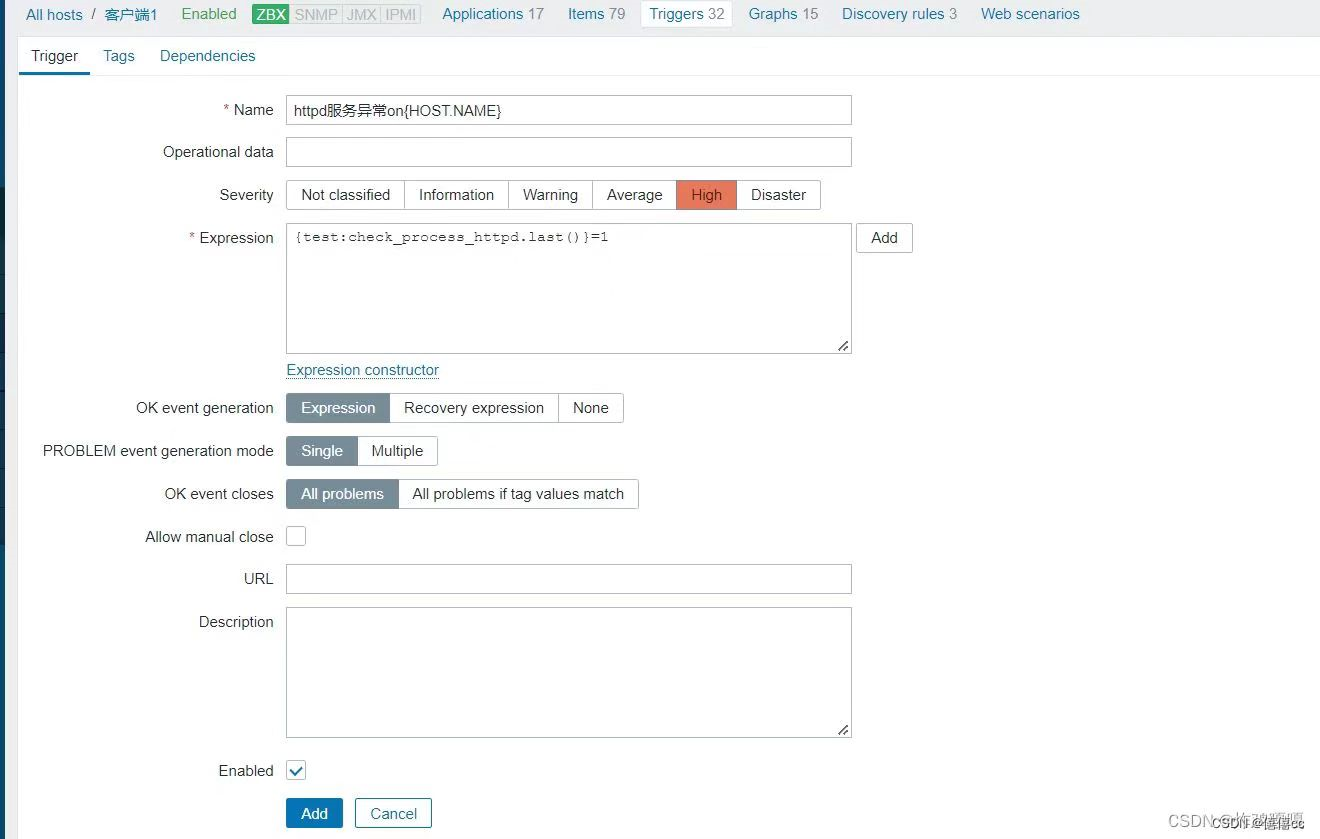
 添加触发器
添加触发器
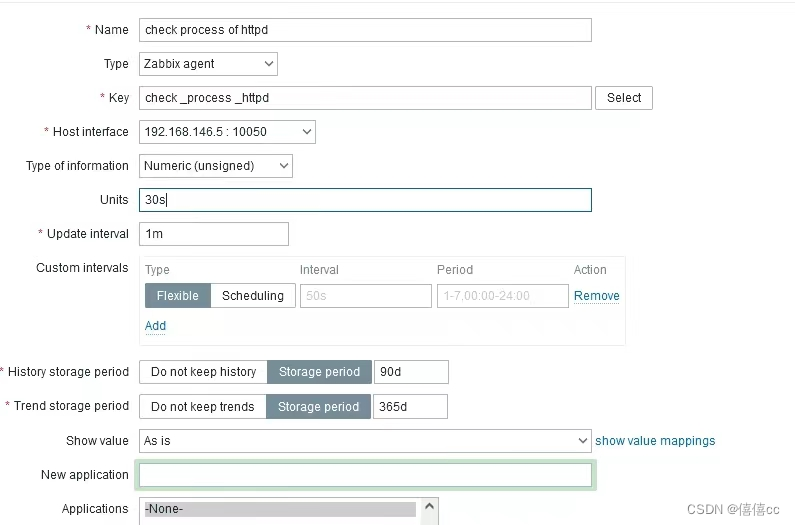
 填写参数
填写参数
 测试查看 打印为1
自定义监控mysql主从延迟
mysql> show slave status \G
*************************** 1. row ***************************
               Slave_IO_State: Waiting for master to send event
                  Master_Host: 192.168.146.101
                  Master_User: repl
                  Master_Port: 3306
                Connect_Retry: 60
              Master_Log_File: mysql_bin.000001
          Read_Master_Log_Pos: 469
               Relay_Log_File: mysql-relay-bin.000007
                Relay_Log_Pos: 320
        Relay_Master_Log_File: mysql_bin.000001
             Slave_IO_Running: Yes
            Slave_SQL_Running: Yes
              Replicate_Do_DB:
          Replicate_Ignore_DB:
           Replicate_Do_Table:
       Replicate_Ignore_Table:
      Replicate_Wild_Do_Table:
  Replicate_Wild_Ignore_Table:
                   Last_Errno: 0
                   Last_Error:
                 Skip_Counter: 0
          Exec_Master_Log_Pos: 469
              Relay_Log_Space: 693
              Until_Condition: None
               Until_Log_File:
                Until_Log_Pos: 0
           Master_SSL_Allowed: No
           Master_SSL_CA_File:
           Master_SSL_CA_Path:
              Master_SSL_Cert:
            Master_SSL_Cipher:
               Master_SSL_Key:
        Seconds_Behind_Master: 0   //取出这个值 这个是mysql主从延迟
Master_SSL_Verify_Server_Cert: No
                Last_IO_Errno: 0
                Last_IO_Error:
               Last_SQL_Errno: 0
               Last_SQL_Error:
  Replicate_Ignore_Server_Ids:
             Master_Server_Id: 10
                  Master_UUID: 32748ca6-00f6-11ed-a5ea-000c29972037
             Master_Info_File: /opt/data/master.info
                    SQL_Delay: 0
          SQL_Remaining_Delay: NULL
      Slave_SQL_Running_State: Slave has read all relay log; waiting for more updates
           Master_Retry_Count: 86400
                  Master_Bind:
      Last_IO_Error_Timestamp:
     Last_SQL_Error_Timestamp:
               Master_SSL_Crl:
           Master_SSL_Crlpath:
           Retrieved_Gtid_Set:
            Executed_Gtid_Set:
                Auto_Position: 0
         Replicate_Rewrite_DB:
                 Channel_Name:
           Master_TLS_Version:
1 row in set (0.00 sec)
编写脚本
[root@agent scropts]# cat mysql_delay.sh
#!/bin/bash

delay=$( mysql -uroot -pruntime123! -e "show slave status\G" 2>/dev/null | grep 'Seconds_Behind_Master'| awk '{print $2}')

echo $delay
测试
[root@agent scropts]# chmod +x mysql_delay.sh
[root@agent scropts]# ll
总用量 16
-rwxr-xr-x. 1 root root  124 7月   9 11:17 check_process.sh
-rwxr-xr-x. 1 root root 1854 7月   9 16:15 log.py
-rwxr-xr-x. 1 root root  151 7月  11 20:30 mysql_delay.sh
-rwxr-xr-x. 1 root root  178 7月  11 20:40 mysqlms.sh

[root@agent scropts]# bash mysql_delay.sh   //因为是在虚拟机中所以延迟为0
0
修改文件
[root@agent etc]# cd /usr/local/etc/
[root@agent etc]# cat zabbix_agentd.conf
UserParameter=mysql_delay,/bin/bash /scropts/mysql_delay.sh
[root@agent etc]# pkill zabbix_agentd   //让文件生效
[root@agent etc]# zabbix_agentd
配置zabbix网页
添加监控项
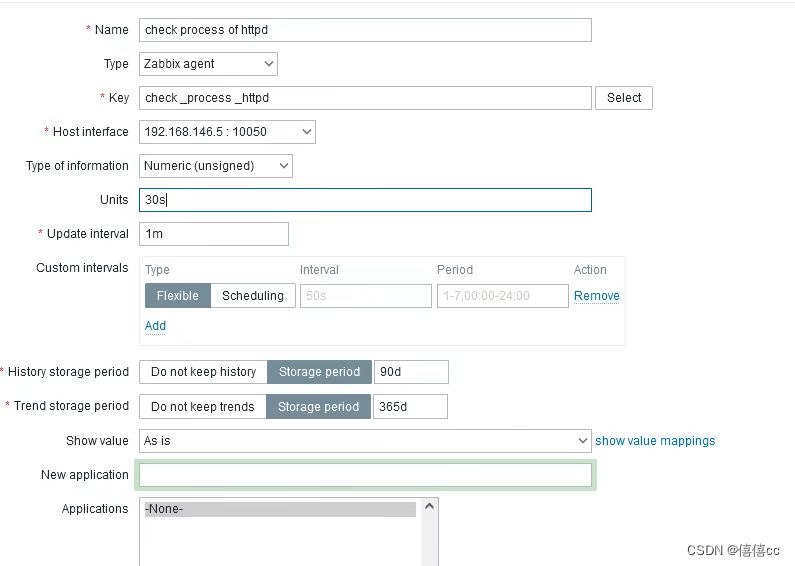
添加触发器
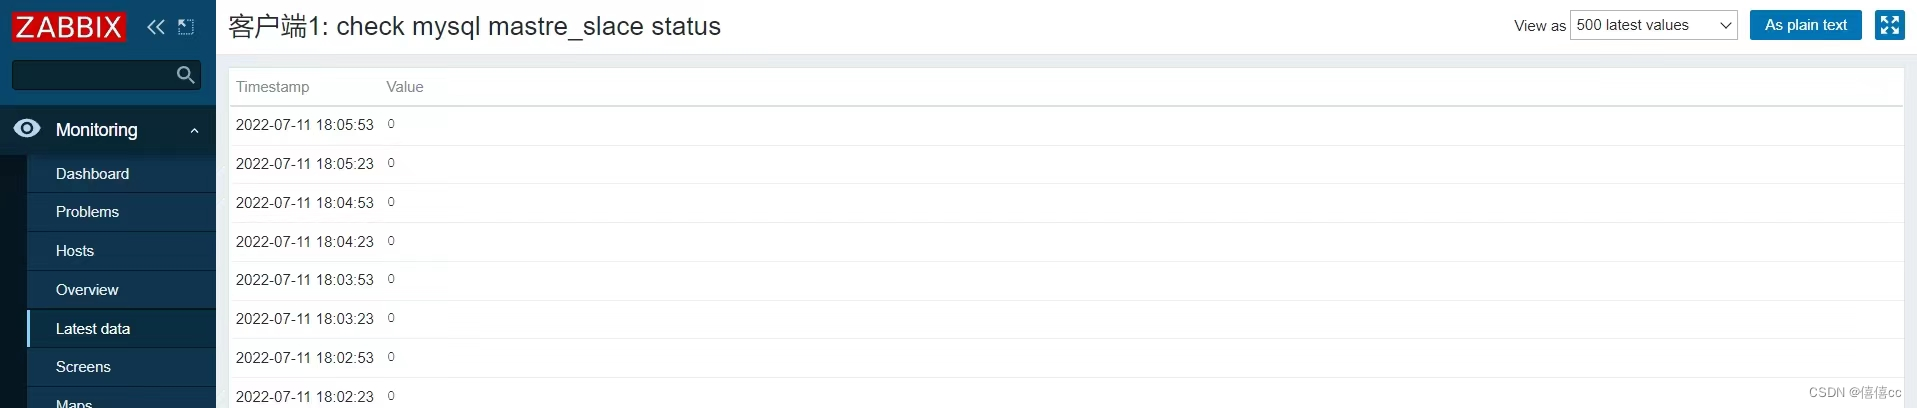
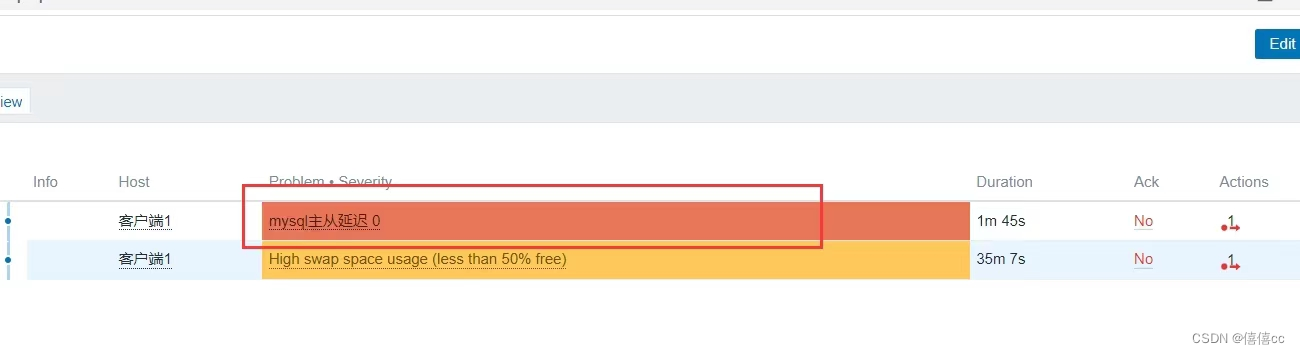
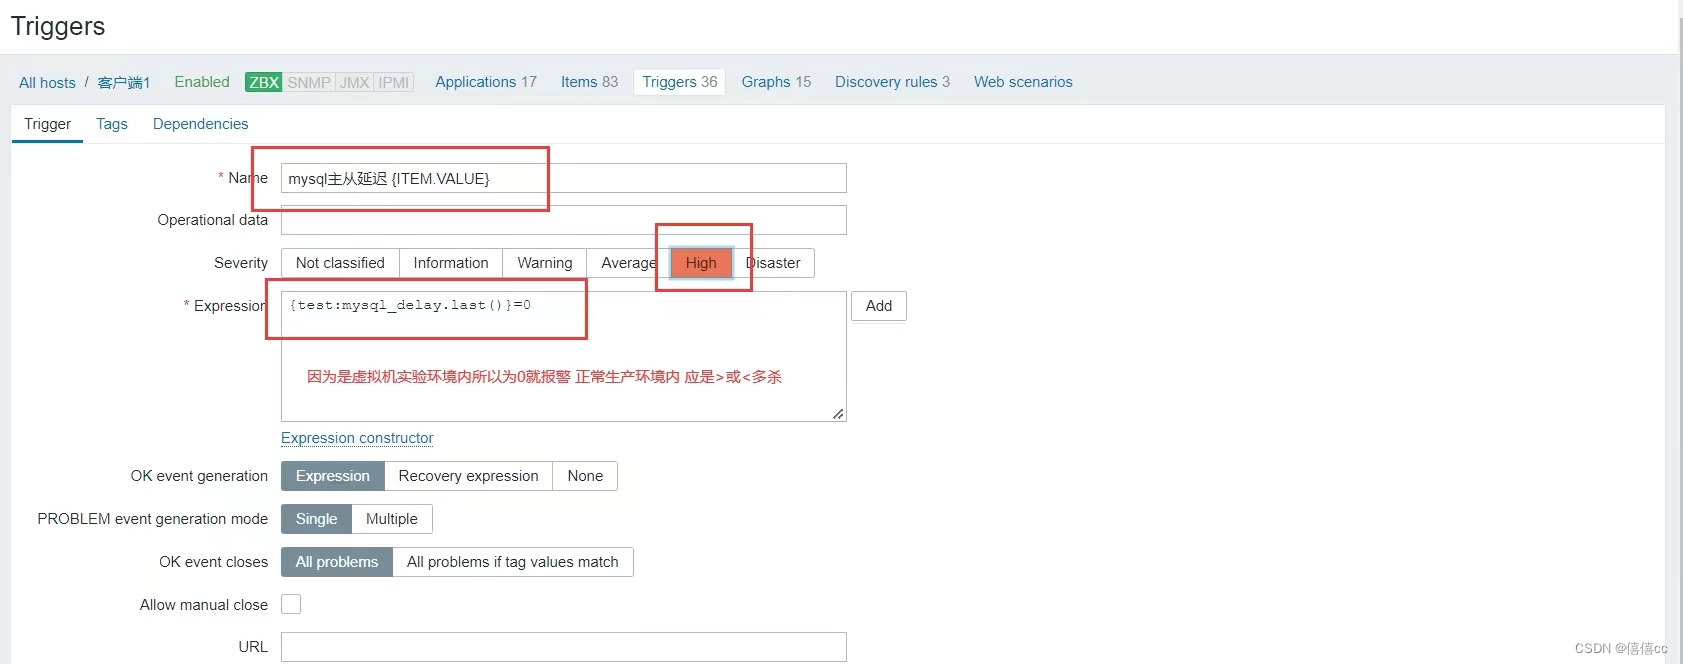 测试
测试


 495
495


 被折叠的 条评论
为什么被折叠?
被折叠的 条评论
为什么被折叠?
 到【灌水乐园】发言


