


基础HTML代码
①通过在 <head>中添加script标签来包含A-Frame框架, 指向一个CDN缓存的A-Frame构建版本。这个必须放在 <a-scene>声明之前,否则 <a-scene>将不起作用。
②在<body>中声明一个 <a-scene>标签, <a-scene>是场景容器,用来包含所有实体。
<a-scene>处理所有3D所需要的设置:建立WebGL上下文,画布,相机,光照,渲染器,渲染循环以及现成可用的设备平台支持如:HTC Vive, Oculus Rift, Samsung GearVR, 以及智能手机(Google Cardboard)。<a-scene>帮我们做了很多事情!
添加一个实体
①在 <a-scene>里面,我们通过原语 <a-box>来添加一个实体。
我们可以把
<a-box>当作普通HTML元素一样使用,定义标签,通过属性来定制它。还有一些其他的原语包括:<a-cylinder>,<a-plane>, or<a-sphere>.
<a-scene>
    <a-box color="red"></a-box>
</a-scene>
补充说明:原语(primitives)是A-Frame所使用的HTML元素扩展,用来封装底层的实体-构件组合。使用起来很方便,但我们要意识到
<a-box>的内部实现是带geometry和material的一个<a-entity>
<a-entity id="box" geometry="primitive: box" material="color: red"></a-entity>
②不过,因为缺省的相机(camera)和盒子(box)都在原点 0 0 0,我们将看不到盒子,除非我们移动它的位置,这可以通过使用 position组件来变换3D空间中的盒子
3D实体变换
让我们先看看3D空间。A-Frame使用右手坐标系统。默认的摄像机方向:正x轴延伸。 右(right), 正y轴延伸 上(up), 正z轴延伸 前(out)对着我们的屏幕:
①A-Frame的距离单位是米(meters),因为 WebVR API以米为单位返回姿势数据。在设计VR场景时,考虑我们创建的实体的真实世界大小是很重要的。一个
height="10"的盒子在我们电脑屏幕上看起来很普通的,但是在VR里将显示成真实的大小,那会是一个很高的盒子。②A-Frame的旋转单位是角度(degrees),虽然它会在three.js内部转换为弧度。要确定旋转的正方向, 请使用右手规则(right-hand rule)。 把大拇指指向正轴的方向,我们手指绕的方向就是旋转的正方向。
③要平移,旋转和缩放盒子,我们可以改变 位置(position), 旋转(rotation, 和 缩放(scale)组件。让我们首先应用旋转和缩放组件:
<a-scene>
  <a-box color="red" position="0 2 -5" rotation="0 45 45" scale="2 2 2"></a-box>
</a-scene>
上面的代码示例将旋转我们的盒子并放大到两倍。
父子变换
A-Frame HTML代表一个 场景图(scene graph)。在场景图中,实体可以有一个单亲和多个孩子。子实体继承其父代的变换(即位置、旋转和缩放)。
例如,盒子有一个球的子对象:
<a-scene>
  <a-box position="0 2 0" rotation="0 45 45" scale="2 4 2">
    <a-sphere position="1 0 3"></a-sphere>
  </a-box>
</a-scene>
如果盒子改变了它的位置、旋转或刻度,它将立即适用于球体并影响球体。
把我们的盒子放在照相机前面
现在让我们把盒子放到一个对于相机可见的位置上去。我们可以使用位置组件把盒子沿负z轴方向往后退5米,然后往上移动2米,避免跟地面接触:
<a-scene>
  <a-box color="red" position="0 2 -5" rotation="0 45 45" scale="2 2 2"></a-box>
</a-scene>
缺省控制
对于平板显示器(即膝上型电脑、台式机),默认的控制方式是通过点击-拖动鼠标来四下观望以及通过
WASD或方向键来四处移动。在手机上,我们可以通过旋转摄像机来四下观望。虽然A-Frame是为WebVR量身定做,这个默认的控制方案在没有头戴设备的情况下也可以使用
给场景添加一个背景
只需要一行简单的HTML代码,我们就可以添加一个身临其境的背景: <a-sky>是一个围绕着场景的天空背景。
<a-sky>,它是一种应用于球体内部的材料,可以是普通颜色,360°图像,或360°视频。例如,添加一个深灰色的背景代码如下:
<a-scene>
  <a-box color="red" position="0 2 -5" rotation="0 45 45" scale="2 2 2"></a-box>
  <a-sky color="#222"></a-sky>
</a-scene>
应用一个图片纹理
确保建立一个本地web服务器,以便能正常加载纹理贴图。
我们可以使用
src属性来给这个box应用图片、视频或者<canvas>纹理,就好像普通的<img>元素一样。我们得去掉color="red",这样避免和纹理产生混合效果。默认材料颜色是white,所以去掉颜色属性就可以了。
<a-scene>
  <a-box src="https://i.imgur.com/mYmmbrp.jpg" position="0 2 -5" rotation="0 45 45"
    scale="2 2 2"></a-box>
  <a-sky color="#222"></a-sky>
</a-scene>
现在我们将看到一个使用远程图片为纹理的盒子。
添加一张背景图
回到
<a-sky>,我们可以使用一张图片纹理来获取一个360°背景图,使用src而不是color:
<a-scene>
  <a-assets>
    <img id="boxTexture" src="https://i.imgur.com/mYmmbrp.jpg">
    <img id="skyTexture"
      src="https://cdn.aframe.io/360-image-gallery-boilerplate/img/sechelt.jpg">
  </a-assets>
  <a-box src="#boxTexture" position="0 2 -5" rotation="0 45 45" scale="2 2 2"></a-box>
  <a-sky src="#skyTexture"></a-sky>
</a-scene>
添加地面
要添加一个地面,我们可以使用 <a-plane>。默认情况下,a-plane是平行于XY轴的。要让它与地面平行,我们需要将它和XZ轴确定的平面平行。我们可以通过旋转负90°来完成,在x轴上旋转。
<a-plane rotation="-90 0 0"></a-plane>我们希望地面很大,这可以增加
width和height。每个方向长30米:
<a-plane rotation="-90 0 0"></a-plane>然后我们可以给地面添加一个图像纹理:
<a-assets>
  <!-- ... -->
  <img id="groundTexture" src="https://cdn.aframe.io/a-painter/images/floor.jpg">
  <!-- ... -->
</a-assets>
<!-- ... -->
<a-plane src="#groundTexture" rotation="-90 0 0" width="30" height="30"></a-plane>
<!-- ... -->
要实现格子化效果,我们可以设置
repeat属性。repeat接受2个数字,分别是x和y方向的重复次数(通常称为纹理的U和V)。
<a-plane src="#groundTexture" rotation="-90 0 0" width="30" height="30"
  repeat="10 10"></a-plane>
调试光照
我们可以通过<a-light>s来改变场景光照。默认情况下,如果我们不指定任何灯光,A-Frame会帮我们添加一个环境光和一个方向光。否则,场景会是黑色的。一旦我们添加了自己的光源,默认的光源设置将被删除,取而代之的是我们的设置。
我们将添加一个环境光,有淡淡的蓝绿色色调,以配合天空。环境灯光适用于场景中的所有实体(至少得有默认材质)。
我们还将添加一个点光源。点光源就像灯泡,我们可以把它们定位在场景周围,点光源对实体的影响取决于它与实体的距离:
<a-scene>
  <a-assets>
    <img id="boxTexture" src="https://i.imgur.com/mYmmbrp.jpg">
    <img id="skyTexture"
      src="https://cdn.aframe.io/360-image-gallery-boilerplate/img/sechelt.jpg">
    <img id="groundTexture" src="https://cdn.aframe.io/a-painter/images/floor.jpg">
  </a-assets>
  <a-box src="#boxTexture" position="0 2 -5" rotation="0 45 45" scale="2 2 2"></a-box>
  <a-sky src="#skyTexture"></a-sky>
  <a-light type="ambient" color="#445451"></a-light>
  <a-light type="point" intensity="2" position="2 4 4"></a-light>
</a-scene>
添加动画
我们可以使用A-Frame内置动画系统来添加动画。动画随时间推移而改变一个数值或者进行插值。我们可以给实体添加
<a-animation>元素,让我们给盒子添加上下漂浮的动画:
<a-scene>
  <a-assets>
    <img id="boxTexture" src="https://i.imgur.com/mYmmbrp.jpg">
  </a-assets>
  <a-box src="#boxTexture" position="0 2 -5" rotation="0 45 45" scale="2 2 2">
    <a-animation attribute="position" to="0 2.2 -5" direction="alternate" dur="2000"
      repeat="indefinite"></a-animation>
  </a-box>
</a-scene>
我们告诉
<a-animation>:
- 给位置(position)属性设置动画。
0 2.2. -5,表示向上20厘米高度。- 每次循环后更改动画方向(direction)。
- 设置动画每次循环的持续时间(duration)为2秒。
- 无限循环上面的动画。
添加交互
让我们添加与盒子的交互:当我们看盒子时,我们会放大盒子,当我们在盒子上点击的时候,我们会让它旋转。
考虑到目前许多开发人员没有合适的带控制器的VR硬件,我们将使用内置的cursor组件来集中讨论基本移动和桌面输入。默认情况下,光标组件提供了默认的“点击”功能:在移动设备上注视,或在桌面上看着实体,并单击鼠标。但是要知道光标组件只是添加交互的一种方式,如果我们能够访问实际的控制器,那么就有可能开发出更多方式。
要得到一个固定跟随camera的光标,我们可以把光标(cursor)放在camera内部作为其子元素,如上面父子变换章节所述。
因为我们没有自己专门定义一个相机,A-Frame为我们包含了一个默认相机。但由于我们要添加一个光标作为相机的子对象,我们现在需要自己来定义一个<a-camera>,包含
<a-cursor>:
<a-scene>
  <a-assets>
    <img id="boxTexture" src="https://i.imgur.com/mYmmbrp.jpg">
  </a-assets>
  <a-box src="#boxTexture" position="0 2 -5" rotation="0 45 45" scale="2 2 2">
    <a-animation attribute="position" to="0 2.2 -5" direction="alternate" dur="2000"
      repeat="indefinite"></a-animation>
  </a-box>
  <a-camera>
    <a-cursor></a-cursor>
  </a-camera>
</a-scene>
查看
<a-cursor>所封装的光标组件文档,我们可以看到它能发出悬停事件,如mouseenter,mouseleave以及click。
试试!
<!-- VR预览,请点击菜单栏“视图”-》“全屏模式”-->
<script src="https://unpkg.com/aframe-environment-component@1.1.0/dist/aframe-environment-component.min.js"></script>
<a-scene environment="preset: forest">
<a-assets>
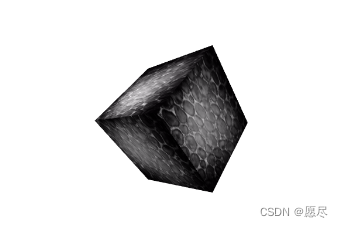
<img id="boxTexture" src="/uploads/1707/meteorite.jpg">
</a-assets>
<a-box src="#boxTexture" position="0 2 -5" rotation="0 45 45" scale="2 2 2" animation__position="property: object3D.position.y; to: 2.2; dir: alternate; dur: 2000; loop: true" animation__mouseenter="property: scale; to: 2.3 2.3 2.3; dur: 300; startEvents: mouseenter"
animation__mouseleave="property: scale; to: 2 2 2; dur: 300; startEvents: mouseleave"></a-box>
<a-entity text="value: Hello, A-Frame; color: #FAFAFA; width: 5; anchor: align" position="-0.9 0.2 -3" scale="1.5 1.5 1.5"></a-entity>
<a-camera>
<a-cursor color="#FAFAFA"></a-cursor>
</a-camera>
</a-scene>


 1253
1253


 被折叠的 条评论
为什么被折叠?
被折叠的 条评论
为什么被折叠?
 到【灌水乐园】发言


