


目录
前言
最近由于某些原因接触到了视频超分辨率和数字人相关的东西,就想研究一番,然后以下是我对论文“Investigating Tradeoffs in Real-World Video Super-Resolution”其源代码的复现。Github网址:RealBasicVSR
安装过程
先anaconda创建虚拟环境
conda create -n RealBasicVSR python=3.8

conda activate RealBasicVSR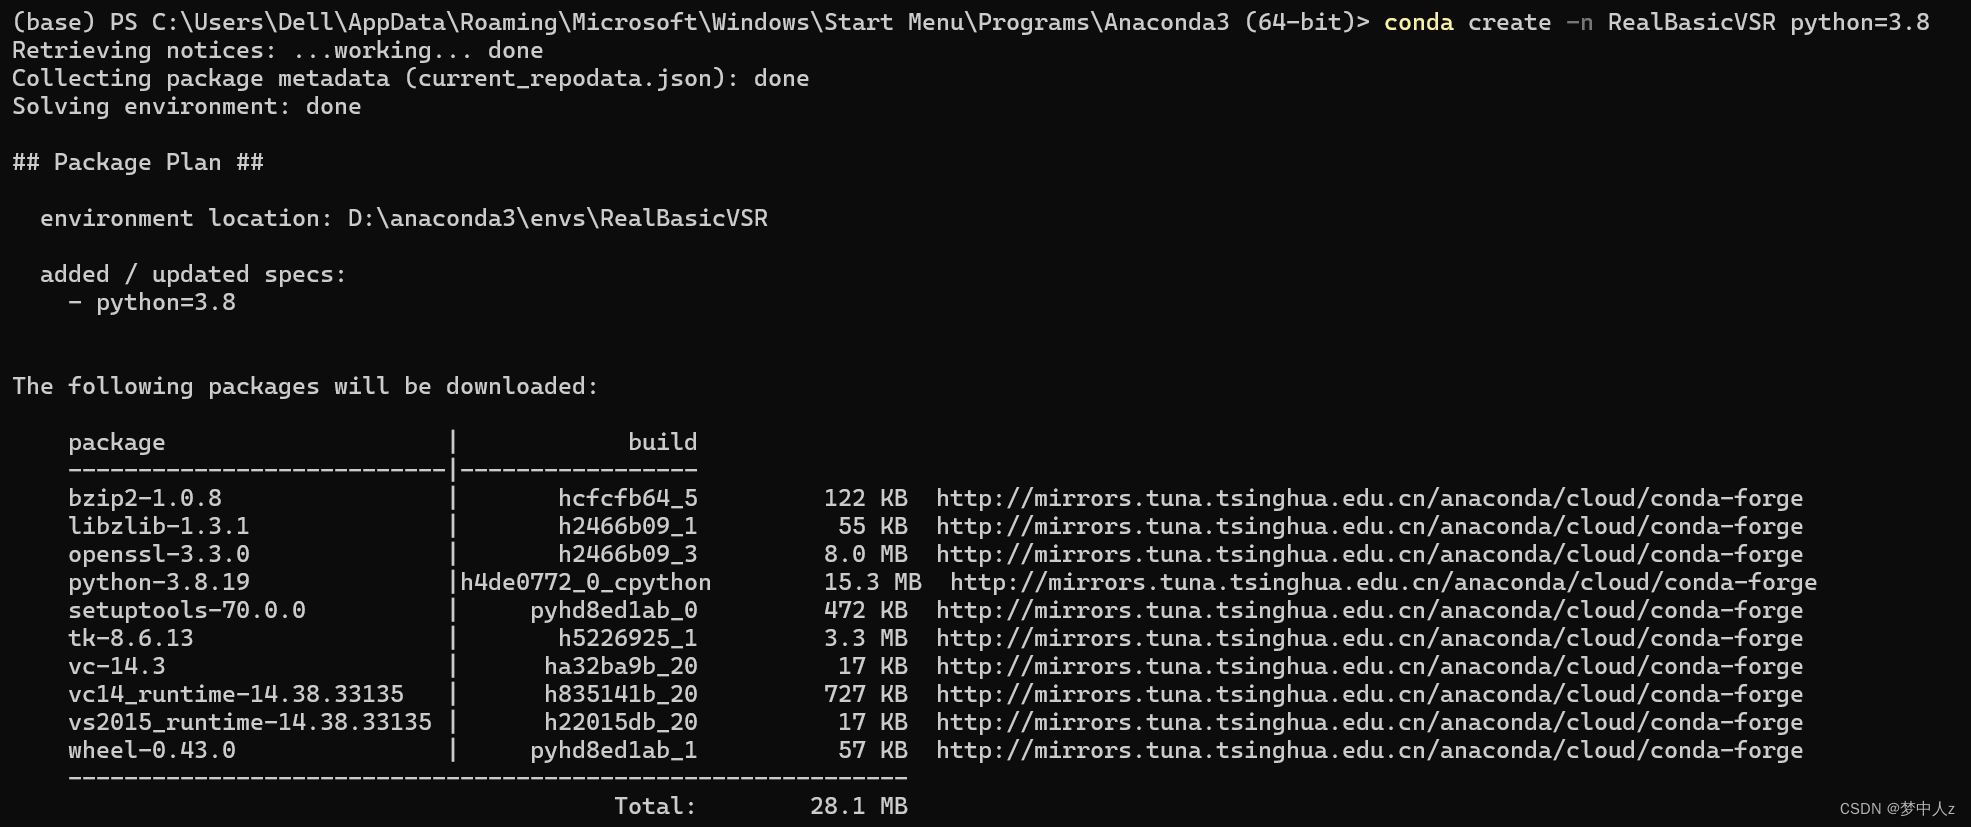
安装 PyTorch 和 torchvision
conda install pytorch==1.7.1 torchvision==0.8.2 torchaudio==0.7.2 cudatoolkit=10.1 -c pytorch安装 mim 和 mmcv-full
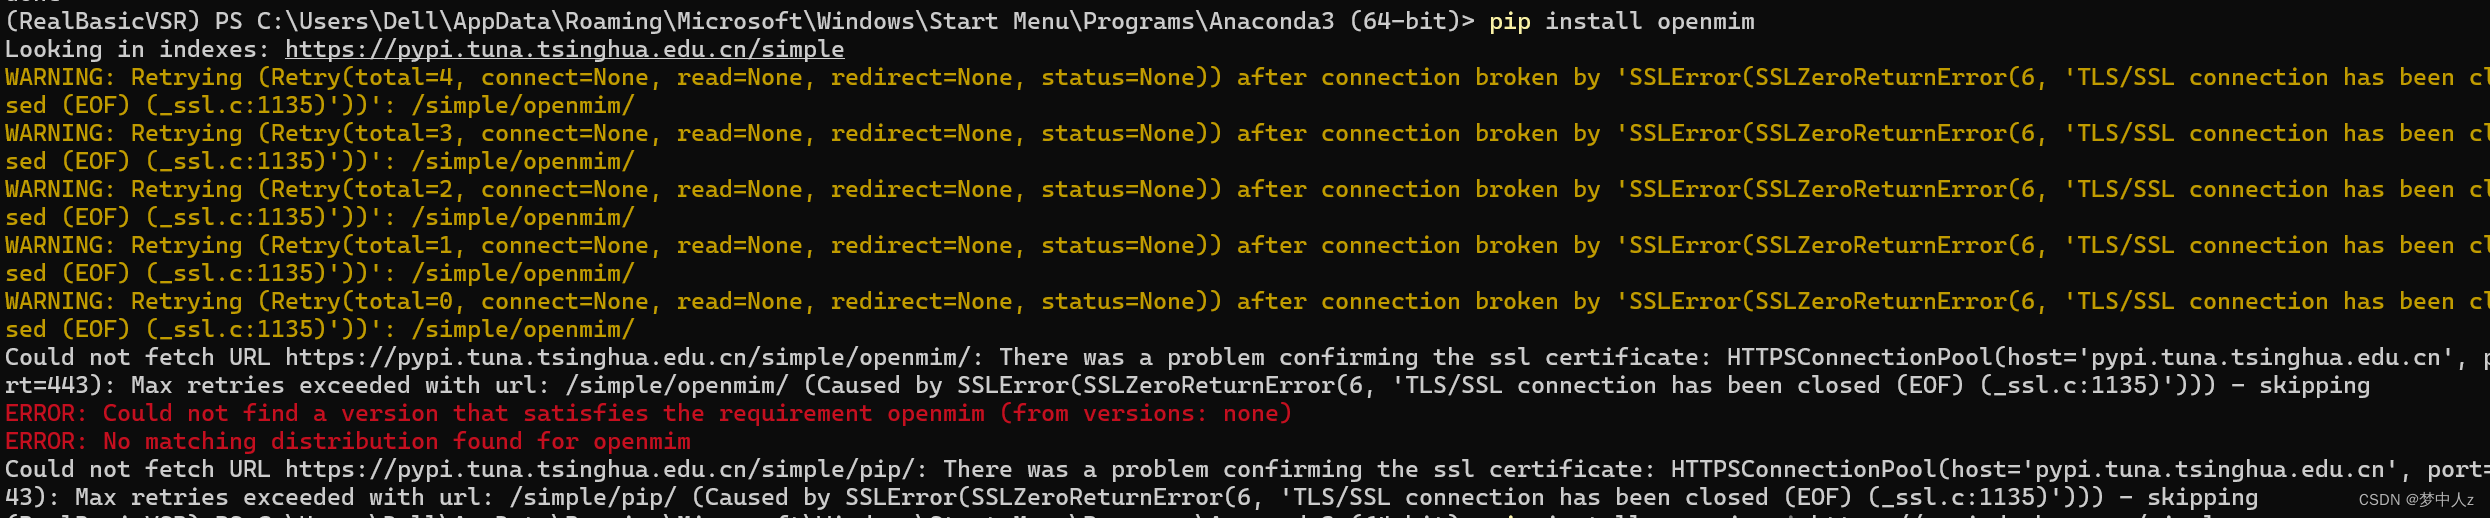
pip install openmim
mim install mmcv-full
这里如果开了梯子会遇到这个问题:解决的方法就是关闭梯子
安装mmedit
pip install mmeditInference 推理
将预训练的权重下载到 checkpoints文件夹下。(源代码没有自己创建一个)
下载链接:OneDrive
使用
经过上述步骤我们的基础工作,我们后续可以开始我们的使用流程了。
代码库给了我们相应的命令:
图像作为输入和输出:
python inference_realbasicvsr.py configs/realbasicvsr_x4.py checkpoints/RealBasicVSR_x4.pth data/demo_000 results/demo_000视频作为输入和输出:
python inference_realbasicvsr.py configs/realbasicvsr_x4.py checkpoints/RealBasicVSR_x4.pth data/demo_001.mp4 results/demo_001.mp4 --fps=12.5遇到的问题
但是输入了以上命令我遇到了一些问题:
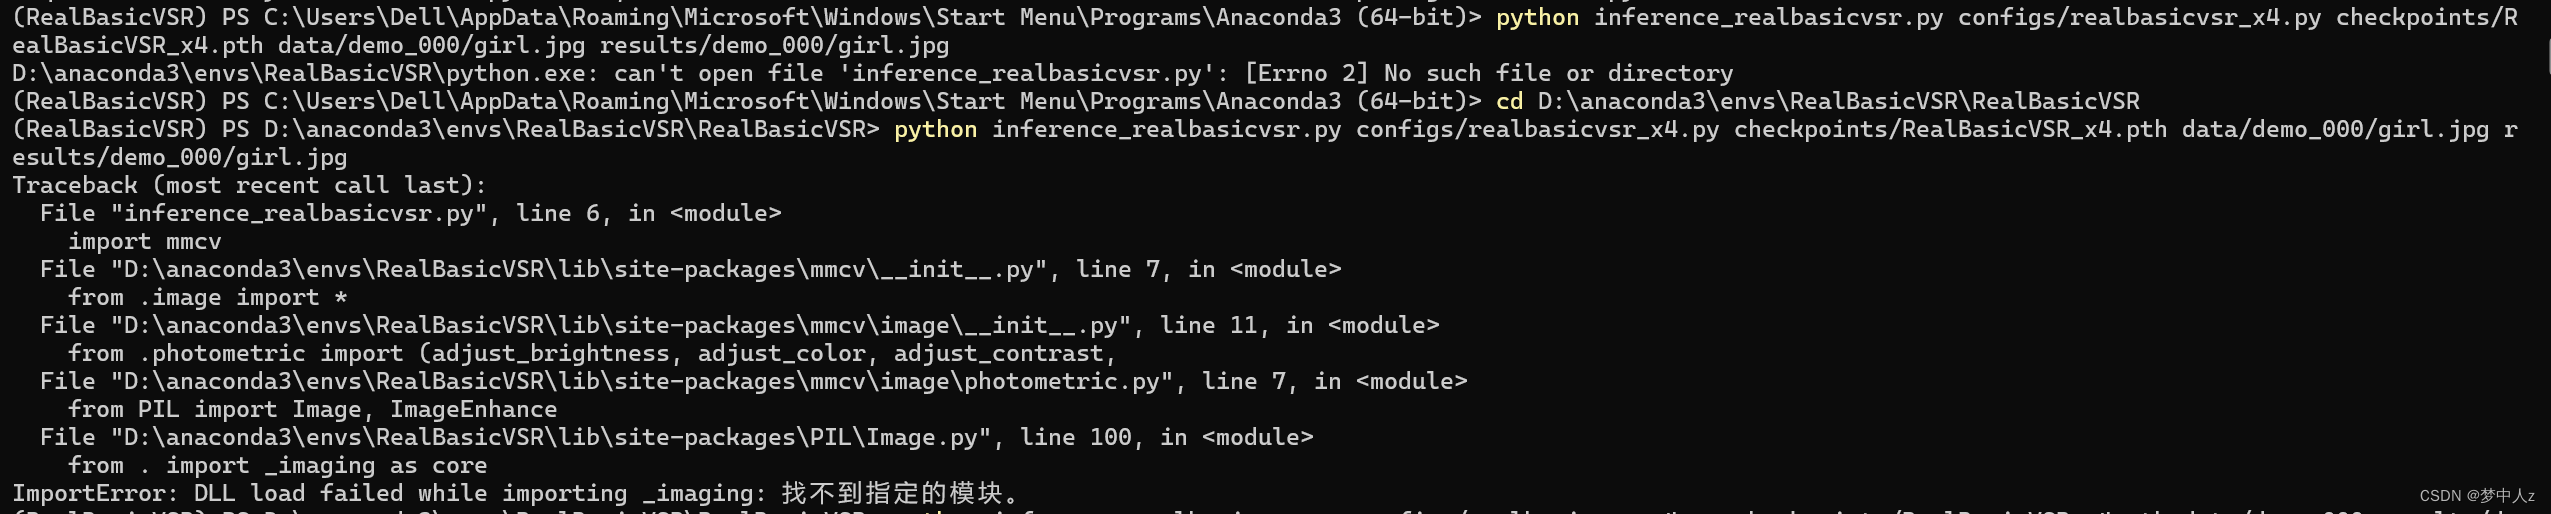 ImportError: DLL load failed while importing _imaging: 找不到指定的模块。
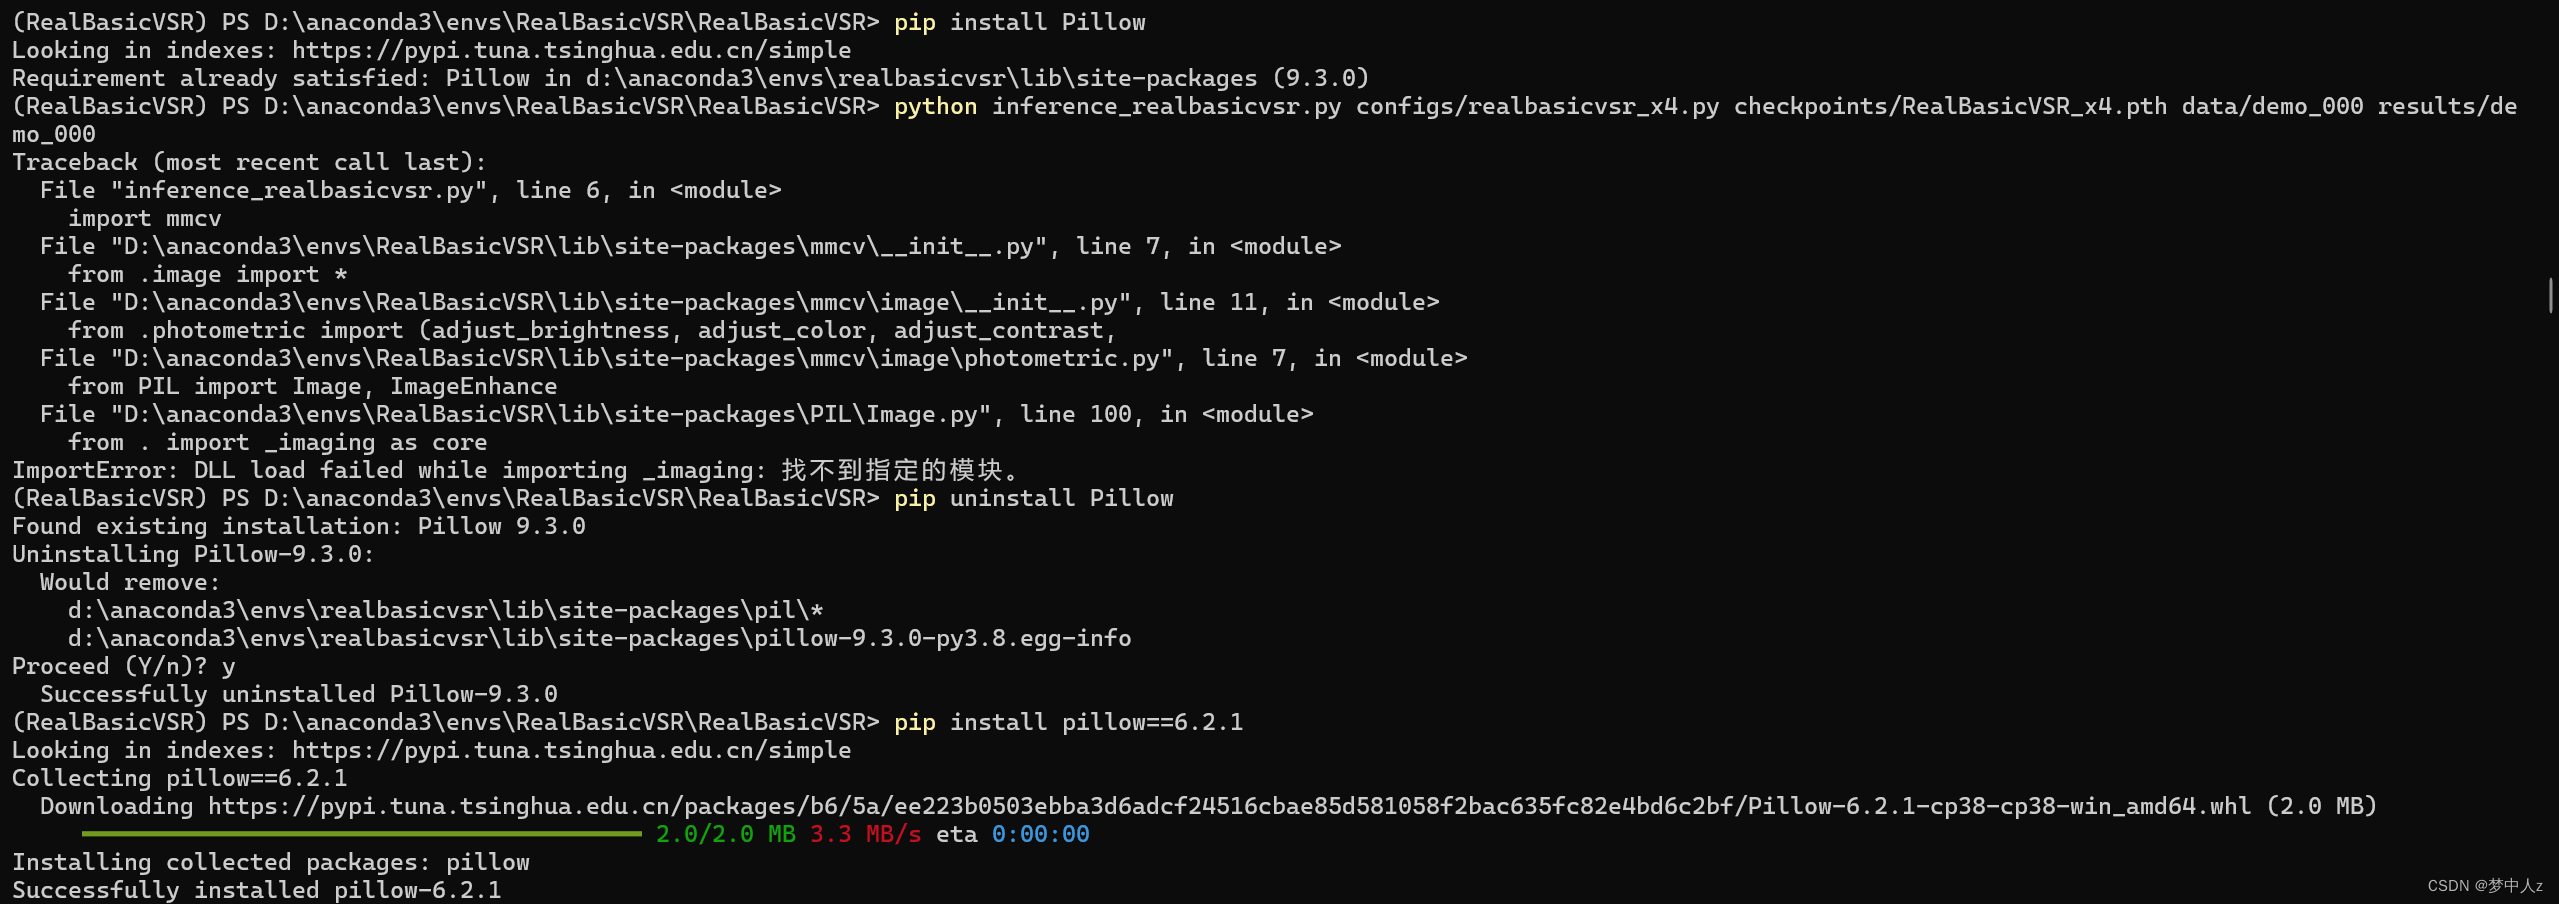
这里我根据CSDN上查找到的卸载了pillow重装版本。之后又报错:
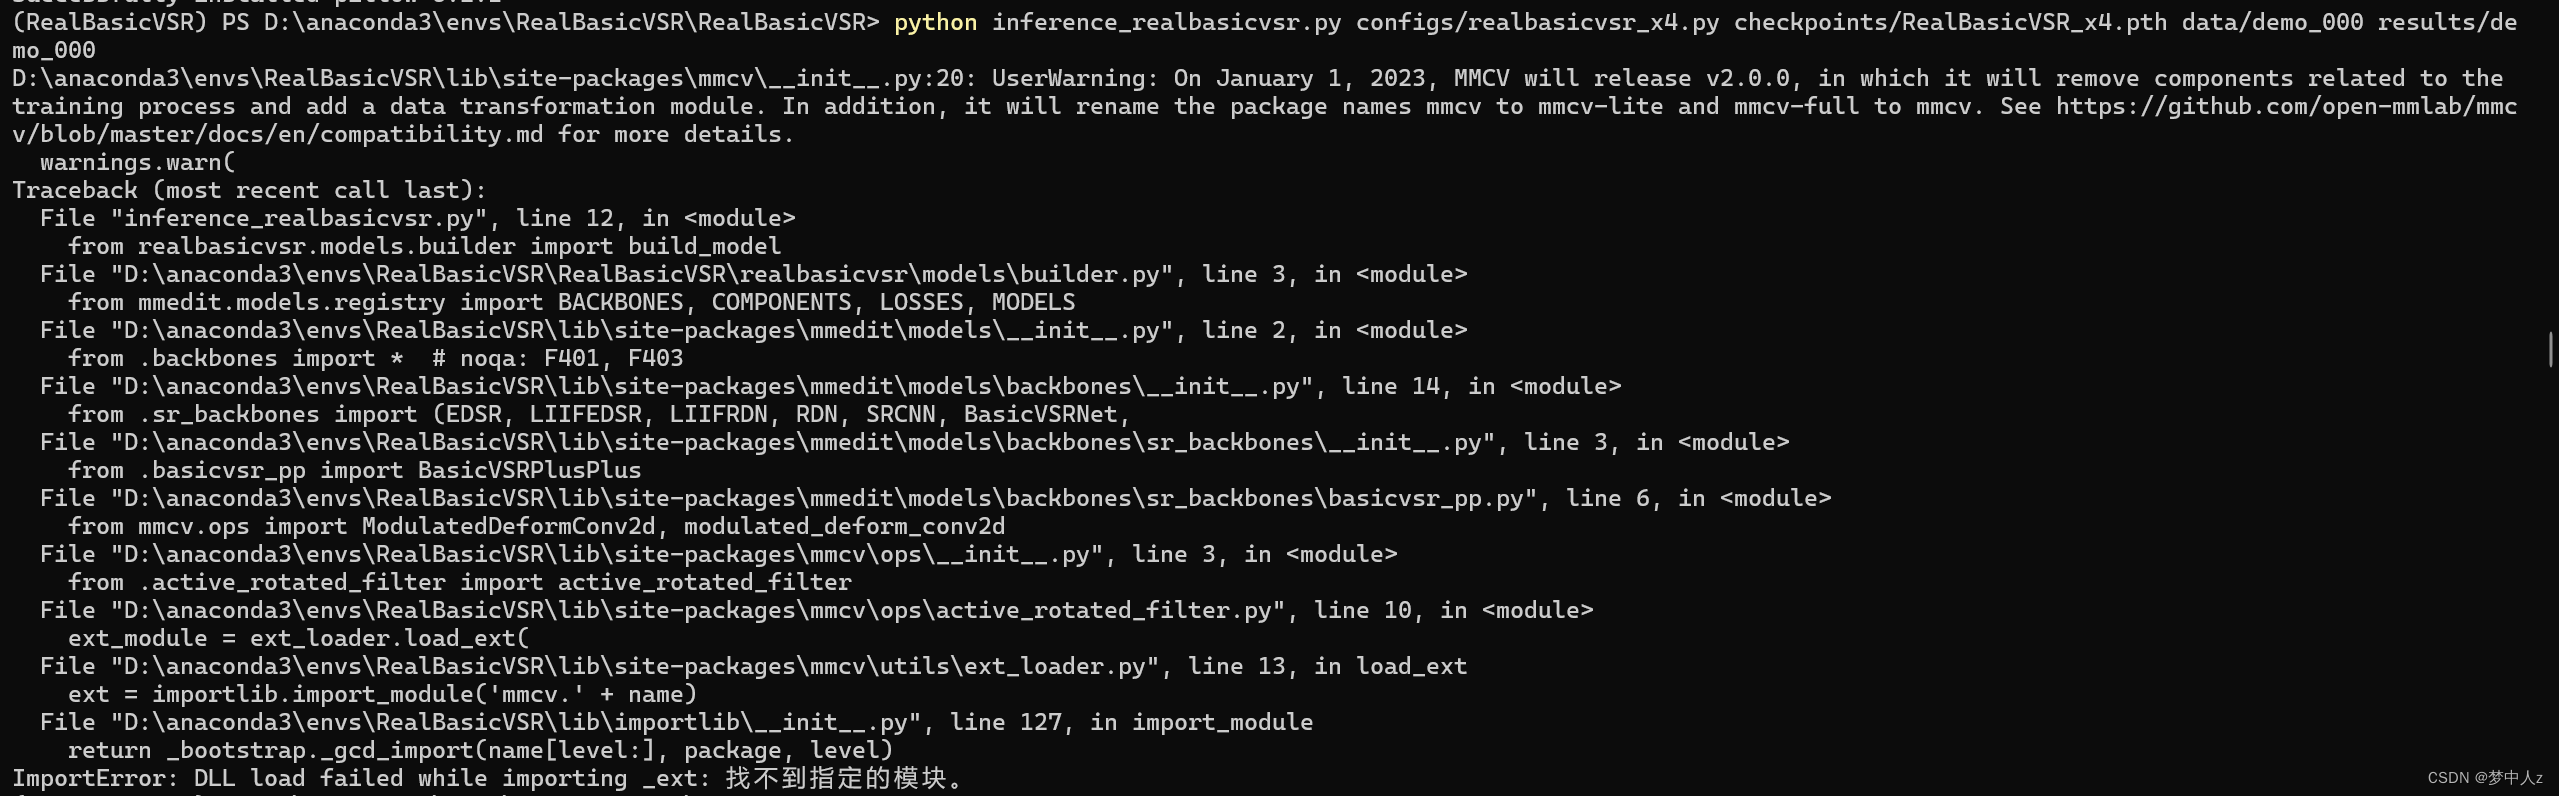 ImportError: DLL load failed while importing _ext: 找不到指定的模块。
这里我可以和大家说就是mmcv的问题。

发现我安装的mmcv-full是版本1.5.1,版本不匹配,先将其mmcv-full卸载
安装mmcv 1.7.1

再安装mmcv-full1.7.1
 再运行命令,就会用进度条

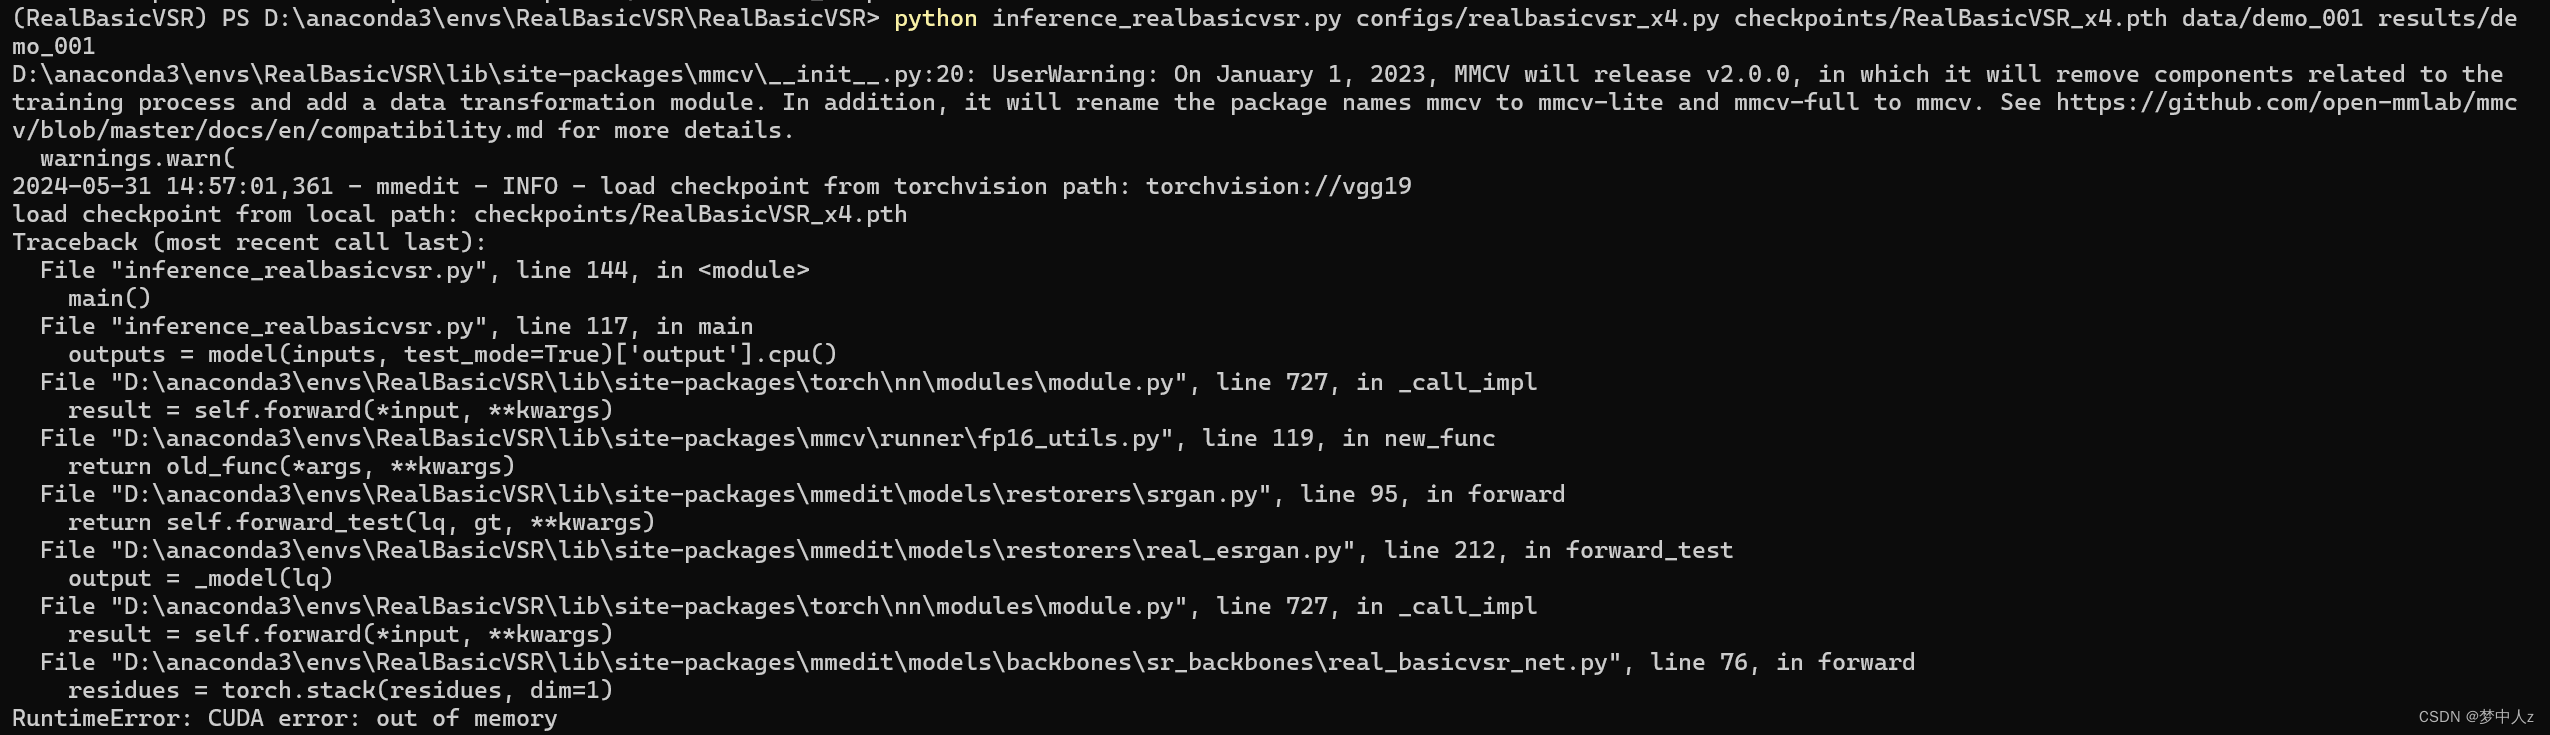
但这里会发现它说显卡不匹配的问题,这是cuda版本不匹配的问题,解决方法:(这里我是查了我的英伟达是3060,然后装cuda11.0版本)
pip3 install torch==1.7.1+cu110 torchvision==0.8.2+cu110 -f https://download.pytorch.org/whl/cu110/torch_stable.html经过本人的测试,如果用CPU去运行图片处理,时间在40min左右,但是GPU10s左右。。。。。
正常的运行是这样:

运行过程遇到的问题
RuntimeError: non-empty 3D or 4D input tensor expected but got ndim: 4,图片数量不能是单数,一定要双数
RuntimeError: CUDA error: out of memory。显存溢出,应该分批次处理
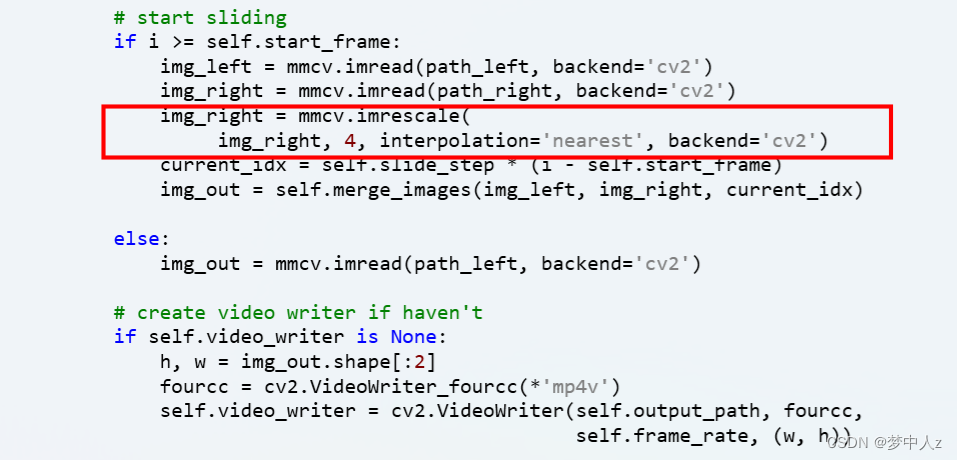
 遇到下面这个问题是由于源代码generate_video_demo.py中注释了,应该不要注释,即恢复原状。这和图片、视频超分模型RealBasicVSR安装使用 | 机器学习_basicvsr使用-CSDN博客文章2022所写的已经不同了

最终使用
到这里,我所遇到的问题基本都解决了,我和在结合RealBasicVSR高清处理视频-CSDN博客 的文章,将视频分割成图片进行自己的处理。
先看源代码库中给的视频例子:
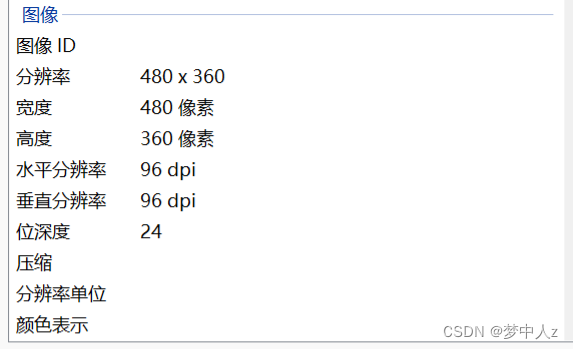
发现帧率是25,分辨率360(这里也和大家说明一下,分辨率不要超过1000,不然GPU内存也会不够,显存溢出)
import cv2
import os

# 视频文件所在目录
video_directory = r'D:\anaconda3\envs\RealBasicVSR\RealBasicVSR\data\yuanban'
# 获取目录中所有的mp4文件
video_files = [f for f in os.listdir(video_directory) if f.endswith('.mp4')]

for video_file in video_files:
    video_path = os.path.join(video_directory, video_file)

    # 创建以视频名命名的文件夹来保存图片
    output_folder = os.path.join(video_directory, os.path.splitext(video_file)[0])
    os.makedirs(output_folder, exist_ok=True)

    # 打开视频文件
    cap = cv2.VideoCapture(video_path)

    # 获取视频的原始帧率
    original_fps = int(cap.get(cv2.CAP_PROP_FPS))

    # 计算每秒需要提取的帧数
    frames_per_second = 30

    # 计算跳帧间隔
    frame_skip = max(1, original_fps / frames_per_second)

    # 初始化帧计数器
    frame_count = 0

    #max_frames = 100

    while True:
        ret, frame = cap.read()
        if not ret :  #or frame_count >= max_frames
            break

        if frame_count % frame_skip == 0:
        # 保存图片
            image_filename = os.path.join(output_folder, f'frame_{frame_count:04d}.jpg')
            cv2.imwrite(image_filename, frame)

        frame_count += 1

    # 释放视频对象
    cap.release()
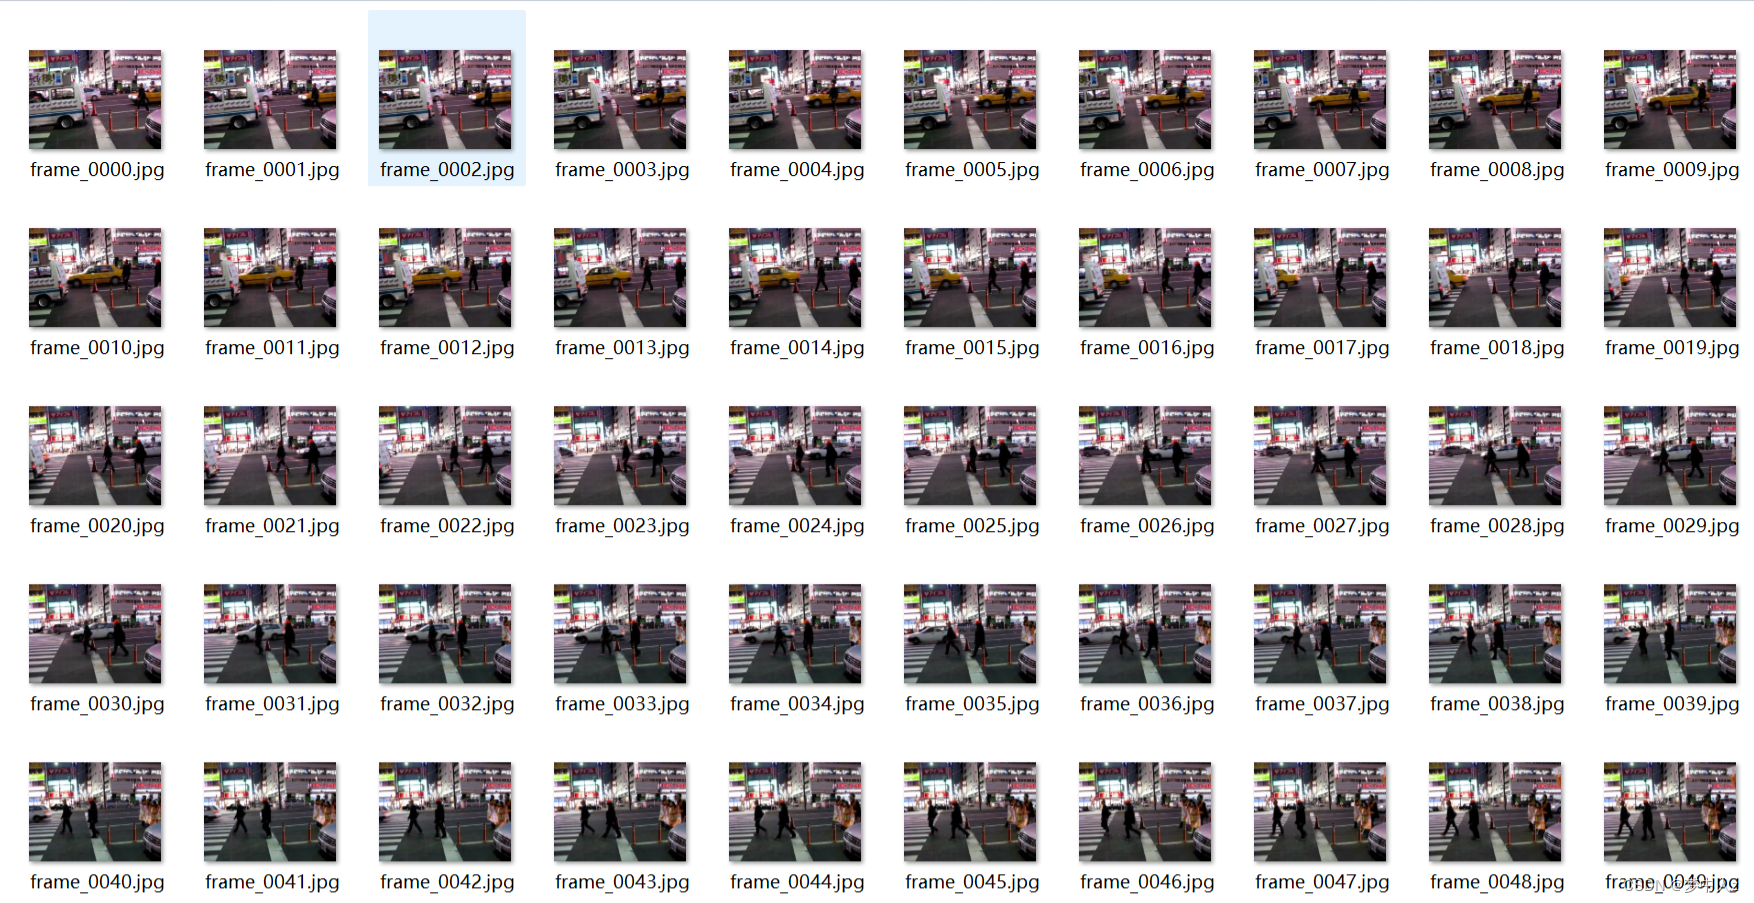
这里我做了一些修改, 设置了一下可以只提取前100帧率(目前我是注释了)就得到了以下图片:
然后对图片进行超分辨率处理:
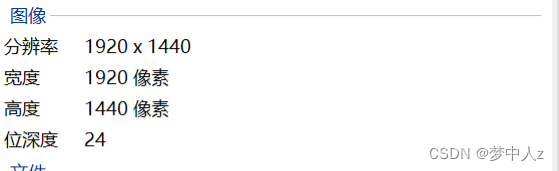
分辨率扩大了4倍
在将处理好的图片恢复成视频:
源代码给了一个generate_video_demo.py,它是展示原视频和改良之后对比的视频,我改了一下只生成改善后的视频:
import glob
import cv2
import mmcv
import numpy as np


class VideoDemo:
    ''' Generate video demo given a set of images.

    Args:
        input_dir (str): The directory storing the images.
        output_path (str): The path of the output video file.
        frame_rate (int): The frame rate of the output video.

    '''

    def __init__(self, input_dir, output_path, frame_rate):
        self.paths = sorted(glob.glob(f'{input_dir}/*'))
        self.output_path = output_path
        self.frame_rate = frame_rate

        # initialize video writer
        self.video_writer = None

    def __call__(self):
        for i, path in enumerate(self.paths):
            img = mmcv.imread(path, backend='cv2')

            # create video writer if haven't
            if self.video_writer is None:
                h, w = img.shape[:2]
                fourcc = cv2.VideoWriter_fourcc(*'mp4v')
                self.video_writer = cv2.VideoWriter(self.output_path, fourcc,
                                                    self.frame_rate, (w, h))

            self.video_writer.write(img.astype(np.uint8))

        cv2.destroyAllWindows()
        self.video_writer.release()


if __name__ == '__main__':
    """
    Assuming you have used our demo code to generate output images in
    results/demo_002. You can then use the following code to generate a video
    demo.
    """

    video_demo = VideoDemo(
        input_dir='D:/anaconda3/envs/RealBasicVSR/RealBasicVSR/results/demo_002',
        output_path='D:/anaconda3/envs/RealBasicVSR/RealBasicVSR/data/demo_video.mp4',
        frame_rate=25,
    )
    video_demo()
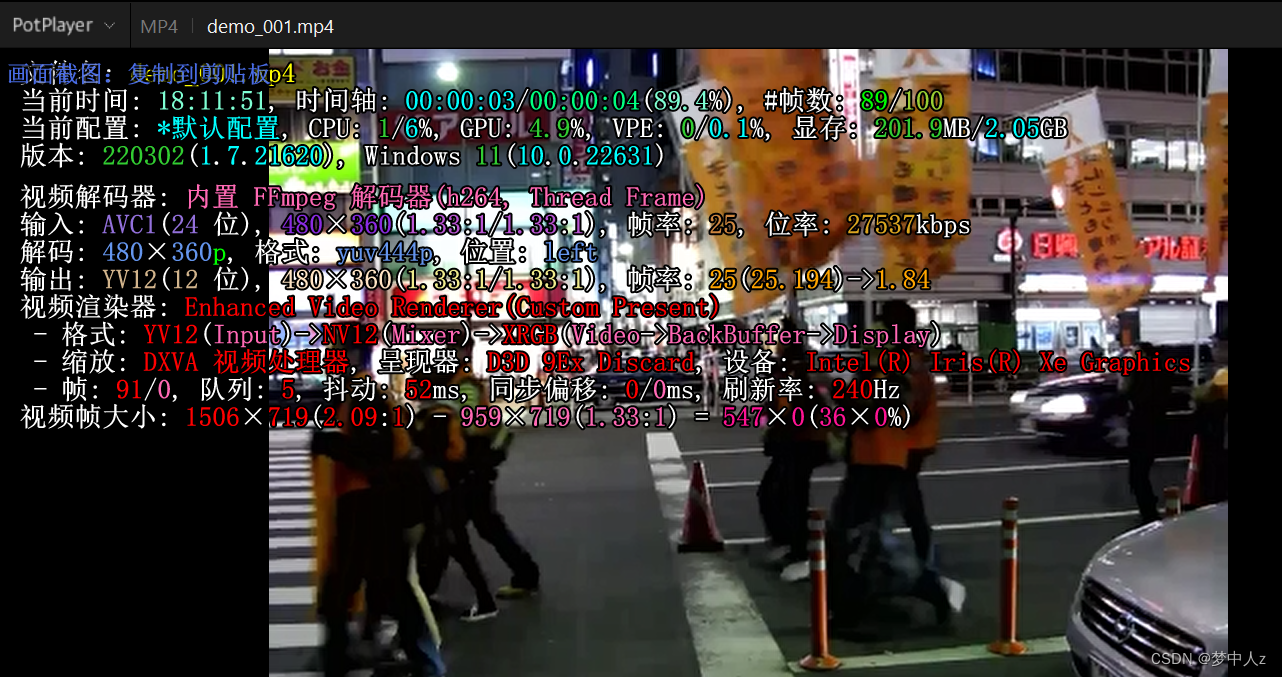
generate_video_demo.py生成的视频:可以看出文字上清晰了很多
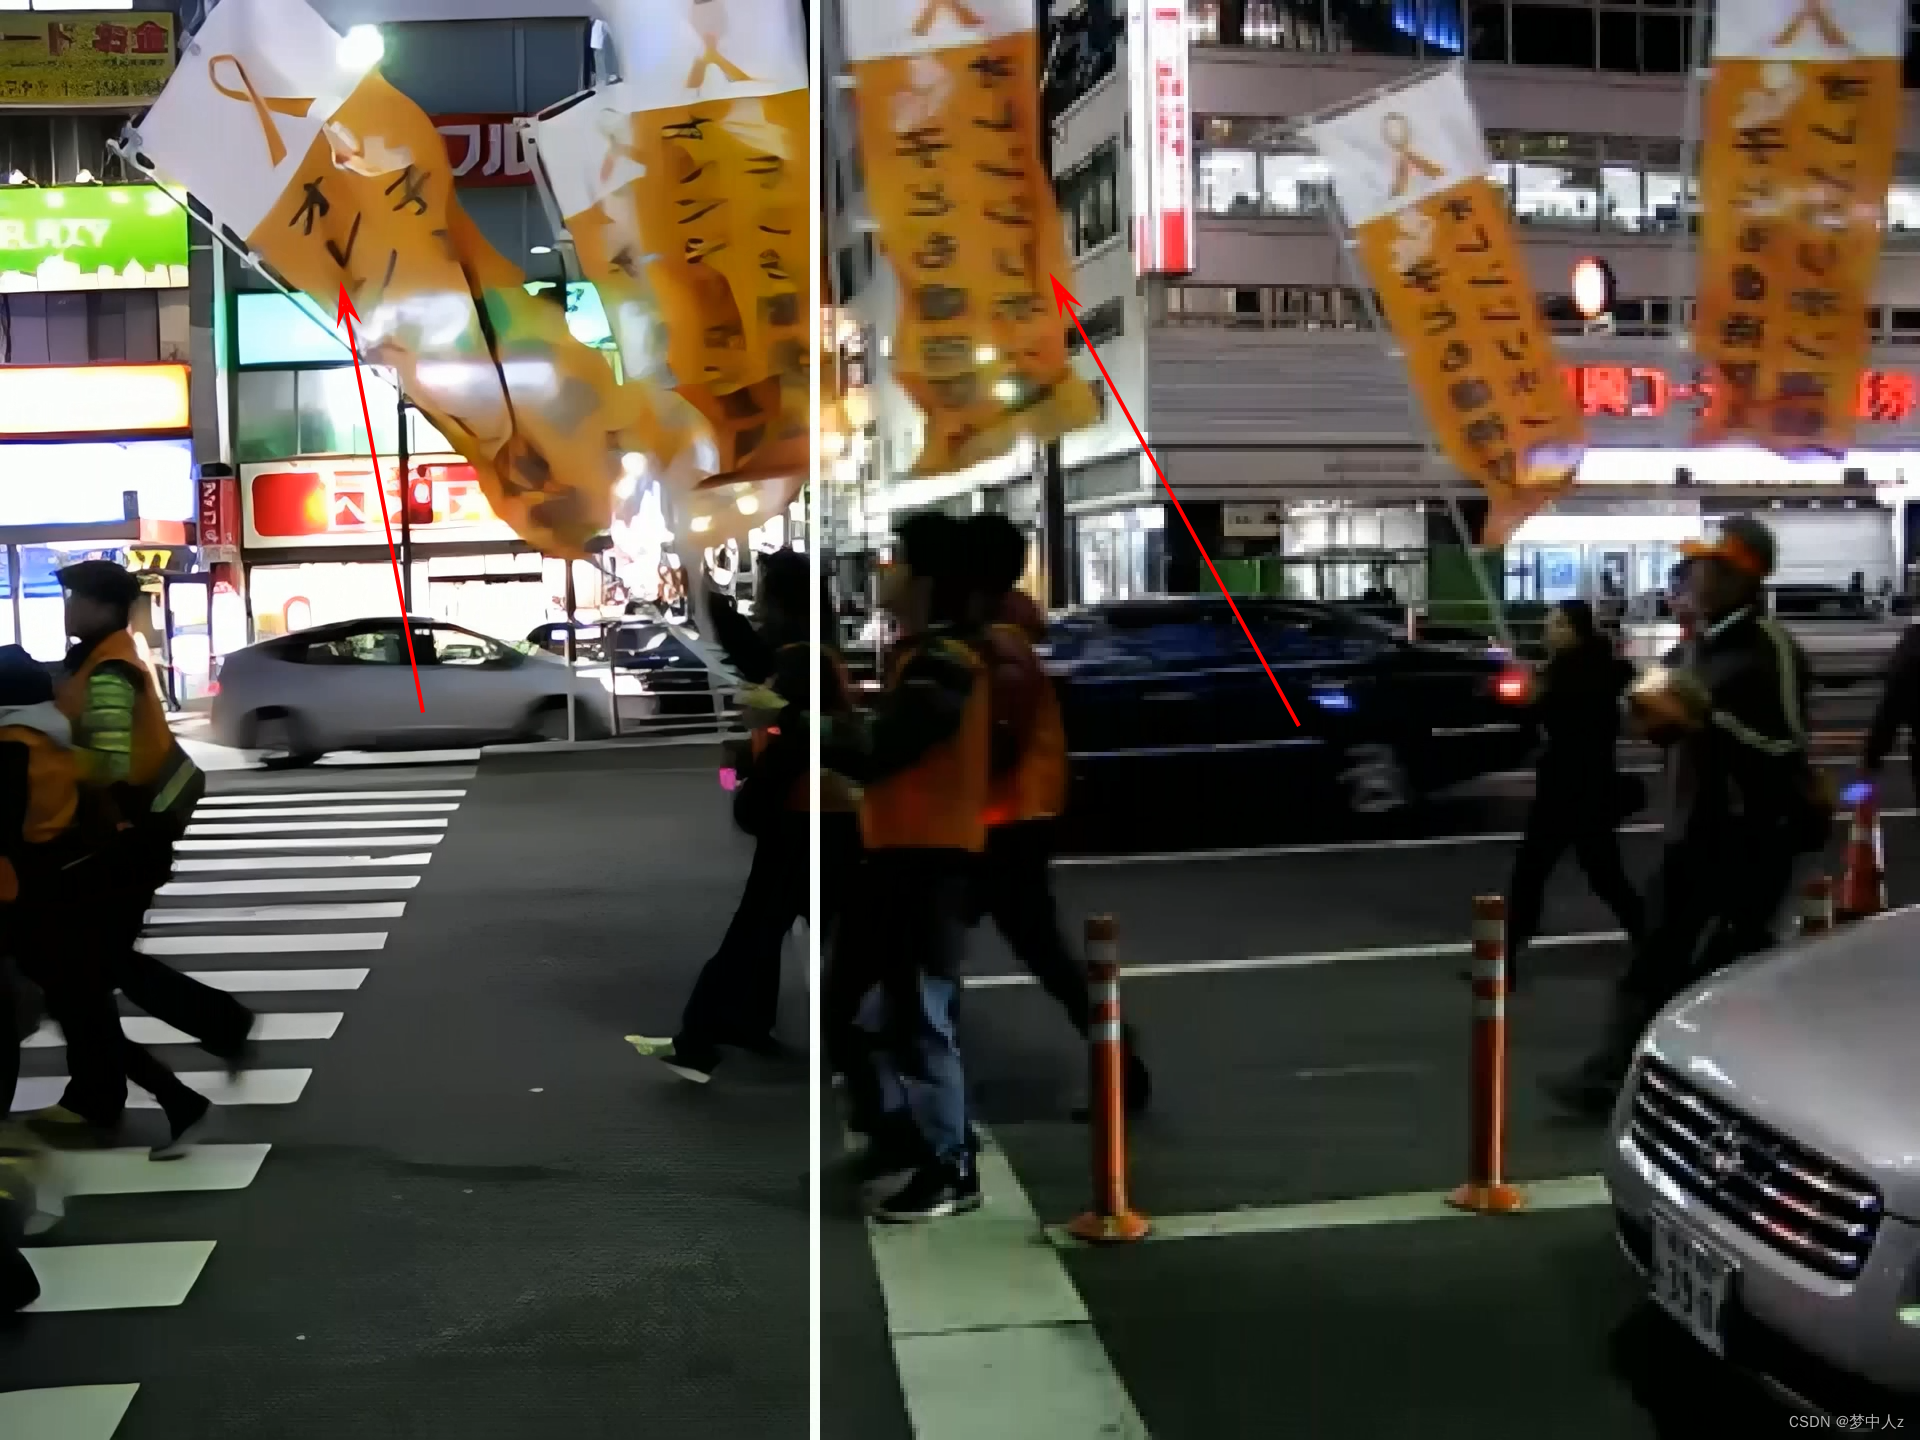
效果还是非常不错的。
我也用了哆啦A梦的视频进行对比:
发现线条确实比以前清晰了不少。
展望
在读了一下“Investigating Tradeoffs in Real-World Video Super-Resolution”文章和自己使用了一遍,发现效果还是不错的,不过也发现一些问题(仅作为业余人员的一些思考):
1、目前在文字处理方面感觉还是有些不足,这点我在使用过topaz ai软件也发现这点,文字有时会直接变成奇形怪状。文字处理方面我觉得需要加强
2、
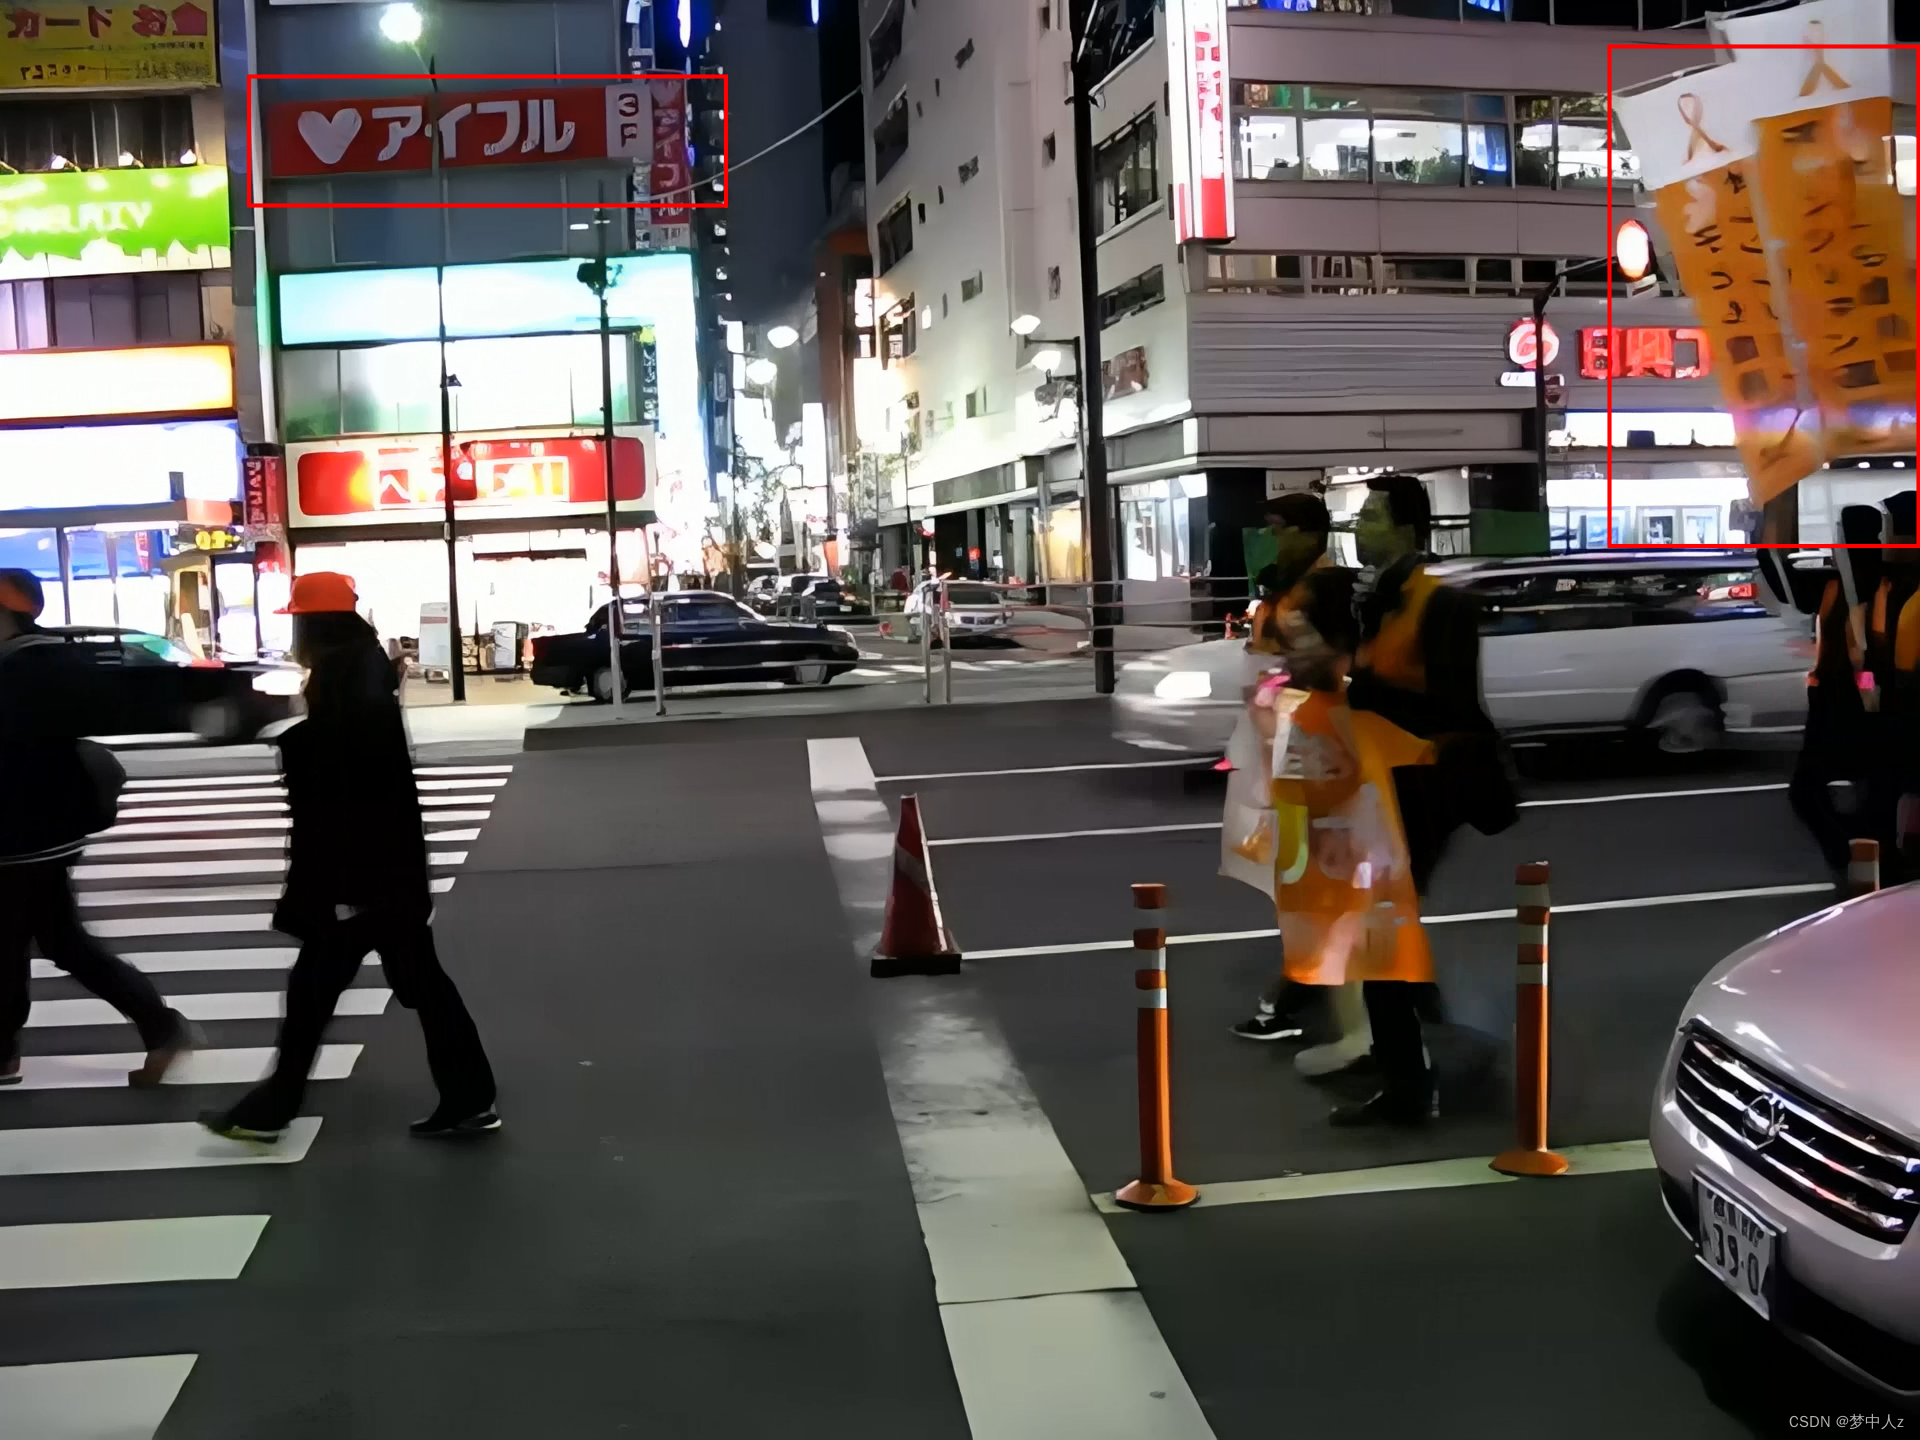
哆啦A梦的这副图由于背景色彩非常的混乱,即使使用超分辨率改善,效果也不是很好。
3、在这两年间我也使用过一些修复软件,加上这个RealBasicVSR,都用于修复我一位长辈的照片,但由于是以前的照片,中间有所破损,最后得到的结果都不尽人意。不过我也相信在不久的将来肯定会出现更强大的方法,能够满足我的需求。
作为一名初始的小白,该博客如果有不妥的地方,大家可以在评论区给我指正,感谢!!!
参考:


 5168
5168

 被折叠的 条评论
为什么被折叠?
被折叠的 条评论
为什么被折叠?
 到【灌水乐园】发言


