


目录
前言
在我们今日List的学习之前我们再温习一下vector和string叭,我们说List和vector的底层原理都是顺序表,那List呢?通过我们对数据结构中链表的学习,我们大概了解到List中很多知识点都和带头双向循环链表 的知识点契合,今天我们还是和之前一样,先进性使用List然后模拟其底层逻辑来实现List。
1、List的使用
我们List使用主要包括数据操作、构造、迭代、元素访问。
1.1 构造和初始化
构造函数主要有下面四个。
| 构造成员函数 | 接口说明 |
| List() | List的空类 |
| List(size_type n,const value _type &val=value_type()) | 构造List中包含n个值为val的元素 |
| List(const &list x) | 拷贝构造 |
| List(inputitertaror first,inputitertator last) | 用first和last区间中构造List |
1.1.1 构造空类
list<int> l1;//构造空类
1.1.2 构造List中包含n个值为val的元素
list<int> l2(4, 80);//l2中放4个80
1.1.3 拷贝构造
list<int>l4(l3);//拷贝构造
1.1.4 用first和last区间中构造List
list<int>l3(l2.begin(), l2.end());//迭代器访问
上面我们可以使用一个范围for来遍历输出一下List。
void print(const list<int>& x)
{
	for (auto& e : x) {
		cout << e << " ";
	}
	cout << endl;
}
调用函数输出结果为 :

1.2 迭代器
此处,大家还是可暂时 将迭代器理解成一个指针,该指针指向 list 中的某个节点,
| 函数声明 | 接口说明 |
| begin+end |
返回第一个元素的迭代器
+
返回最后一个元素下一个位置的迭代器
|
| rbegin+rend |
返回第一个元素的
reverse_iterator,
即
end
位置
,
返回最后一个元素下一个位置的
reverse_iterator,
即
begin
位置
|
1.2.1 正向迭代器
list<int>::iterator ite = l2.begin();
	while (ite != l2.end())
	{
		cout << *ite << " ";
		++ite;
	}
	cout << endl;
1.2.2 反向迭代器
list<int>::reverse_iterator rite = l2.rbegin();
	while (rite!=l2.rend())
	{
		cout << *rite << " ";
		++rite;
	}
	cout << endl;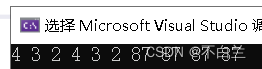
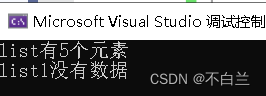
1,3 容量操作
容量主要有两个接口size()和capacity()。
int num[5] = { 1,2,3,4,5 };
	list<int> li(num, num + 5);
	list<int> li1;
	if (li.empty())
	{
		cout << "list没有数据" << endl;
	}
	else
	{
		cout << "list有" << li.size() << "个元素" << endl;
	}

	if (li1.empty())
	{
		cout << "list1没有数据" << endl;
	}
	else
	{
		cout << "list1有" << li1.size() << "个元素" << endl;
	}
1.4 元素访问
C++为List提供了两个元素访问的函数接口front()和back()。front表示获取头元素,back表示获取尾元素。
//list li的值为1 2 3  4 5
	cout << li.front() << endl;
cout << li.back() << endl; 
1.5 数据修改
List是双向循环链表,对于修改数据非常方便,这里先介绍经常使用的8个接口。
| 函数声明 | 接口说明 |
| push_back() | 尾插 |
| pop_back() | 尾删 |
| push_front | 头插 |
| pop_front | 头删 |
| insert | 插入 |
| erase | 清楚数据 |
| swap | 交换数据 |
| clear | 清空 |
int nums[] = { 1,2,3,4,5 };
	list<int>l1(nums, nums + 5);
	//头插和尾插
	l1.push_front(7);
	print(l1);
	l1.push_back(6);
	print(l1);
	//删除头部和尾部的节点
	l1.pop_back();
	print(l1);
	l1.pop_front();
	print(l1);
	//插入数据insert
	auto pos = ++l1.begin();
	cout << "pos的值为" << *pos << endl;

	l1.insert(pos, 2);
	print(l1);
	l1.insert(pos, 5,2);
	print(l1);
	vector<int>l{ 1 ,2, 3 };
	l1.insert(pos, l.begin(), l.end());
	print(l1);
	//删除erase
	l1.erase(pos);
	l1.erase(l1.begin(), l1.end());
2、List的模拟实现
既然我们都了解了List的用法,接下来我们来想一下到底是怎么实现的,为什么这样来使用语法,我们去探讨一下底层逻辑,来试着实现一个简单的List吧。
2.1 构造实现
List类似与双向循环链表的结构,我们要先创建节点,然后定义List的结构体。接下来我们来实现一下吧,先定一个一个List.h 的头文件。头文件里面有节点和List模版。
template<class T>
	struct __list_node
	{
		__list_node<T>* _next;
		__list_node<T>* _prev;
		T _data;


		__list_node(const T&x=T())
			:_next(nullptr)
			,_prev(nullptr)
			,_data(x)
		{}
	};
	template<class T>
	class list
	{
	public:

	private:
		Node* _head;

	};
2.2 默认成员函数
2.2.1构造函数
这里介绍两种构造函数,一个是默认构造函数,另外一个是迭代器的构造函数,这两种经常使用。
list()
		{//带头双向循环
			_head = new Node;
			_head->_next = _head;
			_head->_prev = _head;
		}
template <class InputIterator, class OutputIterator>
list(InputIterator input, OutputIterator output)
{
_head = new Node; // 给头结点开辟一块空间.
_head->_next = _head;
_head->_prev = _head;
while (input != output)
{
push_back(*input);
input++;
}
}2.2.2拷贝构造
拷贝构造我们使用push_back和迭代器来实现。看着简介方便,这里介绍一下实现细节,具体的实现函数我们会在接下的内容介绍。
//拷贝构造
		list(const list<T>& lt)
		{
			_head = new Node;    // 这里必须先开个头结点空间哦,因为这是拷贝构造,不是赋值
			_head->_next = _head;
			_head->_prev = _head;
			for (const auto& e : lt)
			{
				push_back(e);//这个函数后面会实现
			}
		}
2.2.3赋值重载
	//赋值重载
		list<T>& operator=(const list<T> lt)
	//注意哦,这里的参数故意没有使用 引用.这样lt就是通过拷贝构造获取了值
		{
			swap(_head, lt._head);   //然后交换两个链表的头结点
2.2.4析构函数
这里先要释放List里面的数据,接下在释放头结点。
	//析构函数
		~list()
		{
			clear();    //一定要先释放头结点后面的数据
			delete _head;
			_head = nullptr;
		}
2.3 数据操作实现
数据操作主要是增删查改,分别是
push_back(),pop_back(),push_front(),pop_front()
我们接下来一一实现这些函数。
2.3.1 push_back()
List尾插,主要分为四个步骤
- 给数据新建一个结点
- 保存尾结点
- 尾结点和新建节点连接
- 新建节点和头结点连接
void push_back(const T& x)
		{
			Node* tail = _head->_prev;
			Node* newnode = new Node(x);
			tail->_next = newnode;
			newnode->_prev = tail;
			newnode->_next = _head;
			_head->_prev = newnode;
		}
使用迭代器遍历输出:

2.3.2 pop_back()
list尾删步骤;
- 保存尾结点的前一个结点
- 释放尾结点
- 头结点和保存的结点连接
void pop_back()
		{
			assert(_head != _head->_next);   //如果数据为空,不可删除

			Node * oldtail = _head->_prev;      //提取旧尾巴结点
			Node * newtail = oldtail->_prev;    //保存旧尾巴结点的前一个结点
			delete oldtail;
			oldtail = nullptr;
			_head->_prev = newtail;
			newtail->_next = _head;
} 
2.3.3 push_front()
list头插的步骤:
- 给新数据新建一个结点
- 保存头结点下一个结点
- 头结点和新数据结点连接
- 新结点和保存结点连接
void push_front(const T& val)
		{
			Node* tmp = new Node(val);     //给新数据新建一个结点
			Node* next = _head->_next;     //保存头结点下一个结点
			_head->_next = tmp;
			tmp->_prev = _head;            //头结点和新数据结点连接
			tmp->_next = next;
			next->_prev = tmp;             //新结点和保存结点连接
} 
2.3.4 pop_front()
List头删的步骤:
- 保存头结点下两个结点
- 释放头结点下一个结点
- 头结点和保存结点连接
void pop_front()
		{
			assert(_head != _head->_next);//如果数据为空,不可删除
			Node * dnext = _head->_next->_next;
			delete _head->_next;
			_head->_next = dnext;
			dnext->_prev = _head;
} 
2.4 迭代器实现
这里我们要思考一个问题,我们这里的迭代器是不是还是可以想string和vector一样直接就可以当做指针处理,对数据进行访问呢?我们在这里如果对结点指针进行加减是没有意义的,我们需要的是*()里面的数据,这个时候我们就需要对数据结点指针进行封装,重载运算符,来实现迭代器的功能。
实现迭代器需要的运算符操作如下:
- ++ 代表走向数据的下一个位置,博主这里只实现前置++
- - - 代表走向数据的上一个位置,博主这里只实现前置- -
*(解引用)代表获取该迭代器位置的元素- != 判断两个迭代器的位置是否不一样
- == 判断两个迭代器的位置是否一样
到这里我们可以实现一个简单的迭代器,用于读取List里面的数据,来实现打印输出。
	//迭代器
	template <class T>
	struct __list_iterator
	{
		typedef __list_iterator<T> iterator;
		typedef __list_node<T> Node;
		Node* _node;
		__list_iterator(Node* node)

			:_node(node)
		{}
		//*it
		T& operator*()
		{
			return _node->_data;
		}
		//++it
		iterator& operator ++()
		{
			_node = _node->_next;
			return *this;
		}
		//--it
		iterator& operator --()
		{
			_node = _node->_prev;
			return *this;
		}
		//!=
		bool operator!=(const iterator& it) const
		{
			return _node != it._node;
		}
		//==
		bool operator==(const iterator& it) const
		{
			return _node == it._node;
		}
	};
这里的迭代器可以对上面普通的数据操作,但是我们如果想输出Date类,还有不可修改的常迭代器,这个时候对于迭代器的参数要求就会更多,我们来实现一下吧。
//迭代器
	template <class T,class Ref,class Ptr>
	struct __list_iterator
	{
		typedef __list_iterator<T, T&, T*> iterator;              //普通迭代器
		//typedef __list_iterator<T> iterator;
		typedef __list_node<T> Node;
		Node* _node;
		__list_iterator(Node* node)

			:_node(node)
		{}
		//*it
		/*T& operator*()
		{
			return _node->_data;
		}*/
		//
		Ref operator*() //迭代器使用*的意思是 获取结点值,所以就直接解引用_node,然后返回
		{
			return _node->_data;
		}
		//
		Ptr operator->()
		{
			return &(_node->_data);
		}
		//++it
		iterator& operator ++()
		{
			_node = _node->_next;
			return *this;
		}
		//--it
		iterator& operator --()
		{
			_node = _node->_prev;
			return *this;
		}
		//!=
		bool operator!=(const iterator& it) const
		{
			return _node != it._node;
		}
		//==
		bool operator==(const iterator& it) const
		{
			return _node == it._node;
		}
	};
我们迭代器的常用接口也实现一下把。放在List里面,以便于调用。
iterator begin() { return iterator(_head->_next); }
iterator end() { return iterator(_head); }

const_iterator begin() const { return iterator(_head->_next); }
const_iterator end() const { return iterator(_head); }
2.5 clear清理和析构函数实现
2.5.1 实现clear()
这里的clear会将头结点以后得数据全部清除掉,但是不会释放头结点。
//clear()
			void clear()
			{
				iterator it = begin();
				while (it != end())
				{
					it = erase(it);
				}
			}
2.5.2实现析构函数
上面介绍析构函数的时候就实现了一下。这里再实现一下。
//析构函数
		~list()
		{
			clear(); //一定要先释放头结点后面的数据
			delete _head;
			_head = nullptr;
		}
2.6 erase和insert实现头尾数据的删除
我们可以通过erase和insert发现实现数据操作和这两有很多重复的代码,我们可以直接调用简化这里的代码,最终来实现一个完整的List。
2.6.1 实现erase()
//erase()
		iterator erase(iterator pos)
		{
			assert(pos != end());
			Node * cur = pos._node;
			Node * prev = cur->_prev;
			Node * next = cur->_next;
			delete cur;
			prev->_next = next;
			next->_prev = prev;
			return iterator(next);
		}
2.6.2 实现insert()
//insert()
		iterator insert(iterator pos, const T& x)
		{
			Node* cur = pos._node;
			Node* prev = cur->_prev;
			Node* newnode = new Node(x);

			prev->_next = newnode;
			newnode->_prev = prev;
			newnode->_next = cur;
			cur->_prev = newnode;

			return iterator(newnode);
		}
2.7 List的最终完全实现
这里将我们实现的List代码,整体观察一下,List的底层原理就介绍到这啦
namespace zb
{
template<class T>
struct __list_node
{
__list_node<T>* _next;
__list_node<T>* _prev;
T _data;
__list_node(const T&x=T())
:_next(nullptr)
,_prev(nullptr)
,_data(x)
{}
};
//迭代器
template <class T,class Ref,class Ptr>
struct __list_iterator
{
typedef __list_iterator<T, T&, T*> iterator; //普通迭代器
//typedef __list_iterator<T> iterator;
typedef __list_node<T> Node;
Node* _node;
__list_iterator(Node* node)
:_node(node)
{}
//*it
/*T& operator*()
{
return _node->_data;
}*/
//
Ref operator*() //迭代器使用*的意思是 获取结点值,所以就直接解引用_node,然后返回
{
return _node->_data;
}
//
Ptr operator->()
{
return &(_node->_data);
}
//++it
iterator& operator ++()
{
_node = _node->_next;
return *this;
}
//--it
iterator& operator --()
{
_node = _node->_prev;
return *this;
}
//!=
bool operator!=(const iterator& it) const
{
return _node != it._node;
}
//==
bool operator==(const iterator& it) const
{
return _node == it._node;
}
};
struct Date
{
int _year;
int _month;
};
template<class T>
class list
{
typedef __list_node<T> Node;
public:
//typedef __list_iterator<T> iterator;
//typedef __list_iterator<T, T&> iterator; //普通迭代器
//typedef __list_iterator<T, const T&> const_iterator; //常迭代器
typedef __list_iterator<T, T&, T*> iterator; //普通迭代器
typedef __list_iterator<T, const T&, const T*> const_iterator; //常迭代器
iterator begin() { return iterator(_head->_next); }
iterator end() { return iterator(_head); }
const_iterator begin() const { return iterator(_head->_next); }
const_iterator end() const { return iterator(_head); }
list()
{//带头双向循环
_head = new Node;
_head->_next = _head;
_head->_prev = _head;
}
//迭代器构造函数
//template <class InputIterator, class OutputIterator>
//list(InputIterator input, OutputIterator output)
//{
// _head = new Node; // 给头结点开辟一块空间.
// _head->_next = _head;
// _head->_prev = _head;
// while (input != output)
// {
// push_back(*input); //这个函数是用来实现尾插数据的,博主在下面进行讲解
// input++;
// }
//}
//拷贝构造
list(const list<T>& lt)
{
_head = new Node; // 这里必须先开个头结点空间哦,因为这是拷贝构造,不是赋值
_head->_next = _head;
_head->_prev = _head;
for (const auto& e : lt)
{
push_back(e);//这个函数后面会实现
}
}
//赋值重载
list<T>& operator=(const list<T> lt)
//注意哦,这里的参数故意没有使用 引用.这样lt就是通过拷贝构造获取了值
{
swap(_head, lt._head); //然后交换两个链表的头结点
return *this;
}
//clear()
void clear()
{
iterator it = begin();
while (it != end())
{
it = erase(it);
}
}
//erase()
iterator erase(iterator pos)
{
assert(pos != end());
Node * cur = pos._node;
Node * prev = cur->_prev;
Node * next = cur->_next;
delete cur;
prev->_next = next;
next->_prev = prev;
return iterator(next);
}
//insert()
iterator insert(iterator pos, const T& x)
{
Node* cur = pos._node;
Node* prev = cur->_prev;
Node* newnode = new Node(x);
prev->_next = newnode;
newnode->_prev = prev;
newnode->_next = cur;
cur->_prev = newnode;
return iterator(newnode);
}
//析构函数
~list()
{
clear(); //一定要先释放头结点后面的数据
delete _head;
_head = nullptr;
}
尾插
//void push_back(const T& x)
//{
// Node* tail = _head->_prev;
// Node* newnode = new Node(x);
// tail->_next = newnode;
// newnode->_prev = tail;
// newnode->_next = _head;
// _head->_prev = newnode;
//}
尾删
//void pop_back()
//{
// assert(_head != _head->_next); //如果数据为空,不可删除
// Node * oldtail = _head->_prev; //提取旧尾巴结点
// Node * newtail = oldtail->_prev; //保存旧尾巴结点的前一个结点
// delete oldtail;
// oldtail = nullptr;
// _head->_prev = newtail;
// newtail->_next = _head;
//}
头插
//void push_front(const T& val)
//{
// Node* tmp = new Node(val); //给新数据新建一个结点
// Node* next = _head->_next; //保存头结点下一个结点
// _head->_next = tmp;
// tmp->_prev = _head; //头结点和新数据结点连接
// tmp->_next = next;
// next->_prev = tmp; //新结点和保存结点连接
//}
头删
//void pop_front()
//{
// assert(_head != _head->_next);//如果数据为空,不可删除
// Node * dnext = _head->_next->_next;
// delete _head->_next;
// _head->_next = dnext;
// dnext->_prev = _head;
//}
void push_back(const T& x) { insert(end(), x); }
void push_front(const T& x) { insert(begin(), x); }
void pop_back() { erase(--end()); }
void pop_front() { erase(begin()); }
private:
Node* _head;
};
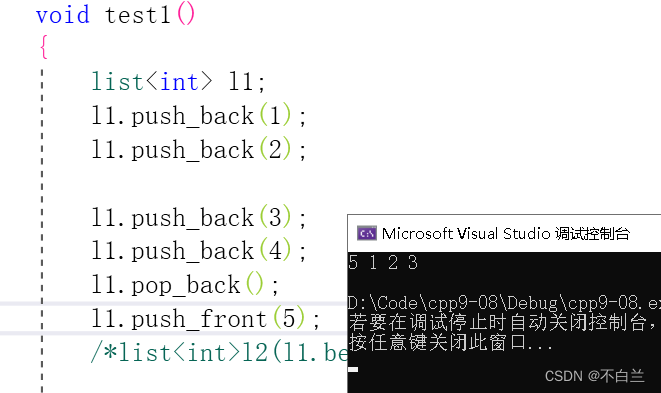
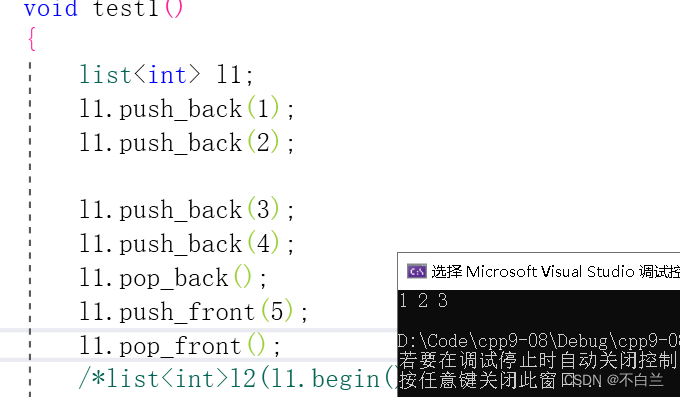
void test1()
{
list<int> l1;
l1.push_back(1);
l1.push_back(2);
l1.push_back(3);
l1.push_back(4);
l1.pop_back();
l1.push_front(5);
l1.pop_front();
/*list<int>l2(l1.begin(), l1.end());*/
list<int>::iterator it = l1.begin();
while (it != l1.end())
{
//*it *= 2;
cout << *it << " ";
++it;
}
cout << endl;
}
//void test2()
//{
// Date date[10];
// zb::list<Date> li(date, date + 10);
//
//}
}


 633
633


 被折叠的 条评论
为什么被折叠?
被折叠的 条评论
为什么被折叠?
 到【灌水乐园】发言


