


🌈Yu-Gateway::基于 Netty 构建的自研 API 网关,采用 Java 原生实现,整合 Nacos 作为注册配置中心。其设计目标是为微服务架构提供高性能、可扩展的统一入口和基础设施,承载请求路由、安全控制、流量治理等核心网关职能。
🌈项目代码地址:https://github.com/YYYUUU42/YuGateway-master
如果该项目对你有帮助,可以在 github 上点个 ⭐ 喔 🥰🥰
🌈自研网关系列:可以点开专栏,参看完整的文档
目录
1、限流配置
nacos 上的配置:
type:匹配的类型(根据路径或者服务名称)
value:路径或者服务名
model:限流方式(单机或者分布式)
algorithm:限流算法(固定窗口、令牌桶)
duration:限流时间单位(秒)
permits:限流请求次数(次)
    {
      "id": "http-server",
      "name": "http-server",
      "paths": [
        "/http-server/ping",
        "/http-server/gray"
      ],
      "prefix": "/http-server",
      "protocol": "http",
      "retryConfig": {
        "times": 3
      },
      "serviceId": "backend-http-server",
      "filterConfigs": [
        {
          "config": {
            "load_balance": "RoundRobin"
          },
          "id": "load_balance_filter"
        },
        {
          "id": "auth_filter"
        },
        {
          "id": "gray_filter"
        },
        {
          "id": "flow_ctl_filter"
        }
      ],
      "flowControlConfigs": [ {
        "type": "path",
        "value": "/http-server/ping",
        "mode": "distributed",
        "algorithm": "fixed_window",
        "config": {
          "duration": 1,
          "permits": 10
        }
      } ]
    }
2、实现流程
继续通过debug的方式来讲述流程,由于类比较多,就不展示代码,在 github 上 clone 代码执行查看
首先还是从 nacos 中读取 Rule 规则,得到限流的配置,这里是可以制定多个限流规则的,每个 url 都可以自己的限流规
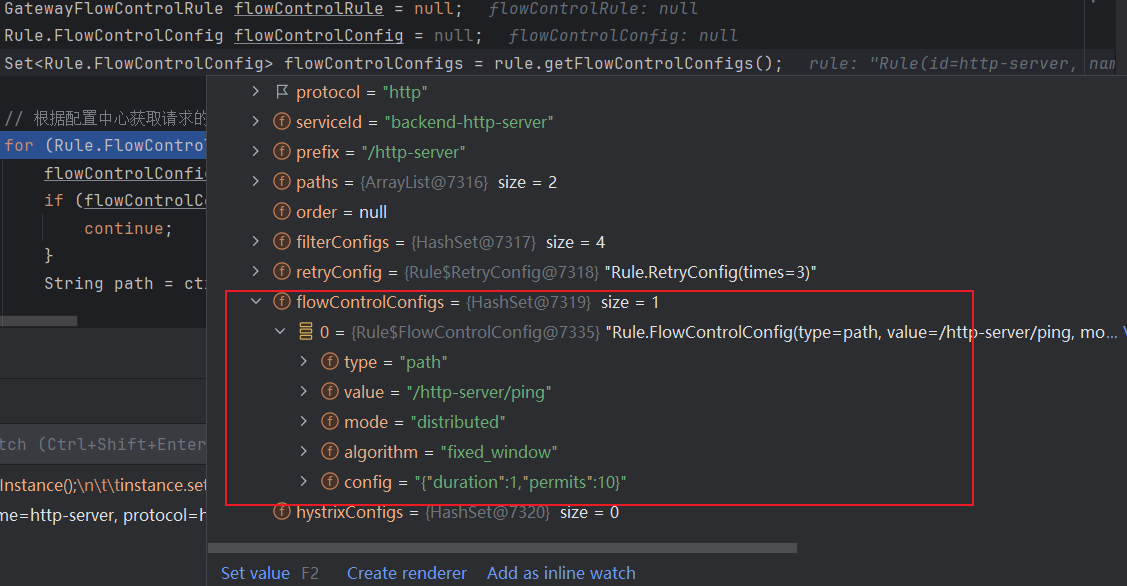
这一步的主要作用是获取一个 FlowControlByPathRule 的实例,这样做的目的是为了实现对每个服务路径的流量控制,每个服务路径都有一个对应的 FlowControlByPathRule 实例,用于处理该路径的流量控制规则,也算是单例设计模式的一种运用
if (flowControlConfig.getType().equalsIgnoreCase(FilterConst.FLOW_CTL_TYPE_PATH)
    && path.equals(flowControlConfig.getValue())) {
    flowControlRule = FlowControlByPathRule.getInstance(rule.getServiceId(), path);
}
这里根据服务ID和请求路径,以及从配置中心获取的限流配置,来执行具体的流控操作
if (flowControlConfig == null || StringUtils.isEmpty(serviceId) || StringUtils.isEmpty(flowControlConfig.getConfig())) {
	return;
}
//获得当前路径对应的流控次数
Map<String, Integer> configMap = JSON.parseObject(flowControlConfig.getConfig(), Map.class);

//判断是否包含流控规则   FLOW_CTL_LIMIT_DURATION:限流时间单位---秒  FLOW_CTL_LIMIT_PERMITS:限流请求次数---次
if (!configMap.containsKey(FLOW_CTL_LIMIT_DURATION) || !configMap.containsKey(FLOW_CTL_LIMIT_PERMITS)) {
	return;
}

//得到流控时间和时间内限制次数
double duration = configMap.get(FLOW_CTL_LIMIT_DURATION);
double permits = configMap.get(FLOW_CTL_LIMIT_PERMITS);

//当前请求是否触发流控标志位
boolean flag = false;
String key = serviceId + "." + path;

//如果是分布式项目 那么我们就需要使用Redis来实现流控  单机则可以直接使用Guava
if (FilterConst.FLOW_CTL_MODE_DISTRIBUTED.equalsIgnoreCase(flowControlConfig.getMode())) {
	flag = switch (flowControlConfig.getAlgorithm()) {
		case VOTE_BUCKET_ALGORITHM -> new VoteBucketAlgorithm(new JedisUtil()).executeResp(flowControlConfig);
		case FIXED_WINDOWS_ALGORITHM -> new StableAlgorithm(new JedisUtil()).executeResp(flowControlConfig);
		default -> new VoteBucketAlgorithm(new JedisUtil()).executeResp(flowControlConfig);
	};
}
Redis 固定窗口限流
/**
 * @param limit      请求限制数量
 * @param windowSize 窗口大小
 */
public boolean isAllowed(String id, int limit, int windowSize) {
	String lockKey = PREFIX + ":" + "LOCK" + ":" + id;
	// 窗口初始化
	try {
		boolean isLock = jedisUtil.getDistributeLock(lockKey, id, windowSize);
		if (isLock) {
			String window_key = PREFIX + ":" + id;
			long current = jedisUtil.increment(window_key);
			if (current == 1) {
				jedisUtil.setExpire(window_key, windowSize);
			}
			return current <= limit;
		}
	} finally {
		jedisUtil.releaseDistributeLock(lockKey, id);
	}
	return false;
}
Guava 单机限流
主要就是通过 Guava 库中的 RateLimiter 类来实现限流
/**
 * 获取令牌
 *
 * @param permits 需要获取的令牌数量
 * @return 是否获取成功
 */
public boolean acquire(int permits) {
	return rateLimiter.tryAcquire(permits);
}
3、限流压测
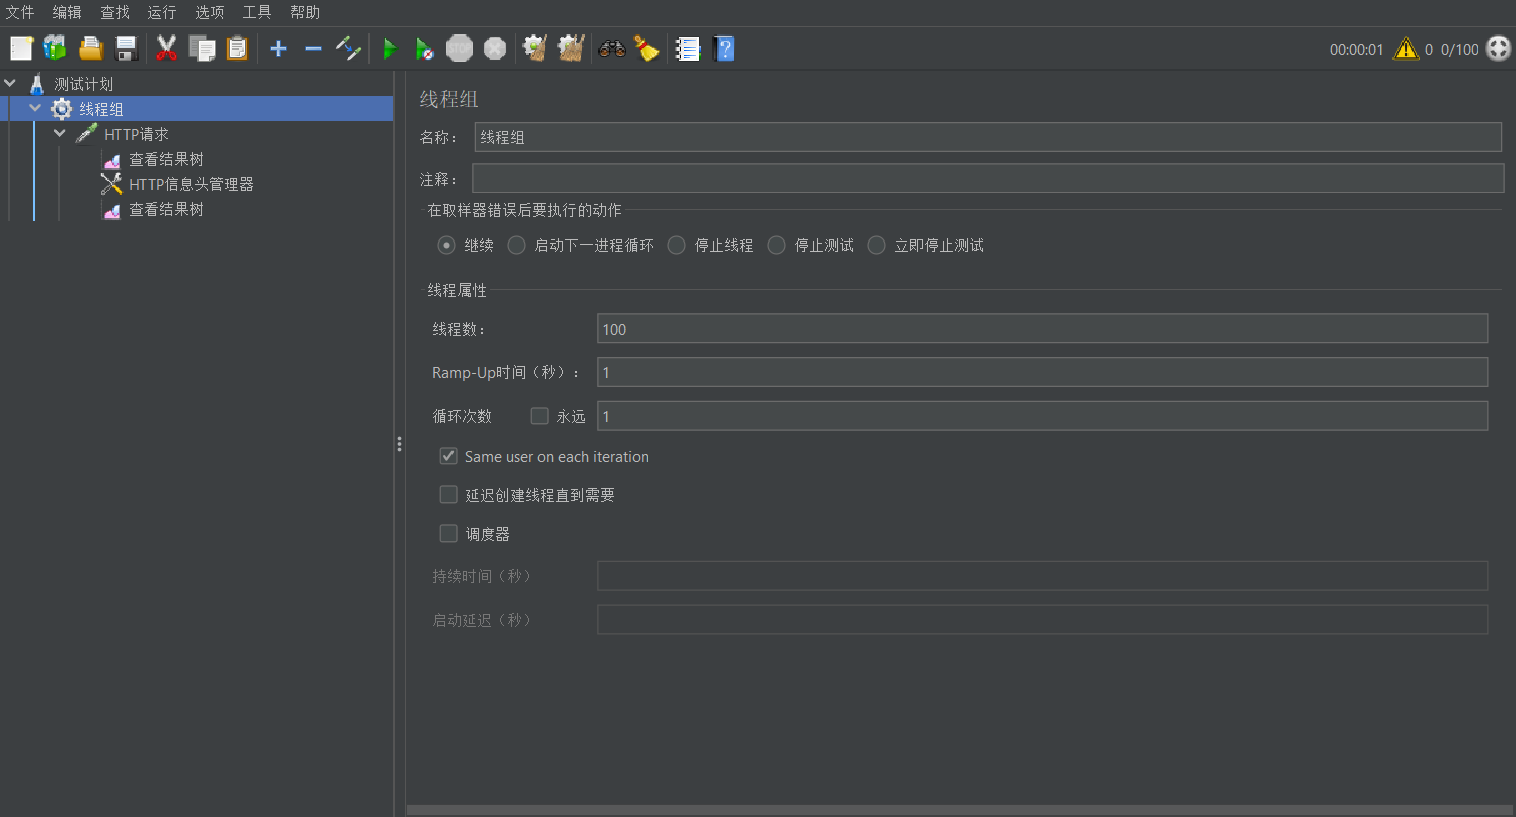
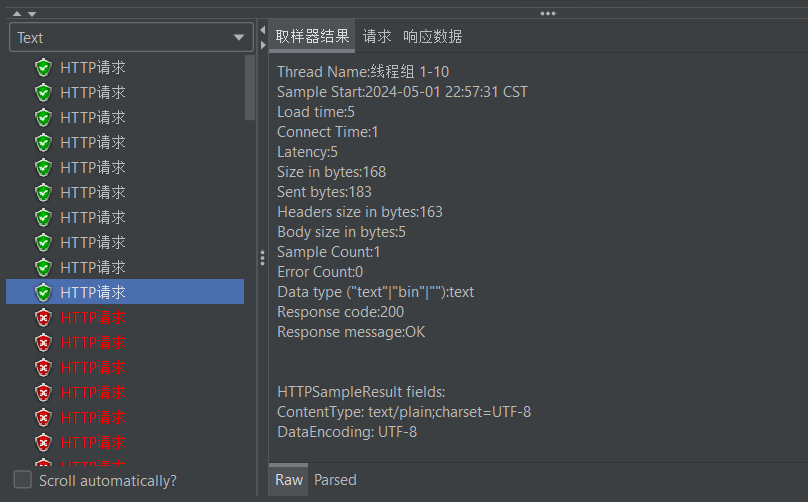
这里的话,网关限流配置是 1 秒 10个请求
jmeter 设置 1 秒 100 个请求,结果树显示只有 10 个请求响应成功,剩下的请求失败


 610
610

 被折叠的 条评论
为什么被折叠?
被折叠的 条评论
为什么被折叠?
 到【灌水乐园】发言


