


这是一个在RedHat7.9中安装Oracle11g的过程展示,之前没有安装成功的朋友,那是因为你还没有看见我这篇文章,本文章超详细,步骤有点多,跟着此过程安装一步一步的走,一定没有问题!RedHat的安装我这就不展示了,本文主要是针对在RedHat上安装Oracle11g。
安装前环境准备:
虚拟机Redhat7.9
下载地址https://developers.redhat.com/products/rhel/download
资料包提取
链接:https://pan.baidu.com/s/1qLskX6HMpArokSKW8f4XuA
提取码:8hcc


链接:https://pan.baidu.com/s/1C589Ru3qeujLQKyrRrnEGg
提取码:a11e
1,首先我们切换到root用户,然后编辑/etc/sysconfig/network文件
su root
vi /etc/sysconfig/network
在该空目录下添加如下内容,保存后退出
NETWORKING=yes
NETWORKING_IPV6=yes
HOSTNAME=rhel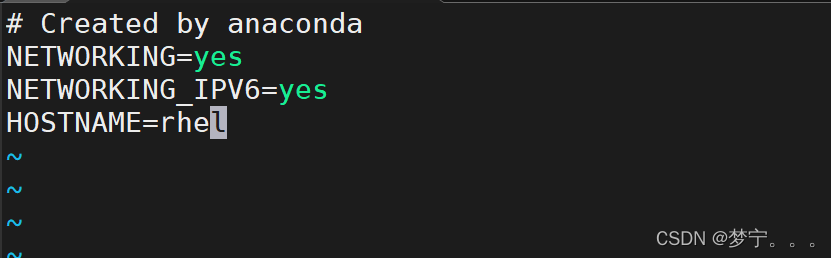
2,关闭防火墙
//临时关闭防火墙,重启后会重新自动打开
systemctl restart firewalld
//检查防火墙状态
firewall-cmd --state
firewall-cmd --list-all
//Disable firewall(永久关闭防火墙)
systemctl stop firewalld.service
systemctl disable firewalld
systemctl stop firewalld
systemctl status firewalld
//Enable firewall(启用防火墙)
systemctl enable firewalld
systemctl start firewalld
systemctl status firewalld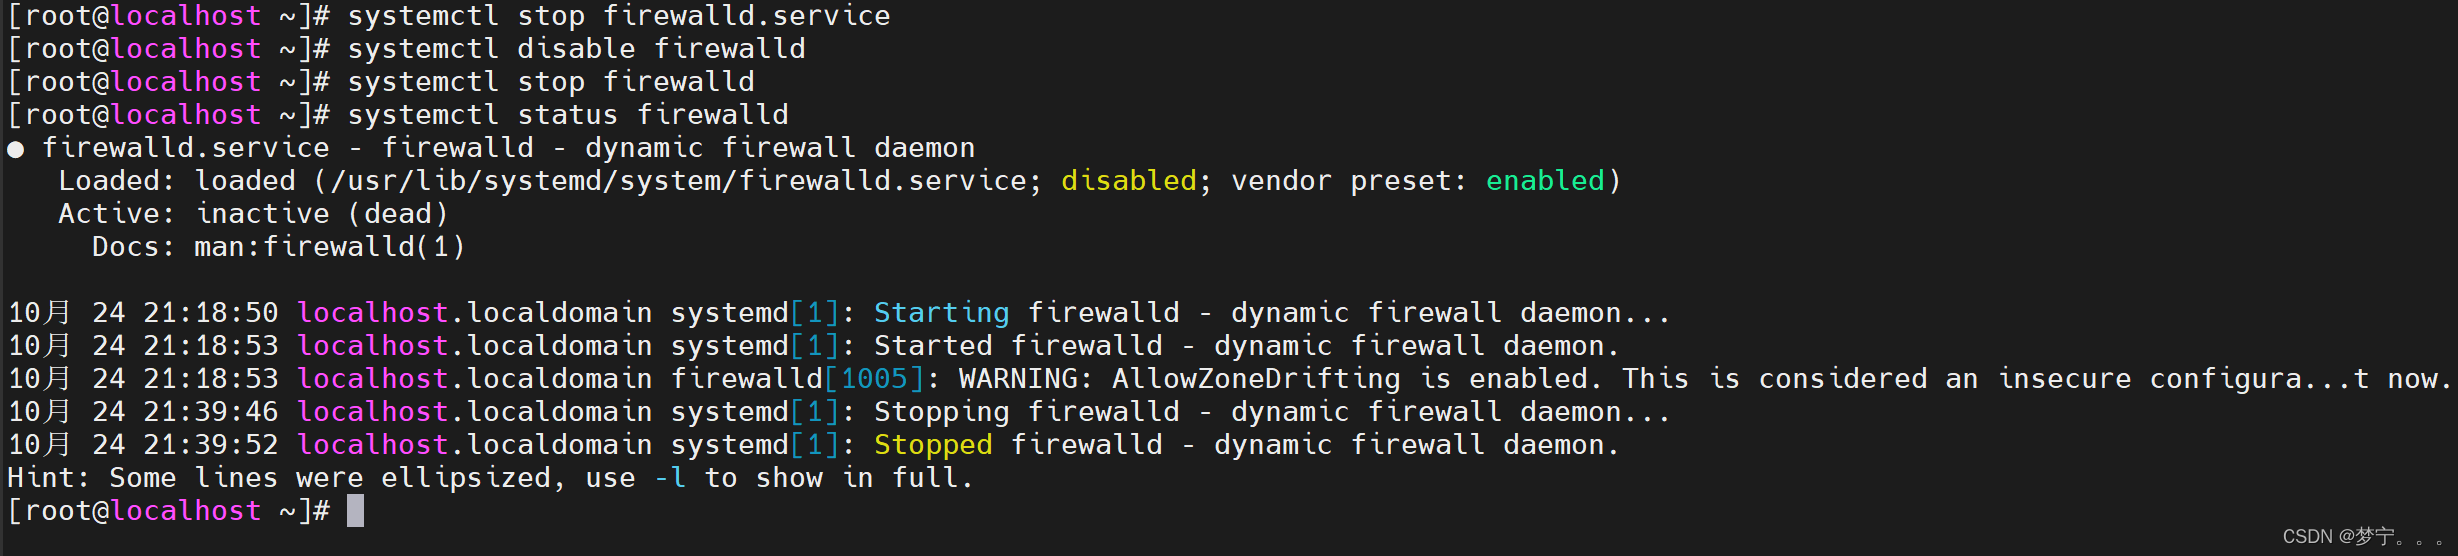
3,yum依赖包的安装
执行下面命令
yum -y install bc binutils elfutils-libelf gcc gcc-c++ glibc glibc.i686 glibc-devel  glibc-devel.i686  ksh libaio libaio-devel libaio-devel.i686 libcap libXrender libX11 libXau libXi libXi.i686 libXtst libXtst.i686 libgcc libgcc.i686  libstdc++ libstdc++.i686 libstdc++-devel libstdc++-devel.i686  libxcb  libibverbs make policycoreutils  smartmontools sysstat
xdpyinfo elfutils-libelf-devel

yum install -y compat-libstdc++-33 elfutils-libelf-devel gcc gcc-c++ glibc-devel

yum install -y ksh libaio-devel numactl-devel

yum install -y unixODBC unixODBC-devel oracleasm oracleasmlib oracleasm-support
会发现会报错。问题:rathat7.9的yum仓库无效
该问题的解决步骤:
(1)首先查看redhat 7.0系统本身所安装的那些yum 软件包
rpm -qa | grep yum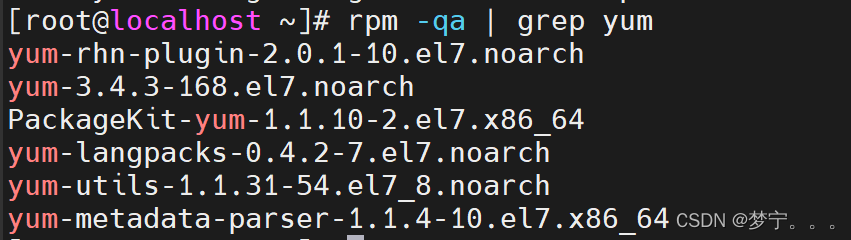
(2)删除redhat自带的包
rpm -qa|grep yum|xargs rpm -e --nodeps
rpm -qa |grep yum
(3)确保能够连网
ping www.baidu.com
(4)我们把我们事先准备好的yum包上传到/root/目录下,然后执行安装
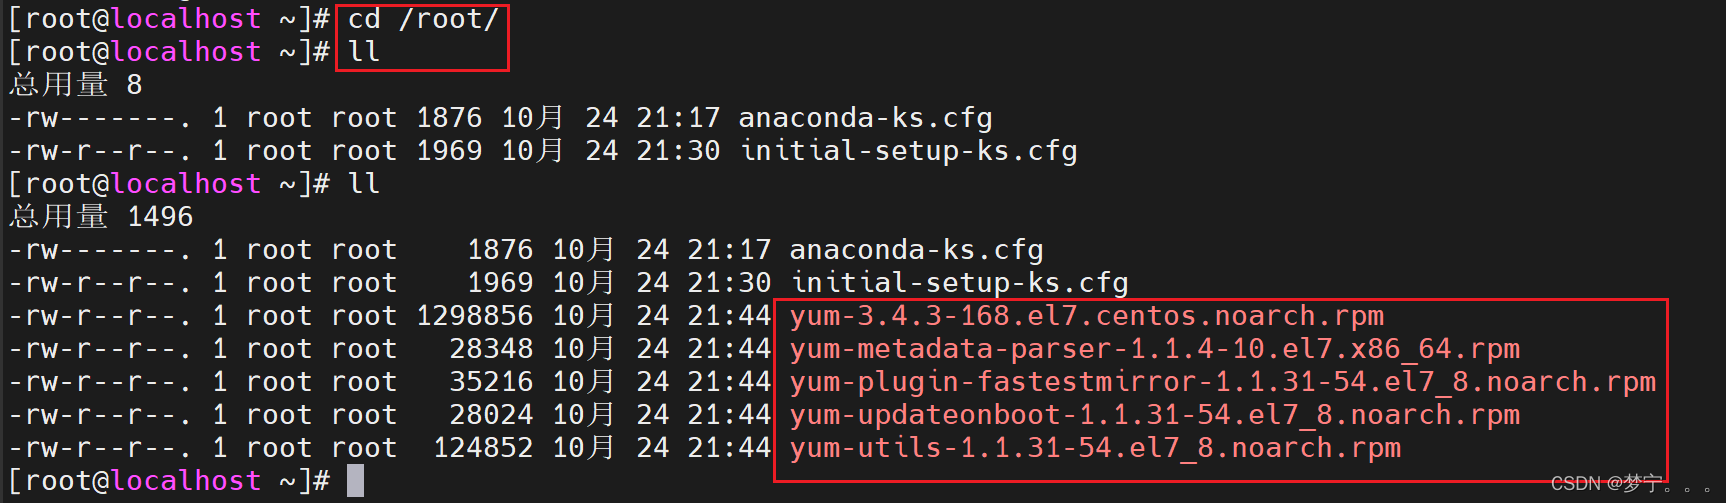
rpm -ivh yum-* --force --nodeps
rpm -ivh python-* --force --nodeps
该代码执行后如果出现安装python包出错的语句,我们不用管它。

(5)下载阿里云镜像包
wget -O /etc/yum.repos.d/CentOS-Base.repo http://mirrors.aliyun.com/repo/Centos-7.repo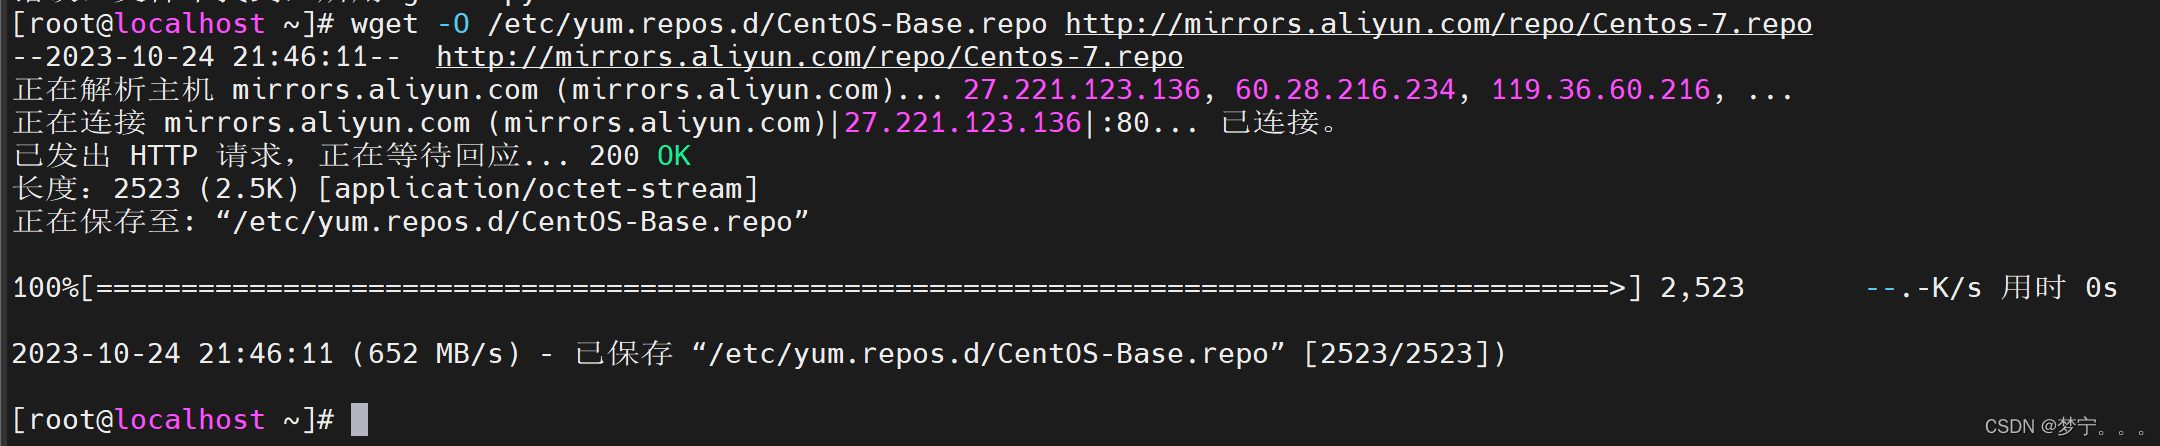
(6)修改上一步下载的文件,全部替换为以下内容
修改文件
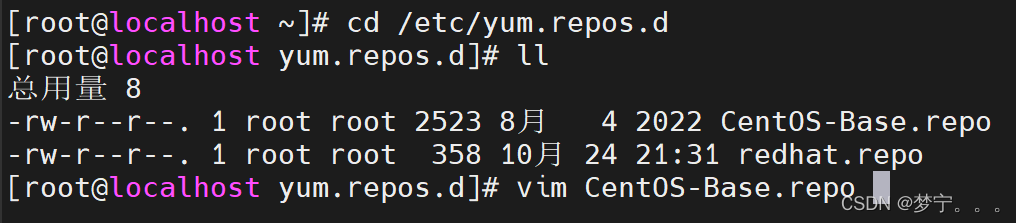
替换为以下内容,然后保存退出
# CentOS-Base.repo
#
# The mirror system uses the connecting IP address of the client and the
# update status of each mirror to pick mirrors that are updated to and
# geographically close to the client.  You should use this for CentOS updates
# unless you are manually picking other mirrors.
#
# If the mirrorlist= does not work for you, as a fall back you can try the
# remarked out baseurl= line instead.
#
#

[base]
name=CentOS-7 - Base - mirrors.aliyun.com
failovermethod=priority
baseurl=http://mirrors.aliyun.com/centos/7/os/$basearch/
        http://mirrors.aliyuncs.com/centos/7/os/$basearch/
        http://mirrors.cloud.aliyuncs.com/centos/7/os/$basearch/
gpgcheck=1
gpgkey=http://mirrors.aliyun.com/centos/RPM-GPG-KEY-CentOS-7

#released updates
[updates]
name=CentOS-7 - Updates - mirrors.aliyun.com
failovermethod=priority
baseurl=http://mirrors.aliyun.com/centos/7/updates/$basearch/
        http://mirrors.aliyuncs.com/centos/7/updates/$basearch/
        http://mirrors.cloud.aliyuncs.com/centos/7/updates/$basearch/
gpgcheck=1
gpgkey=http://mirrors.aliyun.com/centos/RPM-GPG-KEY-CentOS-7

#additional packages that may be useful
[extras]
name=CentOS-7 - Extras - mirrors.aliyun.com
failovermethod=priority
baseurl=http://mirrors.aliyun.com/centos/7/extras/$basearch/
        http://mirrors.aliyuncs.com/centos/7/extras/$basearch/
        http://mirrors.cloud.aliyuncs.com/centos/7/extras/$basearch/
gpgcheck=1
gpgkey=http://mirrors.aliyun.com/centos/RPM-GPG-KEY-CentOS-7

#additional packages that extend functionality of existing packages
[centosplus]
name=CentOS-7 - Plus - mirrors.aliyun.com
failovermethod=priority
baseurl=http://mirrors.aliyun.com/centos/7/centosplus/$basearch/
        http://mirrors.aliyuncs.com/centos/7/centosplus/$basearch/
        http://mirrors.cloud.aliyuncs.com/centos/7/centosplus/$basearch/
gpgcheck=1
enabled=0
gpgkey=http://mirrors.aliyun.com/centos/RPM-GPG-KEY-CentOS-7

#contrib - packages by Centos Users
[contrib]
name=CentOS-7 - Contrib - mirrors.aliyun.com
failovermethod=priority
baseurl=http://mirrors.aliyun.com/centos/7/contrib/$basearch/
        http://mirrors.aliyuncs.com/centos/7/contrib/$basearch/
        http://mirrors.cloud.aliyuncs.com/centos/7/contrib/$basearch/
gpgcheck=1
enabled=0
gpgkey=http://mirrors.aliyun.com/centos/RPM-GPG-KEY-CentOS-7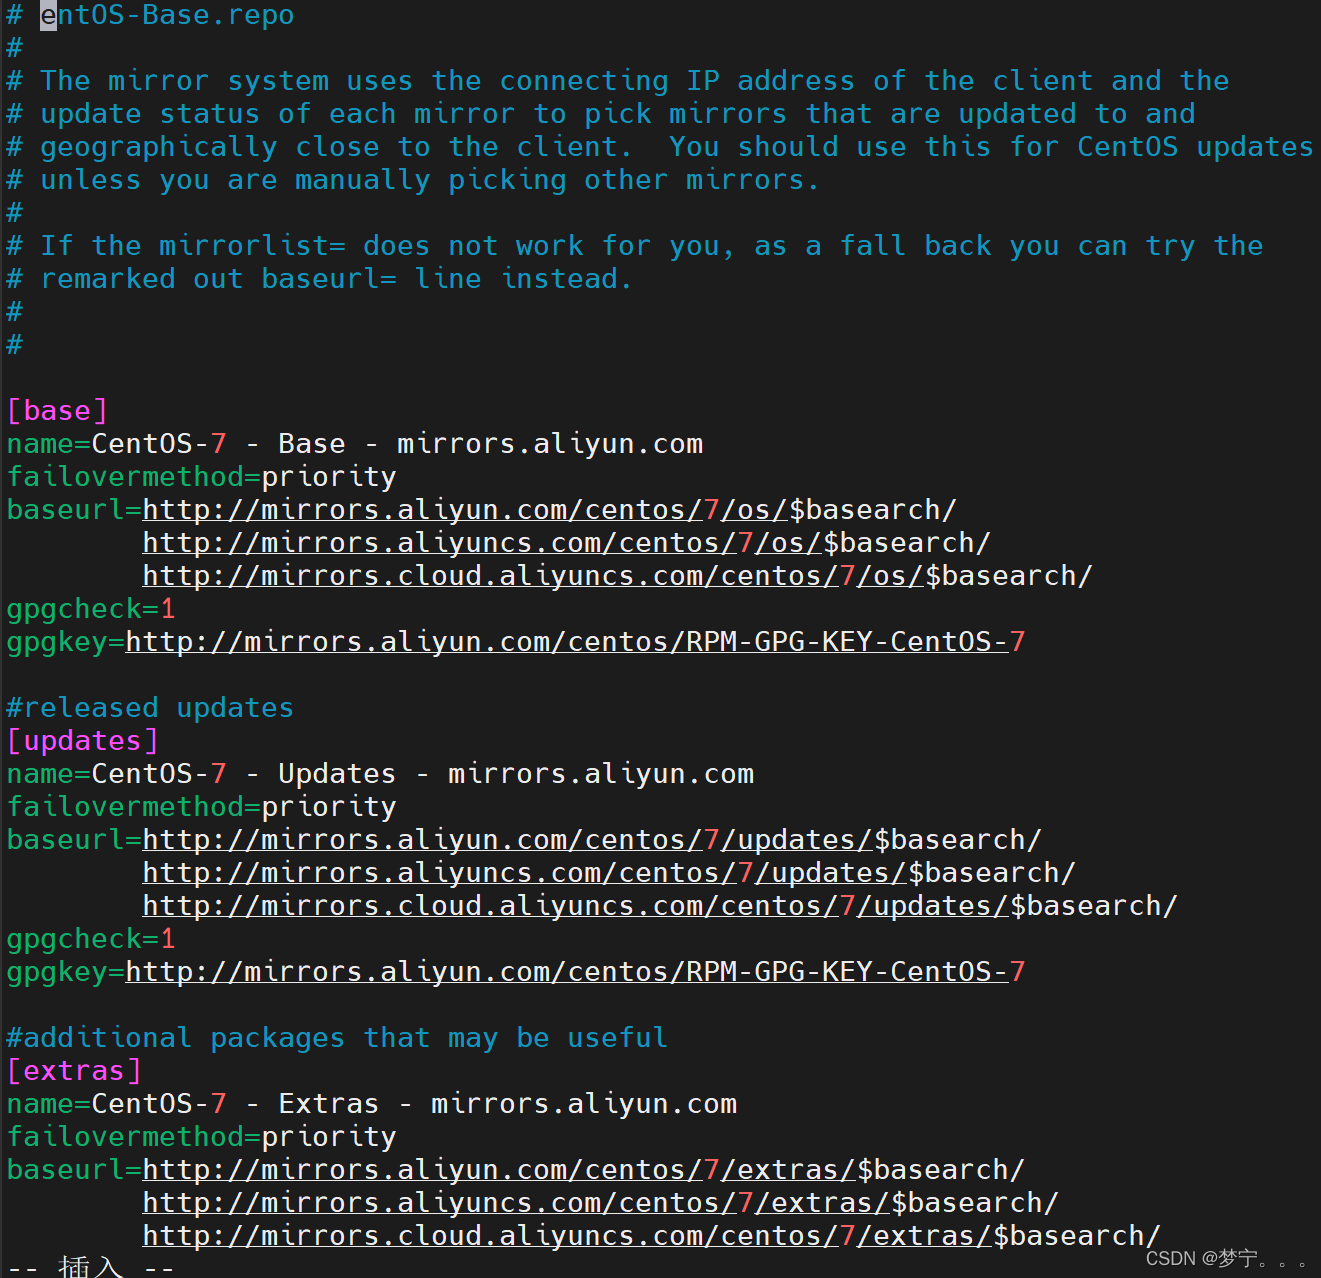
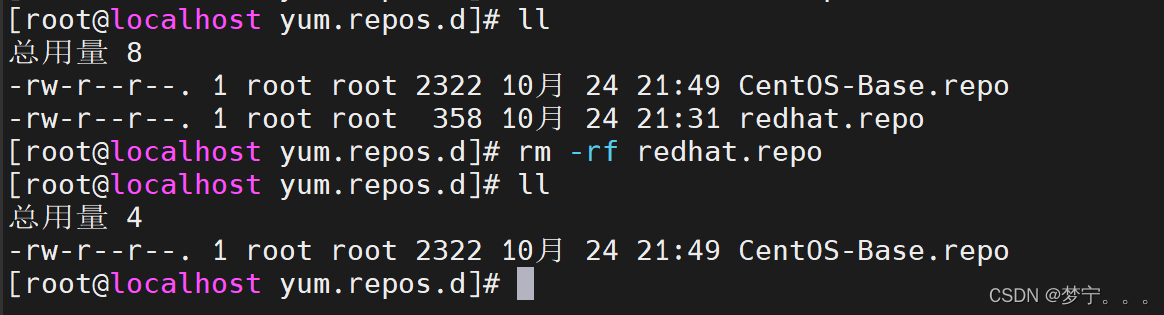
(7)删除该目录下的原本文件,只剩下创建的新文件
清理缓存并测试
yum clean all
yum makecache
yum update
然后再重新执行这四个命令,每个命令都要执行,不要漏了。
yum -y install bc binutils elfutils-libelf gcc gcc-c++ glibc glibc.i686 glibc-devel  glibc-devel.i686  ksh libaio libaio-devel libaio-devel.i686 libcap libXrender libX11 libXau libXi libXi.i686 libXtst libXtst.i686 libgcc libgcc.i686  libstdc++ libstdc++.i686 libstdc++-devel libstdc++-devel.i686  libxcb  libibverbs make policycoreutils  smartmontools sysstat xdpyinfo elfutils-libelf-devel

yum install -y compat-libstdc++-33 elfutils-libelf-devel gcc gcc-c++ glibc-devel

yum install -y ksh libaio-devel numactl-devel

yum install -y unixODBC unixODBC-devel oracleasm oracleasmlib oracleasm-support
4,编辑端口范围,并使其生效
vim /etc/sysctl.conf
//添加以下内容
net.ipv4.ip_local_port_range = 9000 65500
//保存退出后使其生效
sysctl -p /etc/sysctl.conf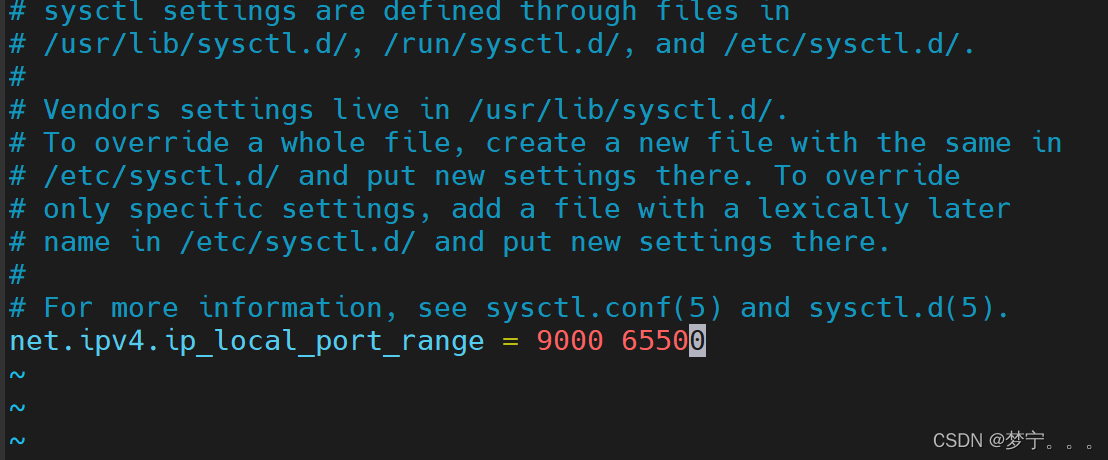

5,配置/etc/hosts文件,这是为了主机名可以解析到地址
grep 127.0.0.1 /etc/hosts
6,创建用户和组,输入自己即将为用户设定的密码
groupadd oinstall
groupadd dba
useradd -g oinstall -G dba oracle
passwd oracle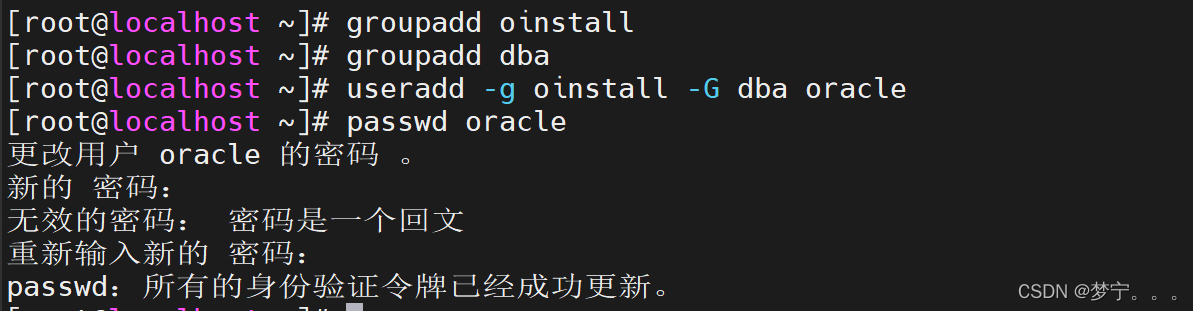
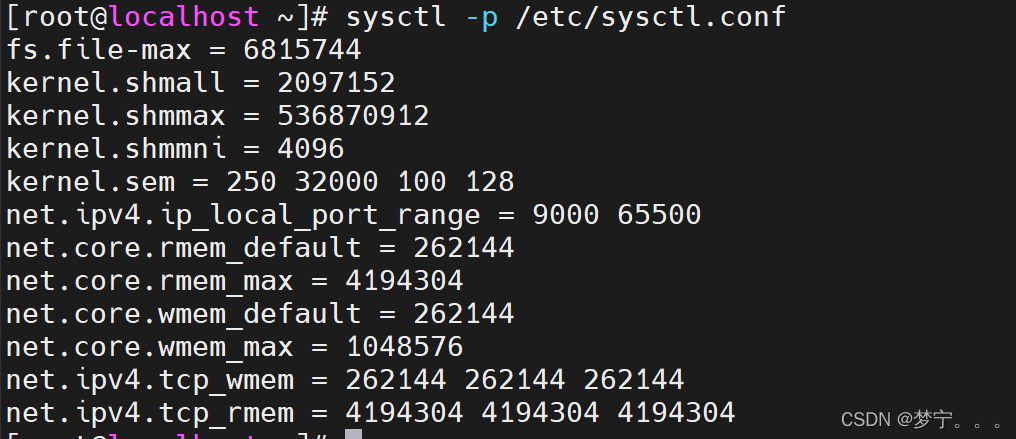
7,配置内核参数(root用户),修改文件,添加以下内容,要覆盖原有的内容!!!然后保存退出,使用生效命令。
vim /etc/sysctl.conffs.file-max = 6815744
kernel.shmall = 2097152
kernel.shmmax = 536870912
kernel.shmmni = 4096
kernel.sem = 250 32000 100 128
net.ipv4.ip_local_port_range = 9000 65500
net.core.rmem_default = 262144
net.core.rmem_max = 4194304
net.core.wmem_default = 262144
net.core.wmem_max = 1048576
net.ipv4.tcp_wmem = 262144 262144 262144
net.ipv4.tcp_rmem = 4194304 4194304 4194304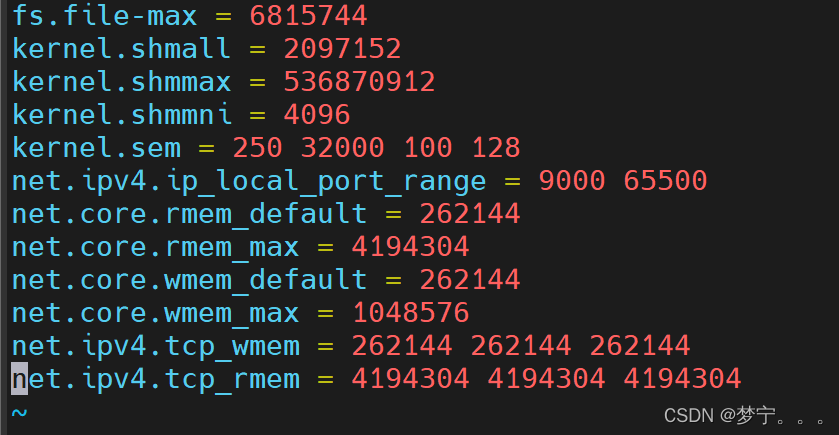
使用生效命令生效
8,创建Oracle的安装目录
mkdir -p /u01/app/
chown -R oracle:oinstall /u01/app/
chmod -R 775 /u01/app/
vim /etc/security/limits.conf添加以下内容后保存退出,并重启使其生效
oracle          soft    nproc           2047
oracle          hard    nproc           16384
oracle          soft    nofile          1024
oracle          hard    nofile          65536
oracle          soft    stack           10240
oracle          hard    stack           32768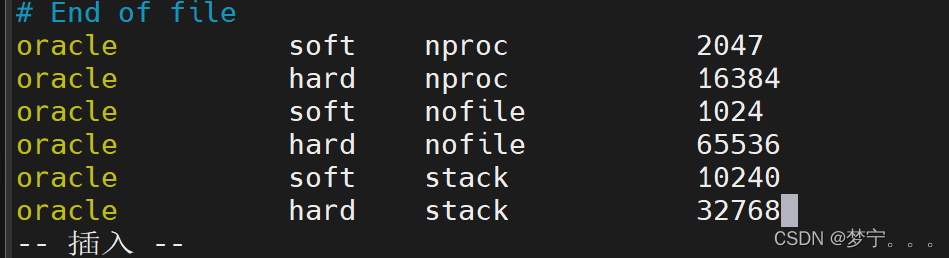
9,配置linux内核参数
vim /etc/sysctl.conf插入以下内容,不要覆盖掉原来的内容!!!保存退出
# ============================
# Oracle 11g
# ============================
# semaphores: semmsl, semmns, semopm, semmni
kernel.sem = 250 32000 100 128
kernel.shmall = 2097152
kernel.shmmni = 4096
# Replace kernel.shmmax with the half of your memory size in bytes
# if lower than 4 GB minus 1
# 6442450944 is 6 GigaBytes (12 GB of RAM / 2)
kernel.shmmax=6442450944
# Max number of network connections. Use sysctl -a | grep ip_local_port_range to check.
net.ipv4.ip_local_port_range = 9000  65500
net.core.rmem_default = 262144
net.core.rmem_max = 4194304
net.core.wmem_default = 262144
net.core.wmem_max = 1048576
# The maximum allowed value, set to avoid overhead and input/output errors
fs.aio-max-nr = 1048576
# 512 * Processes
fs.file-max = 6815744
fs.suid_dumpable = 1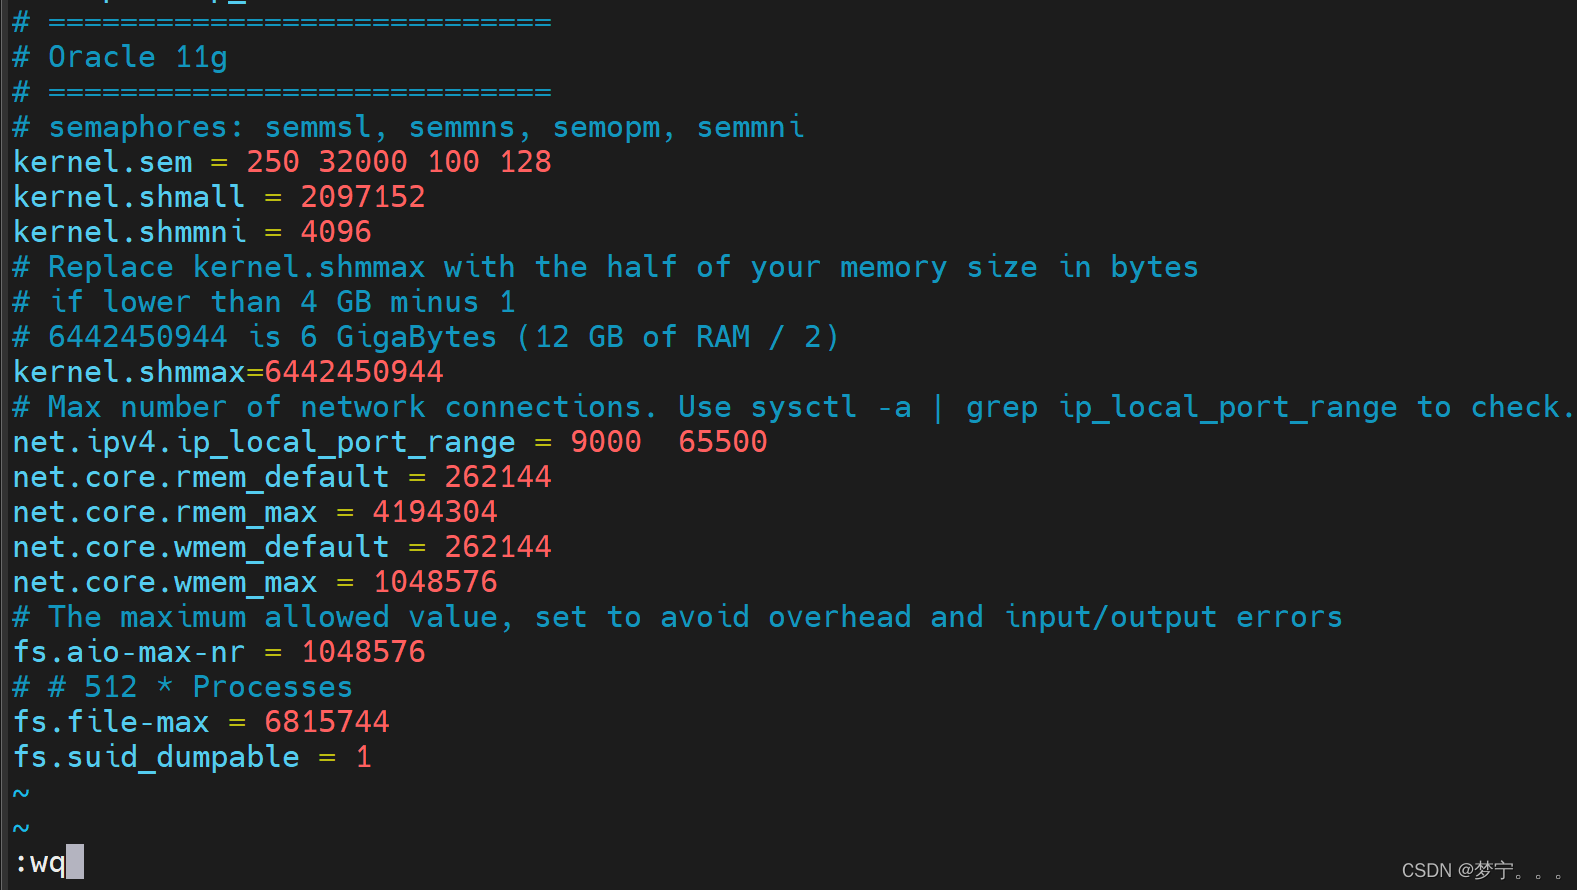
使配置生效
sysctl -p /etc/sysctl.conf
10,设置shell配置文件
vim /etc/profile添加以下内容,保存退出
if [ $USER = "oracle" ]; then
    if [ $SHELL = "/bin/ksh" ]; then
        ulimit -p 16384
        ulimit -n 65536
    else
        ulimit -u 16384 -n 65536
    fi
fi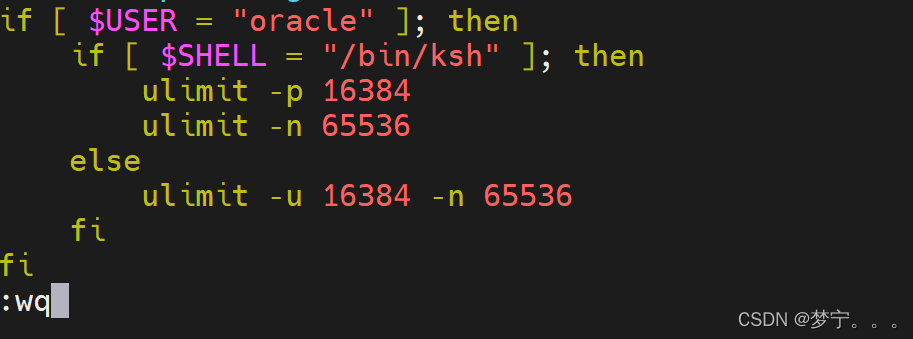
使生效
source /etc/profile11,配置Oracle软件所有者环境
su - oracle
vi  ~/.bashrc
vim /home/oracle/.bash_profile
两个都要插入以下代码,不要覆盖原有的内容。
PATH=$PATH:$HOME/.local/bin:$HOME/bin
export PATH
#For Oracle
export DISPLAY=:0.0
export TMP=/tmp;
export TMPDIR=$TMP;
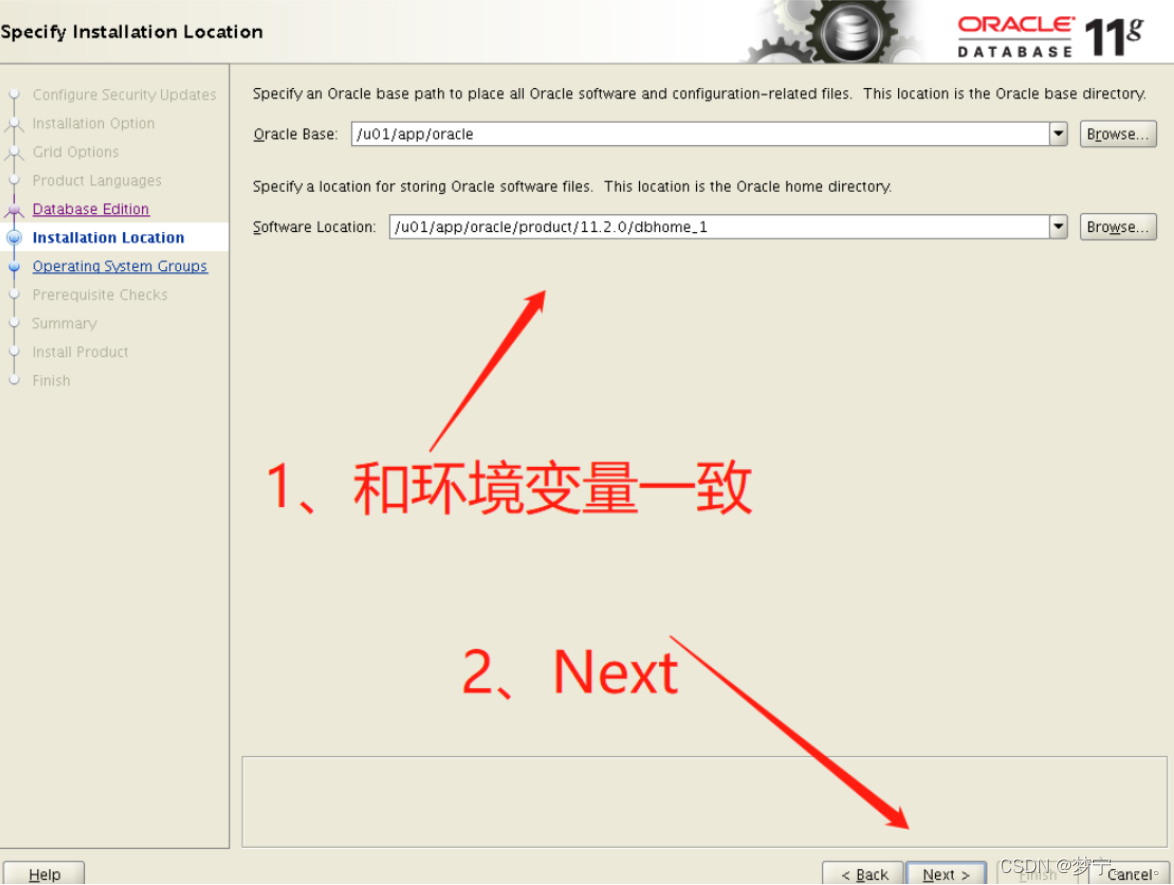
export ORACLE_BASE=/u01/app/oracle;
export ORACLE_HOME=$ORACLE_BASE/product/11.2.0/dbhome_1;
export ORACLE_SID=orcl;
export ORACLE_TERM=xterm;
export PATH=/usr/sbin:$PATH;
export PATH=$ORACLE_HOME/bin:$PATH;
export LD_LIBRARY_PATH=$ORACLE_HOME/lib:/lib:/usr/lib;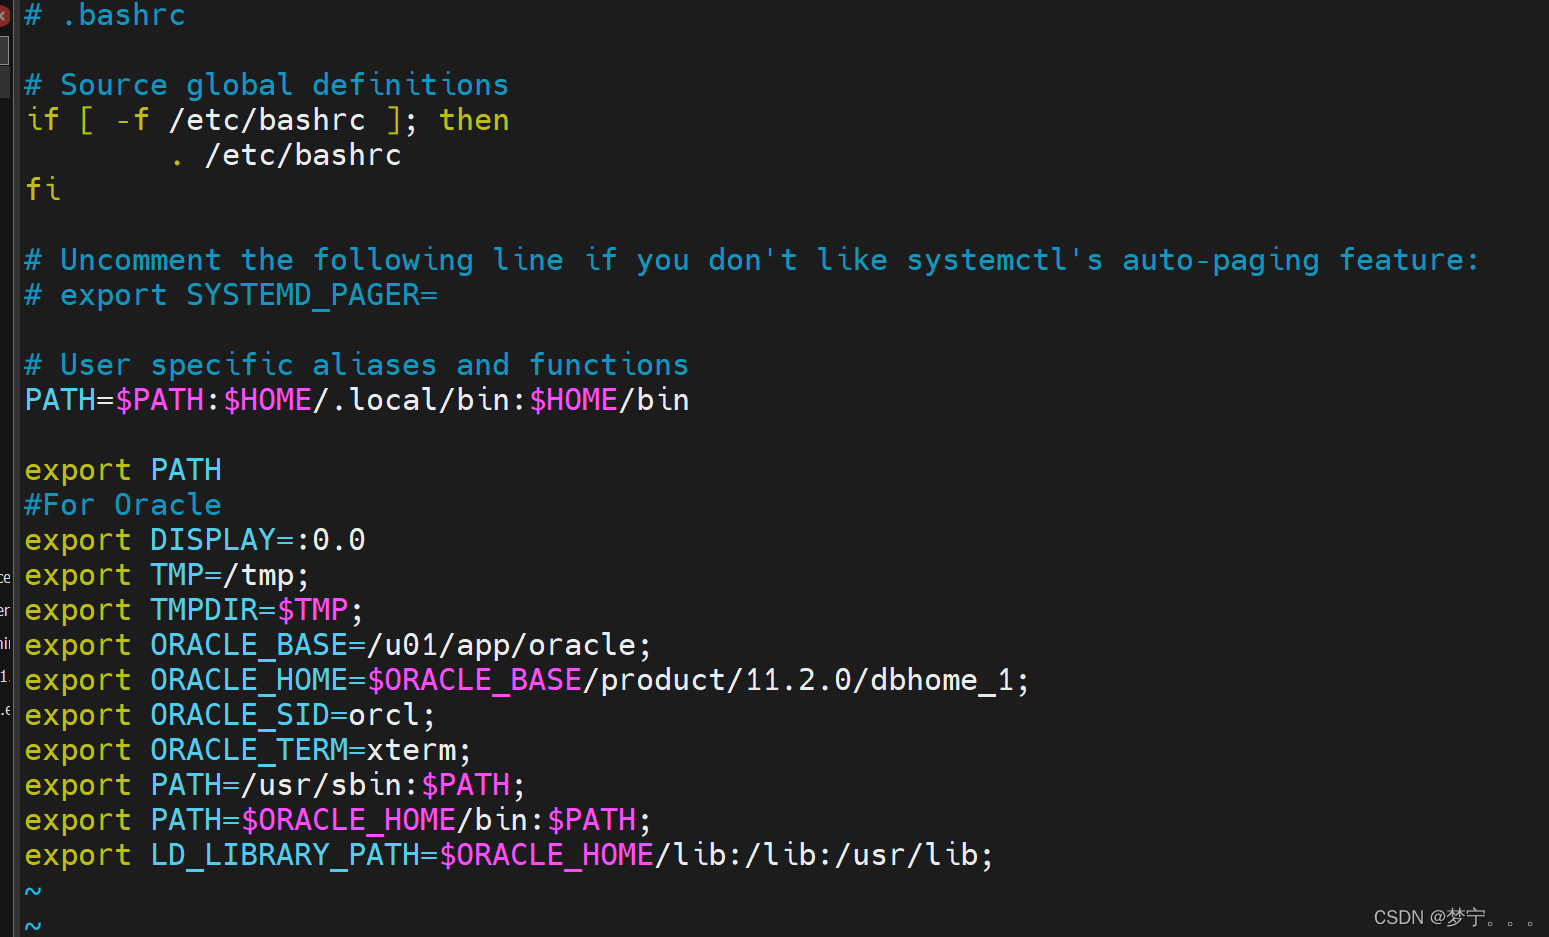
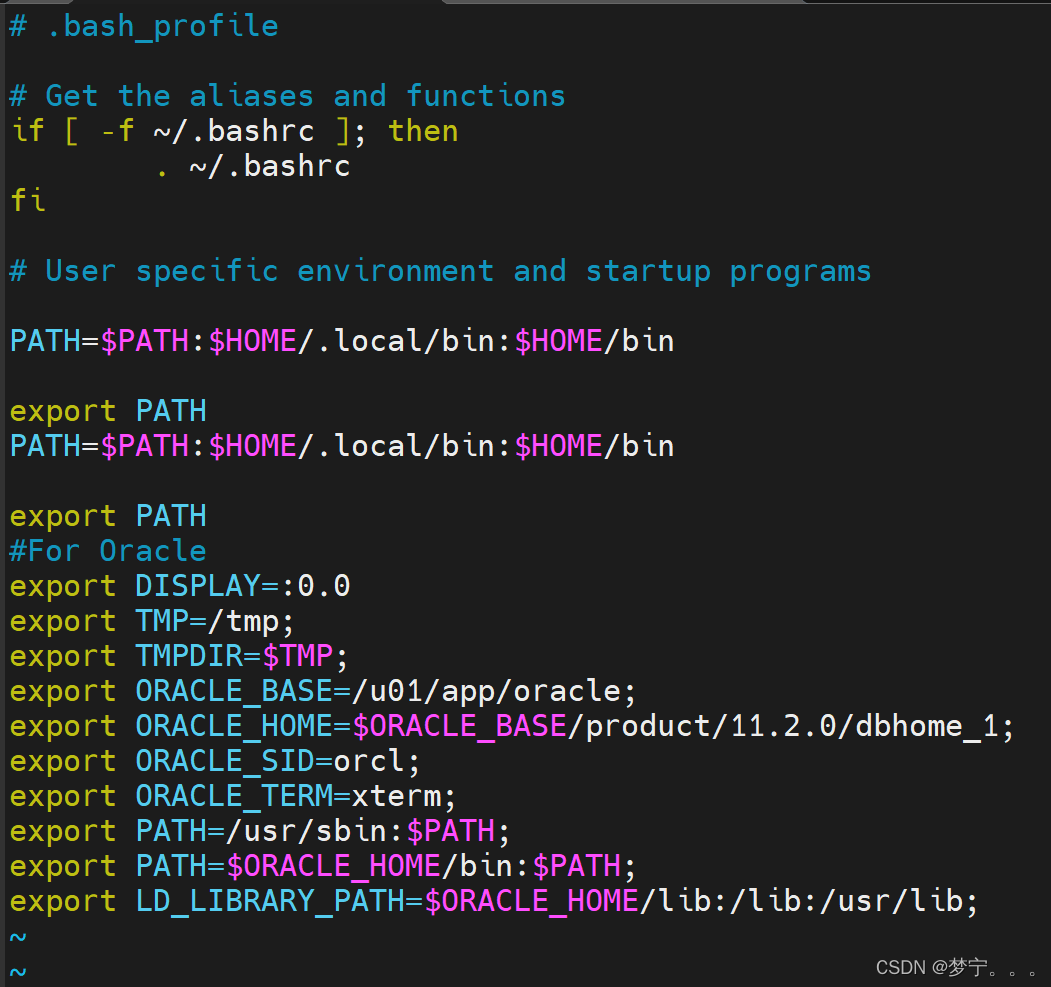
使其生效
source ~/.bashrc12,接下来就是安装了,上传Oracle文件到目录/home/oracle,并进行解压
unzip linux.x64_11gR2_database_1of2
unzip linux.x64_11gR2_database_2of2
解压后有一个database文件夹,我们进去,并回到redhat界面的该路径下的oracle用户执行runinstall(此时不是远程连接界面!!!)


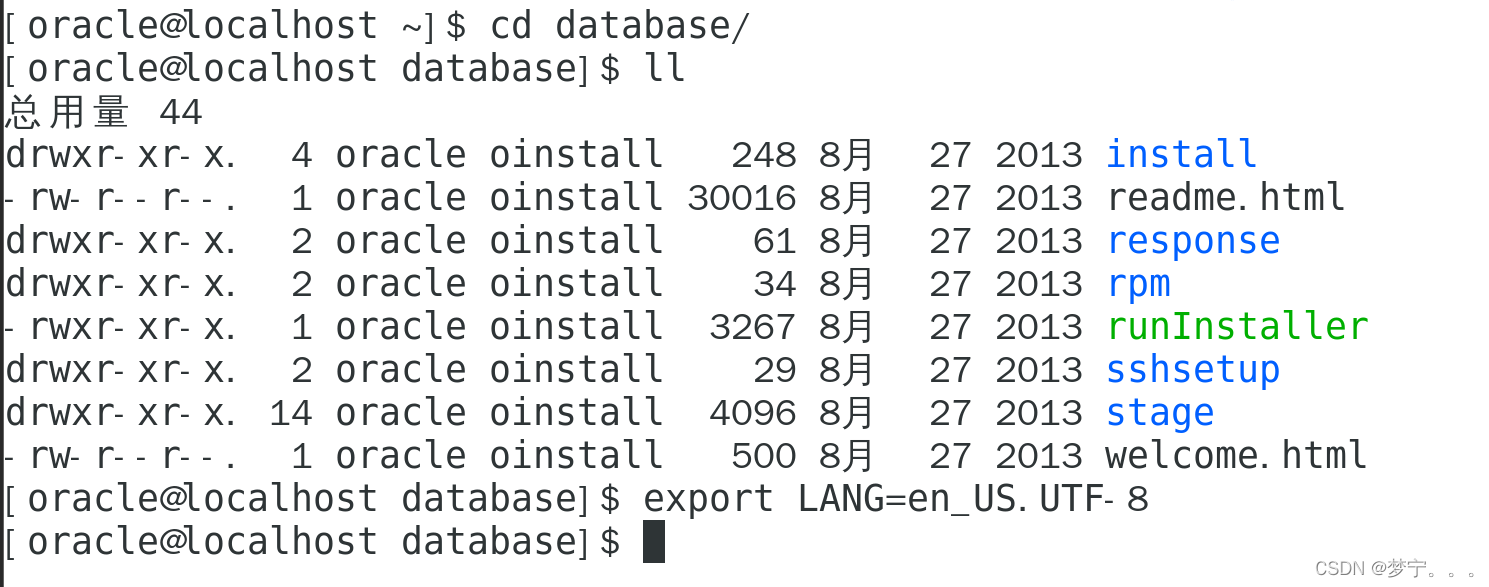
执行过程中安装界面可能还有乱码,我们事先执行export LANG=en_US.UTF-8 或切换系统语言为EN
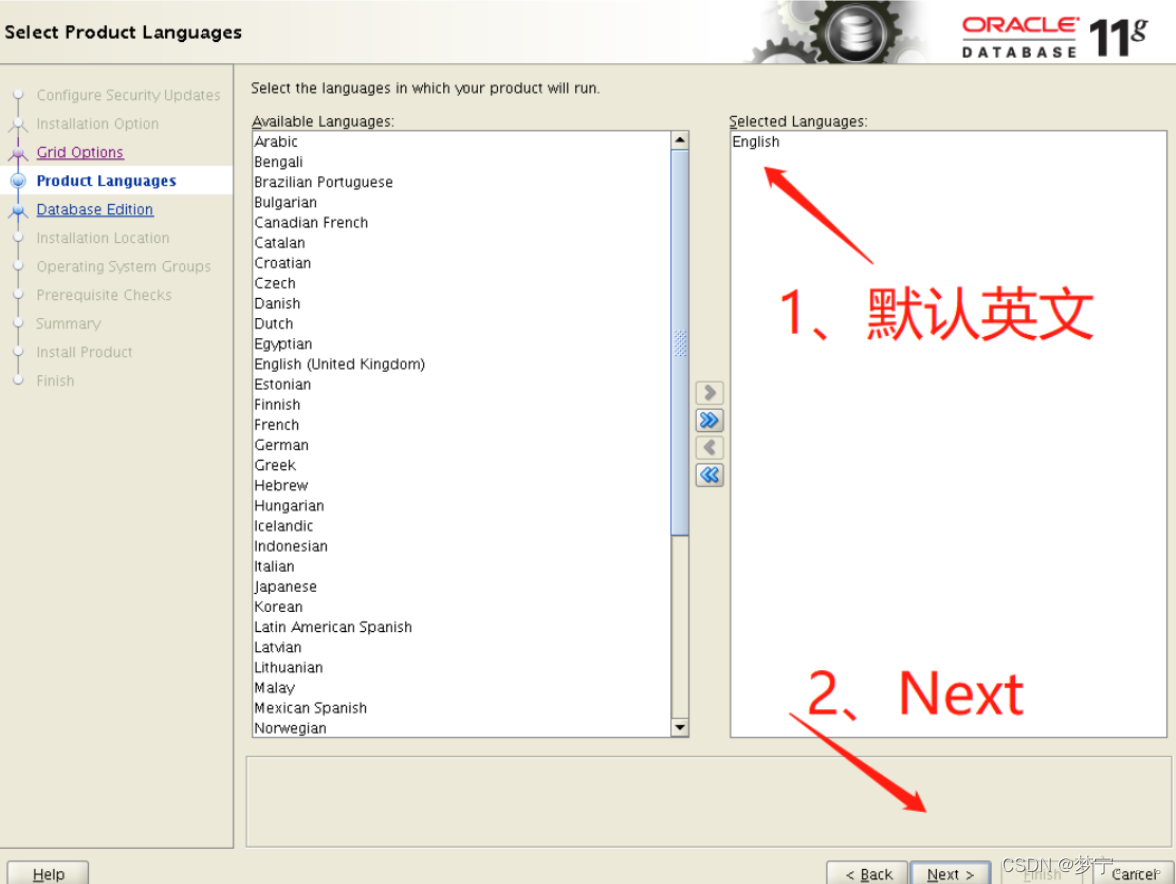
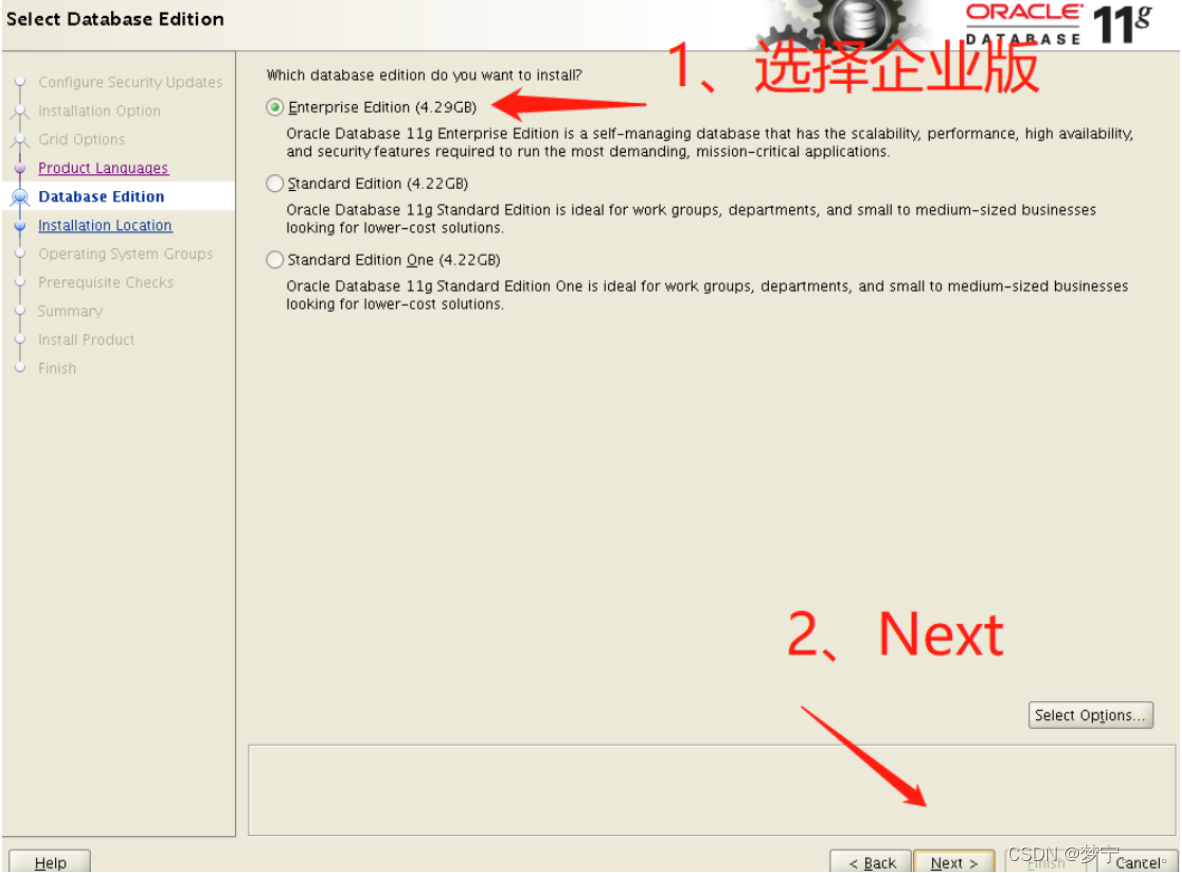
然后就会弹出安装界面,该安装界面不会在远程登录那出现,然后一步步按照一下来执行
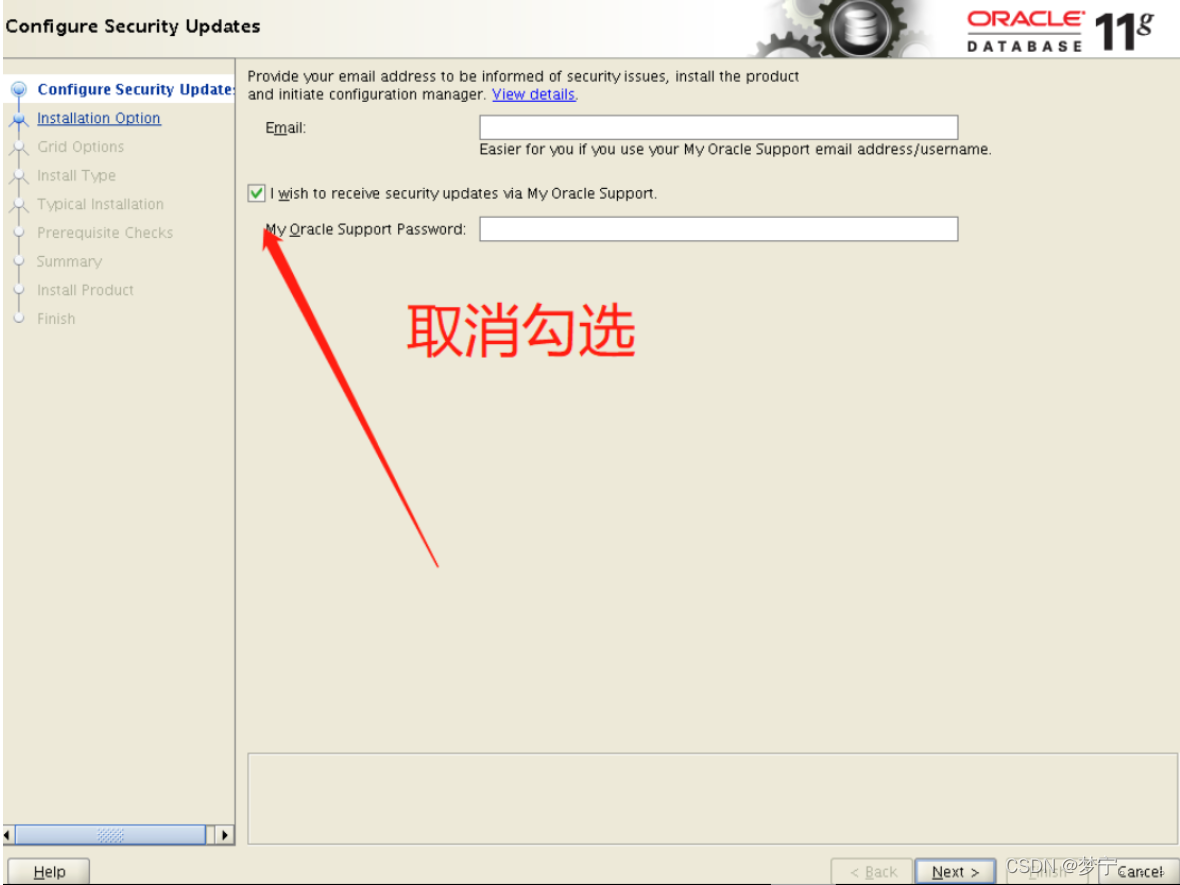
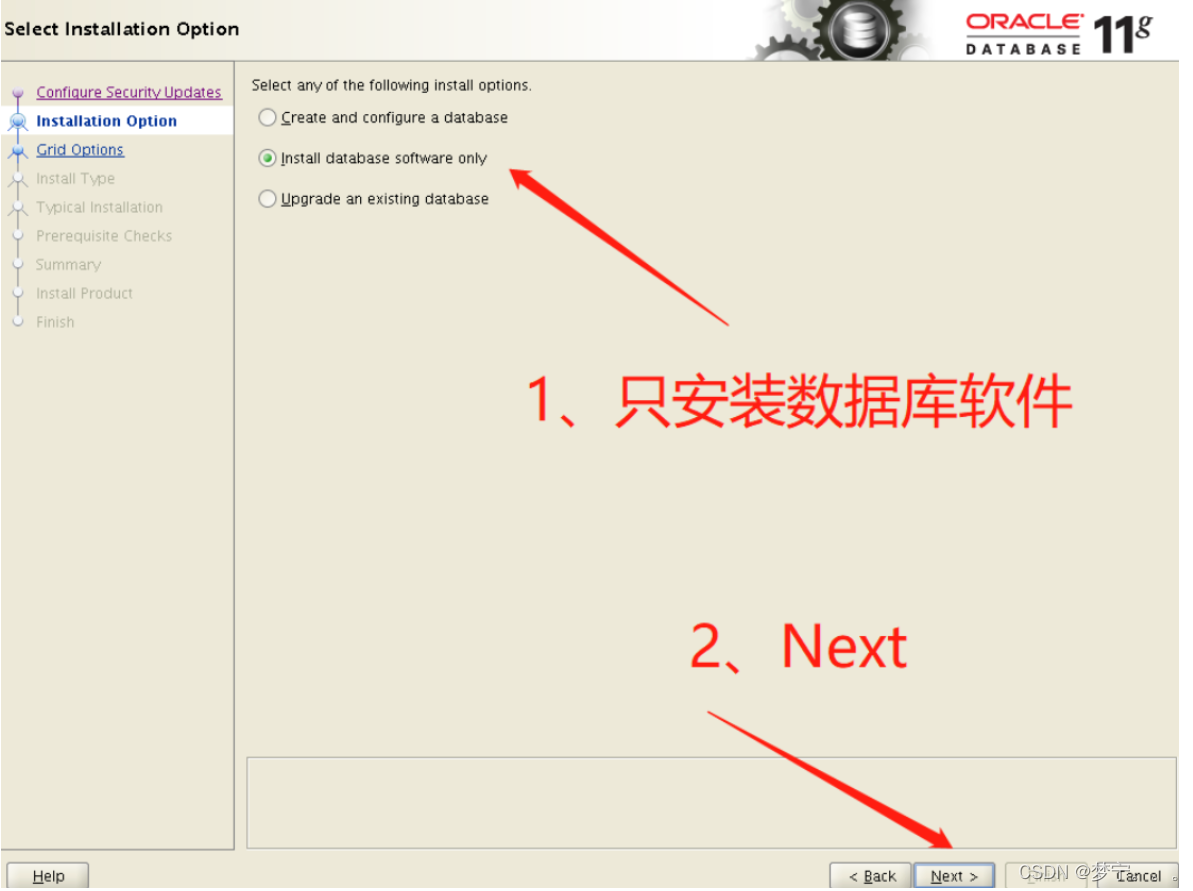
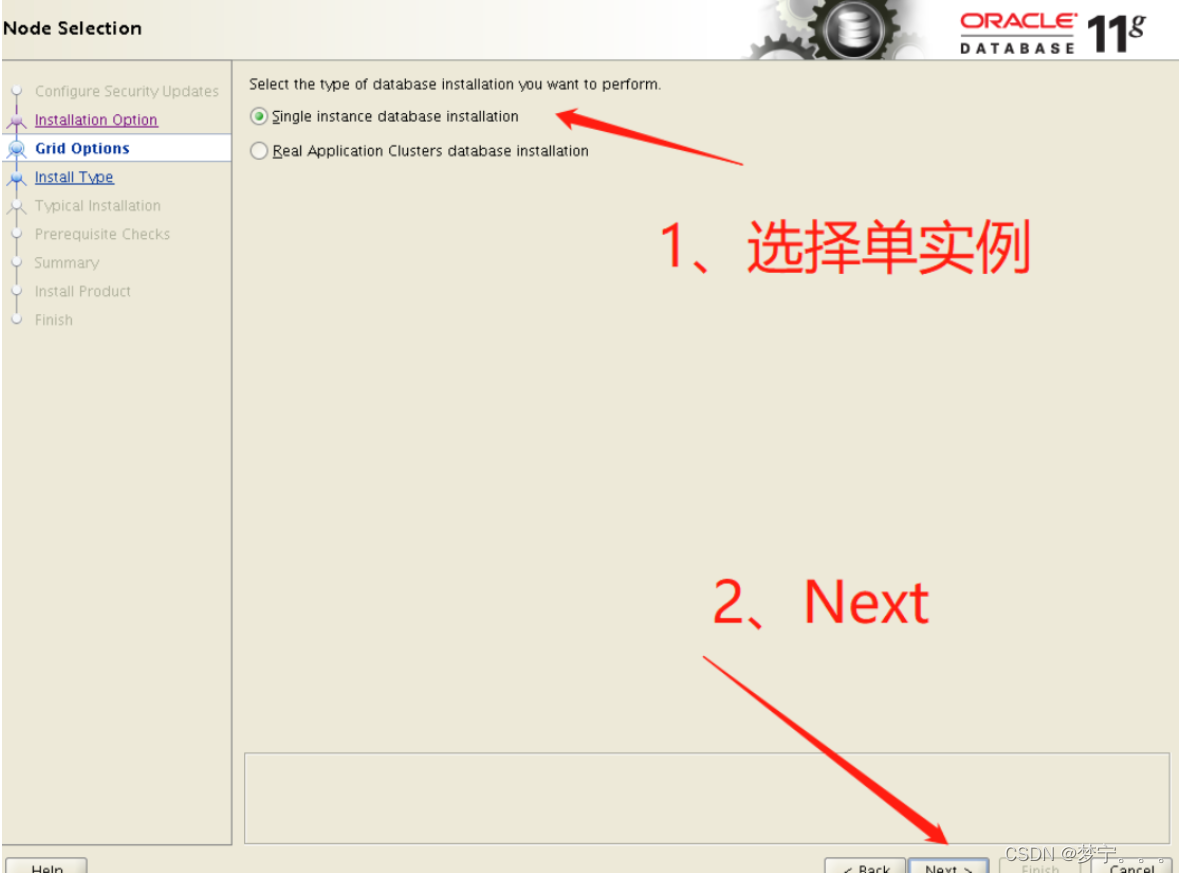
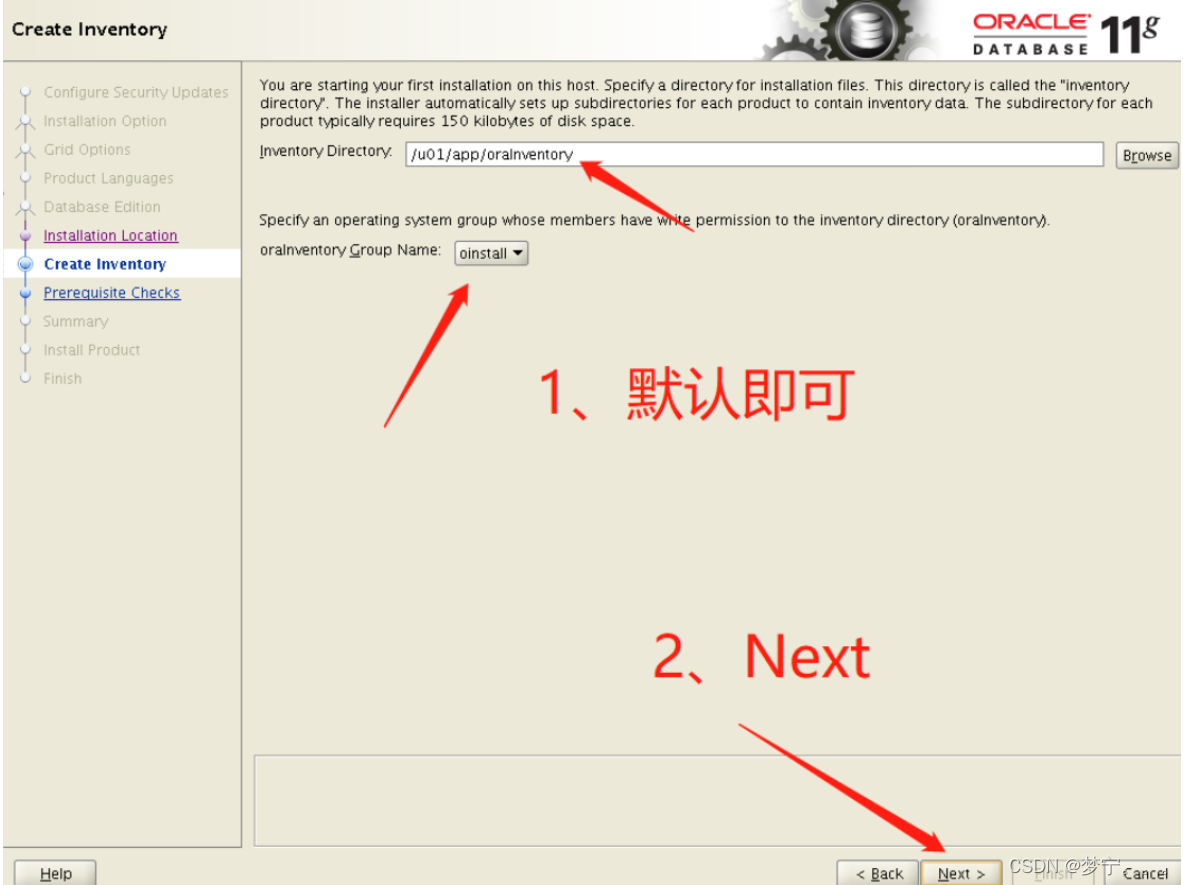

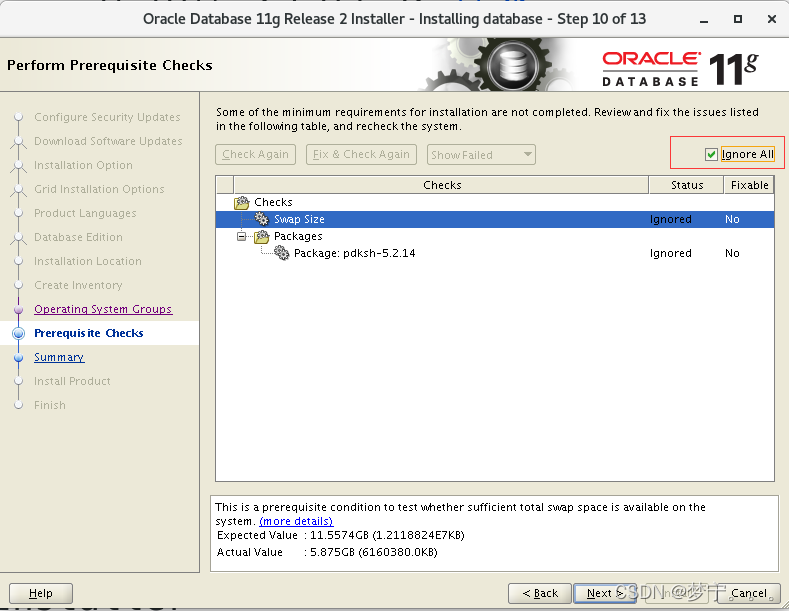
这一步如果出现加载不出来卡顿的情况 使用方向键 ↑ + 空格 跳过

勾选ignoreAll忽视
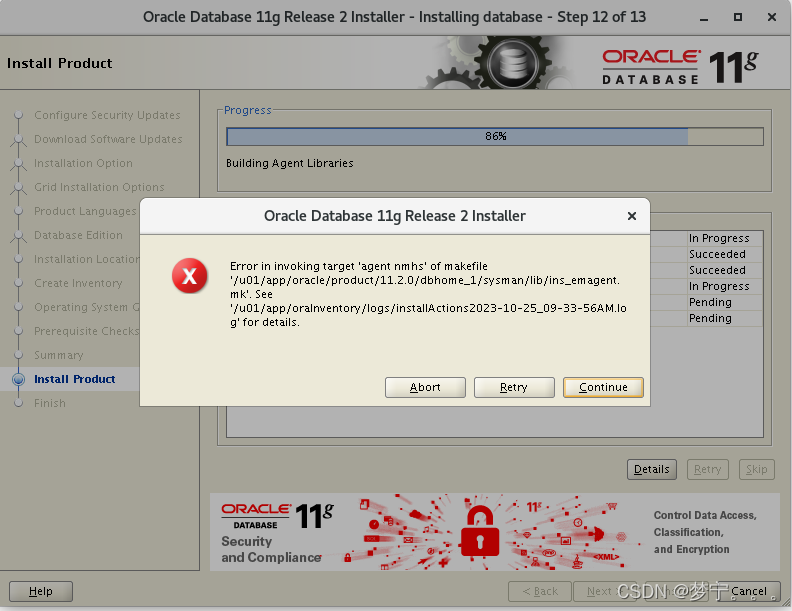
此时此刻遇到了这个错误,打开另一个端口,在makefile中添加链接libnnz11库的参数,修改$ORACLE_HOME/sysman/lib/ins_emagent.mk,
找到下面这行
$(MK_EMAGENT_NMECTL)修改为:
$(MK_EMAGENT_NMECTL) -lnnz11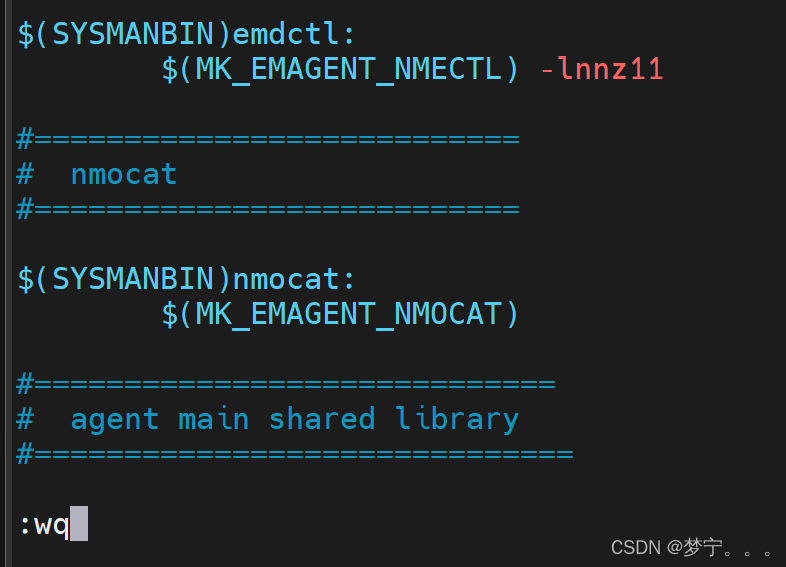
进入vi编辑器后 命令模式输入/NMECTL 进行查找,快速定位要修改的行。在后面追加参数-lnnz11, 第一个是字母l,后面两个是数字1。
保存退出后点击Retry。

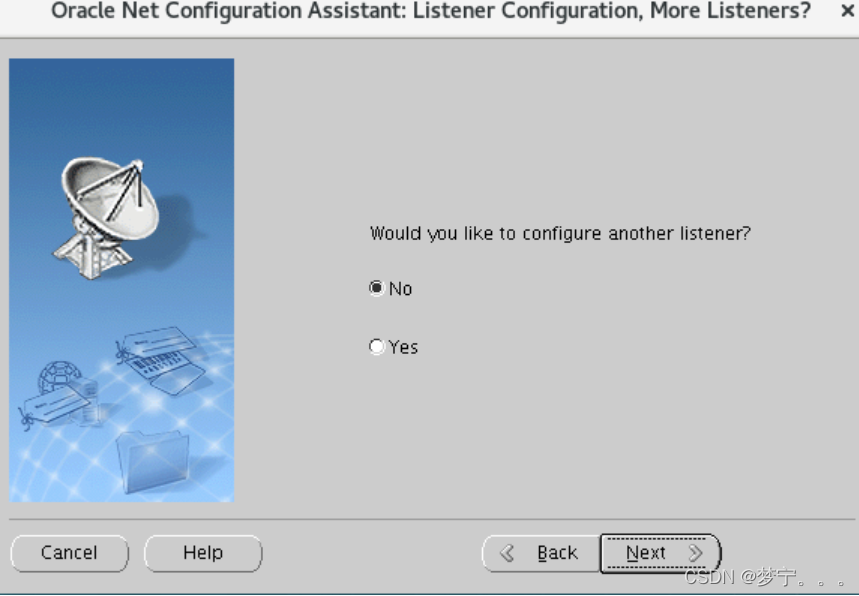
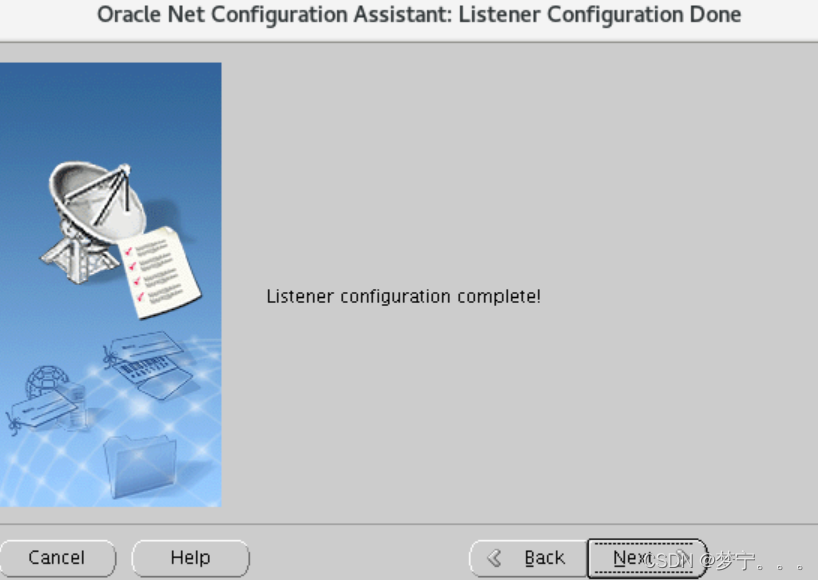
ok之后close就成功啦。下面我们开始创建监听
13,同样是在redhat界面下,而不是在远程登录界面
切换到oracle用户 su - oracle
执行监听命令netca
此时此刻会弹出设置界面
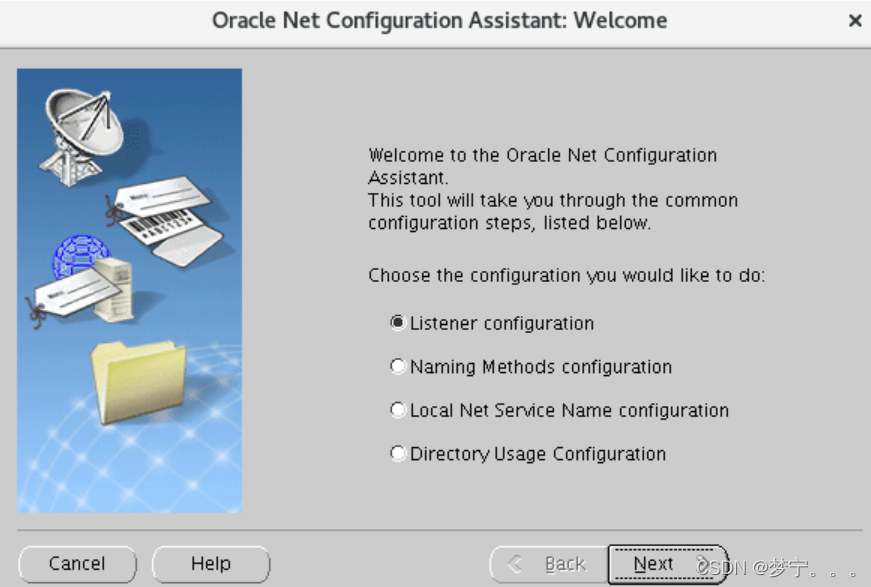
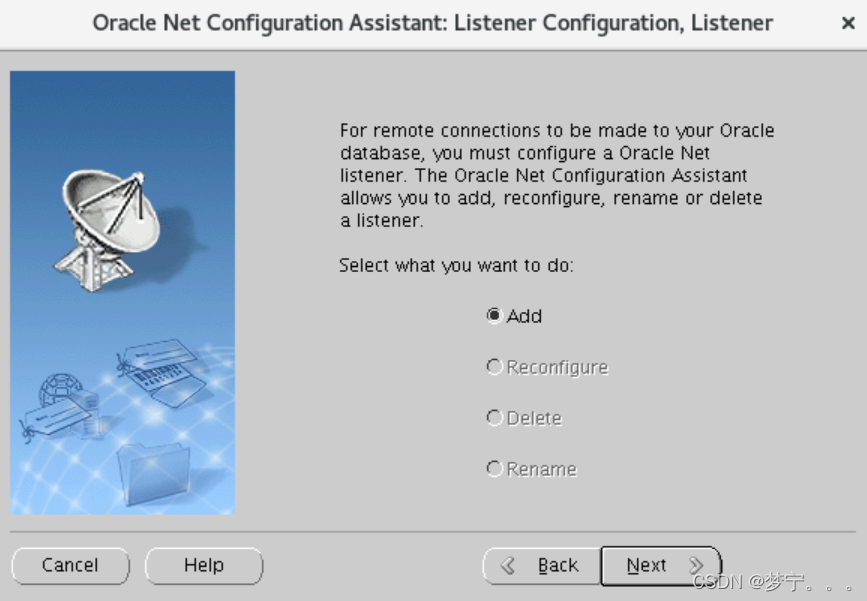
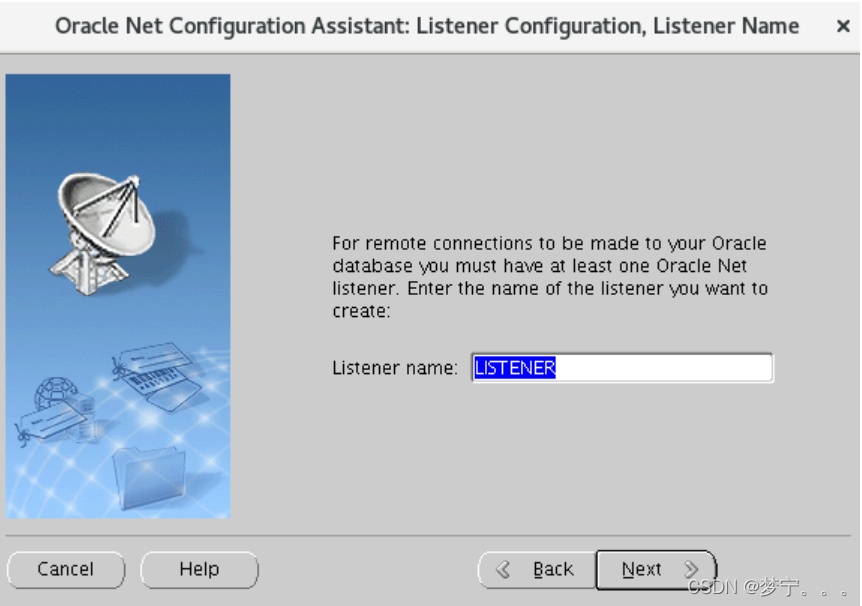

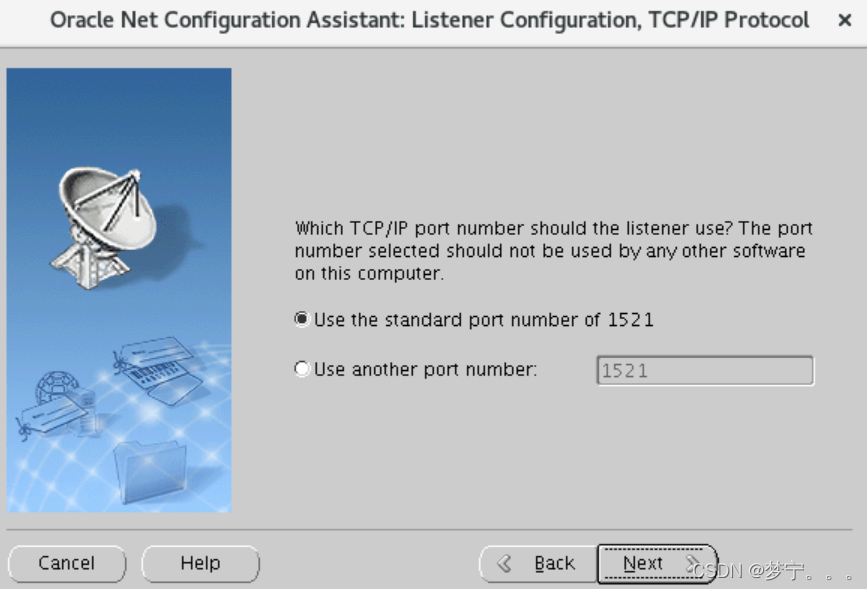
监听相关命令
开启监听
lsnrctl start查看监听状态
lsnrctl status停止监听
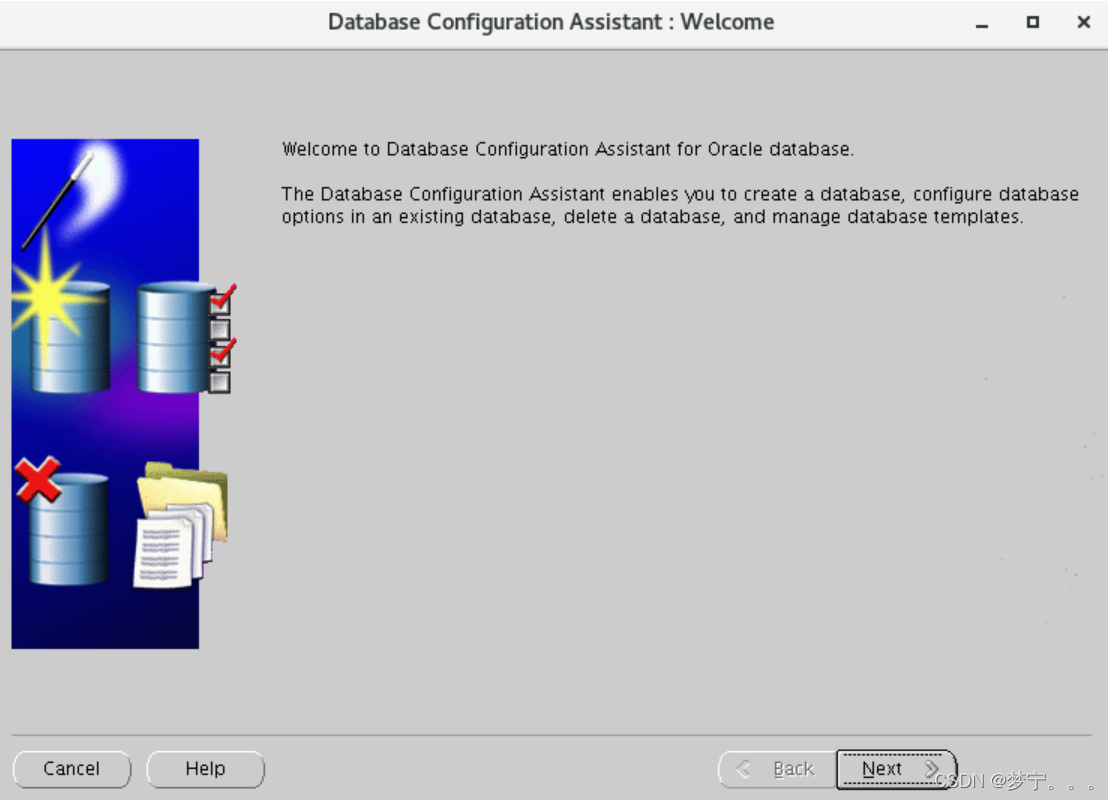
lsnrctl stop接下来就是最后一步,使用dbca建立数据库
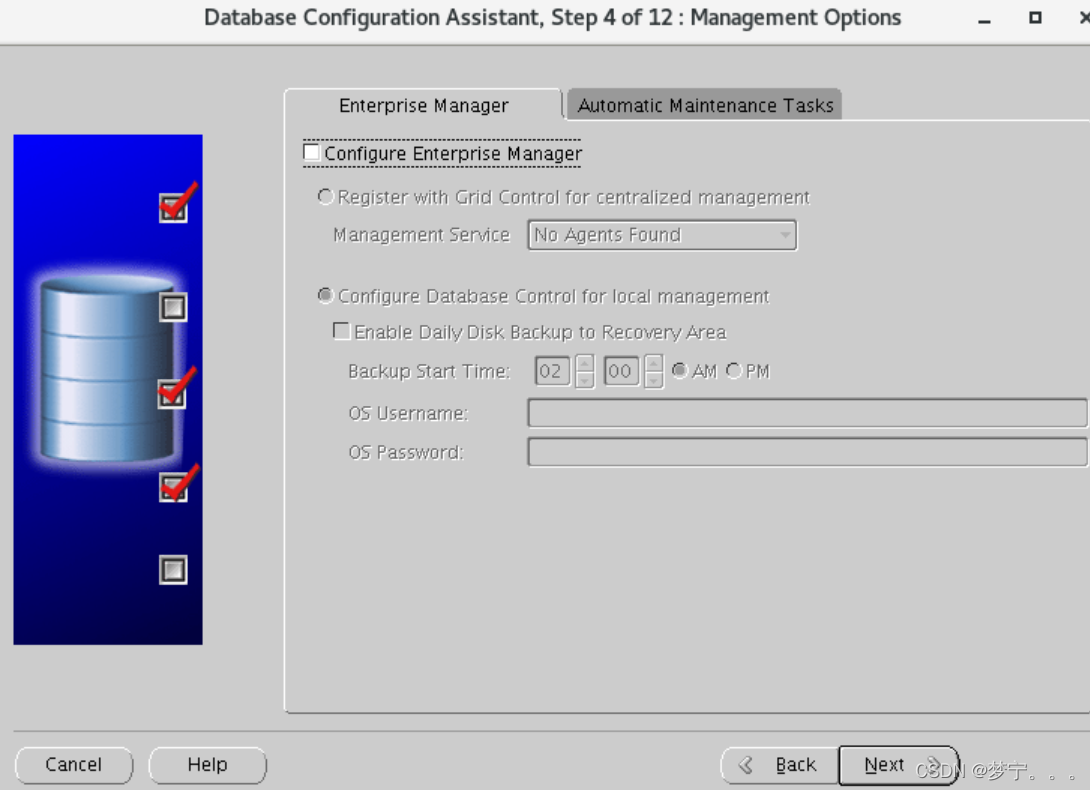
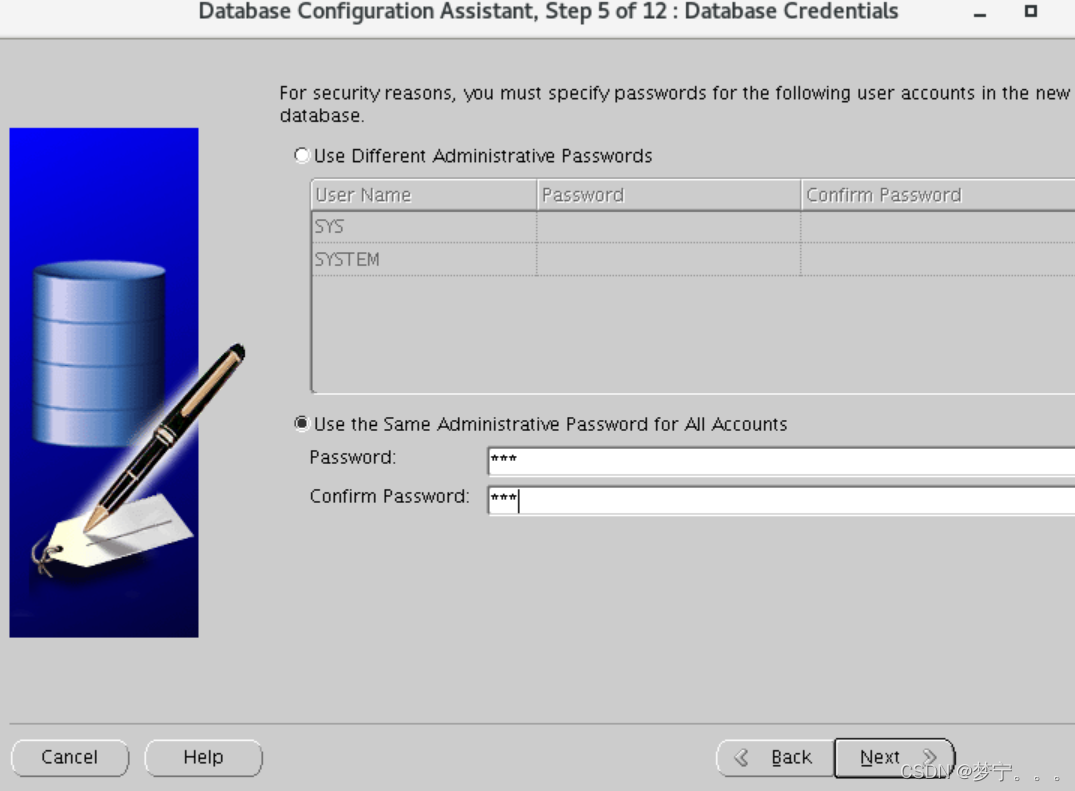
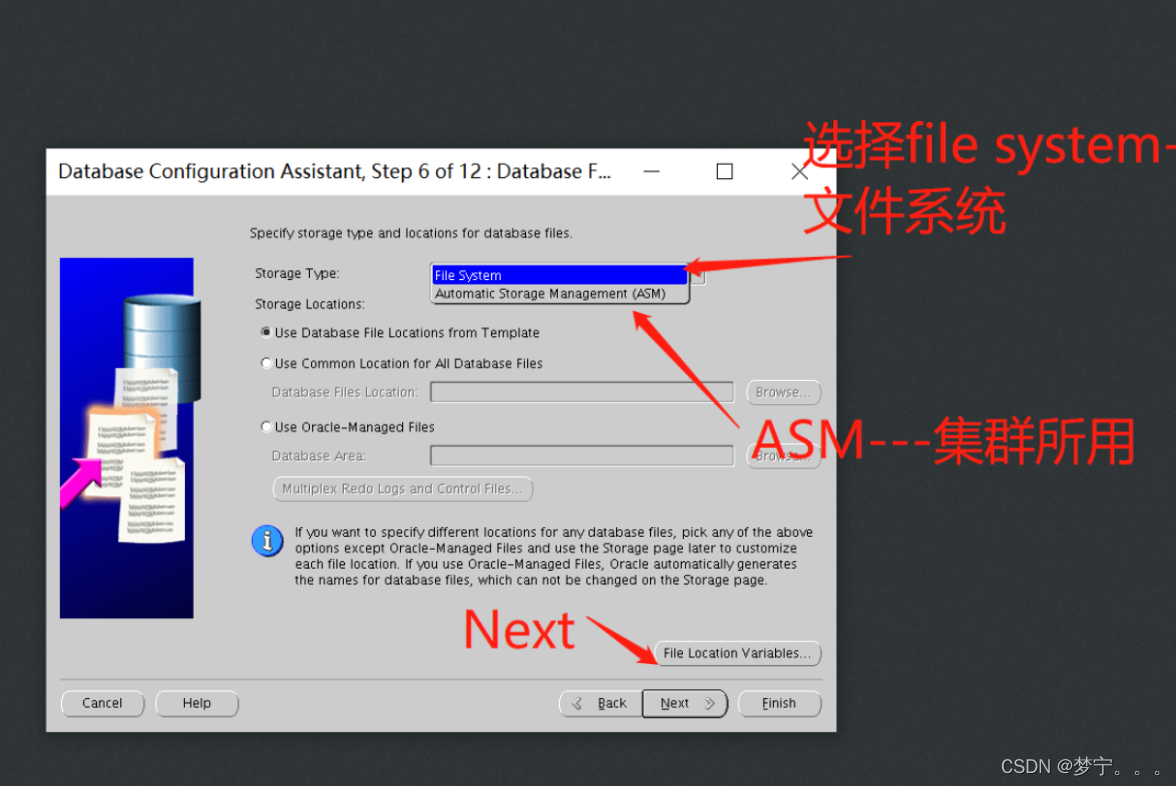
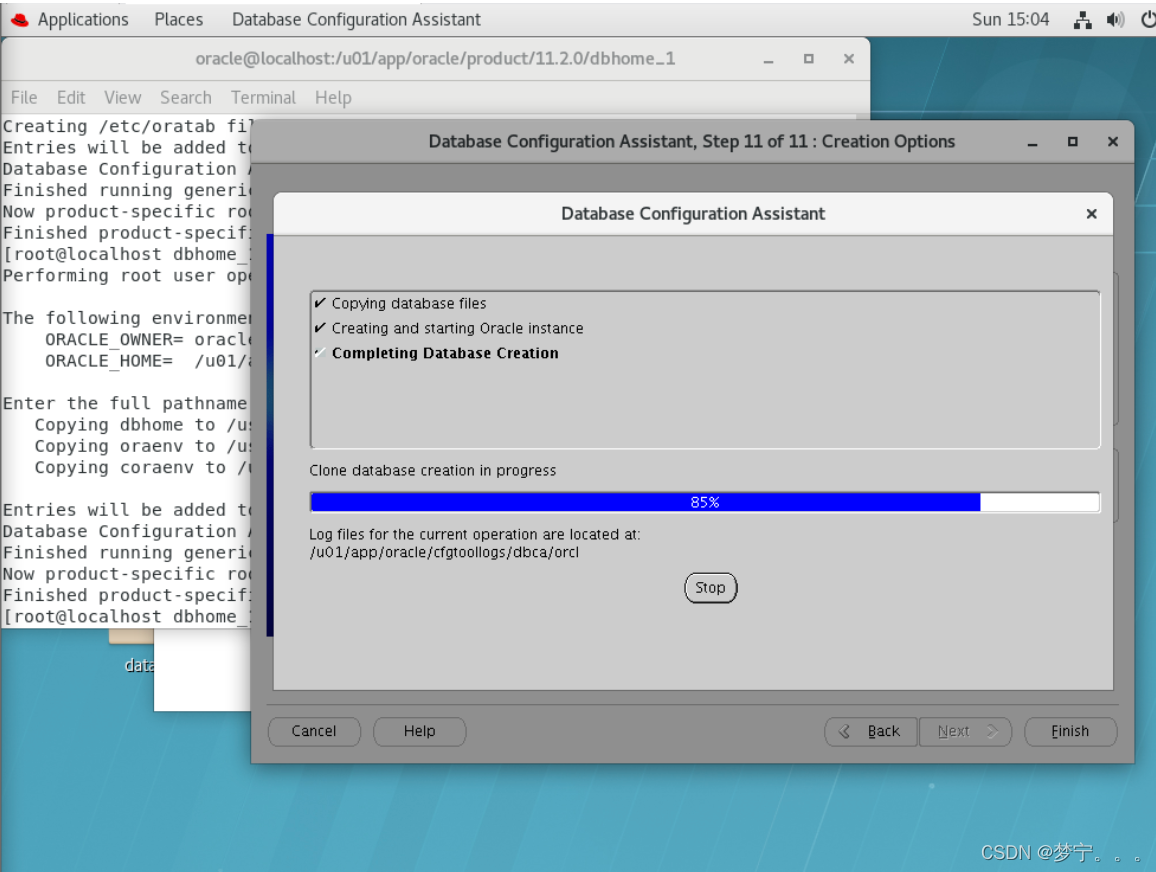
14,创建数据库,同样是在redhat界面下,而不是在远程登录界面
切换至oracle用户su - oracle
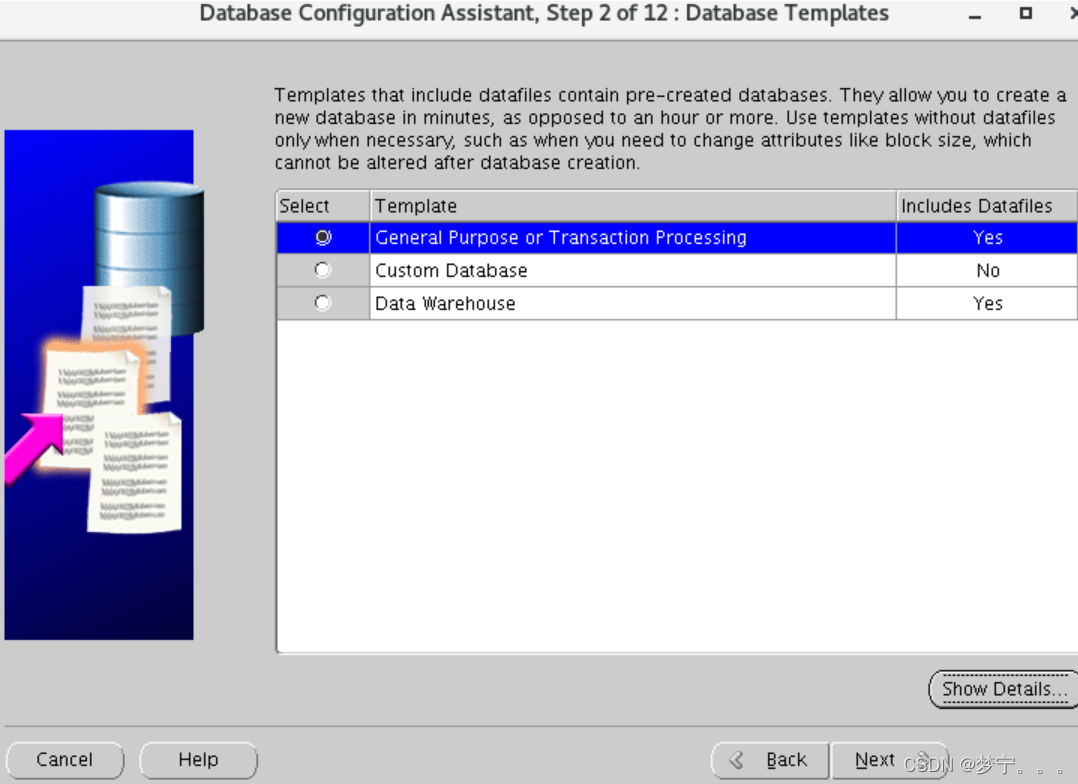
dbca命令dbca
输入dbca后会弹出以下界面

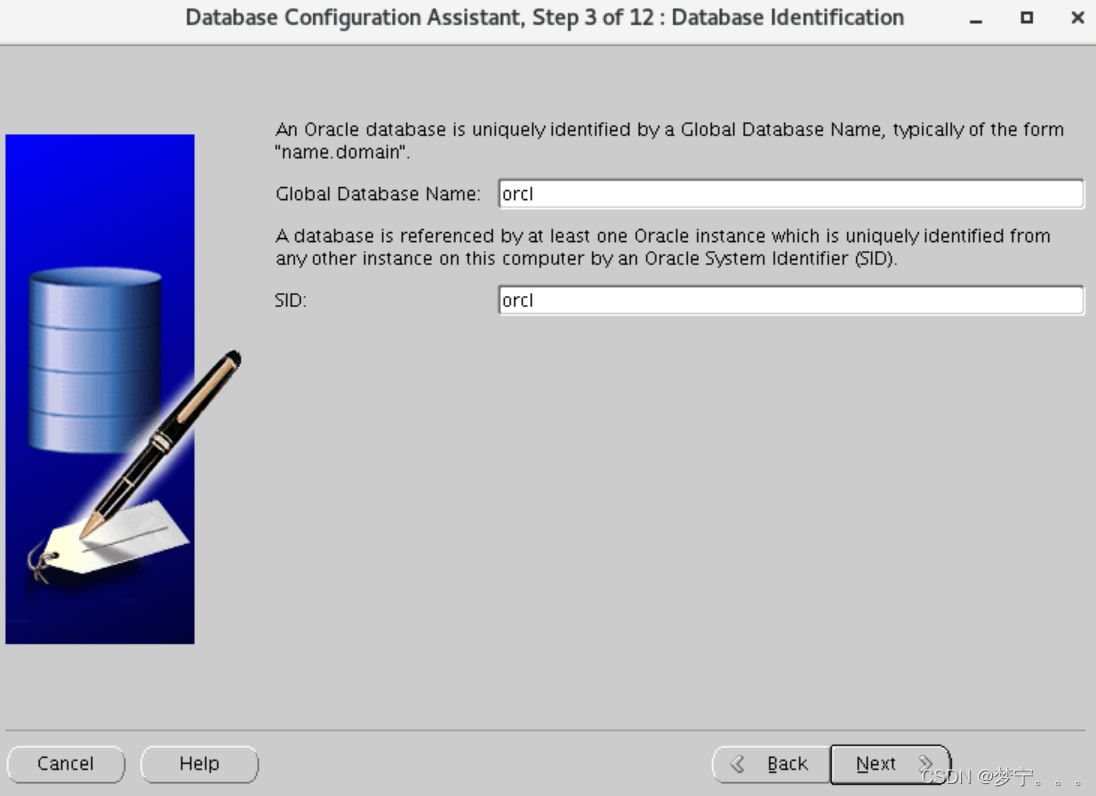
设置全局数据库密码,这里自己随意设置
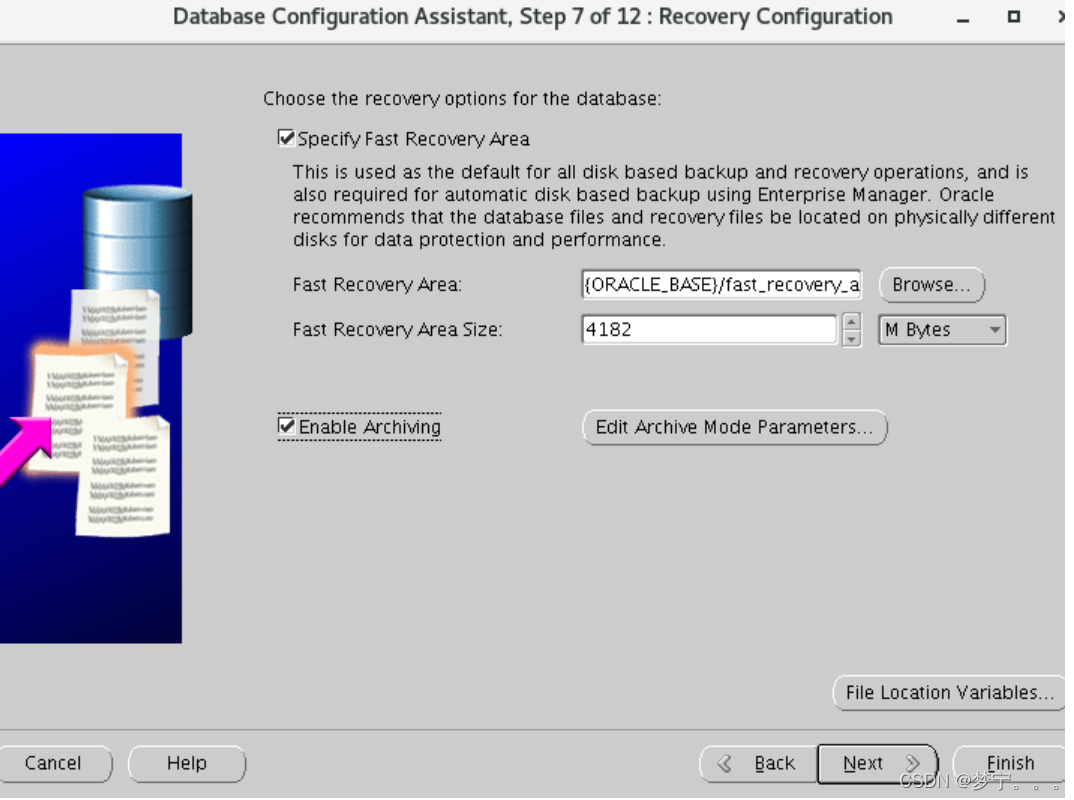
注意,这里不要选择归档模式,两个都不要勾选,后期有需要的话可以自行打开
这里如果出现界面变灰的情况,用鼠标左右上下拉取中间那根白色竖线,就可以看到summary界面了,然后点击OK
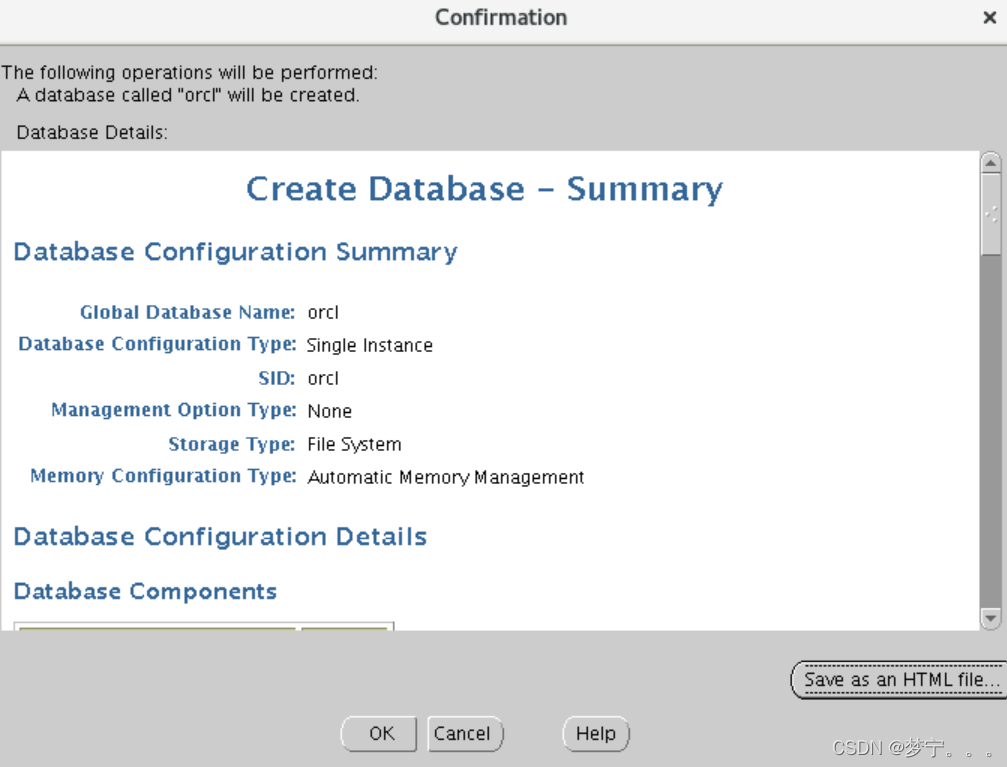
点击ok后如果出现报错(一般情况不会出现报错)
file ‘’etc oratab’’ is not accessible
解决:
切换到root用户:su root
切换到oracle安装目录 :cd $ORACLE_HOME
运行root.sh文件:./root.sh
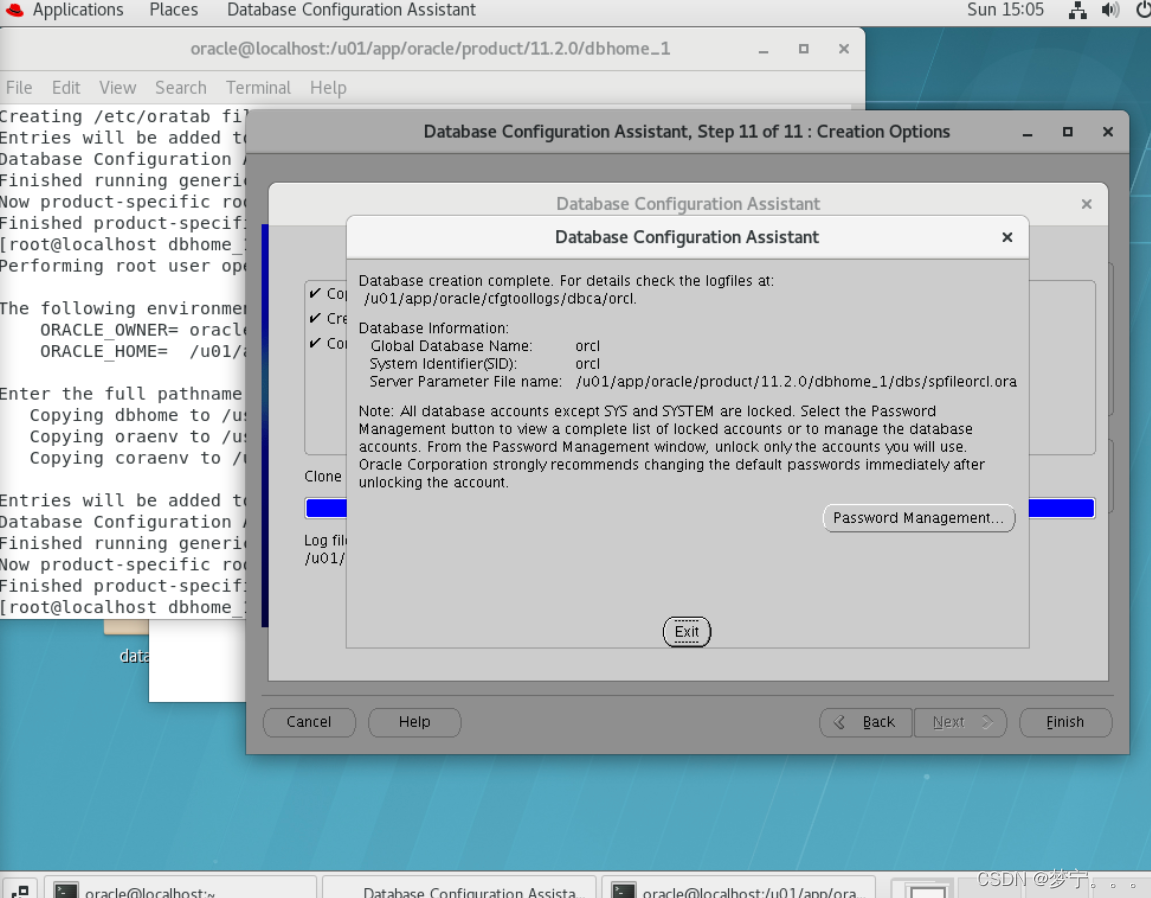
点击退出,数据库创建成功
15,测试,链接数据库
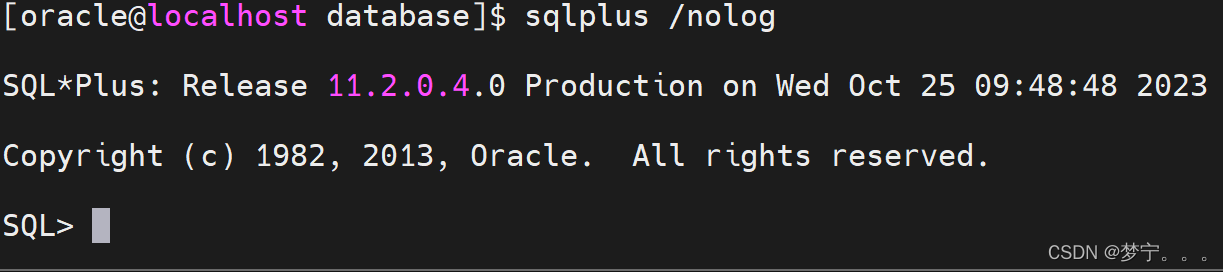

先使用startup启动数据库,这里如果出现有一个instance已经启动的错误,我们先关闭数据库,再重新启动就可以了。
startup
至此,所有的安装已经完成,如果能帮助到大家就很开心啦,点个赞收藏收藏呗。


 7660
7660


 被折叠的 条评论
为什么被折叠?
被折叠的 条评论
为什么被折叠?
 到【灌水乐园】发言


