


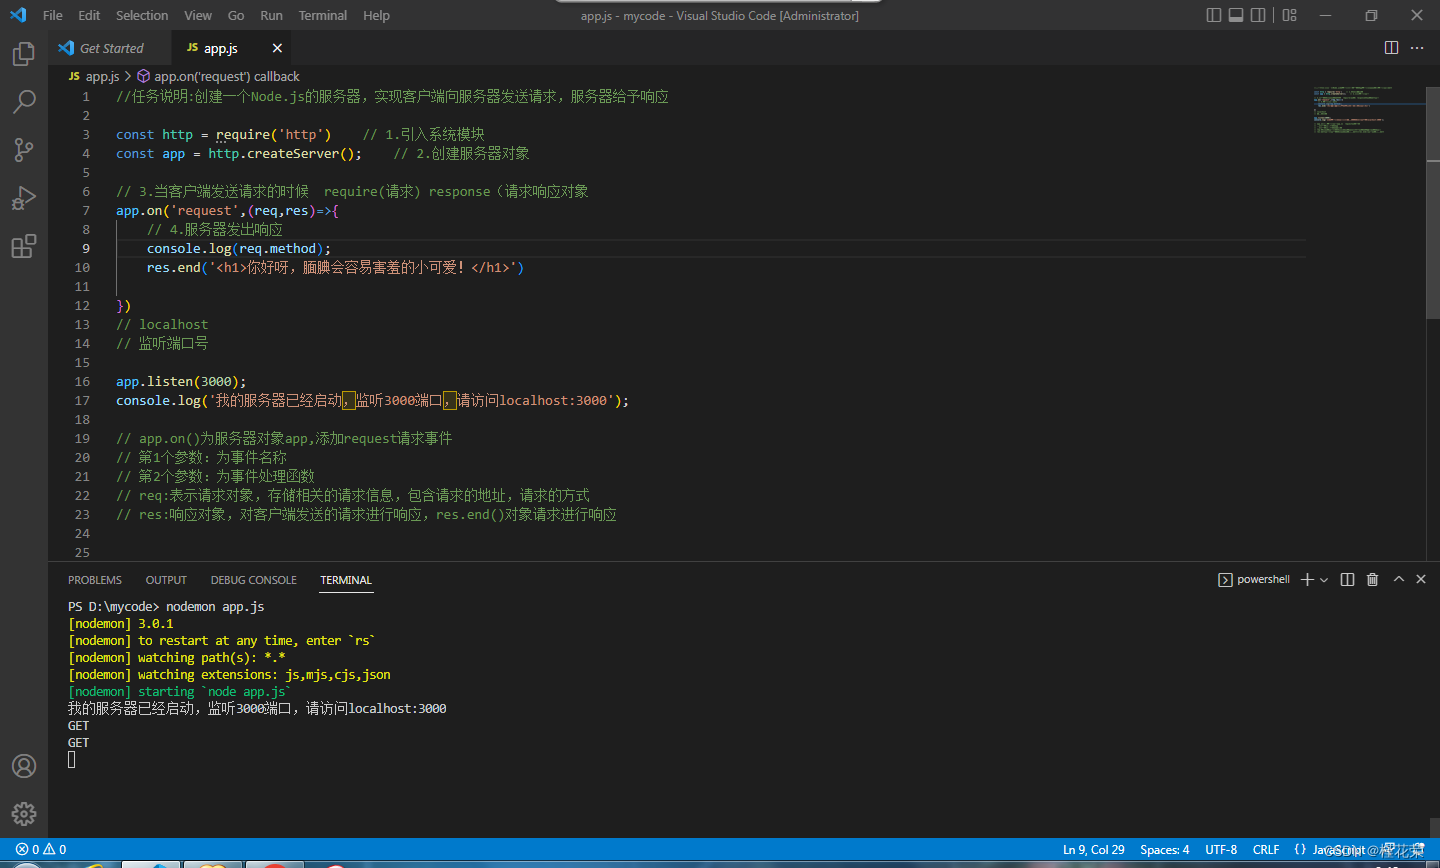
//任务说明:创建一个Node.js的服务器,实现客户端向服务器发送请求,服务器给予响应

const http = require('http')    // 1.引入系统模块
const app = http.createServer();    // 2.创建服务器对象

// 3.当客户端发送请求的时候  require(请求) response(请求响应对象
app.on('request',(req,res)=>{
    // 4.服务器发出响应
    res.end('<h1>hello,word!</h1>')

})
// localhost
// 监听端口号
// require('utf-8');
app.listen(3000);
console.log('我的服务器已经启动,监听3000端口,请访问localhost:3000');

// app.on()为服务器对象app,添加request请求事件
// 第1个参数:为事件名称
// 第2个参数:为事件处理函数
// req:表示请求对象,存储相关的请求信息,包含请求的地址,请求的方式
// res:响应对象,对客户端发送的请求进行响应,res.end()对象请求进行响应
安装模块:
npm i nodemon -g切换:
npm i nrm -g使用镜像:
nrm use taobao若是报错,复制如下:
set-ExecutionPolicy RemoteSigned 跑起来
nodemon app.js 
自行复习http协议和请求消息的GET和POST
在第8行下面新增代码,写入到第9行:
console.log(req.method);代码如下:
//任务说明:创建一个Node.js的服务器,实现客户端向服务器发送请求,服务器给予响应

const http = require('http')    // 1.引入系统模块
const app = http.createServer();    // 2.创建服务器对象

// 3.当客户端发送请求的时候  require(请求) response(请求响应对象
app.on('request',(req,res)=>{
    // 6.打印获取请求方式
    console.log(req.method);
    // 4.服务器发出响应
    res.end('<h1>hello,word!</h1>')

})
// localhost
// 5.监听端口号

app.listen(3000);
console.log('我的服务器已经启动,监听3000端口,请访问localhost:3000');

// app.on()为服务器对象app,添加request请求事件
// 第1个参数:为事件名称
// 第2个参数:为事件处理函数
// req:表示请求对象,存储相关的请求信息,包含请求的地址,请求的方式
// res:响应对象,对客户端发送的请求进行响应,res.end()对象请求进行响应
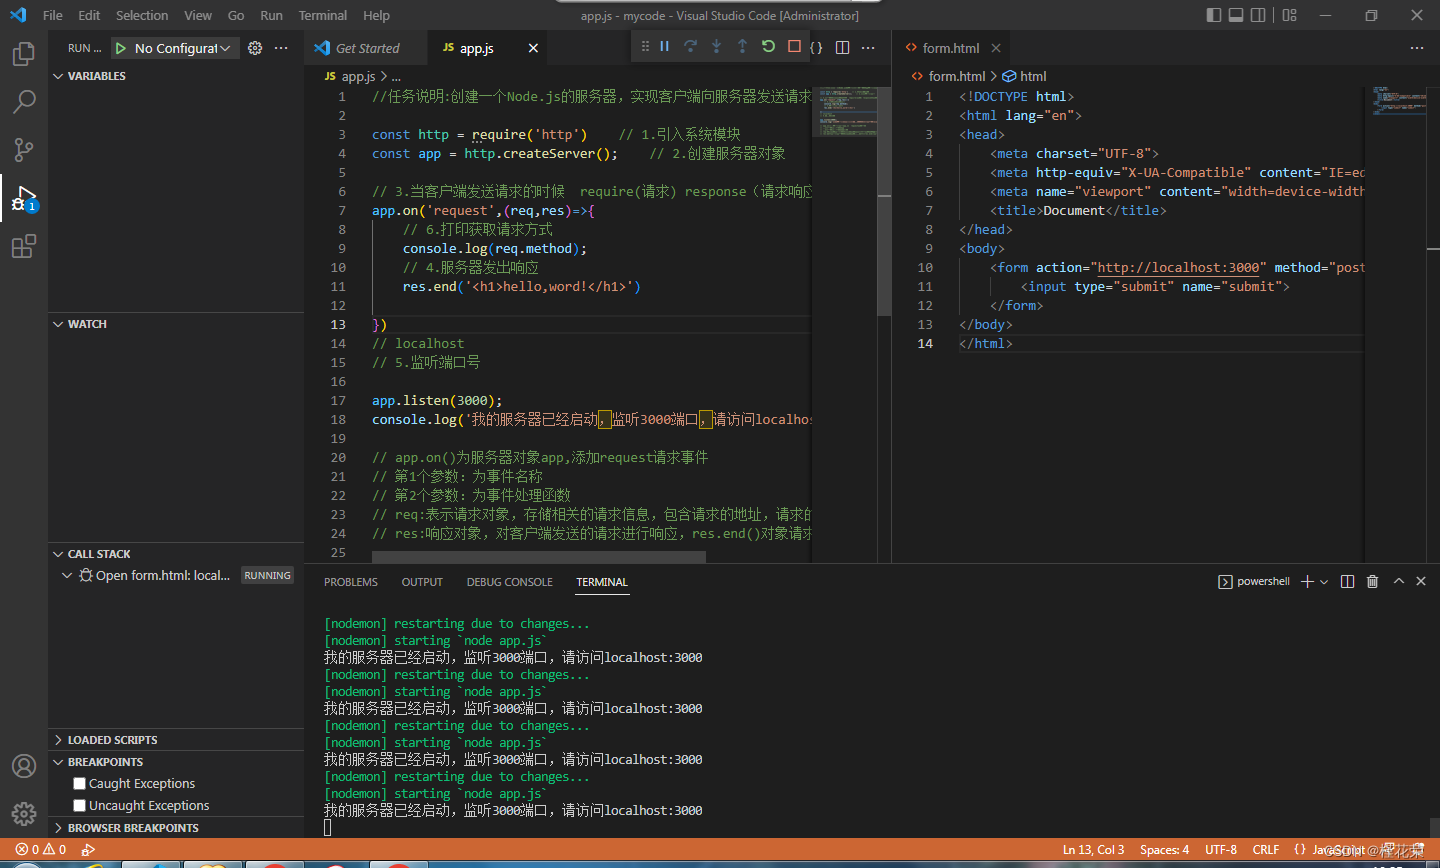
创建form.html文件,代码如下:
<!DOCTYPE html>
<html lang="en">
<head>
<meta charset="UTF-8">
<meta http-equiv="X-UA-Compatible" content="IE=edge">
<meta name="viewport" content="width=device-width, initial-scale=1.0">
<title>Document</title>
</head>
<body>
<form action="http://localhost:3000" method="post">
<input type="submit" name="submit">
</form>
</body>
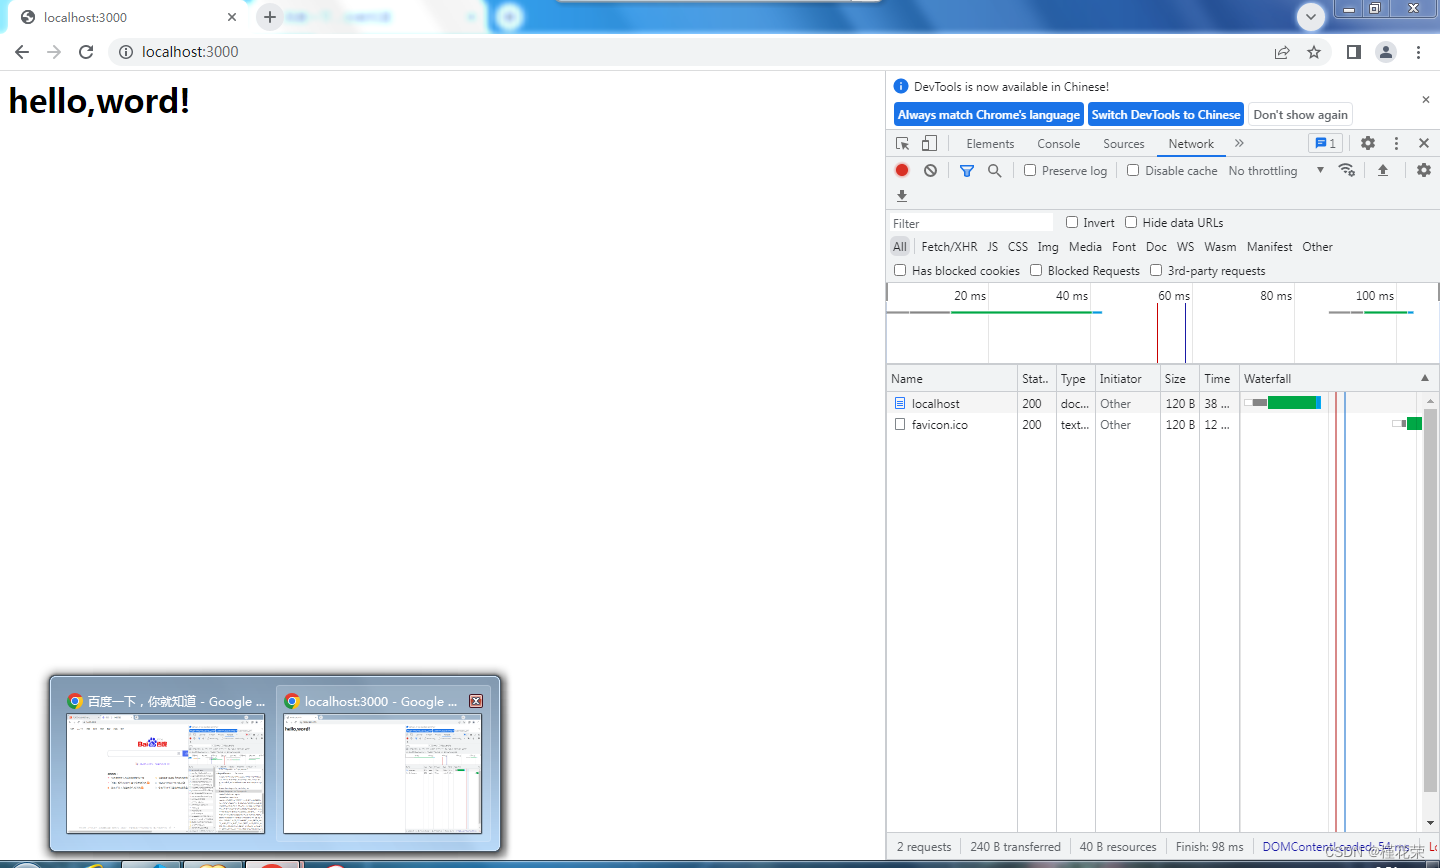
</html>点击运行,浏览器此时打开的是html文件,html里面点击"提交"按钮之后,会打开刚刚的localhost:3000,然后刷新浏览器
回到vsc查看终端效果如下:
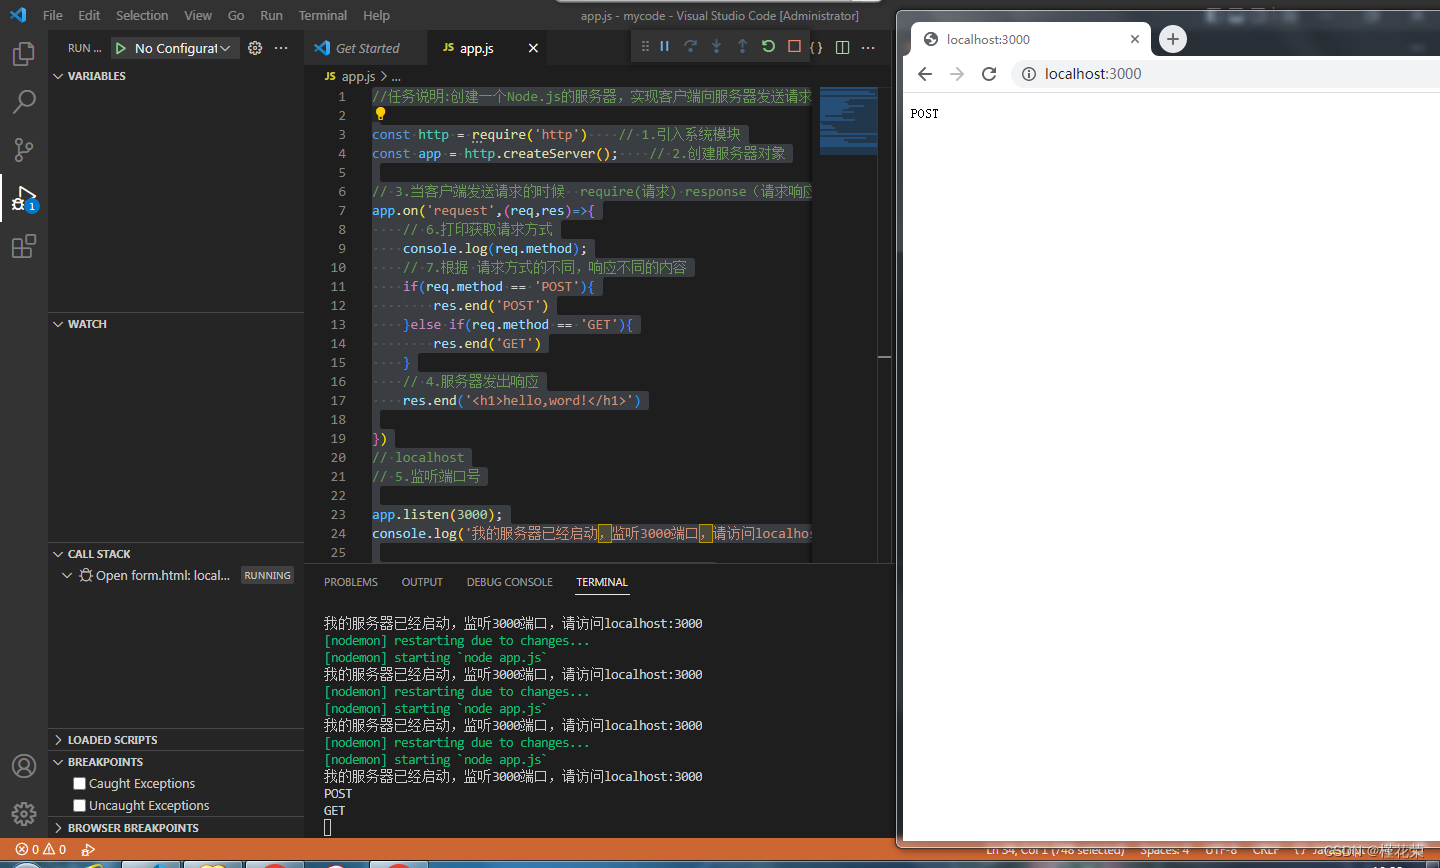
新增代码如下:
//任务说明:创建一个Node.js的服务器,实现客户端向服务器发送请求,服务器给予响应

const http = require('http')    // 1.引入系统模块
const app = http.createServer();    // 2.创建服务器对象

// 3.当客户端发送请求的时候  require(请求) response(请求响应对象
app.on('request',(req,res)=>{
    // 6.打印获取请求方式
    console.log(req.method);
    // 7.根据 请求方式的不同,响应不同的内容
    if(req.method == 'POST'){
        res.end('POST')
    }else if(req.method == 'GET'){
        res.end('GET')
    }
    // 4.服务器发出响应
    res.end('<h1>hello,word!</h1>')

})
// localhost
// 5.监听端口号

app.listen(3000);
console.log('我的服务器已经启动,监听3000端口,请访问localhost:3000');

// app.on()为服务器对象app,添加request请求事件
// 第1个参数:为事件名称
// 第2个参数:为事件处理函数
// req:表示请求对象,存储相关的请求信息,包含请求的地址,请求的方式
// res:响应对象,对客户端发送的请求进行响应,res.end()对象请求进行响应
刷新localhost:3000页面,运行效果如下:
新建文件server.js代码如下:
//任务说明:创建一个Node.js的服务器,实现客户端向服务器发送请求,服务器给予响应

const http = require('http');    // 1.引入系统模块
const { allowedNodeEnvironmentFlags } = require('process');
const app = http.createServer();    // 2.创建服务器对象

// 3.当客户端发送请求的时候  require(请求) response(请求响应对象

app.on('request',(req,res)=>{
    // 4.根据客户端地址访问的不同内容
    console.log(req.url);
})
// 5.监听端口号

app.listen(3000);
console.log('我的服务器已经启动,监听3000端口,请访问localhost:3000');
根据客户端地址不同获取内容代码如下:
通过res.end()来更换内容welcome to homepage
//任务说明:创建一个Node.js的服务器,实现客户端向服务器发送请求,服务器给予响应
const http = require('http'); // 1.引入系统模块
const { allowedNodeEnvironmentFlags } = require('process');
const app = http.createServer(); // 2.创建服务器对象
// 3.当客户端发送请求的时候 require(请求) response(请求响应对象
app.on('request',(req,res)=>{
// 4.根据客户端地址访问的不同内容
var url = req.url; //此处是获取的是完整的网址,包含查询字符串
// 返回结果为完整的URL /list?url=username&pass=password
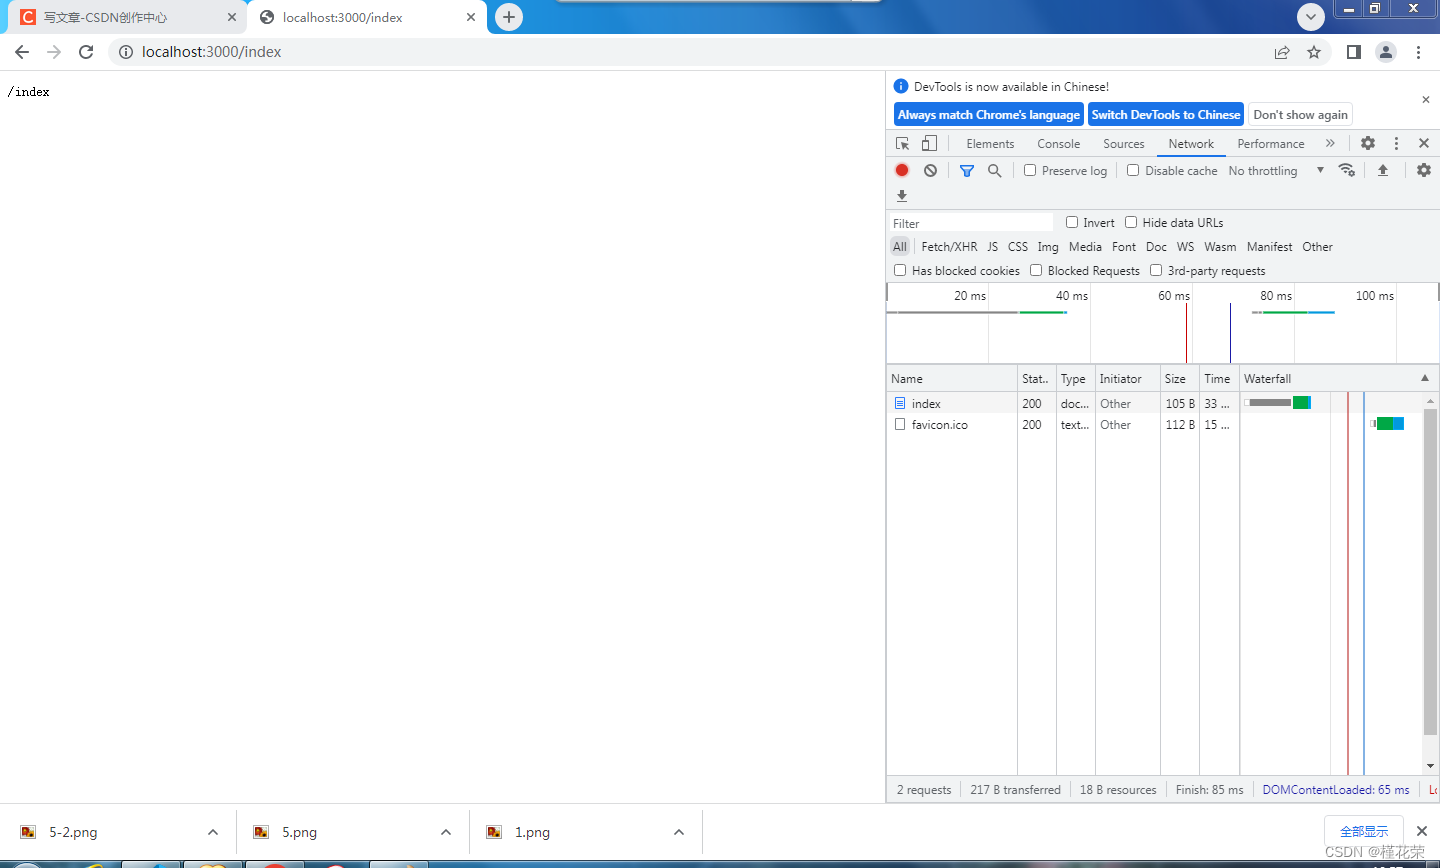
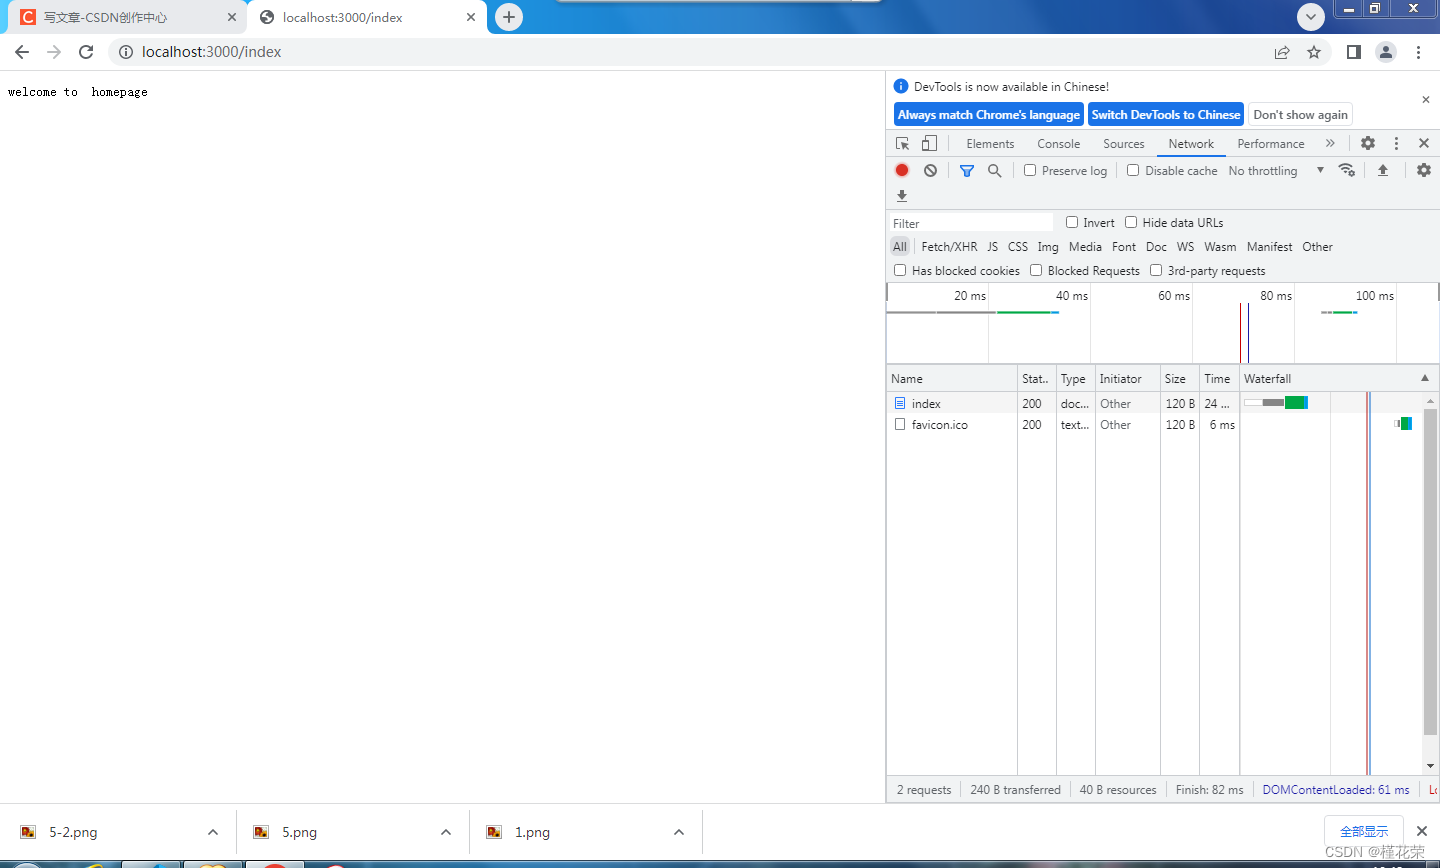
// 当url是"/"或是"/index"时,返回welcome to homepage
// /list 返回 no found
if(url == '/index' || url == '/'){
res.end("welcome to homepage")
}else if(url =='/list'){
res.end('not found')
}
})
// 5.监听端口号
app.listen(3000);
console.log('我的服务器已经启动,监听3000端口,请访问localhost:3000');
效果如下:
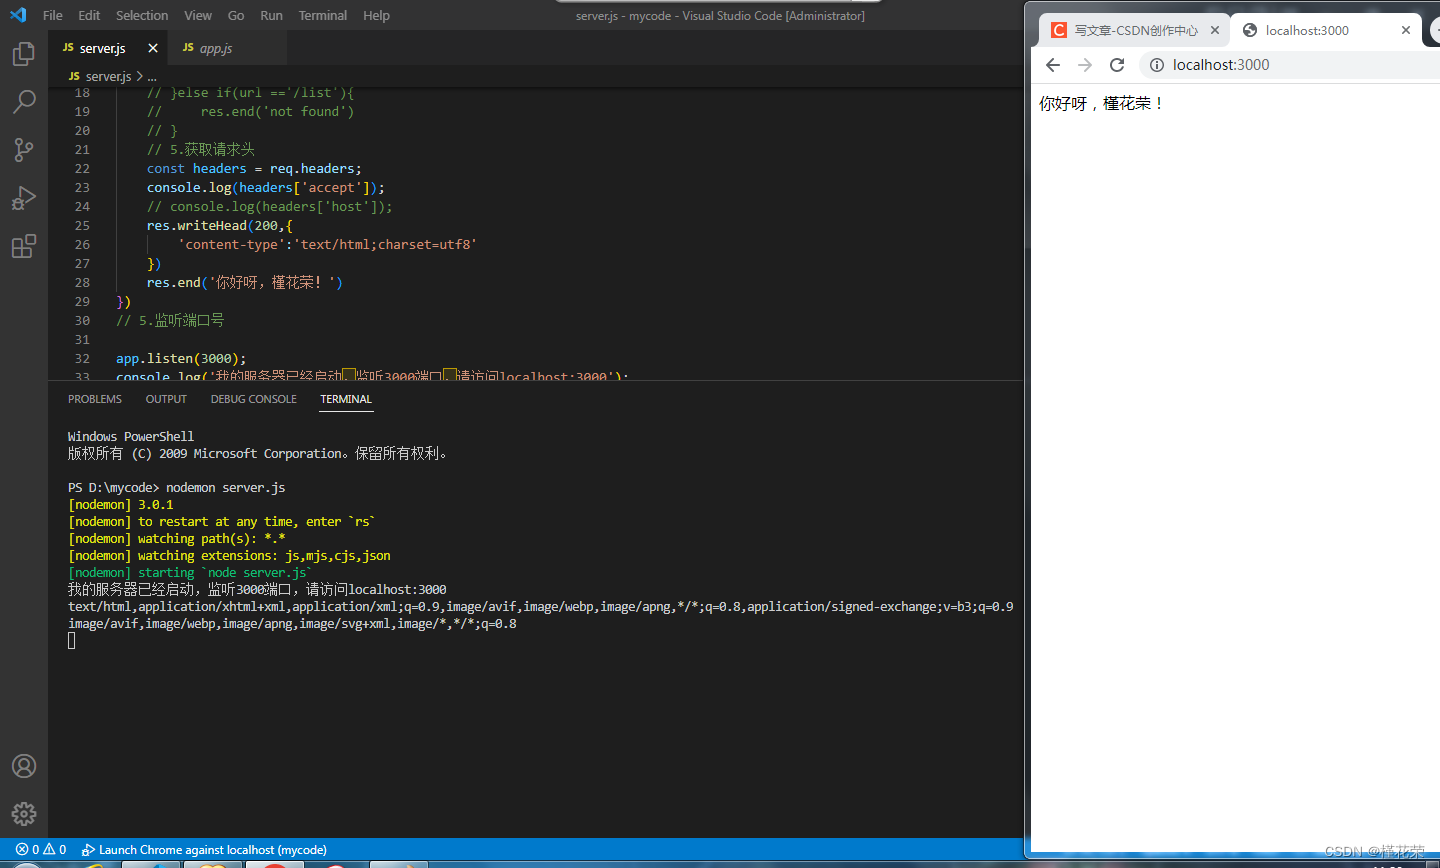
添加请求响应头代码如下:
//任务说明:创建一个Node.js的服务器,实现客户端向服务器发送请求,服务器给予响应

const http = require('http');    // 1.引入系统模块
const { allowedNodeEnvironmentFlags } = require('process');
const app = http.createServer();    // 2.创建服务器对象

// 3.当客户端发送请求的时候  require(请求) response(请求响应对象

app.on('request',(req,res)=>{
    // 4.根据客户端地址访问的不同内容
    var url = req.url;                   //此处是获取的是完整的网址,包含查询字符串

    // 返回结果为完整的URL   /list?url=username&pass=password
    //  当url是"/"或是"/index"时,返回welcome to  homepage
    //   /list  返回 no found
    // if(url == '/index' || url == '/'){
    //     res.end("welcome to  homepage")
    // }else if(url =='/list'){
    //     res.end('not found')
    // }
    // 5.获取请求头
    const headers = req.headers;
    console.log(headers['accept']);
    // console.log(headers['host']);
    res.writeHead(200,{
        'content-type':'text/html;charset=utf8'
    })
    res.end('你好呀,槿花荣!')
})
// 5.监听端口号

app.listen(3000);
console.log('我的服务器已经启动,监听3000端口,请访问localhost:3000');
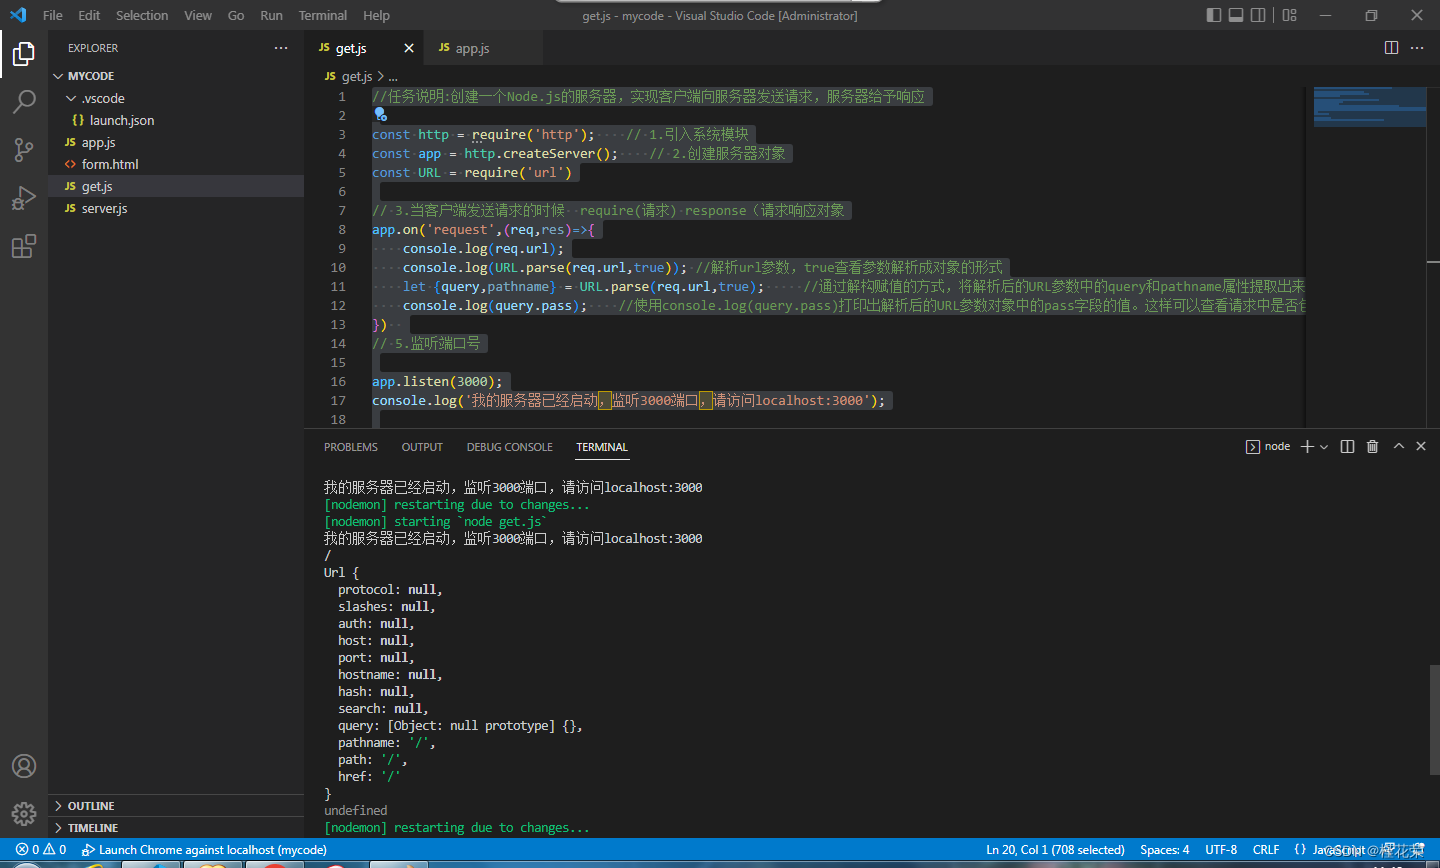
解析url
//任务说明:创建一个Node.js的服务器,实现客户端向服务器发送请求,服务器给予响应

const http = require('http');    // 1.引入系统模块
const app = http.createServer();    // 2.创建服务器对象
const URL = require('url')

// 3.当客户端发送请求的时候  require(请求) response(请求响应对象
app.on('request',(req,res)=>{
    console.log(req.url);
    console.log(URL.parse(req.url,true)); //解析url参数,true查看参数解析成对象的形式
    let {query,pathname} = URL.parse(req.url,true);     //通过解构赋值的方式,将解析后的URL参数中的query和pathname属性提取出来。query是一个包含了解析后的查询参数的对象,pathname是请求的URL路径名部分
    console.log(query.pass);    //使用console.log(query.pass)打印出解析后的URL参数对象中的pass字段的值。这样可以查看请求中是否包含了名为pass的参数,并输出其值。
})
// 5.监听端口号

app.listen(3000);
console.log('我的服务器已经启动,监听3000端口,请访问localhost:3000');


 547
547


 被折叠的 条评论
为什么被折叠?
被折叠的 条评论
为什么被折叠?
 到【灌水乐园】发言


