


spring复习02,xml配置管理bean
获取bean的几种方式
1. 通过id获取bean
由于 id 属性指定了 bean 的唯一标识,所以根据 bean 标签的 id 属性可以精确获取到一个组件对象。
package com.gothic.sunset.demo;

public class HelloWorld {

    public void sayHello(){
        System.out.println("HelloWorld!");
    }
}
applicationContext:
<?xml version="1.0" encoding="UTF-8"?>
<beans xmlns="http://www.springframework.org/schema/beans"
       xmlns:xsi="http://www.w3.org/2001/XMLSchema-instance"
       xsi:schemaLocation="http://www.springframework.org/schema/beans http://www.springframework.org/schema/beans/spring-beans.xsd">

    <!--
       bean:配置一个bean对象,将对象交给IOC容器来管理
       属性:
       id:bean的唯一标识,不能重复
       class:设置bean对象所对应的类型

   -->
    <bean id="HelloWorld" class="com.gothic.sunset.demo.HelloWorld"></bean>
</beans>
测试代码:
	@Test
    public void testHello(){
        ApplicationContext ioc = new ClassPathXmlApplicationContext("applicationContext.xml");
        //通过bean标签的id值来获取bean
        HelloWorld helloWorld = (HelloWorld)ioc.getBean("HelloWorld");
        helloWorld.sayHello();//输出HelloWorld!
    }
2. 通过class获取bean
这里通过观察package org.springframework.beans.factory;,BeanFactory接口为我们提供了多种获取bean的方式。
还是使用上面的helloworld的例子:
	@Test
    public void testHello(){
        ApplicationContext ioc = new ClassPathXmlApplicationContext("applicationContext.xml");
        //通过bean标签的id值来获取bean
        /*HelloWorld helloWorld = (HelloWorld)ioc.getBean("HelloWorld");*/
        //通过class属性来获取Bean
        HelloWorld helloWorld = ioc.getBean(HelloWorld.class);
        helloWorld.sayHello();
    }
3. id和class结合来获取bean
	@Test
    public void testHello(){
        ApplicationContext ioc = new ClassPathXmlApplicationContext("applicationContext.xml");
        //1.通过bean标签的id值来获取bean
        /*HelloWorld helloWorld = (HelloWorld)ioc.getBean("HelloWorld");*/
        //2.通过class属性来获取Bean
        /*HelloWorld helloWorld = ioc.getBean(HelloWorld.class);*/
        HelloWorld helloWorld = ioc.getBean("HelloWorld", HelloWorld.class);
        helloWorld.sayHello();
    }
依赖注入的两种方式
setter注入
首先创建一个实体类Student,用于例子测试:
package com.gothic.sunset.demo;

public class Student {
    private Integer id;//学生id
    private String name;//学生姓名
    private String sex;//学生性别
    private Integer age;//学生年龄

    public Student() {
    }

    public Integer getId() {
        return id;
    }

    public Student(Integer id, String name, String sex, Integer age) {
        this.id = id;
        this.name = name;
        this.sex = sex;
        this.age = age;
    }

    public void setId(Integer id) {
        this.id = id;
    }

    public String getName() {
        return name;
    }

    public void setName(String name) {
        this.name = name;
    }

    public String getSex() {
        return sex;
    }

    public void setSex(String sex) {
        this.sex = sex;
    }

    public Integer getAge() {
        return age;
    }

    public void setAge(Integer age) {
        this.age = age;
    }

    @Override
    public String toString() {
        return "Student{" +
                "id=" + id +
                ", name='" + name + '\'' +
                ", sex='" + sex + '\'' +
                ", age=" + age +
                '}';
    }
}
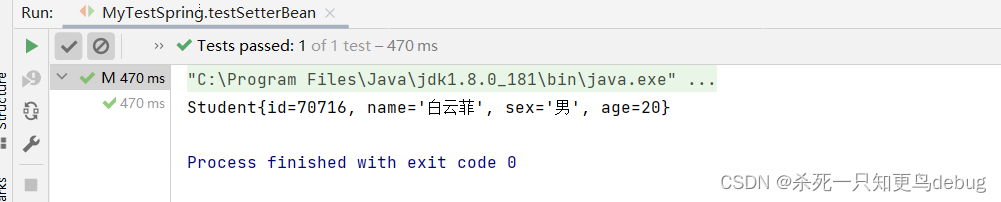
然后通过bean标签的property子标签,配置bean时为属性赋值:
	<bean id="StudentSetter" class="com.gothic.sunset.demo.Student">
        <property name="id" value="070716"></property>
        <property name="name" value="白云菲"></property>
        <property name="sex" value="男"></property>
        <property name="age" value="20"></property>
    </bean>
property标签中需要注意的是,value属性值为字面量,你可以思考一下,上面我们规定年龄和id为Integer类型。
测试输出:
	@Test
    public void testSetterBean(){
        ApplicationContext ioc = new ClassPathXmlApplicationContext("applicationContext.xml");
        Student studentSetter = (Student)ioc.getBean("StudentSetter");
        System.out.println(studentSetter);
    }
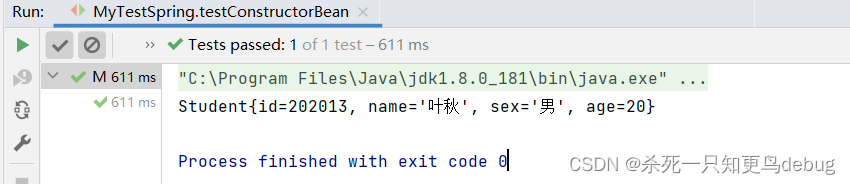
有参构造器注入
有参构造器注入,必须在对应实体类中有有参构造器。然后有参构造注入是用到了constructor-arg标签:
	<bean id="StudentConstructor" class="com.gothic.sunset.demo.Student">
        <constructor-arg name="id" value="202013"></constructor-arg>
        <constructor-arg name="name" value="叶秋"></constructor-arg>
        <constructor-arg name="sex" value="男"></constructor-arg>
        <constructor-arg name="age" value="20"></constructor-arg>
    </bean>
测试输出:
  	@Test
    public void testConstructorBean(){
        ApplicationContext ioc = new ClassPathXmlApplicationContext("applicationContext.xml");
        Student student = (Student)ioc.getBean("StudentConstructor");
        System.out.println(student);
    }
依赖注入时一些特殊值的处理
1.字面量
前面已经说过property标签中的value属性值填写的是字面量。
比如上面我们的setter注入和构造器注入中的id,age这两个属性,它们最后都是数字。
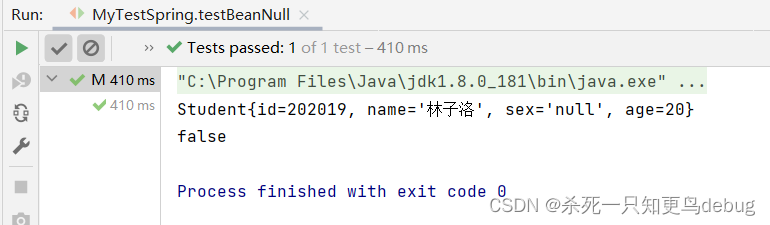
2.null值
注入bean时,我们常常想要一些属性一开始为空。这里大家可以想一下如果只是在property标签的value属性中填写null值是否会成功?
先来测试一下,在property标签的value属性中填写null值:
	<bean id="StudentDemo1Null" class="com.gothic.sunset.demo.Student">
        <property name="id" value="202019"></property>
        <property name="name" value="林子洛"></property>
        <property name="sex" value="null"></property>
        <property name="age" value="20"></property>
    </bean>
测试输出:
 	@Test
    public void testBeanNull(){
        ApplicationContext ioc = new ClassPathXmlApplicationContext("applicationContext.xml");
        Student student = (Student)ioc.getBean("StudentDemo1Null");
        System.out.println(student);
        System.out.println(null==student.getSex());
    }
由此可见,value将null作为了字符串null。
其实我们可以用null标签,对上面的代码修改如下:
	<bean id="StudentDemo1Null" class="com.gothic.sunset.demo.Student">
        <property name="id" value="202019"></property>
        <property name="name" value="林子洛"></property>
        <property name="sex" >
            <null></null>
        </property>
        <property name="age" value="20"></property>
    </bean>
测试输出:

3.xml实体
一些时候,我们想为一些属性值插入一些符号,比如>,<…这样,首先,我们基于xml管理bean和手动注入是在xml中进行的,所以这些大于小于号,是无法直接像上面那样插入到属性中的。
学过前端的,都应该知道xml实体是什么,所以我们可以之间通过xml实体来插入这些特殊的大于小于号:
<property name="expression" value="a < b"/>
< >分别代表大于小于号。
4.CDATA节
CDATA节也是为了解决上面xml实体的问题:
<property name="expression">
	<!-- CDATA中的C代表Character,是文本、字符的含义,CDATA就表示纯文本数据 -->
	<!-- XML解析器看到CDATA节就知道这里是纯文本,就不会当作XML标签或属性来解析 -->
	<!-- 所以CDATA节中写什么符号都随意 -->
	<value><![CDATA[a < b]]></value>
</property>
为类类属性赋值
为类类属性赋值,类似我们之前的mybatis中的一对多和多对一。
一个班级有多个学生,每个学生只有一个班级。
首先我们创建一个班级实体类:
package com.gothic.sunset.demo;

public class ClassSt {
    private Integer classStId;//班级号
    private String classStName;//班级名称

    public Integer getClassStId() {
        return classStId;
    }

    public void setClassStId(Integer classStId) {
        this.classStId = classStId;
    }

    public String getClassStName() {
        return classStName;
    }

    public void setClassStName(String classStName) {
        this.classStName = classStName;
    }


    @Override
    public String toString() {
        return "ClassSt{" +
                "classStId=" + classStId +
                ", classStName='" + classStName + '\'' +
                '}';
    }
}
然后修改之前的学生类,在其中添加班级属性:
package com.gothic.sunset.demo;

public class Student {
    private Integer id;
    private String name;
    private String sex;
    private Integer age;

    /*新增classSt属性,并为其提供setter和getter方法,以及重写toString方法*/
    private ClassSt classSt;

    public ClassSt getClassSt() {
        return classSt;
    }

    public void setClassSt(ClassSt classSt) {
        this.classSt = classSt;
    }

    public Student() {
    }

    public Integer getId() {
        return id;
    }

    public Student(Integer id, String name, String sex, Integer age) {
        this.id = id;
        this.name = name;
        this.sex = sex;
        this.age = age;
    }

    public void setId(Integer id) {
        this.id = id;
    }

    public String getName() {
        return name;
    }

    public void setName(String name) {
        this.name = name;
    }

    public String getSex() {
        return sex;
    }

    public void setSex(String sex) {
        this.sex = sex;
    }

    public Integer getAge() {
        return age;
    }

    public void setAge(Integer age) {
        this.age = age;
    }

    @Override
    public String toString() {
        return "Student{" +
                "id=" + id +
                ", name='" + name + '\'' +
                ", sex='" + sex + '\'' +
                ", age=" + age +
                ", classSt=" + classSt +
                '}';
    }
}
1.引入已经声明的bean的方式
这里我们可以使用ref标签来引入外部已经声明的bean:
  	<bean id="classStCs1" class="com.gothic.sunset.demo.ClassSt">
        <property name="classStId" value="11111"></property>
        <property name="classStName" value="信息管理2班"></property>
    </bean>

    <bean id="studentOne" class="com.gothic.sunset.demo.Student">
        <property name="id" value="202020"></property>
        <property name="name" value="王小香"></property>
        <property name="age" value="20"></property>
        <property name="sex" value="男"></property>
        <!-- ref属性:引用IOC容器中某个bean的id,将所对应的bean为属性赋值 -->
        <property name="classSt" ref="classStCs1"></property>
    </bean>
测试输出:
	@Test
    public void testClassStBean(){
        ApplicationContext ioc = new ClassPathXmlApplicationContext("applicationContext.xml");
        Student student = (Student)ioc.getBean("studentOne");
        System.out.println(student);
    }

2.内部bean的方式
内部bean的方式即在内部再嵌入一个bean标签:
	<bean id="studentTwo" class="com.gothic.sunset.demo.Student">
        <property name="id" value="202021"></property>
        <property name="name" value="李大牛"></property>
        <property name="age" value="20"></property>
        <property name="sex" value="男"></property>
        <property name="classSt">
            <bean id="classStInner" class="com.gothic.sunset.demo.ClassSt">
                <property name="classStId" value="11111"></property>
                <property name="classStName" value="信息管理2班"></property>
            </bean>
        </property>
    </bean>
在一个bean中再声明一个bean就是内部bean,内部bean只能用于给属性赋值,不能在外部通过IOC容器获取,因此可以省略id属性。
测试输出:
    @Test
    public void testClassStBean2(){
        ApplicationContext ioc = new ClassPathXmlApplicationContext("applicationContext.xml");
        Student student = (Student)ioc.getBean("studentTwo");
        System.out.println(student);
    }

3.级联属性赋值的方式
级联属性赋值与mybatis中的级联处理,如出一辙:
	<bean id="classStCs1" class="com.gothic.sunset.demo.ClassSt">
        <property name="classStId" value="11111"></property>
        <property name="classStName" value="信息管理2班"></property>
    </bean>
	<bean id="studentThree" class="com.gothic.sunset.demo.Student">
        <property name="id" value="202022"></property>
        <property name="name" value="张德柱"></property>
        <property name="age" value="21"></property>
        <property name="sex" value="男"></property>
        <!-- 一定先引用某个bean为属性赋值,才可以使用级联方式更新属性 -->
        <property name="classSt" ref="classStCs1"></property>
        <property name="classSt.classStId" value="11112"></property>
        <property name="classSt.classStName" value="计算机科学2班"></property>
    </bean>
这里需要注意的是,一定先引用某个bean为属性赋值,才可以使用级联方式更新属性。
输出:

为数组,集合,map类型赋值
面向不同的问题,spring为我们提供了不同的标签注入。
1.array标签
在学生类中新增一项爱好属性,一个学生的爱好有好多种,所以为一个数组。
package com.gothic.sunset.demo;

public class Student {

    //......
    //新增爱好属性,添加get set 然后重写toString方法
    private String[] hobbies;

    public String[] getHobbies() {
        return hobbies;
    }

    public void setHobbies(String[] hobbies) {
        this.hobbies = hobbies;
    }

}
使用array标签为bean注入属性值:
	<bean id="studentFour" class="com.gothic.sunset.demo.Student">
        <property name="id" value="202023"></property>
        <property name="name" value="文静"></property>
        <property name="age" value="21"></property>
        <property name="sex" value="女"></property>
        <property name="classSt" ref="classStCs1"></property>
        <property name="hobbies">
            <array>
                <value>绘画</value>
                <value>唱歌</value>
                <value>跑步</value>
            </array>
        </property>
    </bean>
测试输出:
	 @Test
    public void testClassStBean(){
        ApplicationContext ioc = new ClassPathXmlApplicationContext("applicationContext.xml");
        //Student student = (Student)ioc.getBean("studentOne");
        //Student student = (Student)ioc.getBean("studentThree");
        Student student = (Student)ioc.getBean("studentFour");
        System.out.println(student);
    }

2.list标签
一个班级有多个学生,一对多,为班级类添加一个学生集合:
package com.gothic.sunset.demo;

import java.util.List;

public class ClassSt {

	//新增学生集合属性
    private List<Student> students;

    public List<Student> getStudents() {
        return students;
    }

    public void setStudents(List<Student> students) {
        this.students = students;
    }

}
使用list标签,将多个学生注入bean中:
	<bean id="studentList" class="com.gothic.sunset.demo.ClassSt">
        <property name="classStId" value="11111"></property>
        <property name="classStName" value="信息管理2班"></property>
        <property name="students">
            <list>
            	<!--通过ref标签将之前的bean引入-->
                <ref bean="studentOne"></ref>
                <ref bean="studentTwo"></ref>
                <ref bean="studentThree"></ref>
                <ref bean="studentFour"></ref>
            </list>
        </property>
    </bean>
测试输出:
 	@Test
    public void testClassStBean2(){
        ApplicationContext ioc = new ClassPathXmlApplicationContext("applicationContext.xml");
        ClassSt classSt = (ClassSt)ioc.getBean("studentList");
        System.out.println(classSt);
    }

3.map标签
学生选修多门课程,不同的课程号对应不同的老师,使用Map的key,value映射注入bean。
首先创建教师类:
package com.gothic.sunset.demo;

public class Teacher {
    private Integer teacherId;
    private String teacherName;


    public Integer getTeacherId() {
        return teacherId;
    }

    public void setTeacherId(Integer teacherId) {
        this.teacherId = teacherId;
    }

    public String getTeacherName() {
        return teacherName;
    }

    public void setTeacherName(String teacherName) {
        this.teacherName = teacherName;
    }

    @Override
    public String toString() {
        return "Teacher{" +
                "teacherId=" + teacherId +
                ", teacherName='" + teacherName + '\'' +
                '}';
    }
}
在学生中添加对应的老师属性:
package com.gothic.sunset.demo;

import java.util.Arrays;
import java.util.Map;

public class Student {

   	//......
   	//新增
    private Map<String,Teacher> teacherMap;

    public Map<String, Teacher> getTeacherMap() {
        return teacherMap;
    }

    public void setTeacherMap(Map<String, Teacher> teacherMap) {
        this.teacherMap = teacherMap;
    }
}
使用map标签注入bean:
 	<bean id="teacherOne" class="com.gothic.sunset.demo.Teacher">
        <property name="teacherId" value="88"></property>
        <property name="teacherName" value="叶问"></property>
    </bean>
    <bean id="teacherTwo" class="com.gothic.sunset.demo.Teacher">
        <property name="teacherId" value="99"></property>
        <property name="teacherName" value="黄飞鸿"></property>
    </bean>
    <bean id="studentFive" class="com.gothic.sunset.demo.Student">
        <property name="id" value="202024"></property>
        <property name="name" value="张三"></property>
        <property name="age" value="21"></property>
        <property name="sex" value="男"></property>
        <property name="classSt" ref="classStCs1"></property>
        <property name="hobbies">
            <array>
                <value>跑步</value>
                <value>武术</value>
                <value>足球</value>
            </array>
        </property>
        <property name="teacherMap">
            <map>
                <entry>
                    <key>
                        <value>88</value>
                    </key>
                    <ref bean="teacherOne"></ref>
                </entry>
                <entry>
                    <key>
                        <value>99</value>
                    </key>
                    <ref bean="teacherTwo"></ref>
                </entry>
            </map>
        </property>
    </bean>
测试输出:
	 @Test
    public void testClassStBean(){
        ApplicationContext ioc = new ClassPathXmlApplicationContext("applicationContext.xml");
        //Student student = (Student)ioc.getBean("studentOne");
        //Student student = (Student)ioc.getBean("studentThree");
        // Student student = (Student)ioc.getBean("studentTwo");
        // Student student = (Student)ioc.getBean("studentFour");
        Student student = (Student)ioc.getBean("studentFive");
        System.out.println(student);
    }

4.until标签
until标签的作用就是,可以将一些类型的bean作为一个整体,供其他bean方便引用。
首先,需要在spring配置文件的头部添加xmlns:util="http://www.springframework.org/schema/util",idea一般会自动导入。
然后就可以开始写until标签的一些集合:
	<!--学生集合-->
    <util:list id="stList">
        <ref bean="studentOne"></ref>
        <ref bean="studentTwo"></ref>
        <ref bean="studentThree"></ref>
        <ref bean="studentFour"></ref>
        <ref bean="studentFive"></ref>
    </util:list>
    <!--教师集合-->
    <util:map id="teacherMap">
        <entry>
            <key>
                <value>88</value>
            </key>
            <ref bean="teacherOne"></ref>
        </entry>
        <entry>
            <key>
                <value>99</value>
            </key>
            <ref bean="teacherTwo"></ref>
        </entry>
    </util:map>
p命名空间
注意的是,与上面的util一样,也需要在spring配置文件的头部中添加xmlns:p="http://www.springframework.org/schema/p"
引入p命名空间后,可以通过以下方式为bean的各个属性赋值:
  <bean id="studentSix" class="com.gothic.sunset.demo.Student"
          p:id="1006" p:name="周小明" p:sex="男" p:age="18" p:classSt-ref="classStCs1" p:teacherMap-ref="teacherMap">
    </bean>
bean的作用域及生命周期
1.bean的作用域
在Spring中可以通过配置bean标签的scope属性来指定bean的作用域范围:

在WebApplicationContext环境下还会有另外两个作用域:

	<!-- scope属性:取值singleton(默认值),bean在IOC容器中只有一个实例,IOC容器初始化时创建对象 -->
    <!-- scope属性:取值prototype,bean在IOC容器中可以有多个实例,getBean()时创建对象 -->
    <bean class="com.xxxxx" scope="prototype"></bean>
2.bean的生命周期
具体的生命周期过程:
- bean对象创建(调用无参构造器)
- 给bean对象设置属性
- bean对象初始化之前操作(由bean的后置处理器负责)
- bean对象初始化(需在配置bean时指定初始化方法)
- bean对象初始化之后操作(由bean的后置处理器负责)
- bean对象就绪可以使用
- bean对象销毁(需在配置bean时指定销毁方法)
- IOC容器关闭
配置bean:
在bean标签的配置中,可以使用init-method和destroy-method属性,分别指定初始化和销毁方法。
	<!-- 使用init-method属性指定初始化方法 -->
	<!-- 使用destroy-method属性指定销毁方法 -->
  <bean id="xxx" class="com.xxx" init-method="" destroy-method="">
        ....
    </bean>
后置处理器:
bean的后置处理器会在生命周期的初始化前后添加额外的操作,需要实现BeanPostProcessor接口,
且配置到IOC容器中,需要注意的是,bean后置处理器不是单独针对某一个bean生效,而是针对IOC容
器中所有bean都会执行。
创建bean的后置处理器:
package com.gothic.sunset.demo;
import org.springframework.beans.BeansException;
import org.springframework.beans.factory.config.BeanPostProcessor;
public class MyTestBeanProcessor implements BeanPostProcessor {
    @Override
    public Object postProcessBeforeInitialization(Object bean, String beanName)
            throws BeansException {
        System.out.println("lalala" + beanName + " = " + bean);
        return bean;
    }
    @Override
    public Object postProcessAfterInitialization(Object bean, String beanName)
            throws BeansException {
        System.out.println("dadada" + beanName + " = " + bean);
        return bean;
    }
}
在IOC容器中配置后置处理器:
<bean id="MyTestBeanProcessor" class="com.gothic.sunset.demo.MyTestBeanProcessor"></bean>
基于xml的自动装配
自动装配:
根据指定的策略,在IOC容器中匹配某一个bean,自动为指定的bean中所依赖的类类型或接口类型属性赋值。
使用bean标签的autowire属性设置自动装配效果,autuwire=byType|byName。
- 自动装配方式:byType
byType:根据类型匹配IOC容器中的某个兼容类型的bean,为属性自动赋值
若在IOC中,没有任何一个兼容类型的bean能够为属性赋值,则该属性不装配,即值为默认值null。
若在IOC中,有多个兼容类型的bean能够为属性赋值,则抛出异常NoUniqueBeanDefinitionException。
- 自动装配方式:byName
byName:将自动装配的属性的属性名,作为bean的id在IOC容器中匹配相对应的bean进行赋值
自动装配小例子
项目目录结构:
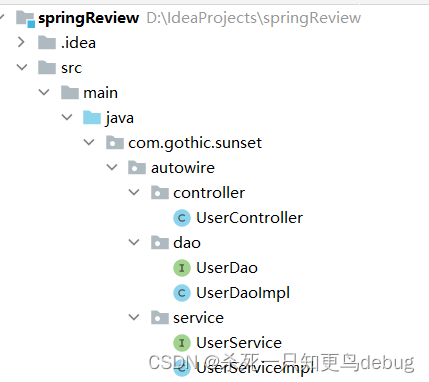
1.dao层:
dao层接口:
package com.gothic.sunset.autowire.dao;

public interface UserDao {

    void saveUser();
}
dao层实现类:
package com.gothic.sunset.autowire.dao;

public class UserDaoImpl implements UserDao{
    @Override
    public void saveUser() {
        System.out.println("ok,保存成功啦!!!");
    }
}
2.service层:
service层接口:
package com.gothic.sunset.autowire.service;

public interface UserService {
    void saveUser();
}
service层实现类:
package com.gothic.sunset.autowire.service;

import com.gothic.sunset.autowire.dao.UserDaoImpl;

public class UserServiceImpl implements UserService{

    private UserDaoImpl userDao;

    public UserDaoImpl getUserDao() {
        return userDao;
    }

    public void setUserDao(UserDaoImpl userDao) {
        this.userDao = userDao;
    }

    @Override
    public void saveUser() {
        userDao.saveUser();
    }
}
3.controller层:
controller层实现类:
package com.gothic.sunset.autowire.controller;

import com.gothic.sunset.autowire.service.UserServiceImpl;

public class UserController {

    private UserServiceImpl userService;

    public UserServiceImpl getUserService() {
        return userService;
    }

    public void setUserService(UserServiceImpl userService) {
        this.userService = userService;
    }

    public void saveUser(){
        userService.saveUser();
    }
}
4.配置bean
在resources目录下新建一个,名为springAutoWireTest.xml,的spring配置文件:
<?xml version="1.0" encoding="UTF-8"?>
<beans xmlns="http://www.springframework.org/schema/beans"
       xmlns:xsi="http://www.w3.org/2001/XMLSchema-instance"
       xsi:schemaLocation="http://www.springframework.org/schema/beans http://www.springframework.org/schema/beans/spring-beans.xsd">


    <bean class="com.gothic.sunset.autowire.controller.UserController" autowire="byType">
    </bean>

    <bean class="com.gothic.sunset.autowire.service.UserServiceImpl" autowire="byType"></bean>

    <bean class="com.gothic.sunset.autowire.dao.UserDaoImpl" autowire="byType"></bean>
</beans>
5.测试代码:
import com.gothic.sunset.autowire.controller.UserController;
import org.junit.Test;
import org.springframework.context.ApplicationContext;
import org.springframework.context.support.ClassPathXmlApplicationContext;

public class MyTestAutoWire {

    @Test
    public void testAutoWire(){
        ApplicationContext ioc = new ClassPathXmlApplicationContext("springAutoWireTest.xml");
        UserController bean = ioc.getBean(UserController.class);
        bean.saveUser();
    }
}
输出:
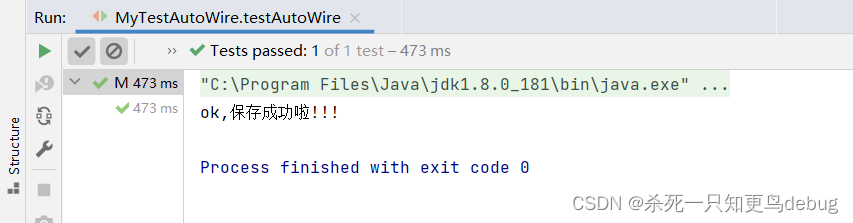
byName方式就不演示啦,xml配置管理bean暂告一段落!!!!


 376
376


 被折叠的 条评论
为什么被折叠?
被折叠的 条评论
为什么被折叠?
 到【灌水乐园】发言


