


目录
代码中写了详细注释
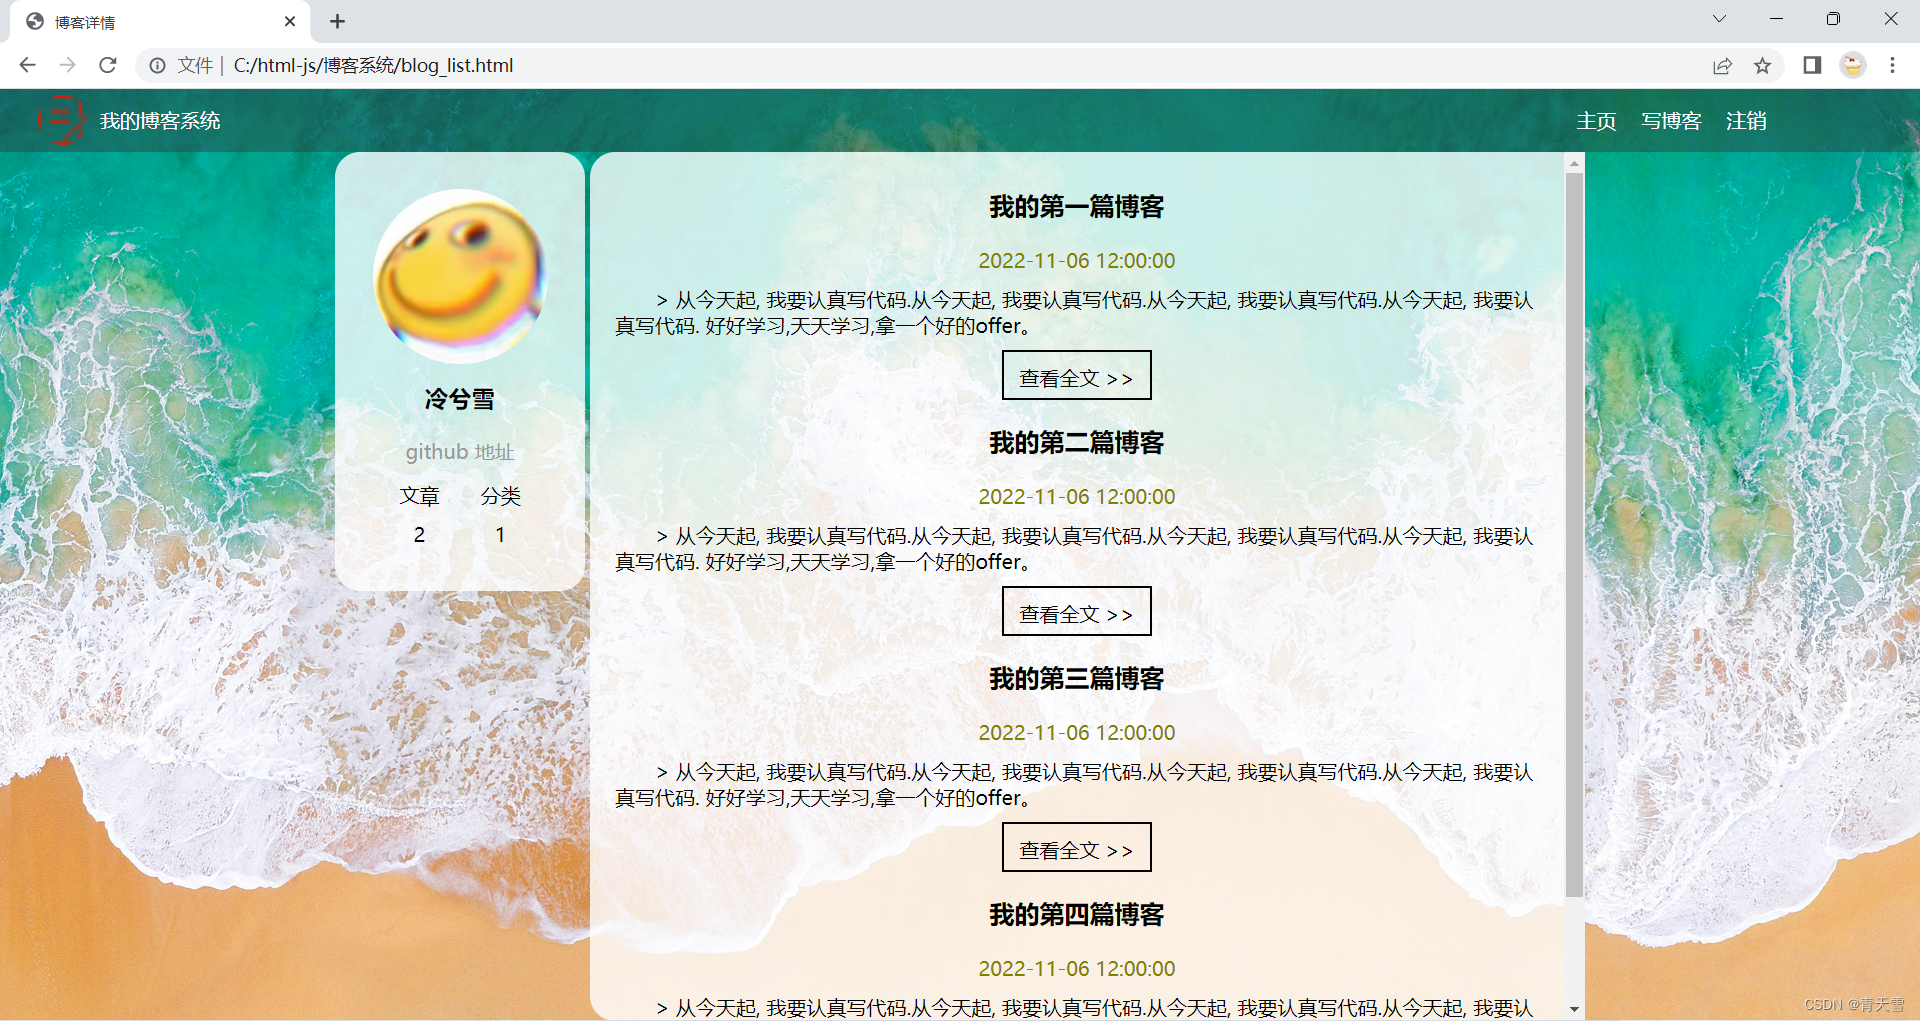
1、博客系统效果图
博客主页:
博客详情页:

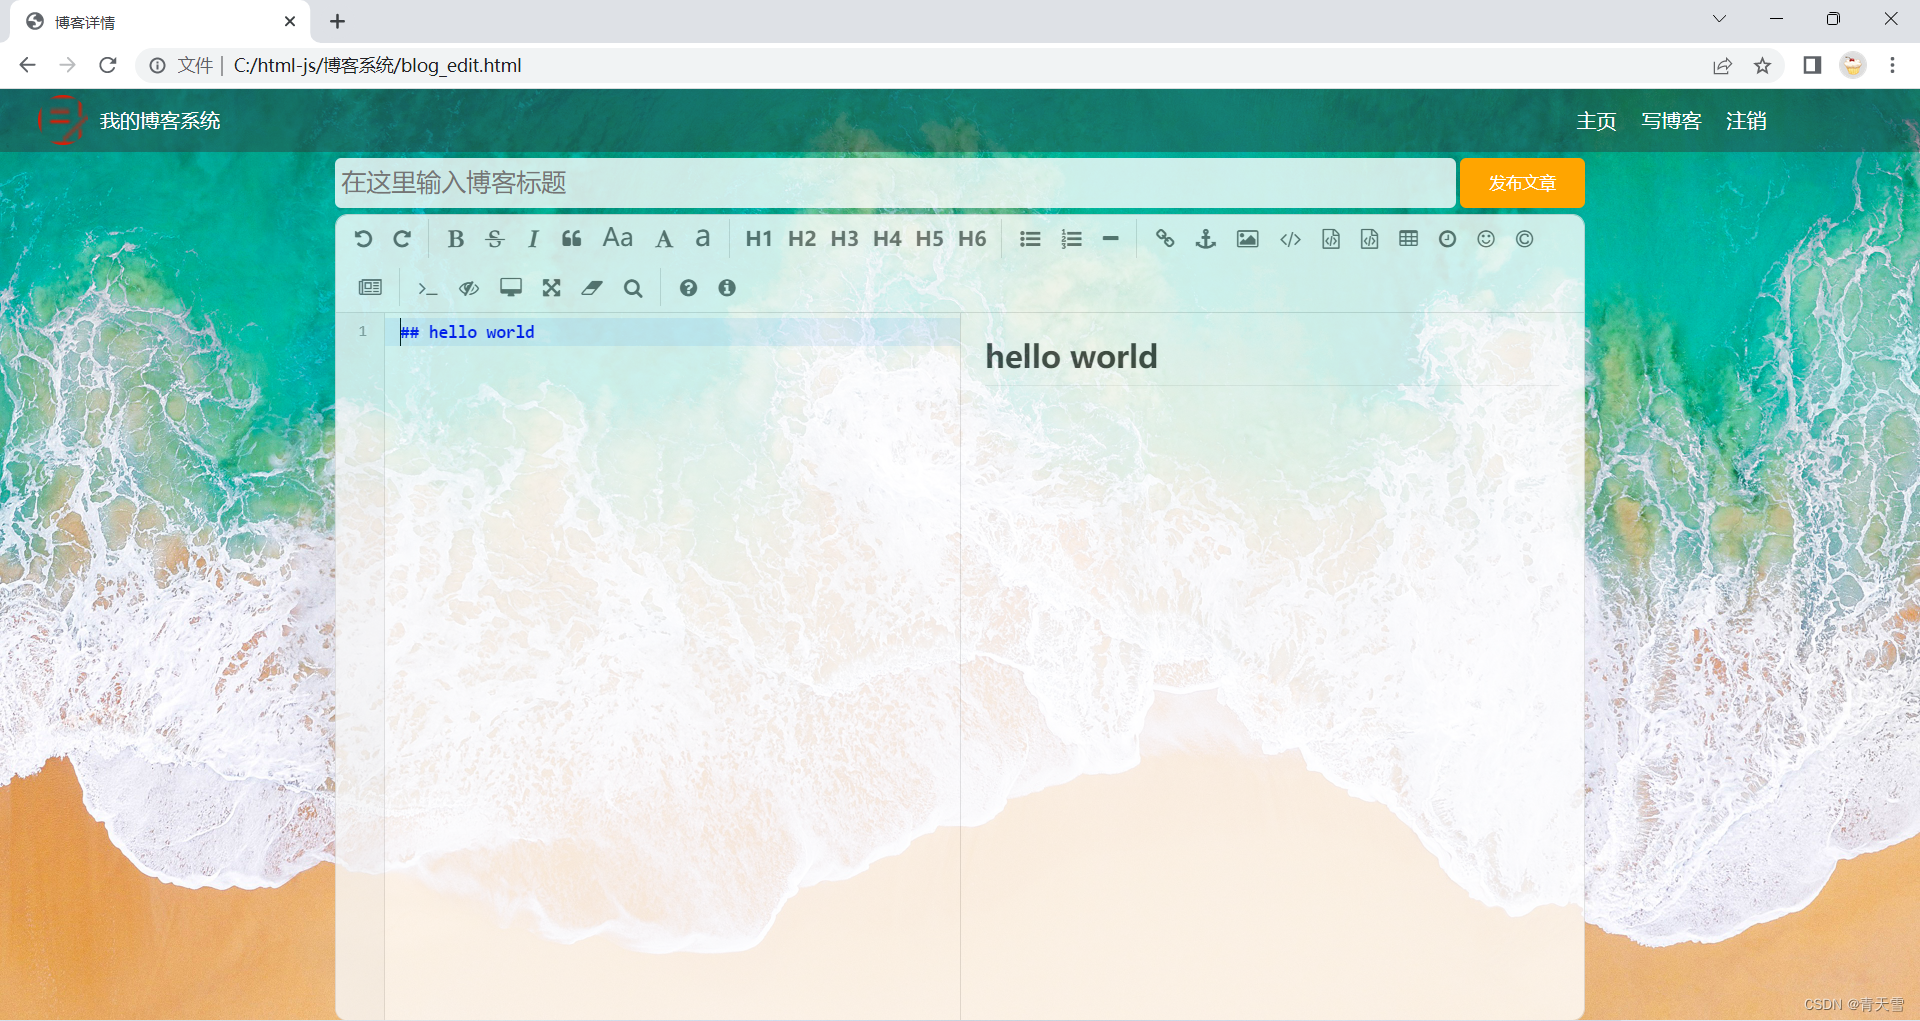
博客编辑页:
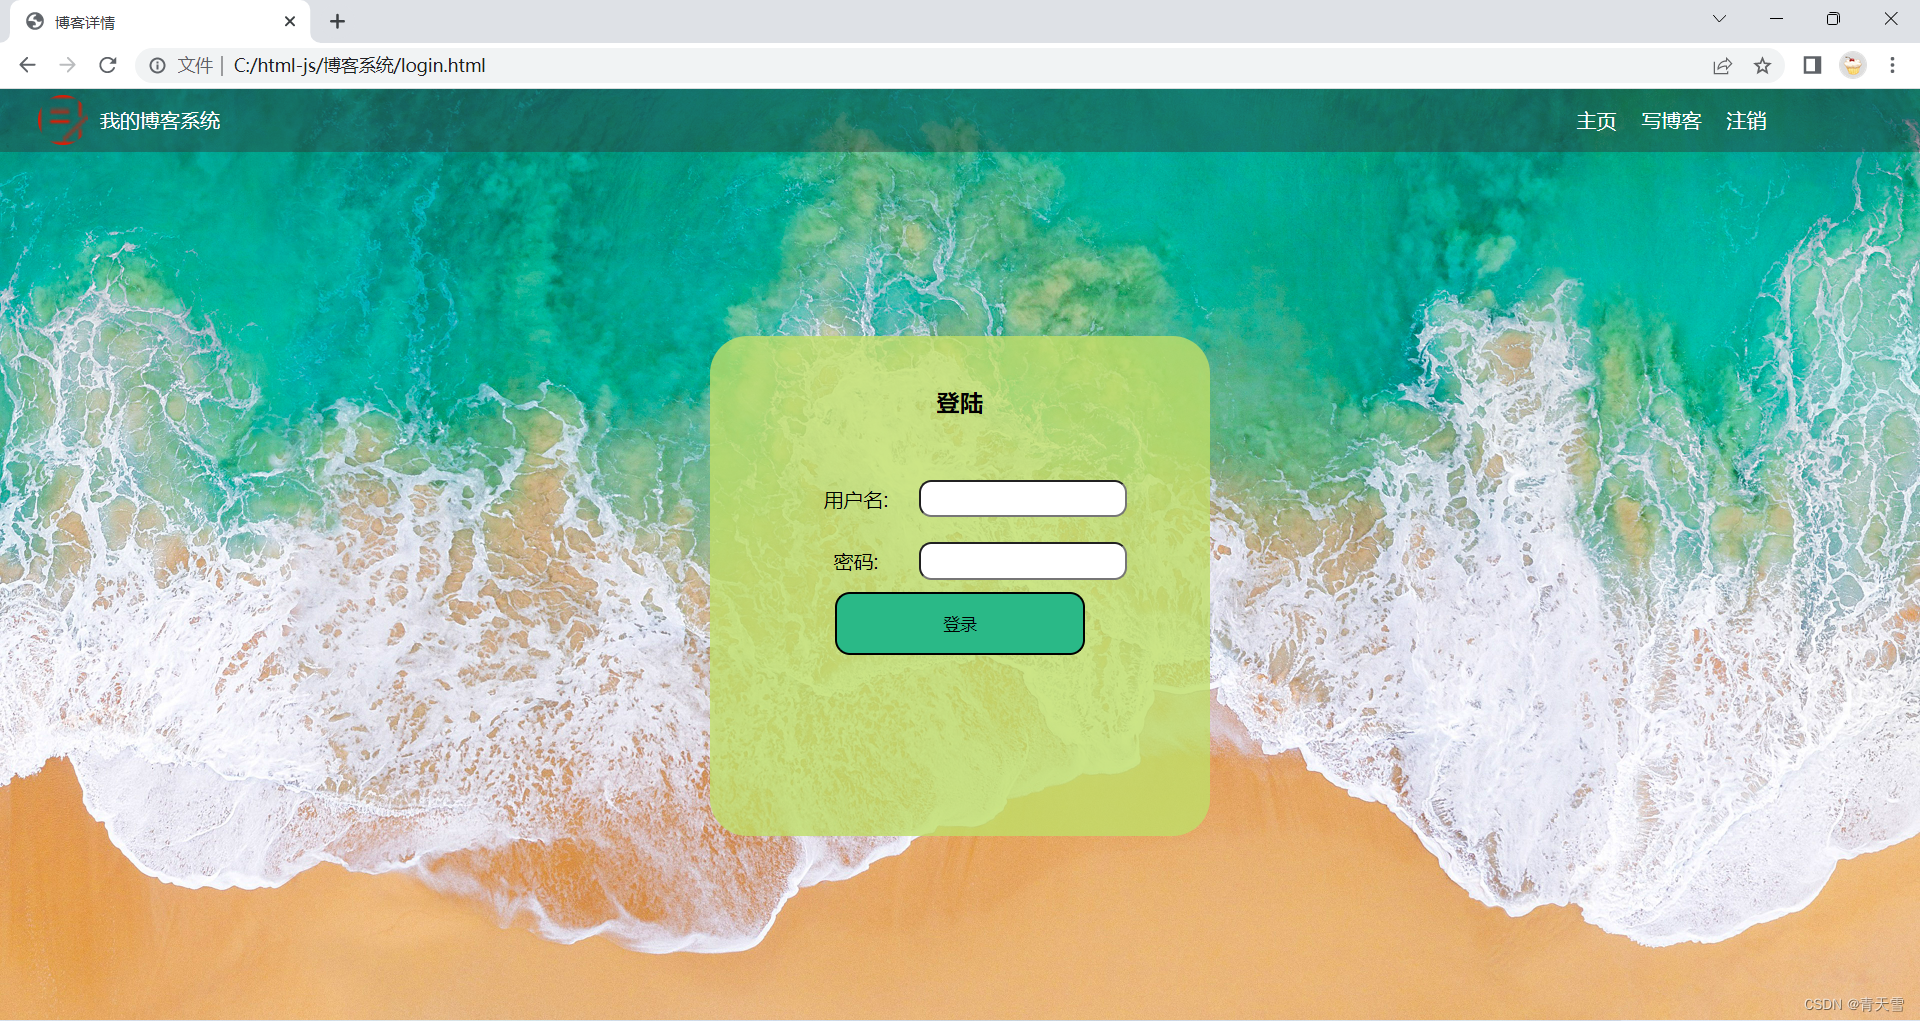
博客注销页:
2、代码实现
1)、博客详情页
<!DOCTYPE html>
<html lang="en">
<head>
    <meta charset="UTF-8">
    <meta http-equiv="X-UA-Compatible" content="IE=edge">
    <meta name="viewport" content="width=device-width, initial-scale=1.0">
    <title>博客详情</title>

    <!-- 引入css链接 -->
    <link rel="stylesheet" href="css/common.css">
    <link rel="stylesheet" href="css/blog_detail.css">

</head>
<body>
    <!-- 导航条 -->
    <div class="nav">
        <img src="img/博客园.png" alt="">
        <span class="title">我的博客系统</span>

        <!-- spacer 不现实任何内容, 只是占位, 把后面 a 标签撑到右侧去 -->
        <div class="spacer"></div>

        <a href="blog_list.html">主页</a>
        <a href="blog_edit.html">写博客</a>
        <a href="login.html">注销</a>
    </div>

    <!-- 这个 div 表示页面的主区域(版心) -->
    <div class="container">

        <!-- 左侧的用户信息 -->
        <div class="container-left">
            <!-- 用这个元素表示用户的信息 -->
            <div class="card">
                <!-- 用户的头像 -->
                <img src="img/1.jpg!1" alt="">
                <!-- 用户的名字 -->
                <h3>冷兮雪</h3>
                <!-- 这个空链接可以放自己的GitHub或者Gitee -->
                <a href="#" target="_blank">github 地址</a>

                <div class="counter">
                    <span>文章</span>
                    <span>分类</span>
                </div>

                <div class="counter">
                    <span>2</span>
                    <span>1</span>
                </div>

            </div>
        </div>

        <!-- 右侧内容区域 -->
        <div class="container-right">
            <div class="blog-detail">
                <!-- 博客标题 -->
                <h3>我的第一篇博客</h3>
                <!-- 编写博客的时间 -->
                <div class="date">2022-11-06 12:00:00</div>
                <!-- 博客正文 -->
                <p>
                从今天起, 我要认真写代码. 句多么朴实的话语,当我们平静下来仔细审视它的时
           候,你会发现它是如此地完美,在人人觉得俗不可耐的外表下却是一个让人怦然心动的
           真理,一种饱含深情的希翼。毛泽东的伟大之处从这简单而深刻的语言中大概就能让人
           深深地体会到了现在的孩子真的该好好学习这句话了。从字义上去理解,我想就是
           要求学生认认真真地学习,把学习当作一回事来做,这里的“好”即是态度,这种态度
           不是一般的好,不是强迫的好,而是发自内心的、出自求知的、来自远大理想的好,
           两个“好”就体现了一种切切实实的、脚踏实地的那种学习姿态,没有做作,没有
           虚张,没有花哨,只告诉你学习应该是“好好”地学。还有呢?就是要“天天向上”,
           这里既是“好好学习”的目的,更是培养人才的目的。人生就不是完善的,学而知之,学
           而善之,要告教化才能不断进步,“向上”即是从善,要有好学的精神,要有见贤思
           齐的思想,要能不断弥补自己的不足之处、改正自己的缺点,从而把自己塑造成一个
           文明的人,一个有思想、有道德、有情操、有文化、有知识、有才干的人。“向上”
           是一切的“上”,所谓的“择其善者而从之,择其不善者而改之”也,凡是值得学的我们都
           要学,凡是不可学的坚决不学,而“向”更能说明一种自觉主动的姿态,一种积极奋发
           的样子,从善如流的心情。而且“向上”之外,还在于“天天”。一个人要进步不难,难的
           是每天进步,哪怕是进步一点,这里有希望、有责任、有寄托,是对少年儿童殷切的
           期望、真诚的教诲。
                </p>

            </div>
        </div>

    </div>
</body>
</html>
2)、博客列表页
<!DOCTYPE html>
<html lang="en">
<head>
<meta charset="UTF-8">
<meta http-equiv="X-UA-Compatible" content="IE=edge">
<meta name="viewport" content="width=device-width, initial-scale=1.0">
<title>博客列表</title>
<!-- 引入css链接 -->
<link rel="stylesheet" href="css/blog_list.css">
<link rel="stylesheet" href="css/common.css">
</head>
<body>
<!-- 导航条 -->
<div class="nav">
<img src="img/博客园.png" alt="">
<span class="title">我的博客系统</span>
<!-- spacer 不现实任何内容, 只是占位, 把后面 a 标签撑到右侧去 -->
<div class="spacer"></div>
<a href="blog_list.html">主页</a>
<a href="blog_edit.html">写博客</a>
<a href="login.html">注销</a>
</div>
<!-- 这个 div 表示页面的主区域(版心) -->
<div class="container">
<!-- 左侧的用户信息 -->
<div class="container-left">
<!-- 用这个元素表示用户的信息 -->
<div class="card">
<!-- 用户的头像 -->
<img src="img/1.jpg!1" alt="">
<!-- 用户的名字 -->
<h3>冷兮雪</h3>
<!-- 这个空链接可以放自己的GitHub或者Gitee -->
<a href="#" target="_blank">github 地址</a>
<div class="counter">
<span>文章</span>
<span>分类</span>
</div>
<div class="counter">
<span>2</span>
<span>1</span>
</div>
</div>
</div>
<!-- 右侧内容区域 -->
<div class="container-right">
<div class="blog">
<div class="title">我的第一篇博客</div>
<div class="date">2022-11-06 12:00:00</div>
<div class="desc">
从今天起, 我要认真写代码.从今天起, 我要认真写代码.从今天起, 我要认真写代码.从今天起, 我要认真写代码.
好好学习,天天学习,拿一个好的offer。
</div>
<!-- >为‘>’的实体名称 -->
<a href="blog_detail.html">查看全文 >> </a>
</div>
<div class="blog">
<div class="title">我的第二篇博客</div>
<div class="date">2022-11-06 12:00:00</div>
<div class="desc">
从今天起, 我要认真写代码.从今天起, 我要认真写代码.从今天起, 我要认真写代码.从今天起, 我要认真写代码.
好好学习,天天学习,拿一个好的offer。
</div>
<!-- >为‘>’的实体名称 -->
<a href="blog_detail.html">查看全文 >> </a>
</div>
<div class="blog">
<div class="title">我的第三篇博客</div>
<div class="date">2022-11-06 12:00:00</div>
<div class="desc">
从今天起, 我要认真写代码.从今天起, 我要认真写代码.从今天起, 我要认真写代码.从今天起, 我要认真写代码.
好好学习,天天学习,拿一个好的offer。
</div>
<!-- >为‘>’的实体名称 -->
<a href="blog_detail.html">查看全文 >> </a>
</div>
<div class="blog">
<div class="title">我的第四篇博客</div>
<div class="date">2022-11-06 12:00:00</div>
<div class="desc">
从今天起, 我要认真写代码.从今天起, 我要认真写代码.从今天起, 我要认真写代码.从今天起, 我要认真写代码.
好好学习,天天学习,拿一个好的offer。
</div>
<!-- >为‘>’的实体名称 -->
<a href="blog_detail.html">查看全文 >> </a>
</div>
</div>
</div>
</body>
</html>3)、博客编辑页
<!DOCTYPE html>
<html lang="en">
<head>
    <meta charset="UTF-8">
    <meta http-equiv="X-UA-Compatible" content="IE=edge">
    <meta name="viewport" content="width=device-width, initial-scale=1.0">
    <title>博客编辑</title>
    <!-- 引入css链接 -->
    <link rel="stylesheet" href="css/common.css">
    <link rel="stylesheet" href="css/blog_edit.css">

    <!-- 引入 editor.md 的依赖 -->
    <link rel="stylesheet" href="editor.md/css/editormd.min.css" />

    <!-- 这是另一个第三方库 -->
    <script src="https://apps.bdimg.com/libs/jquery/2.1.4/jquery.min.js"></script>
    <!-- 引入 editor.md 的依赖 -->
    <script src="editor.md/lib/marked.min.js"></script>
    <script src="editor.md/lib/prettify.min.js"></script>
    <script src="editor.md/editormd.js"></script>

</head>
<body>
    <!-- 导航条 -->
    <div class="nav">
        <img src="img/博客园.png" alt="">
        <span class="title">我的博客系统</span>
        <!-- spacer 不现实任何内容, 只是占位, 把后面 a 标签撑到右侧去 -->
        <div class="spacer"></div>

        <a href="blog_list.html">主页</a>
        <a href="blog_edit.html">写博客</a>
        <a href="login.html">注销</a>
    </div>

    <!-- 整个编辑页的版心 -->
    <div class="blog-edit-container">
        <!-- 标题的编辑区 -->
        <div class="title">
            <!-- 输入的标题内容 -->
            <input type="text" id="blog-title" placeholder="在这里输入博客标题">
            <!-- 发布按钮 -->
            <button id="submit">发布文章</button>
        </div>
        <!-- 正文的编辑区 -->
        <div id="editor">
        </div>
    </div>

    <script>
        // 初始化编辑器, 代码也是截取自 官方文档 .
        var editor = editormd("editor", {
            // 这里的尺寸必须在这里设置. 设置样式会被 editormd 自动覆盖掉.
            width: "100%",
            // 设定编辑器高度
            height: "calc(100% - 50px)",
            // 编辑器中的初始内容
            markdown: "## hello world",
            // 指定 editor.md 依赖的插件路径
            path: "editor.md/lib/"
        });
    </script>
</body>
</html> 
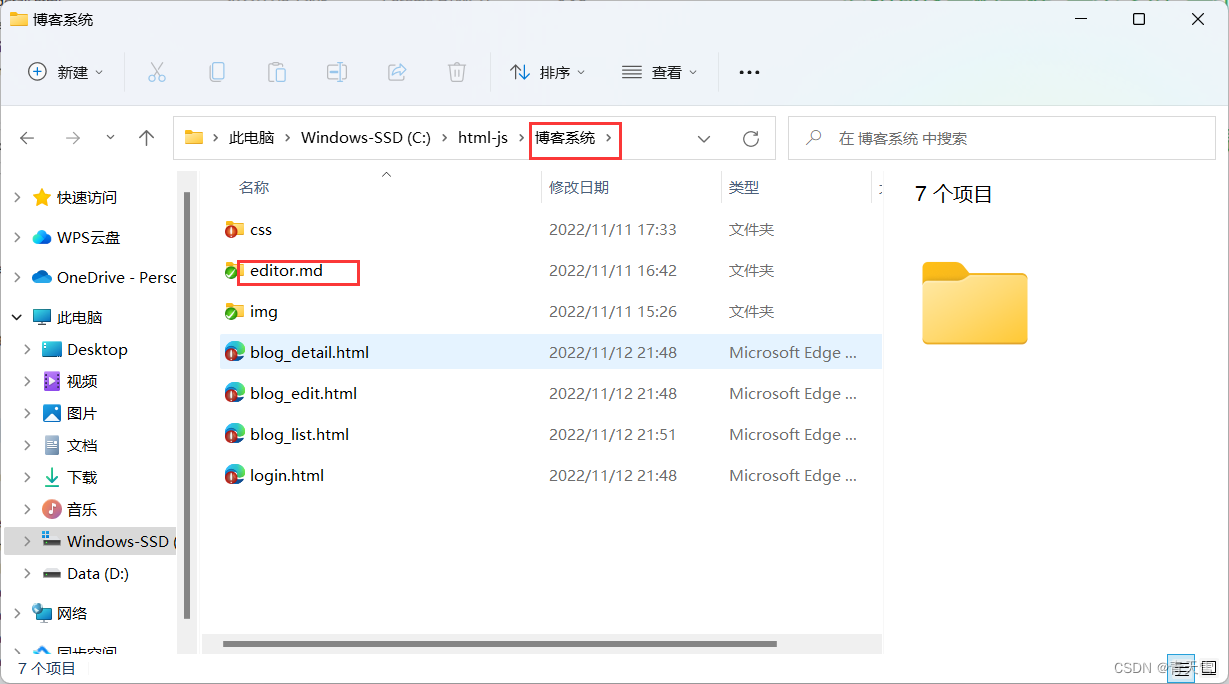
另外博客编辑页还需要下载引入开源的markddown编辑器Editor.md
Editor.md - 开源在线 Markdown 编辑器 (pandao.github.io)
直接Github下载
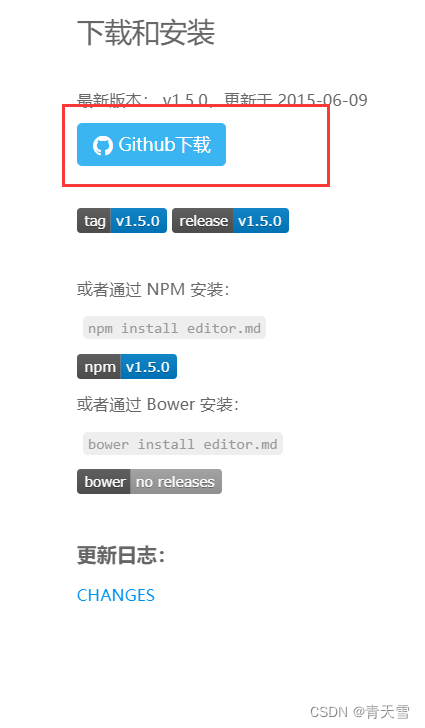
下载好之后我们把它放在我们写博客系统的文件夹中,并改名为editor.md
除此之外,我们还要引入一个第三方库
https://apps.bdimg.com/libs/jquery/2.1.4/jquery.min.js

4)博客注销页
<!DOCTYPE html>
<html lang="en">
<head>
    <meta charset="UTF-8">
    <meta http-equiv="X-UA-Compatible" content="IE=edge">
    <meta name="viewport" content="width=device-width, initial-scale=1.0">
    <title>博客注销</title>
    <link rel="stylesheet" href="css/common.css">
    <link rel="stylesheet" href="css/blog_login.css">
</head>
<body>
    <!-- 导航条 -->
    <div class="nav">
        <img src="img/博客园.png" alt="">
        <span class="title">我的博客系统</span>
        <!-- spacer 不现实任何内容, 只是占位, 把后面 a 标签撑到右侧去 -->
        <div class="spacer"></div>
        <a href="blog_list.html">主页</a>
        <a href="blog_edit.html">写博客</a>
        <a href="login.html">注销</a>
    </div>

    <!-- 博客页面 -->
   <dir class="login-container">

    <div class="login">
        <h3 >登陆</h3>

        <div class="row">
              <span>用户名:</span>
              <input type="text">
        </div>

        <div class="row">
             <span>密码:</span>
             <input type="password">
        </div>

        <div>
            <button class="bin">登录</button>
        </div>

    </div>

   </dir>

</body>
</html>
css代码
1)公共样式css
/* 这个css样式是要放多个页面都需要使用的公共样式 */

/* 清除浏览器的默认样式 */
* {
    margin: 0;
    padding: 0;
    box-sizing: border-box;
}

html {
    /* 设置让 html 的高度和浏览器窗口一样高 */
    height: 100%;
}

body {
    /* 设置让 body 的高度和 html 标签一样高 */
    height: 100%;
    /* 博客系统背景图 */
    background-image: url(../img/2.jpg);
    /* 背景图片居中 */
    background-position: center center;
    /* 背景图片不平铺 */
    background-repeat: no-repeat;
    /* 背景图片扩展至足够大,以至使背景图片完全覆盖背景区域 */
    background-size: cover;
}

.nav {
    /* 导航栏高度普遍都是 50px */
    height: 50px;
    /* 导航栏颜色及透明度 */
    background-color: rgba(50, 50, 50, 0.4);
    color: white;
    /* 导航栏设置成弹性布局 */
    display: flex;
    /* 水平居中 */
    justify-content: flex-start;
    /* 竖直居中 */
    align-items: center;
}

 /* 导航栏图片样式 */
.nav img {
    width: 40px;
    height: 40px;
    /* 设置图片左右边距 */
    margin-left: 30px;
    margin-right: 10px;
    /* 设置图片圆角边框属性 */
    border-radius: 20px;
}

/* 导航栏中间空白长宽,使主页,写博客,注销等排列到右边 */
.nav .spacer {
    /* 宽度设置成百分比的形式, 以父元素为基准, 设置当前的尺寸 */
    width: 70%;
    height: 40px;
}

/* 导航栏链接样式 */
.nav a {
    color: white;
    text-decoration: none;
    padding: 0 10px;
}

/* 主页中心介绍 */
.container {
    width: 1000px;
    /* 水平居中 */
    margin: 0 auto;

    /* 设置高度 */
    height: calc(100% - 50px);

    /* 为了让里面的 left 和 right 能够水平方向排列, 就需要使用弹性布局了 */
    display: flex;
    justify-content: space-between;
}

.container .container-left {
    height: 100%;
    width: 200px;
}

.container .container-right {

    height: 100%;
    width: 796px;
     /* 均匀排列每个元素 首个元素放置于起点,末尾元素放置于终点 */
    background-color: rgba(255, 255, 255, 0.8);
    /* 设置内边距 */
    padding: 20px;
    border-radius: 20px;
    /* 如果内容超出范围了, 自动添加滚动条 */
    overflow: auto;
}

/* 介绍卡片的css属性 */
.card {
    background-color: rgba(255, 255, 255, 0.8);
    /* 设置内边距, 就是为了让文字和图片不要顶着边界 */
    padding: 30px;
    /* 设置介绍卡片的圆角边框属性 */
    border-radius: 20px;
}

/* 介绍卡片的图片 */
.card img {
    width: 140px;
    height: 140px;
    border-radius: 70px;
}

.card h3 {
    text-align: center;
    padding: 10px;
}

/* githup地址 的css属性*/
.card a {
    /* a 默认是行内元素. 默认尺寸就是和内容是一样的 */
    display: block;
    text-align: center;
    color: #999;
    text-decoration: none;
    padding: 10px 0;
}

.card .counter {
    display: flex;
    justify-content: space-around;
    padding: 5px;
} 
这个图标可以在 阿里巴巴矢量图标库
中找到,这个也是一个公开图标库,分享给大家使用
2)博客详情页css
/* 给博客详情页提供具体的样式 */

/* 给博客标题的css样式 */
.blog-detail h3 {
    font-size: 20px;
    text-align: center;
    padding: 20px 0;
}

/* 博客时间的css样式 */
.blog-detail .date {
    color: rgb(0, 128, 0);
    text-align: center;
    padding: 10px 0;
}

/* 博客正文的css样式 */
.blog-detail p {
    text-indent: 2em;
}
3)博客列表页css
/* 这个文件专门放 博客列表页 的专用样式 */

/* 针对博客的容器进行设置 */

.blog .title {
    font-size: 20px;
    font-weight: 700;
    text-align: center;
    padding: 10px 0;
}

.blog .date {
    text-align: center;
    color: rgb(128, 128, 0);
    padding: 10px 0;
}

/* 设置博客列表页正文 首行文本内容之前的缩进量 */
.blog .desc {
    text-indent: 2em;
}

.blog a {
    /* 转成块级元素, 才好设置尺寸 */
    display: block;
    width: 120px;
    height: 40px;
    /* 元素水平居中 */
    margin: 10px auto;
    /* 文字水平居中 */
    text-align: center;
    /* 文字垂直居中 */
    line-height: 40px;
    color: black;
    /* 去掉下划线 */
    text-decoration: none;
    /* 加上边框 */
    border: 2px solid black;

    /* 加上一个背景的渐变效果 */
    transition: all 0.25s;
}

/* 鼠标悬停的时候, 有个动态效果 */
.blog a:hover {
    background-color: black;
    color: white;
}
4)博客编辑页css
/* 针对博客编辑页写的样式 */

/* 版心 */
.blog-edit-container {
    width: 1000px;
    height: calc(100% - 50px);
    margin: 0 auto;
}

/* 设置标题编辑区的样式 */
.blog-edit-container .title {
    height: 50px;
    /* 只要是水平方向排列多个元素, 就想到弹性布局就好 */
    display: flex;
    justify-content: space-between;
    align-items: center;
}

/* 针对输入框进行调整 */
#blog-title {
    height: 40px;
    width: 897px;
    font-size: 20px;
    padding-left: 5px;
    /* 去掉边界(border)和轮廓(outline)线, 选中输入框时候的黑圈 */
    outline: none;
    border: none;
    border-radius: 5px;
    /* 加上背景半透明效果 */
    background-color: rgba(255, 255, 255, 0.8);
}

/* 针对发布文章的提交按钮调整 */
#submit {
    height: 40px;
    width: 100px;
    border: none;

    border-radius: 5px;
    color: white;
    background-color: orange;
}

#submit:active {
    background-color: grey;
}

#editor {
    border-radius: 10px;
    /* background-color: rgba(255, 255, 255, 0.8); */
    /* 这个属性的半透明是可以让子元素也一起生效的, 值是个百分数. 80% 就相当于 rgba 中的 0.8 */
    opacity: 80%;
}
5)博客注销页css
/* 博客注销页面的css属性 */

.login-container {
    height: calc(100% - 50px);
    /* 这三个样式是为了让 .dialog 垂直水平居中 */
    display: flex;
    justify-content: center;
    align-items: center;
}

/* 博客注销操作台的css属性 */
.login {
    height: 400px;
    width: 400px;
    background-color: rgba(191, 223, 104, 0.8);
    /* 圆角矩边框属性*/
    border-radius: 30px;
}

.login h3{
    text-align: center;
    margin: 40px auto;
}

.row{
    height: 50px;
    display:flex;
    justify-content: center;
    align-items: center;
}

.row span{
    width: 100px;
    text-align: center;
}

.row input{
    height: 30px;
    /* 圆角矩边框属性*/
    border-radius: 10px;
}

.bin{
    width: 200px;
    height: 50px;
    display:block;
    margin: auto;
    border-radius: 12px;
    background-color: rgb(42, 185, 135);
    /* 使登录按钮在 被点击时 有 0.35s 的过渡时间 */
    transition: all 0.35s;
}

/* 鼠标悬停的时候, 有个动态效果 */
.bin:active {
    background-color: rgb(40, 140, 227);
    color: white;
}


 2660
2660


 被折叠的 条评论
为什么被折叠?
被折叠的 条评论
为什么被折叠?
 到【灌水乐园】发言


