


xmlns:app=“http://schemas.android.com/apk/res-auto”
xmlns:tools=“http://schemas.android.com/tools”
tools:context=“com.android.samples.donuttracker.MainActivity”>
<item
android:id="@+id/selectionFragment"
android:orderInCategory=“100”
android:title="@string/action_settings"
app:showAsAction=“never” />
Toolbar
现在应用可以导航到 selectionFragment,但是标题仍然保持原样。当处于 selectionFragment 的时候,我们希望标题可以被更新并且显示返回按钮。
首先我需要添加一个 AppBarConfiguration 对象,NavigationUI 会使用该对象来管理应用左上角的导航按钮的行为。
appBarConfiguration = AppBarConfiguration(navController.graph)
该按钮会根据您的目的页面的层级改变自身的行为。比如,当您在最顶层的目的页面时,就不会显示回退按钮,因为没有更高层级的页面。
默认情况下,您应用的最初页面是唯一的最顶层目的页面,但是您也可以定义多个最顶层目的页面。比如,在我们的应用中,我可以将 donutList 和 coffeeList 的目的页面都定义为最顶层的目的页面。
接下来,在 MainActivity 类中,获得 navController 和 toolbar 的实例,并且验证 setSupportActionBar() 是否被调用。这里我还更新了传入函数的 toolbar 的引用。
val navHostFragment = supportFragmentManager.findFragmentById(
R.id.nav_host_fragment
) as NavHostFragment
navController = navHostFragment.navController
val toolbar = binding.toolbar
要在默认的操作栏 (Action Bar) 中添加导航功能,我在这里使用了 setupActionBarWithNavController() 函数。该函数需要两个参数: navController 和 appBarConfiguration。
setSupportActionBar(toolbar)
setupActionBarWithNavController(navController, appBarConfiguration)
接下来,根据目前的目的页面,我覆写了 onSupportNavigationUp() 函数,然后在 nav_host_fragment 上调用 navigateUp() 并传入 appBarConfiguration 来支持回退导航或者显示菜单图标的功能。
override fun onSupportNavigateUp(): Boolean {
return findNavController(R.id.nav_host_fragment).navigateUp(
appBarConfiguration
)
}
现在我可以导航到 selectionFragment,并且您可以看到标题已经更新,并且也显示了返回按钮,用户可以返回到之前的页面。
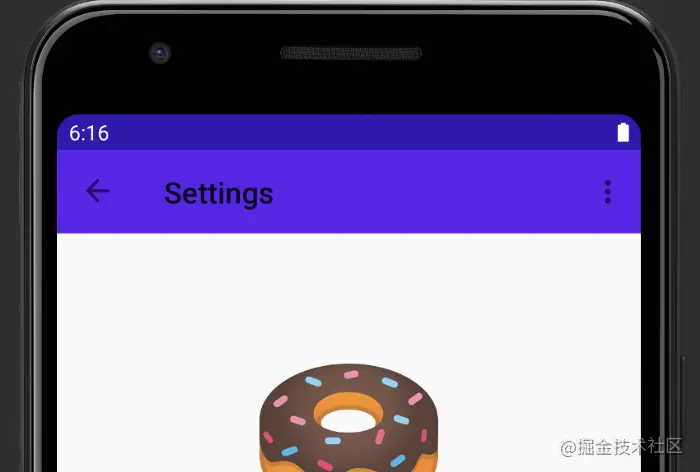
△ 标题更新了并且也显示了返回按钮
底部标签栏
目前为止还算顺利,但是应用还不能导航到 coffeeList Fragment。接下来我们将解决这个问题。
我们从添加底部标签栏入手。首先添加 bottom_nav_menu.xml 文件并且声明两个菜单元素。NavigationUI 依赖 MenuItem 的 id,用它与导航图中目的页面的 id 进行匹配。我还为每个目的页面设置了图标和标题。
<item
android:id="@id/donutList"
android:icon="@drawable/donut_with_sprinkles"
android:title="@string/donut_name" />
<item
android:id="@id/coffeeList"
android:icon="@drawable/coffee_cup"
android:title="@string/coffee_name" />
现在 MenuItem 已经就绪,我在 mainActivity 的布局中添加了 BottomNavigationView,并且将 bottom_nav_menu 设置为 BottomNavigationView的 menu 属性。
<com.google.android.material.bottomnavigation.BottomNavigationView
android:id="@+id/bottom_nav_view"
android:layout_width=“match_parent”
android:layout_height=“wrap_content”
app:menu="@menu/bottom_nav_menu" />
要使底部标签栏发挥作用,这里调用 setupWithNavController() 函数将 navController 传入 BottomNavigationView。
private fun setupBottomNavMenu(navController: NavController) {
val bottomNav = findViewById(
R.id.bottom_nav_view
)
bottomNav?.setupWithNavController(navController)
}
请注意我并没有从导航图中调用任何导航操作。实际上导航图中甚至没有前往 coffeeList Fragment 的路径。和之前对 ActionBar 所做的操作一样,BottomNavigationView 通过匹配 MenuItem 的 id 和导航目的页面的 id 来自动响应导航操作。
抽屉式导航栏
虽然看上去不错,但是如果您设备的屏幕尺寸较大,那么底部标签栏恐怕无法提供最佳的用户体验。要解决这个问题,我会使用另外一个布局文件,它带有 w960dp 限定符,表明它适用于屏幕更大、更宽的设备。
这个布局文件与默认的 activity_main 布局相类似,其中已经包含了 Toolbar 和 FragmentContainerView。我需要添加 NavigationView,并且将 nav_drawer_menu 设置为 NavigationView 的 menu 属性。接下来,我将在 NavigationView 和 FragmentContainerView 之间添加分隔符。
<RelativeLayout
xmlns:android=“http://schemas.android.com/apk/res/android”
xmlns:app="htt
《Android学习笔记总结+最新移动架构视频+大厂安卓面试真题+项目实战源码讲义》
【docs.qq.com/doc/DSkNLaERkbnFoS0ZF】 完整内容开源分享
p://schemas.android.com/apk/res-auto"
xmlns:tools=“http://schemas.android.com/tools”
android:layout_width=“match_parent”
android:layout_height=“match_parent”
tools:context=“com.android.samples.donuttracker.MainActivity”>
<com.google.android.material.navigation.NavigationView
android:id="@+id/nav_view"
android:layout_width=“wrap_content”
android:layout_height=“match_parent”
android:layout_alignParentStart=“true”
app:elevation=“0dp”
app:menu="@menu/nav_drawer_menu" />
<View
android:layout_width=“1dp”
android:layout_height=“match_parent”
android:layout_toEndOf="@id/nav_view"
android:background="?android:attr/listDivider" />
<androidx.appcompat.widget.Toolbar
android:id="@+id/toolbar"
android:layout_width=“match_parent”
android:layout_height=“wrap_content”
android:layout_alignParentTop=“true”
android:background="@color/colorPrimary"
android:layout_toEndOf="@id/nav_view"
android:theme="@style/ThemeOverlay.MaterialComponents.Dark.ActionBar" />
<androidx.fragment.app.FragmentContainerView
android:id="@+id/nav_host_fragment"
android:name=“androidx.navigation.fragment.NavHostFragment”
android:layout_width=“match_parent”
android:layout_height=“match_parent”
android:layout_below="@id/toolbar"
app:defaultNavHost=“true”
android:layout_toEndOf="@id/nav_view"
app:navGraph="@navigation/nav_graph" />
如此一来,在宽屏幕设备上,NavigationView 会代替 BottomNavigationView 显示在屏幕上。现在布局文件已经就绪,我再创建一个 nav_drawer_menu.xml,并且将 donutList 和 coffeeList 作为主要的分组添加为目的页面。对于 MenuItem,我添加了 selectionFragment 作为它的目的页面。
<item
android:id="@id/donutList"
android:icon="@drawable/donut_with_sprinkles"
android:title="@string/donut_name" />


 183
183


 被折叠的 条评论
为什么被折叠?
被折叠的 条评论
为什么被折叠?
 到【灌水乐园】发言


