


使用 Webpack 从 0 到 1 构建 Vue3 项目
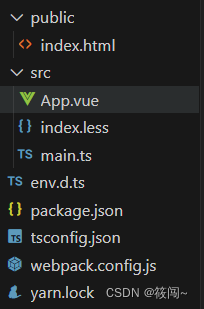
1.初始化项目结构
原则:尽量跟vue-cli构建项目,尽量保持一致
创建 package.json
npm init -y
创建 tsconfig.json
tsc --init
如果没有 tsc,则执行下方命令
npm install typescript -g
2.安装 webpack,补充智能提示
安装 webpack
yarn add webpack
安装完成后,如果 webpack 版本大于 3,则需要安装 webpack-cli
yarn add webpack-cli
安装启动服务
yarn add webpack-dev-server
安装 html 模板
yarn add html-webpack-plugin
新建 webpack 配置文件 —— webpack.config.js
使用 注解 帮我们增加智能提示
// 增加代码智能提示
const { Configuration } = require('webpack')
/**
 * @type { Configuration } // 使用注解的方式,增加代码智能提示
 */
const config = {}
module.exports = config
3.初步编写 webpack.config.js
3.1设置入口文件及出口文件
// 增加代码智能提示
const { Configuration } = require('webpack')
const path = require('path')
/**
 * @type { Configuration } // 使用注解的方式,增加代码智能提示
 */
const config = {
    // 入口文件
    entry: './src/main.ts',
    // 出口文件
    output: {
        filename: "[hash].js",
        path: path.resolve(__dirname, 'dist')
    },
}
module.exports = config
3.2 指定 html 模板位置
// 增加代码智能提示
const { Configuration } = require('webpack')
const path = require('path')
const htmlWebpackPlugin = require('html-webpack-plugin')
/**
 * @type { Configuration } // 使用注解的方式,增加代码智能提示
 */
const config = {
    // 入口文件
    entry: './src/main.ts',
    // 出口文件
    output: {
        filename: "[hash].js",
        path: path.resolve(__dirname, 'dist')
    },
    plugins: [
        new htmlWebpackPlugin({
            // 指定 html 模板位置
            template: "./public/index.html"
        }),
    ],
}
module.exports = config
4.配置 运行/打包 命令,首次打包项目
在 package.json 中,配置下面两条命令:
    "scripts": {
        "test": "echo \"Error: no test specified\" && exit 1",
        "dev": "webpack-dev-server",
        "build": "webpack"
    }
在 main.ts 中,随便写点内容,比如 const a = 1;并执行打包命令:
npm run build
出现下方报错,告诉我们没指定 mode

去 webpack.config.js 中指定 mode —— 如果指定为 开发环境,那么打包出来的代码,不会被压缩
// 增加代码智能提示
const { Configuration } = require('webpack')
const path = require('path')
const htmlWebpackPlugin = require('html-webpack-plugin')
/**
 * @type { Configuration } // 使用注解的方式,增加代码智能提示
 */
const config = {
    mode: "development",
    // 入口文件
    entry: './src/main.ts',
    // 出口文件
    output: {
        filename: "[hash].js",
        path: path.resolve(__dirname, 'dist')
    },
    plugins: [
        new htmlWebpackPlugin({
            // 指定 html 模板位置
            template: "./public/index.html"
        }),
    ],
}
module.exports = config
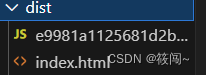
再执行一遍打包命令,顺利输出下方的文件,打包成功
5.添加 Vue 及相关配置
5.1安装并引入 vue
安装 vue
yarn add vue
在 main.ts 中,引入 vue
import { createApp } from 'vue'
import App from './App.vue'
// 注意:这里的 #app,需要在 public/index.html 中,写一个 id 为 app 的 div
createApp(App).mount('#app')
会发现各种爆红,因为 ts 此时还不认识 vue 呢,所以需要增加 vue 声明文件
5.2 补充 vue 声明文件
项目根目录下,新建 env.d.ts
declare module "*.vue" {
   import { DefineComponent } from "vue"
   const component: DefineComponent<{}, {}, any>
   export default component
}
这样,main.ts 里就不会爆红了,因为 ts 现在认识 vue 了
5.3 增加 vue 相关 webpack 配置,打包 vue 文件
直接打包会报错,此时 webpack 不认识 template 之类的标签
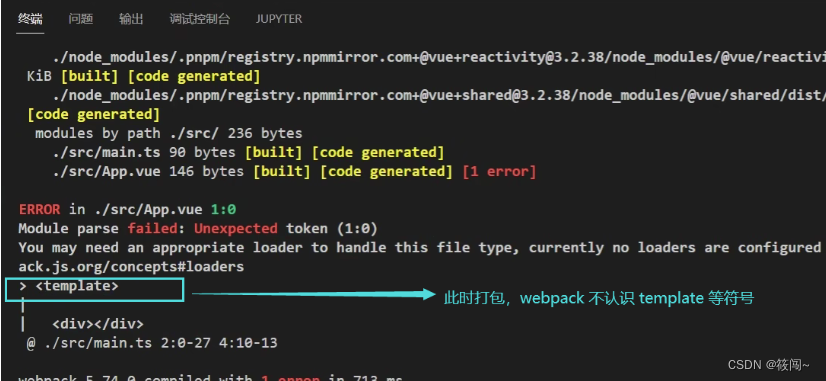
需要安装 loader,协助 webpack 解析 vue 相关标签、文件
yarn add vue-loader@next
yarn add @vue/compiler-sfc
在 webpack.config.js 中,补充配置
// 增加代码智能提示
const { Configuration } = require('webpack')
const path = require('path')
const htmlWebpackPlugin = require('html-webpack-plugin')
const { VueLoaderPlugin } = require('vue-loader/dist/index')
/**
 * @type { Configuration } // 使用注解的方式,增加代码智能提示
 */
const config = {
    mode: "development",
    // 入口文件
    entry: './src/main.ts',
    // 出口文件
    output: {
        filename: "[hash].js",
        path: path.resolve(__dirname, 'dist')
    },
    module: {
        rules: [
            {
                test: /\.vue$/, // 解析 .vue 结尾的文件
                use: "vue-loader"
            },
        ]
    },
    plugins: [
        new htmlWebpackPlugin({
            // 指定 html 模板位置
            template: "./public/index.html"
        }),
        new VueLoaderPlugin(), // 解析 vue 模板
    ],
}
module.exports = config
再打包一下,发现还是打包报错
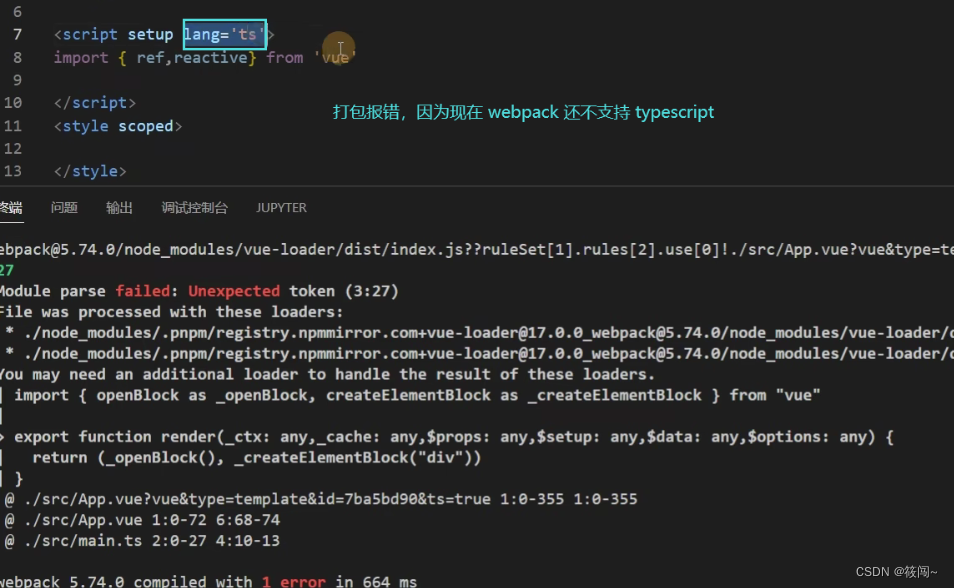
因为此时 webpack 还不支持 typescript,可以把 lang=ts 先删除,就能成功打包了
6.增加 删除上次打包文件 的配置
随着打包次数的不断增多,打包文件也会越来越多
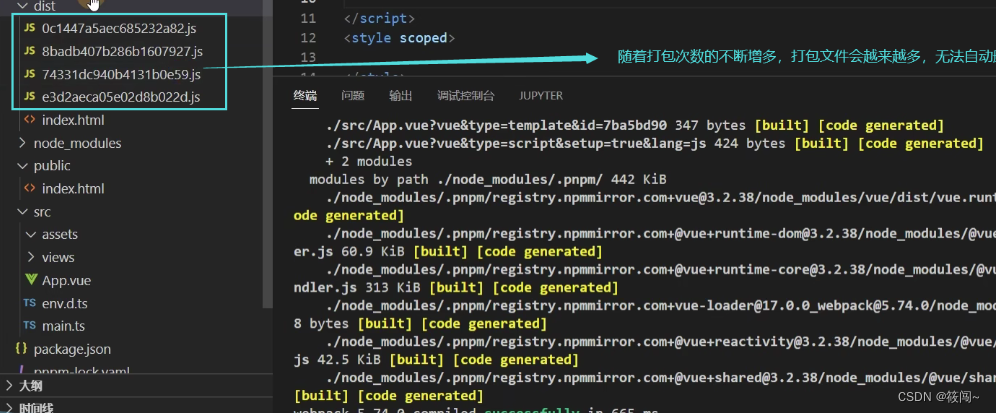
我们需要安装一个插件,在每次打包的时候,清空一下 dist 文件夹
yarn add clean-webpack-plugin
在 webpack.config.js 中,补充配置
// 增加代码智能提示
const { Configuration } = require('webpack')
const path = require('path')
const htmlWebpackPlugin = require('html-webpack-plugin')
const { VueLoaderPlugin } = require('vue-loader/dist/index')
const { CleanWebpackPlugin } = require('clean-webpack-plugin')

/**
 * @type { Configuration } // 使用注解的方式,增加代码智能提示
 */
const config = {
    mode: "development",
    // 入口文件
    entry: './src/main.ts',
    // 出口文件
    output: {
        filename: "[hash].js",
        path: path.resolve(__dirname, 'dist')
    },
    module: {
        rules: [
            {
                test: /\.vue$/, // 解析 .vue 结尾的文件
                use: "vue-loader"
            },
        ]
    },
    plugins: [
        new htmlWebpackPlugin({
            // 指定 html 模板位置
            template: "./public/index.html"
        }),
        new VueLoaderPlugin(), // 解析 vue 模板
        new CleanWebpackPlugin(), // 打包清空 dist
    ],
}
module.exports = config
7.在 webpack 中,配置别名 @,替换 src
在 resolve 中,进行配置
// 增加代码智能提示
const { Configuration } = require('webpack')
const path = require('path')
const htmlWebpackPlugin = require('html-webpack-plugin')
const { VueLoaderPlugin } = require('vue-loader/dist/index')
const { CleanWebpackPlugin } = require('clean-webpack-plugin')
/**
 * @type { Configuration } // 使用注解的方式,增加代码智能提示
 */
const config = {
    mode: "development",
    // 入口文件
    entry: './src/main.ts',
    // 出口文件
    output: {
        filename: "[hash].js",
        path: path.resolve(__dirname, 'dist')
    },
    module: {
        rules: [
            {
                test: /\.vue$/, // 解析 .vue 结尾的文件
                use: "vue-loader"
            },
        ]
    },
    plugins: [
        new htmlWebpackPlugin({
            // 指定 html 模板位置
            template: "./public/index.html"
        }),
        new VueLoaderPlugin(), // 解析 vue 模板
        new CleanWebpackPlugin(), // 打包清空 dist
    ],
    resolve: {
        alias: {
            "@": path.resolve(__dirname, './src') // 别名
        },
        extensions: ['.js', '.json', '.vue', '.ts', '.tsx'] // 识别后缀
    },
}
module.exports = config
8.安装样式相关 loader,协助 webpack 解析样式
新建 index.css,随便写点样式
利用设置好的别名 @,在 main.ts 中进行引入,发现报错了
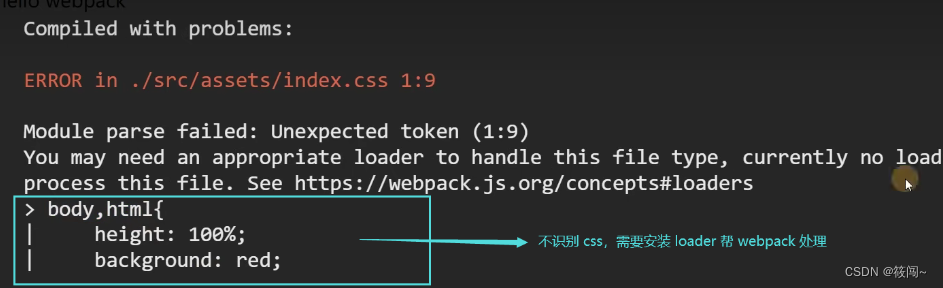
这个报错不是别名 @ 导致的,而是 webpack 不会处理 css 导致的
需要安装一些 loader 协助 webpack 处理样式
处理 css 文件
yarn add css-loader
处理 style 样式
yarn add style-loader
处理 less 语法
yarn add less
yarn add less-loader
在 webpack.config.js 中,补充配置
// 增加代码智能提示
const { Configuration } = require('webpack')
const path = require('path')
const htmlWebpackPlugin = require('html-webpack-plugin')
const { VueLoaderPlugin } = require('vue-loader/dist/index')
const { CleanWebpackPlugin } = require('clean-webpack-plugin')
/**
 * @type { Configuration } // 使用注解的方式,增加代码智能提示
 */
const config = {
    mode: "development",
    // 入口文件
    entry: './src/main.ts',
    // 出口文件
    output: {
        filename: "[hash].js",
        path: path.resolve(__dirname, 'dist')
    },
    module: {
        rules: [
            {
                test: /\.vue$/, // 解析 .vue 结尾的文件
                use: "vue-loader"
            },
            {
                test: /\.less$/, // 解析 less
                use: ["style-loader", "css-loader", "less-loader"],
            },
            {
                test: /\.css$/, // 解析 css
                use: ["style-loader", "css-loader"],
            },
        ]
    },
    plugins: [
        new htmlWebpackPlugin({
            // 指定 html 模板位置
            template: "./public/index.html"
        }),
        new VueLoaderPlugin(), // 解析 vue 模板
        new CleanWebpackPlugin(), // 打包清空 dist
    ],
    resolve: {
        alias: {
            "@": path.resolve(__dirname, './src') // 别名
        },
        extensions: ['.js', '.json', '.vue', '.ts', '.tsx'] // 识别后缀
    },
}
module.exports = config
9.添加 TypeScript Loader,协助 webpack 处理 ts
安装 typescript
yarn add typescript
安装 typescript loader
yarn add ts-loader
注意:ts loader 不能直接使用,他比别的 loader 多了 options(因为 ts loader 需要针对 vue 等单文件组件做单独处理)
在 webpack.config.js 中,补充配置
// 增加代码智能提示
const { Configuration } = require('webpack')
const path = require('path')
const htmlWebpackPlugin = require('html-webpack-plugin')
const { VueLoaderPlugin } = require('vue-loader/dist/index')
const { CleanWebpackPlugin } = require('clean-webpack-plugin')

/**
 * @type { Configuration } // 使用注解的方式,增加代码智能提示
 */
const config = {
    mode: "development",
    // 入口文件
    entry: './src/main.ts',
    // 出口文件
    output: {
        filename: "[hash].js",
        path: path.resolve(__dirname, 'dist')
    },
    module: {
        rules: [
            {
                test: /\.vue$/, // 解析 .vue 结尾的文件
                use: "vue-loader"
            },
            {
                test: /\.less$/, // 解析 less
                use: ["style-loader", "css-loader", "less-loader"],
            },
            {
                test: /\.css$/, // 解析 css
                use: ["style-loader", "css-loader"],
            },
            {
                test: /\.ts$/, // 解析 ts
                loader: "ts-loader",
                options: {
                    configFile: path.resolve(process.cwd(), 'tsconfig.json'),
                    appendTsSuffixTo: [/\.vue$/]
                },
            }
        ]
    },
    plugins: [
        new htmlWebpackPlugin({
            // 指定 html 模板位置
            template: "./public/index.html"
        }),
        new VueLoaderPlugin(), // 解析 vue 模板
        new CleanWebpackPlugin(), // 打包清空 dist
    ],
    resolve: {
        alias: {
            "@": path.resolve(__dirname, './src') // 别名
        },
        extensions: ['.js', '.json', '.vue', '.ts', '.tsx'] // 识别后缀
    },
}

module.exports = config
每次改完配置文件,都需要重启,才能保证 webpack 配置生效
10.美化 webpack 打包时的控制台输出
11.externals 排除打包文件,使用 cdn 引入,实现性能优化
上面的文件直接打包后,产生的文件高达 800k+
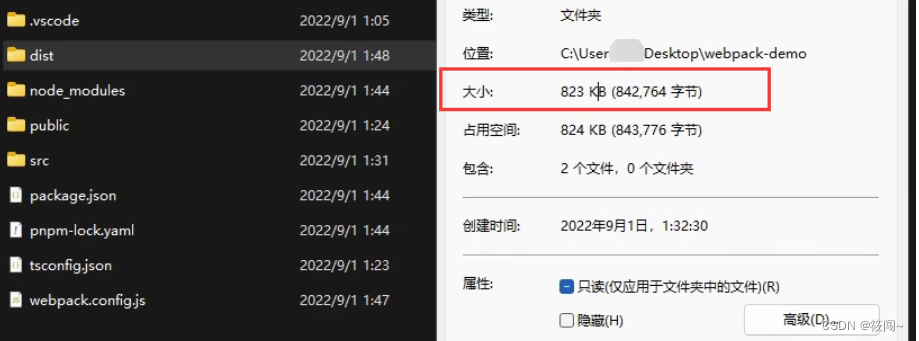
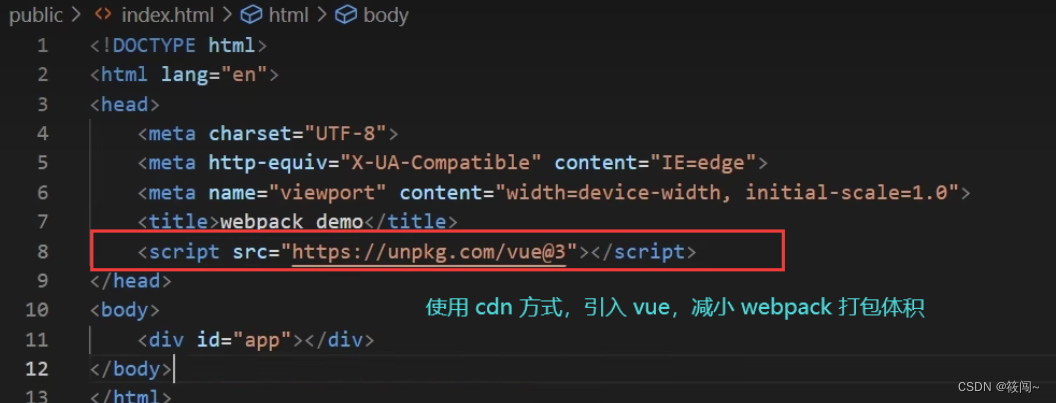
可以考虑不打包 vue,在 public/index.html 中,采用 cdn 方式引入 vue,进而减小体积
为了排除打包文件,在 webpack.config.js 中,补充配置
// 增加代码智能提示
const { Configuration } = require('webpack')
const path = require('path')
const htmlWebpackPlugin = require('html-webpack-plugin')
const { VueLoaderPlugin } = require('vue-loader/dist/index')
const { CleanWebpackPlugin } = require('clean-webpack-plugin')
const FriendlyErrorsWebpackPlugin = require("friendly-errors-webpack-plugin");

/**
 * @type { Configuration } // 使用注解的方式,增加代码智能提示
 */
const config = {
    mode: "development",
    // 入口文件
    entry: './src/main.ts',
    // 出口文件
    output: {
        filename: "[hash].js",
        path: path.resolve(__dirname, 'dist')
    },
    module: {
        rules: [
            {
                test: /\.vue$/, // 解析 .vue 结尾的文件
                use: "vue-loader"
            },
            {
                test: /\.less$/, // 解析 less
                use: ["style-loader", "css-loader", "less-loader"],
            },
            {
                test: /\.css$/, // 解析 css
                use: ["style-loader", "css-loader"],
            },
            {
                test: /\.ts$/, // 解析 ts
                loader: "ts-loader",
                options: {
                    configFile: path.resolve(process.cwd(), 'tsconfig.json'),
                    appendTsSuffixTo: [/\.vue$/]
                },
            }
        ]
    },
    plugins: [
        new htmlWebpackPlugin({
            // 指定 html 模板位置
            template: "./public/index.html"
        }),
        new VueLoaderPlugin(), // 解析 vue 模板
        new CleanWebpackPlugin(), // 打包清空 dist
        new FriendlyErrorsWebpackPlugin({
            compilationSuccessInfo: { // 美化样式
                messages: ['You application is running here http://localhost:9001']
            }

        })
    ],
    // 取消多余的打包提示
    stats: "errors-only",
    resolve: {
        alias: {
            "@": path.resolve(__dirname, './src') // 别名
        },
        extensions: ['.js', '.json', '.vue', '.ts', '.tsx'] // 识别后缀
    },
    // 排除打包 vue,采用 CDN 引入 vue,减小打包体积
    externals: {
        vue: "Vue"
    },
}

module.exports = config
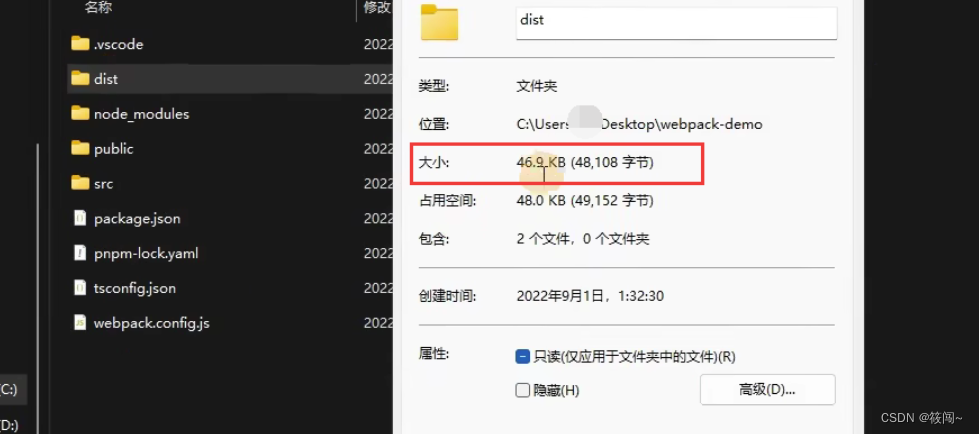
配置完成后,重新打包可得 40k+


 1243
1243


 被折叠的 条评论
为什么被折叠?
被折叠的 条评论
为什么被折叠?
 到【灌水乐园】发言


