


目录
作业一
编程实现:
代码如下:
import numpy as np
import torch
from torch import nn
from torch.autograd import Variable
from PIL import Image
import matplotlib.pyplot as plt
import os
os.environ["KMP_DUPLICATE_LIB_OK"] = "TRUE"
plt.rcParams['font.sans-serif'] = ['SimHei'] # 用来正常显示中文标签
plt.rcParams['axes.unicode_minus'] = False # 用来正常显示负号 #有中文出现的情况,需要u'内容
# im = Image.open(file_path).convert('L') # 读入一张灰度图的图片
'''
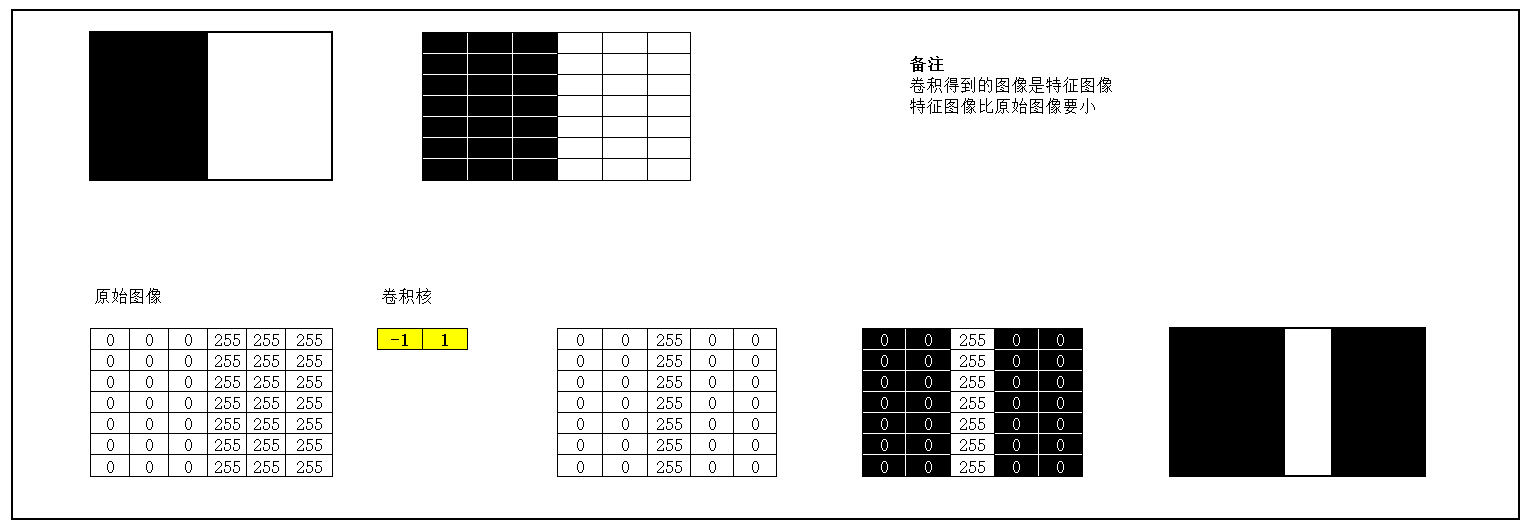
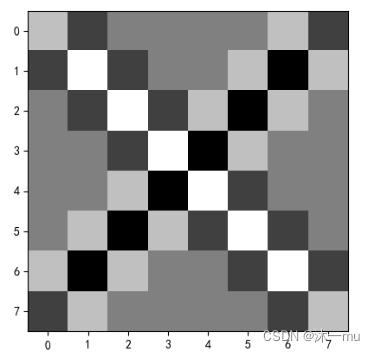
im = np.array([[0, 0, 0, 0, 0, 0, 0, 0, 0],
[0, 255, 0, 0, 0, 0, 0, 255, 0],
[0, 0, 255, 0, 0, 0, 255, 0, 0],
[0, 0, 0, 255, 0, 255, 0, 0, 0],
[0, 0, 0, 0, 255, 0, 0, 0, 0],
[0, 0, 0, 255, 0, 255, 0, 0, 0],
[0, 0, 55, 0, 0, 0, 255, 0, 0],
[0, 255, 0, 0, 0, 0, 0, 255, 0],
[0, 0, 0, 0, 0, 0, 0, 0, 0],
], dtype='float32') # 将其转换为一个矩阵
'''
'''
im = np.array([[0,0,0,255,255,255],
[0,0,0,255,255,255],
[0,0,0,255,255,255],
[0,0,0,255,255,255],
[0,0,0,255,255,255],
[0,0,0,255,255,255],
[0,0,0,255,255,255]], dtype='float32') # 将其转换为一个矩阵
'''
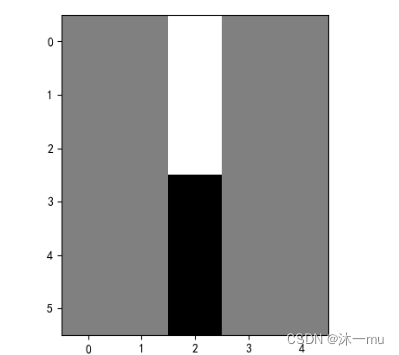
im = np.array([[0, 0, 0, 255, 255, 255],
[0, 0, 0, 255, 255, 255],
[0, 0, 0, 255, 255, 255],
[255, 255, 255, 0, 0, 0],
[255, 255, 255, 0, 0, 0],
[255, 255, 255, 0, 0, 0]], dtype='float32') # 将其转换为一个矩阵
print(im.shape[0], im.shape[1])
plt.imshow(im.astype('uint8'), cmap='gray') # 可视化图片
plt.title('原图')
plt.show()
im = torch.from_numpy(im.reshape((1, 1, im.shape[0], im.shape[1])))
conv1 = nn.Conv2d(1, 1, (1, 2), bias=False) # 定义卷积
sobel_kernel = np.array([[1, -1],
[-1, 1]], dtype='float32') # 定义轮廓检测算子
sobel_kernel = sobel_kernel.reshape((1, 1, 2, 2)) # 适配卷积的输入输出
conv1.weight.data = torch.from_numpy(sobel_kernel) # 给卷积的 kernel 赋值
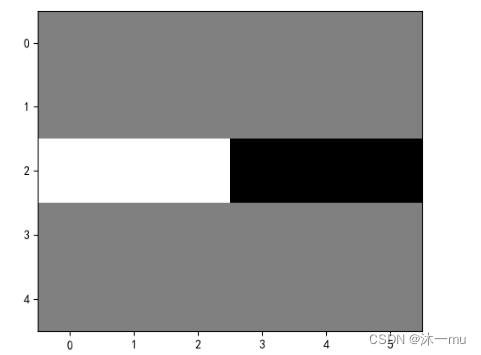
edge1 = conv1(Variable(im)) # 作用在图片上
x = edge1.data.squeeze().numpy()
print(x.shape) # 输出大小
plt.imshow(x, cmap='gray')
plt.show()1.修改卷积核,检测算子以及卷积输入输出格式
sobel_kernel = np.array([[1, -1]], dtype='float32')  # 定义轮廓检测算子
sobel_kernel = sobel_kernel.reshape((1, 1, 1, 2))  # 适配卷积的输入输出
conv1 = nn.Conv2d(1, 1, (1, 2), bias=False) # 定义卷积执行结果:
2.修改卷积核:
代码如下:
sobel_kernel = sobel_kernel.reshape((1, 1, 1, 2)) # 适配卷积的输入输出执行结果:
3.修改相应位置后的特征图
代码如下:
#生成图像
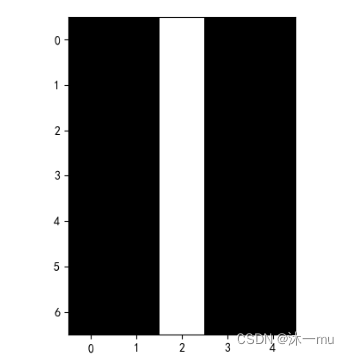
def create_pic():
picture = torch.Tensor([[0,0,0,255,255,255],
[0,0,0,255,255,255],
[0,0,0,255,255,255],
[255,255,255,0,0,0],
[255,255,255,0,0,0],
[255,255,255,0,0,0]])
return picture
#确定卷积核
kernel = torch.tensor([-1.0,1.0])
kshape = (1,1,1,2)
#生成模型
model = MyNet(kernel=kernel,kshape=kshape)
picture = create_pic()
picture = torch.reshape(picture,(1,1,6,6))
print(picture)
output = model(picture)
output = torch.reshape(output,(6,5))
print(output)
plt.imshow(output,cmap='gray')
plt.show()
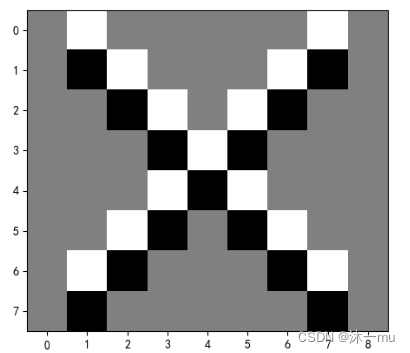
4.图2修改卷积核输出特征图
代码如下:
kernel = torch.tensor([-1.0,1.0])
kshape = (1,1,2,1)
model = MyNet(kernel=kernel,kshape=kshape)
picture = create_pic()
picture = torch.reshape(picture,(1,1,6,6))
print(picture)
output = model(picture)
output = torch.reshape(output,(5,6))
print(output)
plt.imshow(output,cmap='gray')
plt.show()
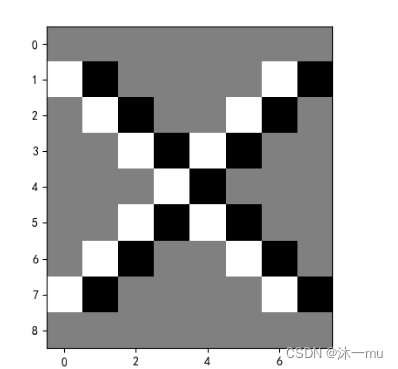
5.图3卷积后:
代码如下:
def create_pic():
    picture = torch.Tensor(
                     [[255,255,255,255,255,255,255,255,255],
                      [255,0  ,255,255,255,255,255,0  ,255],
                      [255,255,0  ,255,255,255,0  ,255,255],
                      [255,255,255,0  ,255,0  ,255,255,255],
                      [255,255,255,255,0  ,255,255,255,255],
                      [255,255,255,0  ,255,0  ,255,255,255],
                      [255,255,0  ,255,255,255,0  ,255,255],
                      [255,0  ,255,255,255,255,255,0  ,255],
                      [255,255,255,255,255,255,255,255,255],])
    return picture
#生成卷积核
kernel = torch.tensor([-1.0,1.0])
#更改卷积核的形状适应卷积函数
kshape = (1,1,1,2)
model = MyNet(kernel=kernel,kshape=kshape)
picture = create_pic()
picture = torch.reshape(picture,(1,1,9,9))
print(picture)
output = model(picture)
output = torch.reshape(output,(9,8))
print(output)
plt.imshow(output,cmap='gray')
plt.show()
作业二
一、概念
1.卷积:卷积是一种数学运算,有一维和二维卷积,说到底就是相乘相加,就像一个函数一样
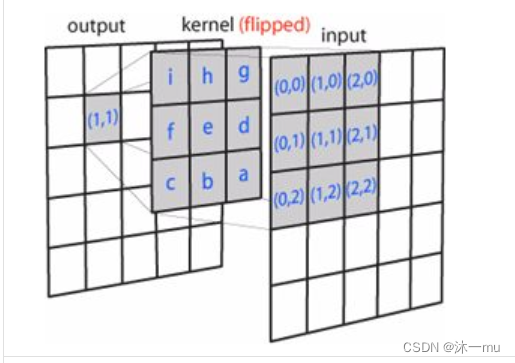
2.卷积核:就像下图一样卷积核依次与输入不同位置的图像块做卷积,得到输出
3.特征图:在每个卷积层,数据都是以三维形式存在的。你可以把它看成许多个二维图片叠在一起,其中每一个称为一个特征图。在输入层,如果是灰度图片,那就只有一个特征图;如果是彩色图片,一般就是3个特征图(红绿蓝)。层与层之间会有若干个卷积核,上一层和每个特征图跟每个卷积核做卷积,都会产生下一层的一个特征图。
4.特征选择:从已有的M个特征中选择N个特征使得系统的特定指标最优化,是从原始特征中选择出一些最有效特征以降低数据集维度的过程,是提高学习算法性能的一个重要手段,也是模式识别中关键的数据预处理步骤。
5.步长:每次卷积核移动的多少就是步长。
6.填充:填充卷积过程中所缺失的部分,如线性化边缘的填充,从而使得其可以进行特征提取等操作。
7.感受野:卷积神经网络每一层输出的特征图(Feature Map)上的像素点在原始图像上映射的区域大小。
二、探究不同卷积核的作用
参考网站:Image Kernels explained visually
这就是不同卷积核对图像的不同操作
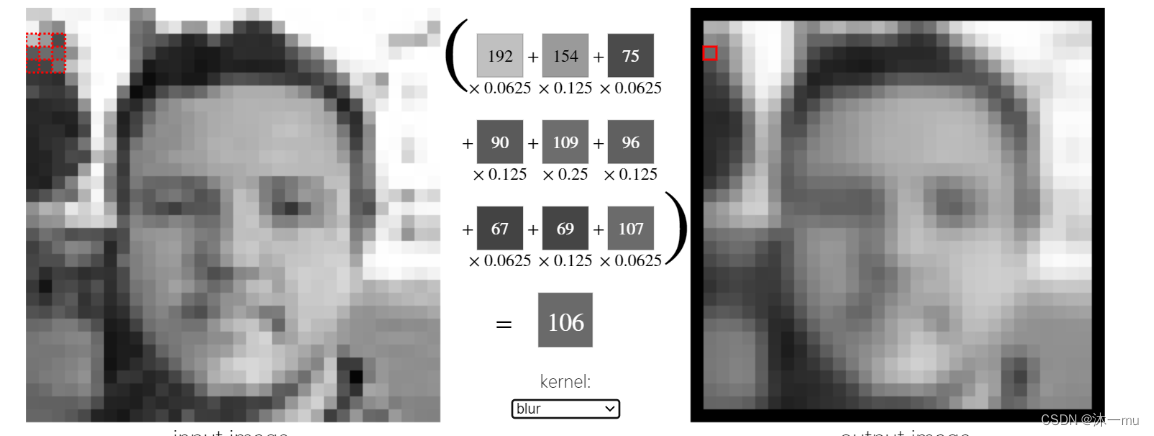
blur算子,将图片进行模糊。
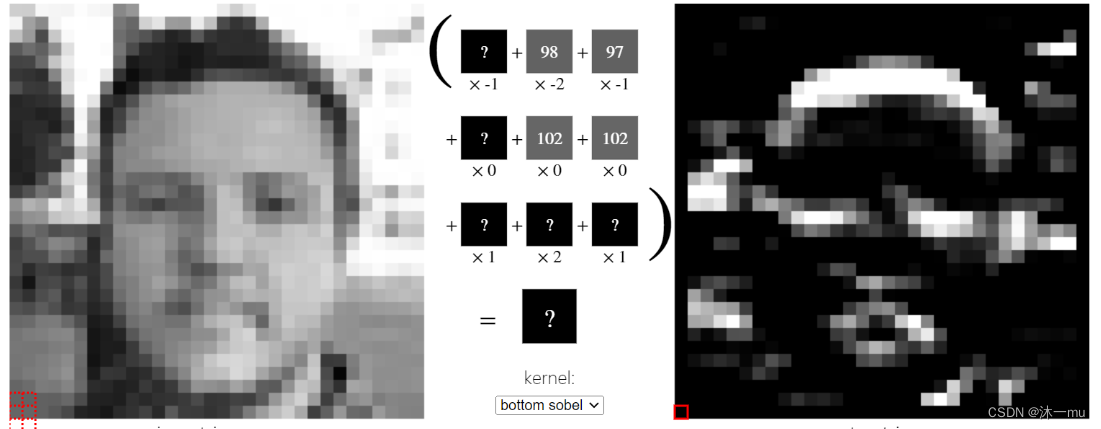
bottom sobel算子
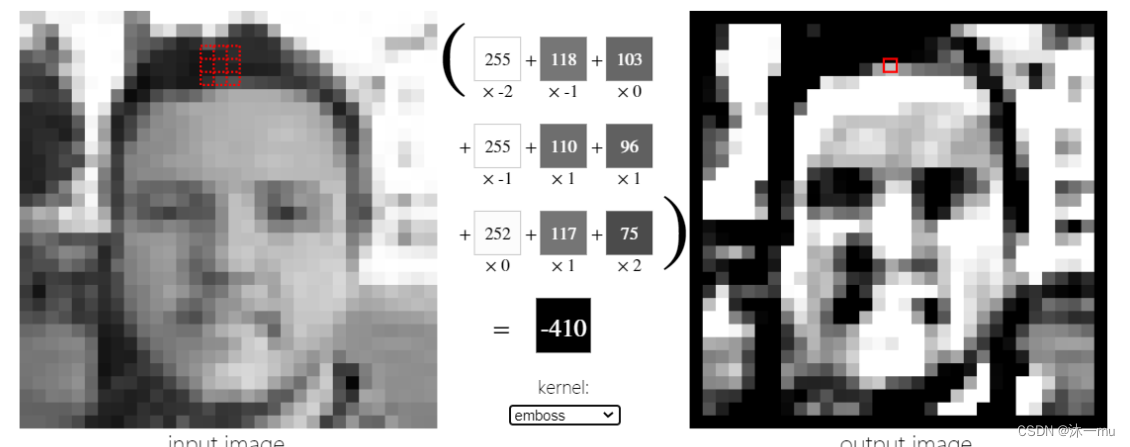
 emboss算子:浮雕
outline算子:边缘检测

三、编程实现
1.实现灰度图边缘检测、锐化、模糊
代码:
import numpy as np
import torch
from torch import nn
from torch.autograd import Variable
from PIL import Image
import matplotlib.pyplot as plt
import os
os.environ["KMP_DUPLICATE_LIB_OK"] = "TRUE"
plt.rcParams['font.sans-serif'] = ['SimHei'] # 用来正常显示中文标签
plt.rcParams['axes.unicode_minus'] = False # 用来正常显示负号 #有中文出现的情况,需要u'内容
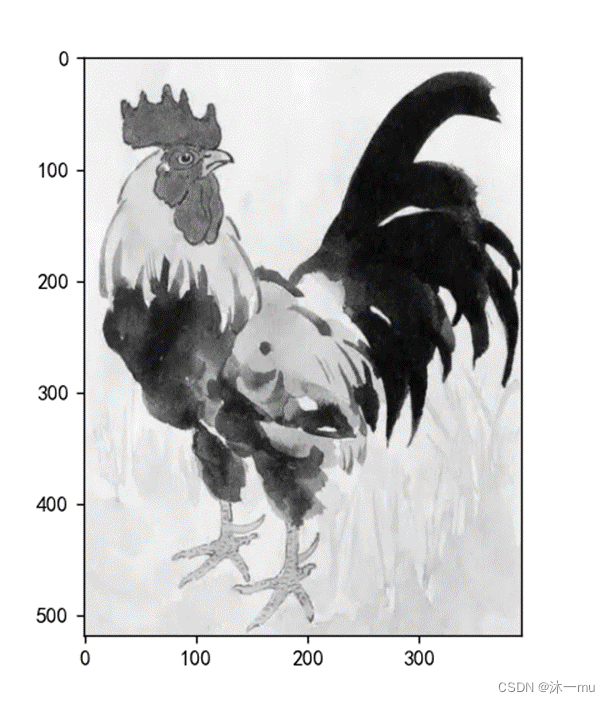
file_path = 'ji.png'
im = Image.open(file_path).convert('L') # 读入一张灰度图的图片
im = np.array(im, dtype='float32') # 将其转换为一个矩阵
print(im.shape[0], im.shape[1])
plt.imshow(im.astype('uint8'), cmap='gray') # 可视化图片
plt.title('原图')
plt.show()
im = torch.from_numpy(im.reshape((1, 1, im.shape[0], im.shape[1])))
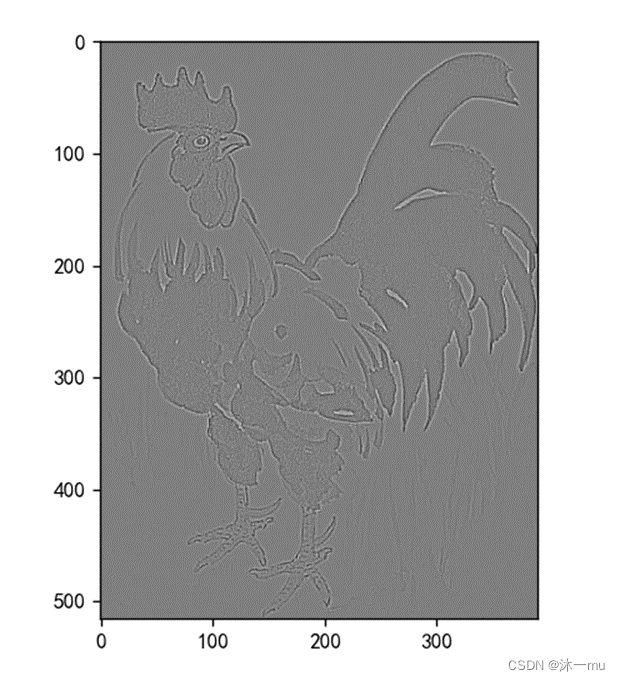
conv1 = nn.Conv2d(1, 1, 3, bias=False) # 定义卷积
# 边缘检测
sobel_kernel = np.array([[-1, -1, -1],
[-1, 8, -1],
[-1, -1, -1]], dtype='float32') # 定义轮廓检测算子
sobel_kernel = sobel_kernel.reshape((1, 1, 3, 3)) # 适配卷积的输入输出
conv1.weight.data = torch.from_numpy(sobel_kernel) # 给卷积的 kernel 赋值
edge1 = conv1(Variable(im)) # 作用在图片上
x = edge1.data.squeeze().numpy()
print(x.shape) # 输出大小
plt.imshow(x, cmap='gray')
plt.show()原图:
边缘检测:
锐化:
# 锐化
sobel_kernel = np.array([[0, -1, 0],
                         [-1, 5, -1],
[0, -1, 0]], dtype='float32') # 定义轮廓检测算子 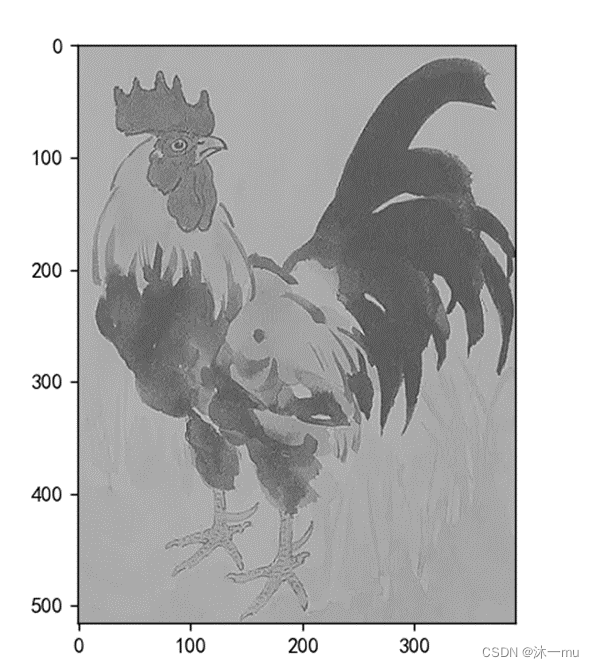
模糊:
# 模糊
sobel_kernel = np.array([[0.0625, 0.125, 0.0625],
                         [0.125, 0.25, 0.125],
                         [0.0625, 0.125, 0.0625]], dtype='float32')  # 定义轮廓检测算子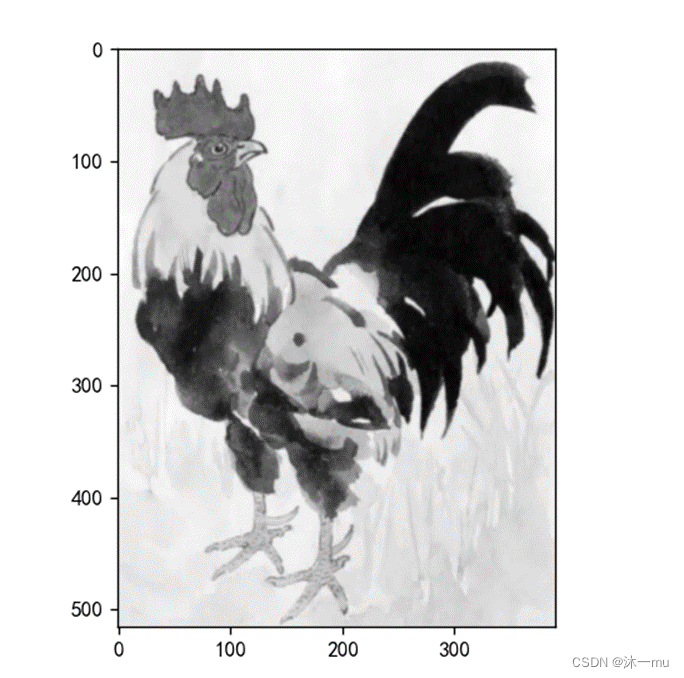
2.调整卷积核参数
修改步长为10
conv1 = nn.Conv2d(1, 1, 3,stride=10, bias=False)
可见步长增加了之后图片变得模糊了
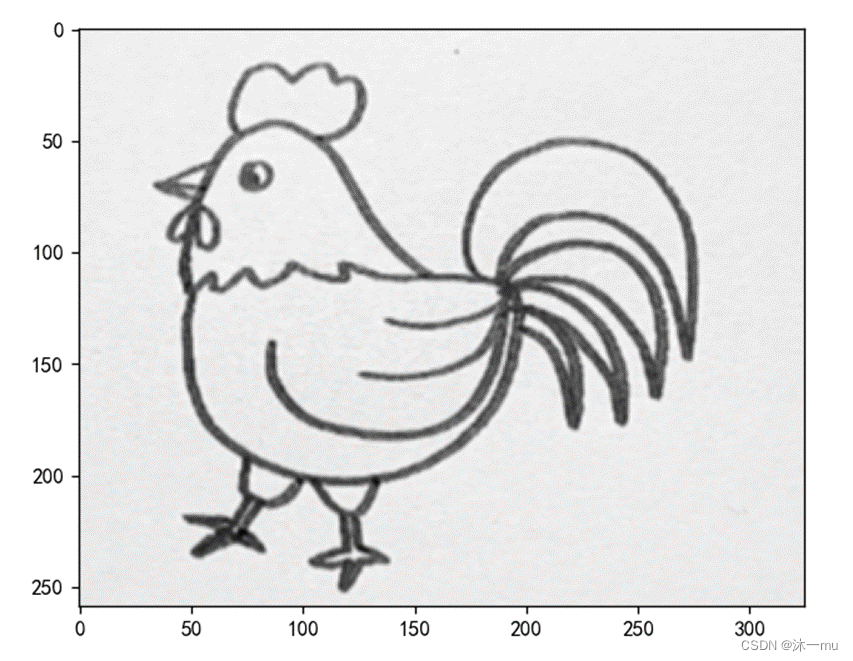
3.使用不同尺度图片测试
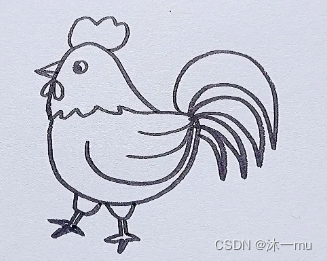
改为下面的图片
模糊:
锐化:
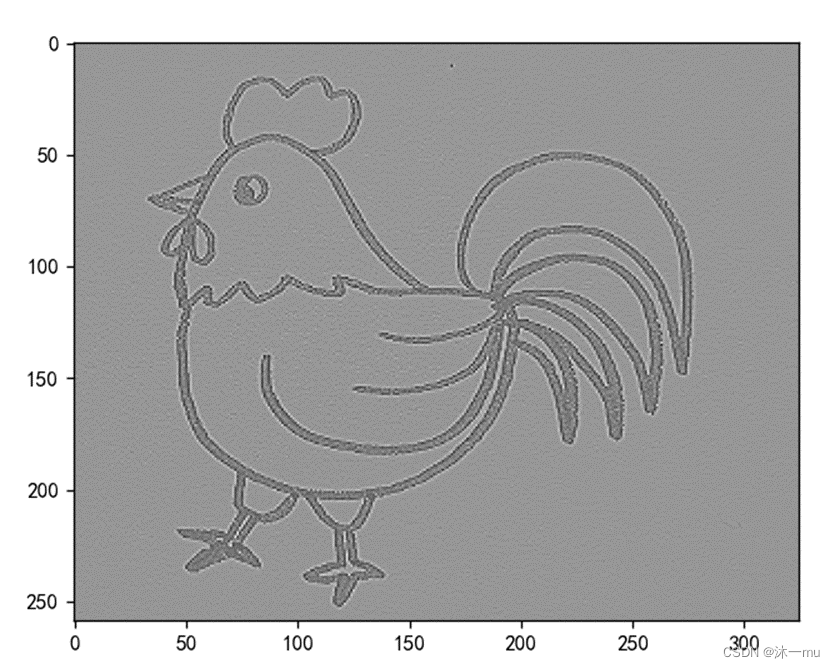
边缘检测:

总结:
有过之前数字图像处理的经验,对这次的作业还是有一定的帮助。这次的作业代码大多都是重复的改一改图片,或者改一改参数。但是认识了很多卷积核,了解了这些卷积核的作用和里面内涵的东西,锐化,模糊,边缘检测,也希望继续在老师的带领下学习卷积网络。


 1022
1022


 被折叠的 条评论
为什么被折叠?
被折叠的 条评论
为什么被折叠?
 到【灌水乐园】发言


