


Ajax
XMLHttpRequest
AJAX:Asynchronous Javascript and XML
Ajax是客户端给服务端发送消息,以及接受响应的工具,是一个默认异步执行机制的功能。
最大的优点:在不刷新页面的情况下更新数据
步骤
1.创建ajax对象
let xhr = new XMLHttpRequest()2.指定请求方式与url地址
xhr.open("get","path",true)
第一个参数 请求方式
第二个参数 请求地址
第三个参数 是否异步
3.发送请求
xhr.send()4.监听//当状态码改变的时候调用一次函数
xhr.onreadystatechange = function () {}ajax状态码 : xhr.readyState ajax请求一共有五个状态
readystate === 0:表示未初始化完成, 也就是open方法还没有执行
readystate === 1:表示配置信息已经完成, 也就是执行完open 之后
readystate === 2:表示send方法已经执行完成
readyState === 3 :表示正在解析响应内容
readystate === 4:表示响应内容已经解析完毕, 可以在客户端使用了
这个时候我们就会发现,当一个ajax请求的全部过程中,只有当readystate === 4的时候,我们才可以正常使用服务端给我们的数据
所以,配合http状态码为200 ~ 299
xhr.status
一个ajax对象中有一个成员叫做xhr. status
这个成员就是记录本次请求的http状态码的
两个条件都满足的时候,才是本次请求正常完成
xhr.responseText:获取响应的内容
后端响应的数据一般是JSON格式,所以我们要转换成对象才能进行操作
JSON.parse(xhr.responseText) xhr.onreadystatechange = () => {
// console.log("电话接通");打印三次
if (xhr.readyState === 4) {
if (/^2\d{2}$/.test(xhr.status)) {
console.log(JSON.parse(xhr.responseText));
}
else {
console.log("error", xhr.responseText);
}
}
}4.无需判断状态码的监听
xhr.onload
        xhr.onload = () => {
            if (/^2\d{2}$/.test(xhr.status)) {
                console.log(JSON.parse(xhr.responseText));
            } else {
                console.log("error", xhr.responseText);
            }
        }
案例步骤
    <button id="btn">click</button>
    <ul id="list"></ul>
const btn = document.querySelector('#btn')
const list = document.querySelector('#list')
btn.onclick = function () {
//创建ajax
let xhr = new XMLHttpRequest()
//指定请求方式与url地址
xhr.open("get", "http://www.xiongmaoyouxuan.com/api/tabs", true)
//发送请求
xhr.send()
//监听
xhr.onload = function () {
// console.log(xhr.readyState);
//状态为200
if (/^2\d{2}$/.test(xhr.status)) {
//字符串
// console.log(xhr.responseText);
//将字符串转为对象
//console.log(JSON.parse(xhr.responseText));
// 调用渲染函数对对象进行渲染
render(JSON.parse(xhr.responseText))
} else {
console.log('error', xhr.responseText);
}
}
}
function render(res) {
console.log(res.data.list);//数组对象
const newlist = res.data.list.map(item => {
return `
<li>
<div>${item.name}</div>
<img src="${item.imageUrl}">
</li>
`
})
console.log(newlist);
list.innerHTML = newlist.join('')
}Ajax请求方式
请求类型
●get偏向获取
●post偏向提交
●put偏向更新,提交的数据会全覆盖
●patch 偏向修改部分,只修改要修改的数据,不会全覆盖
●delete偏向删除信息
使用ajax发送请求时携带参数
使用ajax发送请求可以携带参数
参数就是和后台交互时给后台的一些信息
get和post两个请求方式携带参数的方式不同
json-server
json-server是一个在前端本地运行,可以存储json格式数据的服务器.
在平时的项目开发中,当后端还没有提供接口时,可以选择json-server,来模拟请求和响应的过程。
使用json-server之前,请先下载插件:Preview on Web Server,然后用它打开网页。
安装json-server包
npm install json-server -g使用json-server
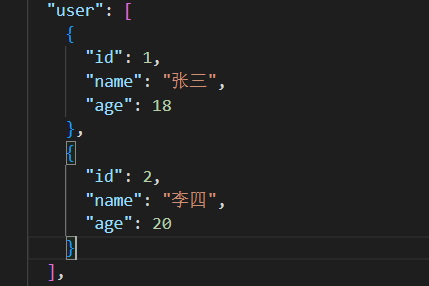
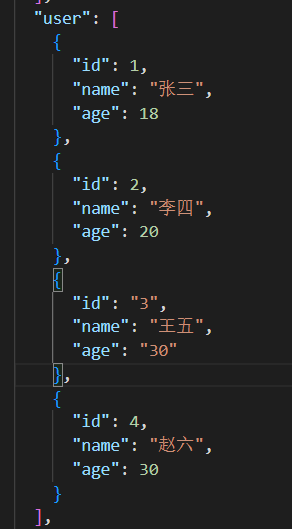
创建一个json文件夹,启动json-server,此时的json文件相当于模拟一个数据库。
json-server --watch 文件名.jsonget请求方式
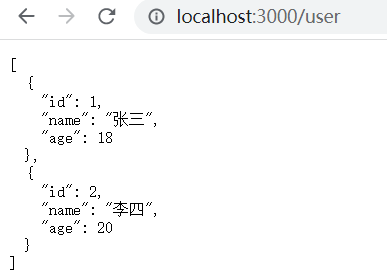
通过id查询记录
<button id="get">get</button> const get = document.querySelector('#get')
get.onclick = function () {
const xhr = new XMLHttpRequest()
xhr.open('GET','http://localhost:3000/user?id=2')
xhr.send()
xhr.onload = function () {
if (/^2\d{2}$/.test(xhr.status)) {
console.log(JSON.parse(xhr.responseText));
}
}
}post请求方式
前端提交数据的两种格式
form编码 id=1&name=张三&age=18
json {"id"=1,"name"="张三","age"=18}
必须在发送请求前(xhr.send())设置请求头,告诉后端我提交数据的格式
请求头:xhr.setRuestHeader()
form编码格式
xhr.setRequestHeader("content-type","application/x-www-form-urlencoded")提交的数据放在xhr.send()方法里
// 提交的数据放在send()方法
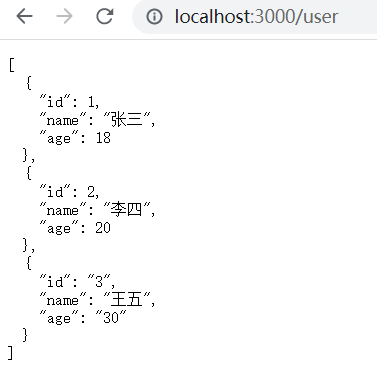
xhr.send(`id=3&name=王五&age=30`)未提交的json与json-server
<button class="post">post</button> const btn2 = document.querySelector('.post')
btn2.onclick = function () {
//创建ajax对象
const xhr = new XMLHttpRequest()
//调用xhr.open()方法,指定请求方式与url地址
xhr.open('post', 'http://localhost:3000/user', true)
//设置请求头,告诉后端提交数据的格式
xhr.setRequestHeader("content-type", "application/x-www-form-urlencoded")
// 提交的数据放在send()方法
xhr.send(`id=3&name=王五&age=30`)
//监听
xhr.onload = function () {
if (/^2\d{2}$/.test(xhr.status)) {
console.log(JSON.parse(xhr.responseText));
} else {
console.log('error', xhr.responseText);
}
}
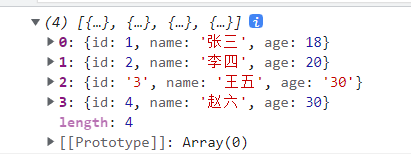
}提交数据后json与json-server
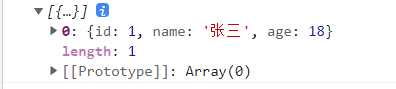
提交的数据为json格式
            xhr.setRequestHeader("content-type", "application/json")
            // 提交的数据放在send()方法
            xhr.send(JSON.stringify({name:"赵六",age:30}))
const btn2 = document.querySelector('.post')
btn2.onclick = function () {
//创建ajax对象
const xhr = new XMLHttpRequest()
//调用xhr.open()方法,指定请求方式与url地址
xhr.open('post', 'http://localhost:3000/user', true)
//设置请求头,告诉后端提交数据的格式
xhr.setRequestHeader("content-type", "application/json")
// 提交的数据放在send()方法
xhr.send(JSON.stringify({name:"赵六",age:30}))
//监听
            xhr.onload = function () {
                if (/^2\d{2}$/.test(xhr.status)) {
                    console.log(JSON.parse(xhr.responseText));
                } else {
                    console.log('error', xhr.responseText);
                }
            }
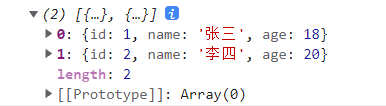
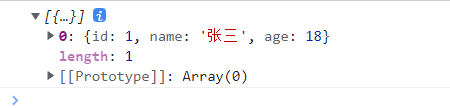
}提交数据前
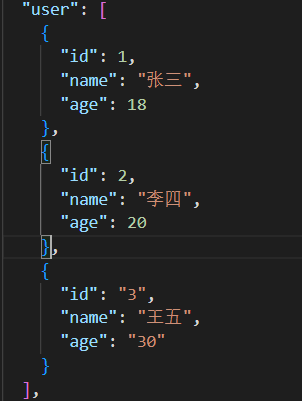
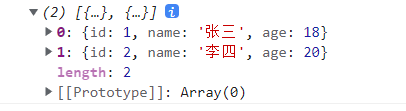
提交数据后
注意:
post请求时:live-server会与json-server矛盾,控制台会自动刷新,不会打印出响应回来的数据
原生JavaScript-Ajax请求方式缺点:
1.提交数据前要设置请求头.
xhr.setRequestHeader("content-type", "application/json")2.若要提交json格式数据要自己将数据转换为json格式。
xhr.send(JSON.stringify({name:"赵六",age:30}))3.监听时,要自己判断状态码,要自己获取响应回来的数据,并且将后端数据json格式转换为对象
xhr.onload = function () {
if (/^2\d{2}$/.test(xhr.status)) {
console.log(JSON.parse(xhr.responseText));
} else {
console.log('error', xhr.responseText);
}
}Fetch
        get.onclick = function () {
            //默认get,无需写"get"
            fetch("http://localhost:3000/user").then(res => {
                console.log(res.json());//promise对象
            })
        }
        get.onclick = function () {
            //默认get,无需写"get"
            fetch("http://localhost:3000/user").then(res => {
                console.log(res.text());//promise对象
            })
        }
        get.onclick = function () {
            //默认get,无需写"get"
            fetch("http://localhost:3000/user").then(res => {
                res.json().then(res => {
                    console.log(res);
                })
            })
        }
            const p = fetch("http://localhost:3000/user").then(res => {
                return res.json()
            }).then(res => {
                console.log(res);
            })
res.json()是promise实例化对象,返回值是对象
res.text()是promise实例化对象,返回值是json格式,需要自己转成对象才能操作
get请求
<button id="get">get</button> const get = document.querySelector('#get')
get.onclick = function () {
fetch("http://localhost:3000/user").then(res => res.json())
.then(res => {
console.log(res);
})
}
        get.onclick = function () {
            //默认get,无需写"get"
            const p = fetch("http://localhost:3000/user").then(res => {
                return res.text()
            }).then(res => {
                console.log(JSON.parse(res));
            })
        }
带参数查询
        get.onclick = function () {
            //默认get,无需写"get"
            const p = fetch("http://localhost:3000/user?id=1").then(res => {
                return res.json()
            }).then(res => {
                console.log(res);
            })
        }
完整写法
res.ok 请求的路由能在服务器找到为true,不能找到为false
        get.onclick = function () {
            //默认get,无需写"get"
            const p = fetch("http://localhost:3000/users?id=1").then(res => {
                //res.ok 请求的路由能在服务器找到为true,不能找到为false
                if (res.ok) {
                    return res.json()
                } else {
                     //Promise.reject()//生成promise实例化对象,并将状态变为rejected
                    return Promise.reject({
                        status: res.status,
                        statusText: res.statusText
                    })
                }
            }).then(res => {
                console.log(res);
            }).catch(err => {
                console.log("err", err);
            })
        }
post请求
<button class="post">post</button>提交数据为form格式
        post.onclick = function () {
            fetch('http://localhost:3000/user', {
                method: "POST",
                headers: {
                    "content-type": "application/x-www-form-urlencoded"
                },
                body: "name=鞠婧祎&age=18"
            })
                .then(res => res.json())
                .then(res => {
                    console.log(res);
                })
        }
提交数据为json格式
        post.onclick = function () {
            fetch('http://localhost:3000/user', {
                method: "POST",
                headers: {
                    "content-type": "application/json"
                },
                body: JSON.stringify({
                    name: "车银优",
                    age: 25
                })
            })
                .then(res => res.json())
                .then(res => {
                    console.log(res);
                })
        }
提交数据后:


案例:
    <button>click</button>
    <ul id='list'>
const btn = document.querySelector('button')
const list = document.querySelector('#list')
btn.onclick = function () {
fetch('http://www.xiongmaoyouxuan.com/api/tabs').then(res=>res.json()).then(res=>{
render(res)
})
}
function render(res) {
// console.log(res.data.list);
let newArr = res.data.list.map(item => {
return `
<li>
<div>${item.name}</div>
<img src="${item.imageUrl}">
</li>`
})
// console.log(newArr);
list.innerHTML = newArr.join('')
}axios
引入axios
<script src="https://cdn.jsdelivr.net/npm/axios@1.1.2/dist/axios.min.js"></script>get请求
        const btn = document.querySelector('button')
        btn.onclick = function () {
            axios.get('http://localhost:3000/user').then(res=>{
                console.log(res.data);
            }).catch(err=>{
                console.log("err",err);
            })
        }
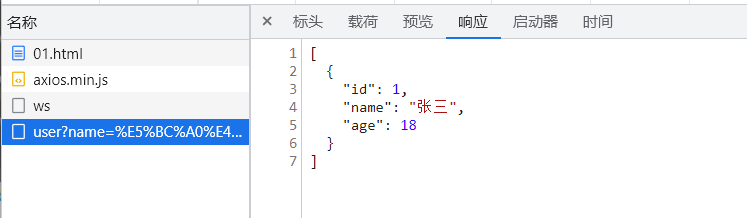
传参查询:
        btn.onclick = function () {
            axios.get('http://localhost:3000/user',{params:{name:"张三",age:18}}).then(res=>{
                console.log(res.data);
            }).catch(err=>{
                console.log("err",err);
            })
        }

post请求
<button class="post">post</button>优点,提交数据会根据提交的数据自动解析格式
        const btn2 = document.querySelector('.post')
        btn2.onclick = function () {
            axios.post('http://localhost:3000/user', { id: 5, name: "鞠婧祎", age: 18 }).then(res => {
                console.log(res.data);
            }).catch(err => {
                console.log("err", err);
            })
        }
const btn2 = document.querySelector('.post')
btn2.onclick = function () {
axios.post('http://localhost:3000/user', "id=6&name=车银优&age=18")
.then(res => {
console.log(res.data);
}).catch(err => {
console.log("err", err);
})
}提交数据后
axios拦截器
axios请求拦截器,axios响应拦截器
如果我们使用中需要统一处理所有 http 请求和响应, 就需要使用 axios 拦截器。
    <button>get</button>
    <button class="post">post</button>
    <script src="https://cdn.jsdelivr.net/npm/axios@1.1.2/dist/axios.min.js"></script>
//添加请求拦截器
// Add a request interceptor
axios.interceptors.request.use(function (config) {
// Do something before request is sent
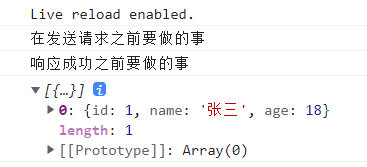
console.log("在发送请求之前要做的事");
return config;
}, function (error) {
// Do something with request error
console.log("请求失败前要做的事");
return Promise.reject(error);
});
//添加响应拦截器
// Add a response interceptor
axios.interceptors.response.use(function (response) {
// Any status code that lie within the range of 2xx cause this function to trigger
// Do something with response data
console.log("响应成功之前要做的事");
return response;
}, function (error) {
// Any status codes that falls outside the range of 2xx cause this function to trigger
// Do something with response error
console.log("响应失败前要做的事");
return Promise.reject(error);
});
const btn = document.querySelector('button')
btn.onclick = function () {
axios.get('http://localhost:3000/user', { params: { name: "张三", age: 18 } }).then(res => {
console.log(res.data);
}).catch(err => {
console.log("err", err);
})
}
const btn2 = document.querySelector('.post')
btn2.onclick = function () {
axios.post('http://localhost:3000/user', "id=6&name=车银优&age=18").then(res => {
console.log(res.data);
}).catch(err => {
console.log("err", err);
})
}get请求演示:
请求成功,响应成功
请求成功,响应失败

AbortController
axios中断器
当网速过慢,点击太快时可能会报错,这时我们可以设置取消连接,即中断之前还在进行的交互
    <button>get</button>
    <button class="abort">abort</button>
    <script src="https://cdn.jsdelivr.net/npm/axios@1.1.2/dist/axios.min.js"></script>
const btn = document.querySelector('button')
//创建中断器对象
const controller = new AbortController()
//在get()方法第二个参数添加{signal: controller.signal}
btn.onclick = function () {
axios.get('http://localhost:3000/user',{signal: controller.signal})
.then(res => {
console.log(res.data);
}).catch(err => {
console.log("err", err);
})
}
const btn2 = document.querySelector('.abort')
//点击中断请求
btn2.onclick = function () {
//cancel the request
controller.abort()
}
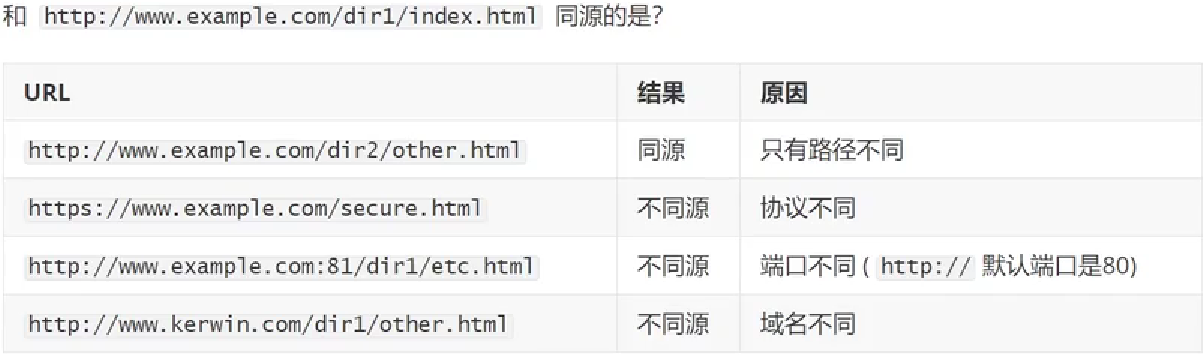
同源策略
一个URL由三部分组成:协议、域名(指向主机)、端口,只有这三个完全相同的URL才能称之为同源。
同源策略目的就是为了保证用户信息的安全,防止恶意的网站窃取用户数据。
如果网页之间不满足“同源”的要求:
(1)无法读取非同源网页的Cookie、LocalStorage 。
(2)无法接触非同源网页的 DOM。
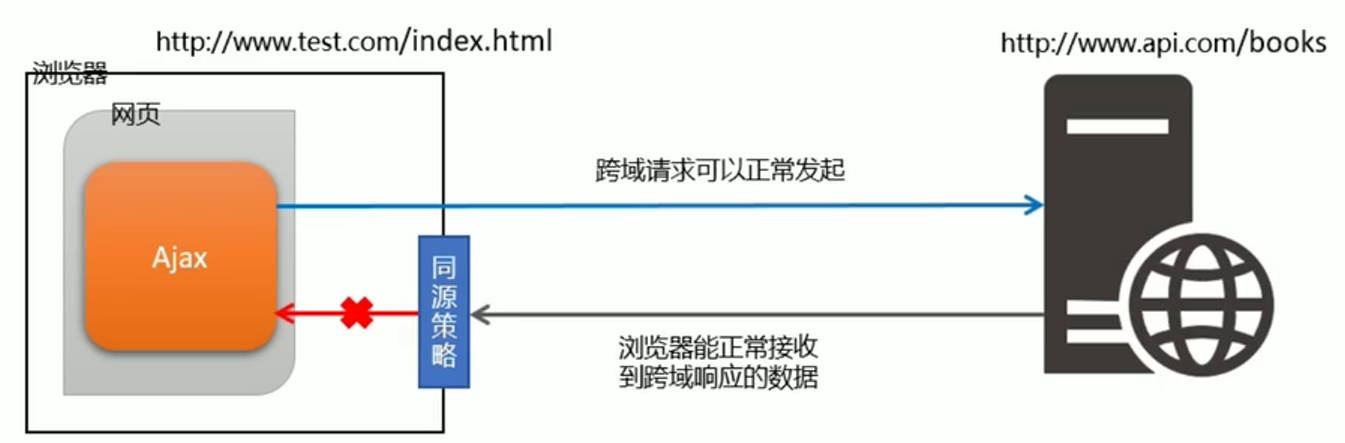
(3)无法向非同源地址发送AJAX请求(可以发送,但浏览器会拒绝接受响应)。
cookie
cookie就是一些数据,用于存储服务器返回给客服端的信息,客户端进行保存。在下一次访问该网站时,客户端会将保存的cookie一同发给服务器,服务器再利用cookie进行一些操作。利用cookie我们就可以实现自动登录,保存游览历史,身份验证等功能。
session
session是存储于服务器端的特殊对象,服务器会为每一个游览器(客户端)创建一个唯一的session。这个session是服务器端共享,每个游览器(客户端)独享的。我们可以在session存储数据,实现数据共享。
跨域
同源策略是浏览器的行为,是为了保护本地数据不被JavaScript代码获取回来的数据污染,因此拦截的是客户端发出的请求回来的数据接收,即请求发送了,服务器响应了,但是无法被浏览器接收。
由于同源策略存在带来的问题就是跨域问题了。当想要与非同源网页的资源进行交互,这时就需要跨域。
实现跨域
jsonp
缺点是只支持GET请求,不支持POST请求。
cors
CORS:出现的较晚,它是W3C标准,属于跨域Ajax请求的根本解决方案。支持GET和POST请求。
jsonp
由于浏览器同源策略的限制,网页中无法通过Ajax请求非同源的接口数据。但是<script> 标签不受浏览器同源策略的影响,可以通过src属性,请求非同源的js脚本。
因此,JSONP的实现原理,就是通过<script>标签的src属性,请求跨域的数据接口,并通过函数调用的形式,接收跨域接口响应回来的数据。
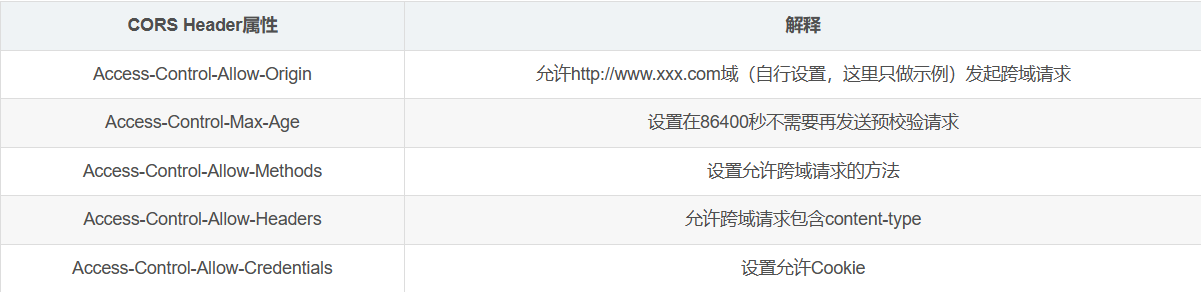
cors(后端在响应头设置)
CORS是一个W3C标准,全称是”跨域资源共享”(Cross-origin resource sharing),允许浏览器向跨源服务器,发出XMLHttpRequest请求,从而克服了AJAX只能同源使用的限制。
它通过服务器增加一个特殊的Header[Access-Control-Allow-Origin]来告诉客户端跨域的限制,如果浏览器支持CORS、并且判断Origin通过的话,就会允许XMLHttpRequest发起跨域请求。
http协议
网页内容又叫超文本,超文本传输协议(HyperText Transfer Protocol)
http请求组成
HTTP请求消息由请求行(request line)、请求头部( header )、 空行和请求体4个部分组成。
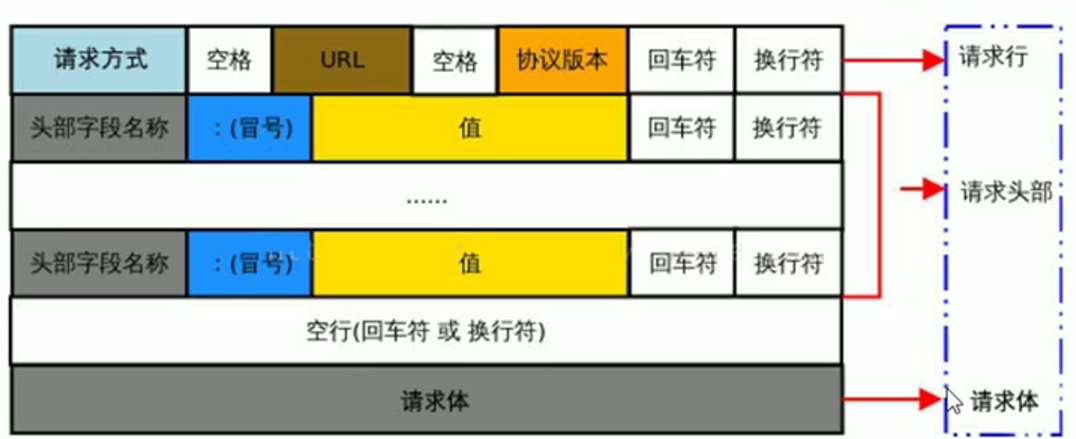
请求行
请求行由请求方式、URL 和HTTP协议版本3个部分组成,他们之间使用空格隔开。


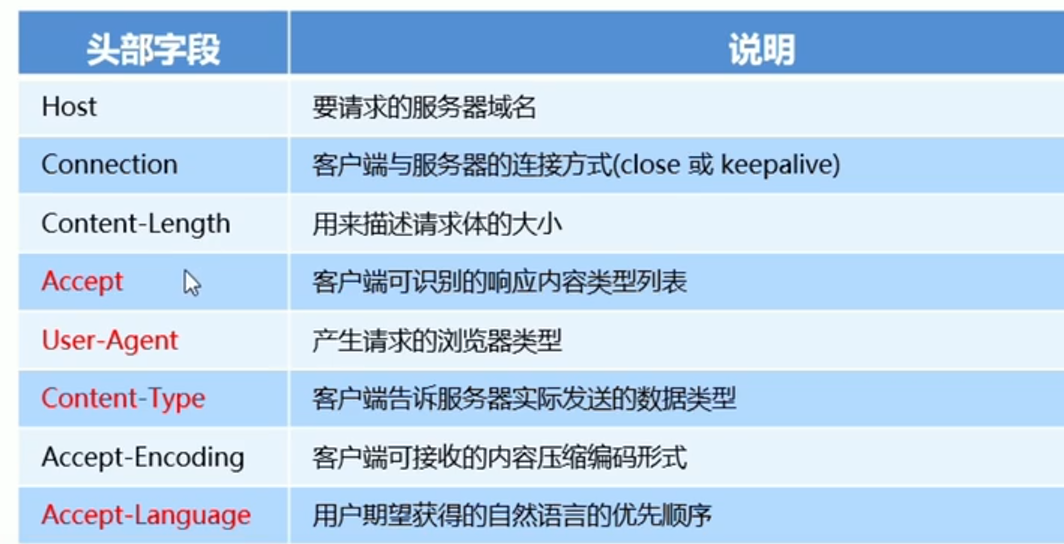
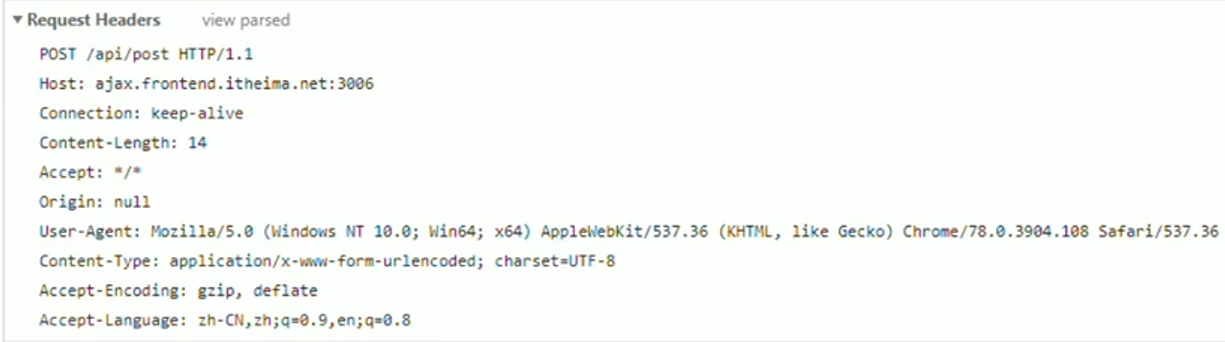
请求头部
请求头部用来描述客户端的基本信息,从而把客户端相关的信息告知服务器。比如: User-Agent 用来说明当前是什么类型的浏览器; Content- Type用来描述发送到服务器的数据格式; Accept 用来描述客户端能够接收什么类型的返回内容; Accept-l anguage用来描述客户端期望接收哪种人类语言的文本内容。
空行
最后一个请求头字段的后面是一个空行, 通知服务器请求头部至此结束。
请求消息中的空行,用来分隔请求头部与请求体。
请求体
请求体中存放的,是要通过POST方式提交到服务器的数据。
注意:只有POST请求才有请求体,GET请求没有请求体!
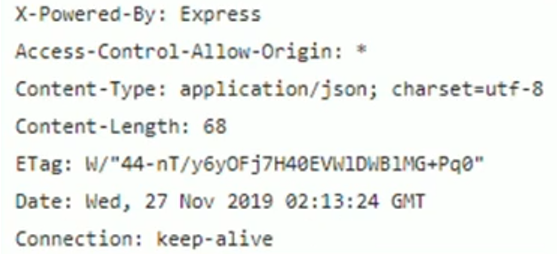
http响应
HTTP响应消息由状态行、响应头部、空行和响应体4个部分组成
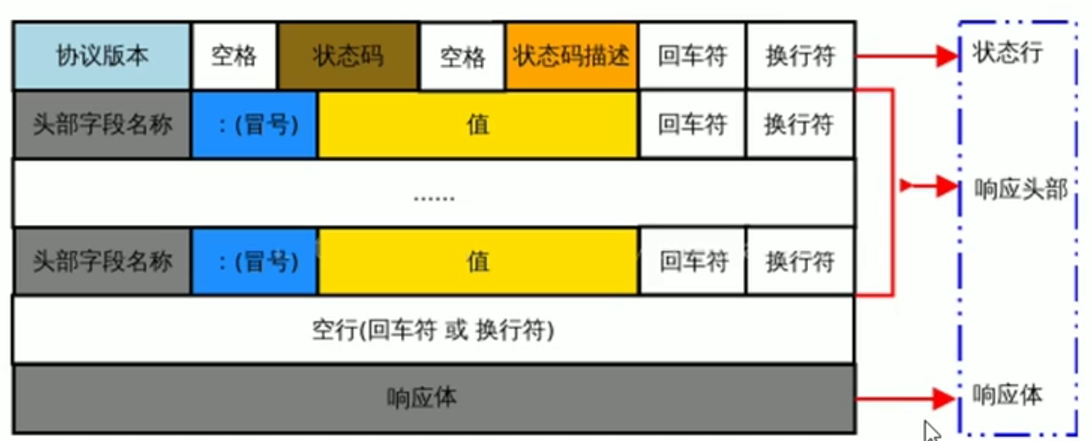
状态行
状态行由HTTP协议版本、状态码和状态码的描述文本3个部分组成,他们之间使用空格隔开;

响应头部
响应头部用来描述服务器的基本信息。响应头部由多行键/值对组成,每行的键和值之间用英文的冒号分隔。
空行
在最后一一个响应头部字段结束之后,会紧跟一个空行,用来通知客户端响应头部至此结束。
响应体
响应体中存放的,是服务器响应给客户端的资源内容。

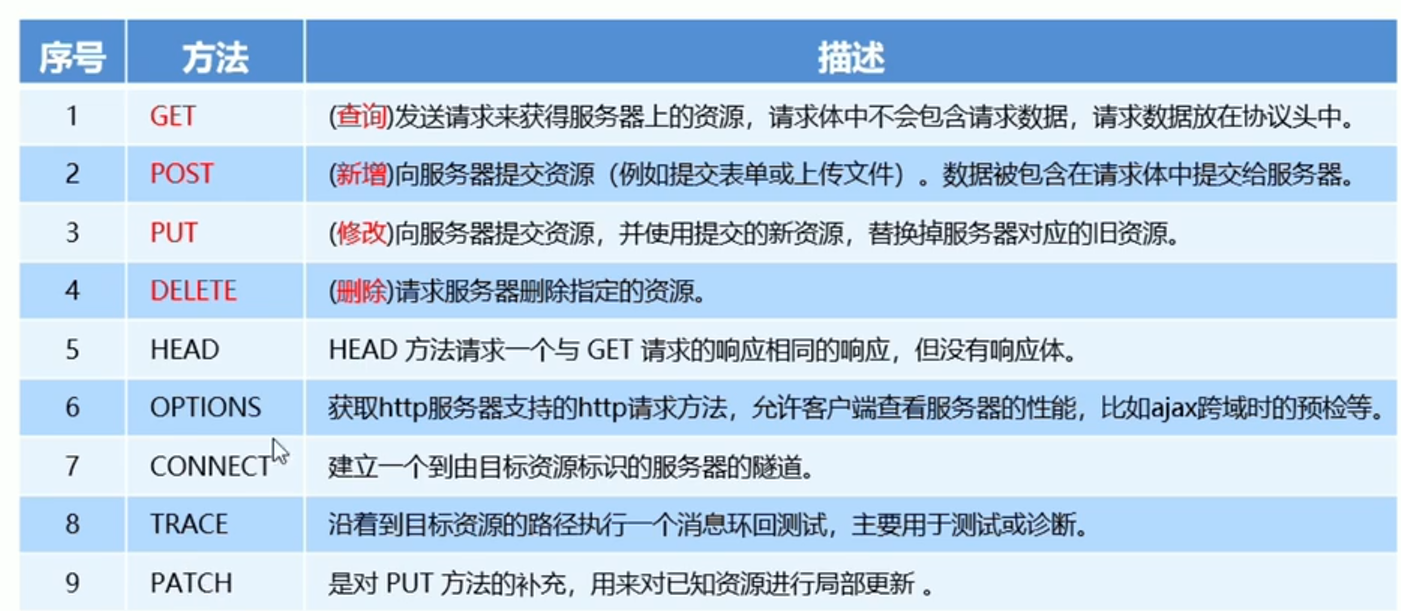
HTTP请求方式
HTTP请求方法,属于HTTP协议中的一部分,请求方法的作用是:用来表明要对服务器上的资源执行的操作。
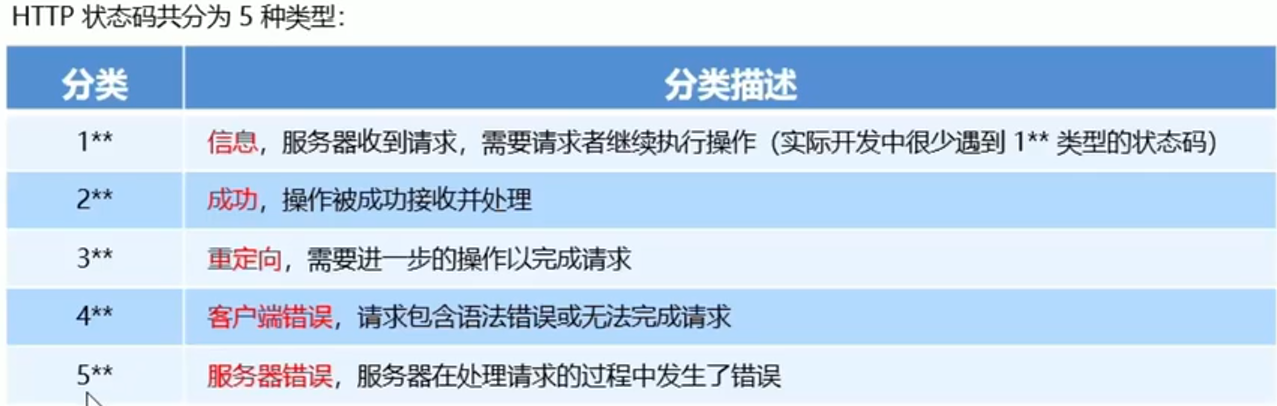
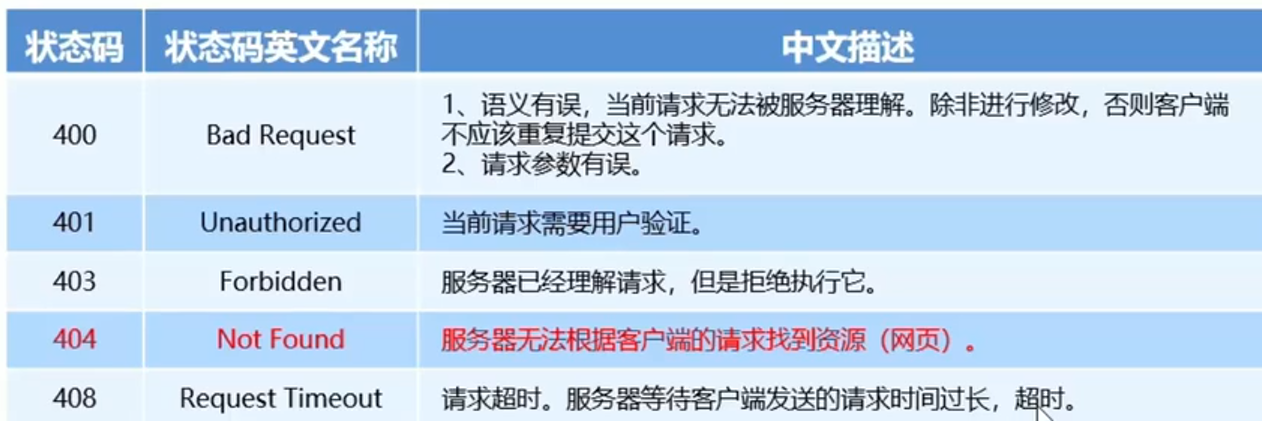
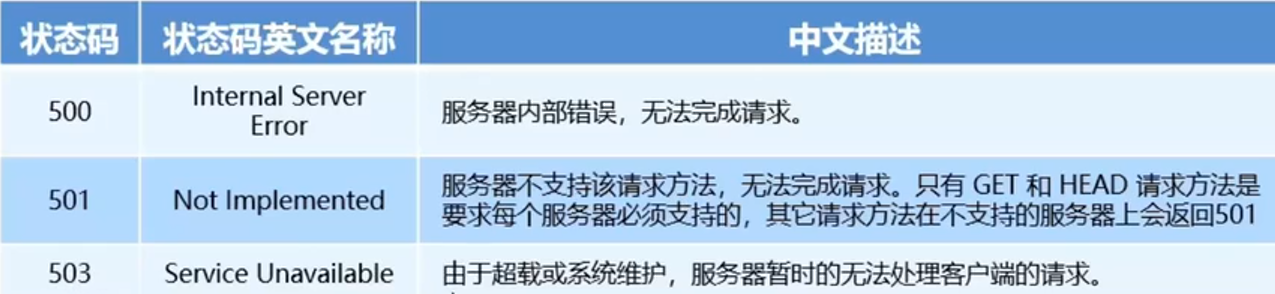
HTTP响应状态码
HTTP响应状态码(HTTP Status Code),也属于HTTP协议的一部分,用来标识响应的状态。
响应状态码会随着响应消息一起被发送至客户端浏览器 ,浏览器根据服务器返回的响应状态码,就能知道这次HTTP请求的结果是成功还是失败了。

客户端:
服务器端:


 193
193

 被折叠的 条评论
为什么被折叠?
被折叠的 条评论
为什么被折叠?
 到【灌水乐园】发言


