1.4运用Java配置类管理Bean

一、引入

  • 在1.3采用注解配置类取代了Spring配置文件,现在,我们来学习如何采用Java配置类管理Bean。

二、运用Java配置类管理Bean

(1)、准备工作

  1. 打开项目,Maven项目 - SpringDemo
  2. 在net.example.spring包里创建day04子包

(2)、创建杀龙任务类–SlayDragonQuest

在这里插入图片描述

  • 没有添加@Component注解符声明Bean

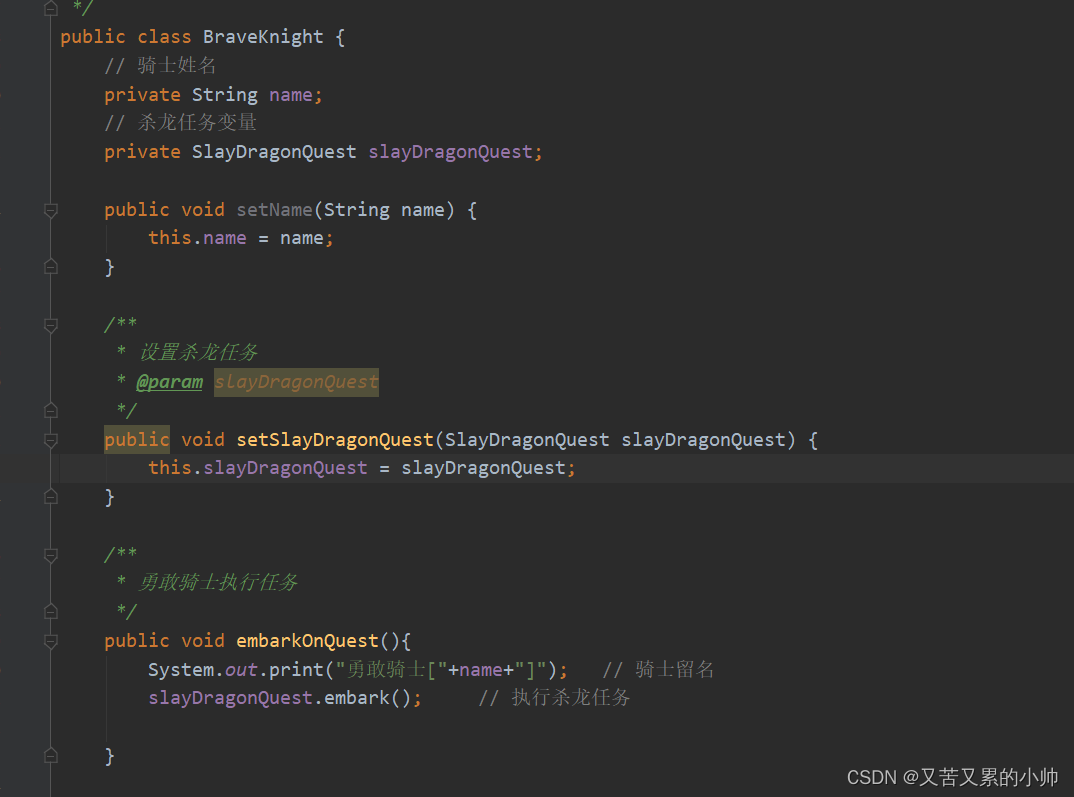
(3)、创建勇敢骑士类-- BraveKnight

在这里插入图片描述

  • 没有添加@Component注解符声明Bean;没有使用@Autowired注解符注入Bean

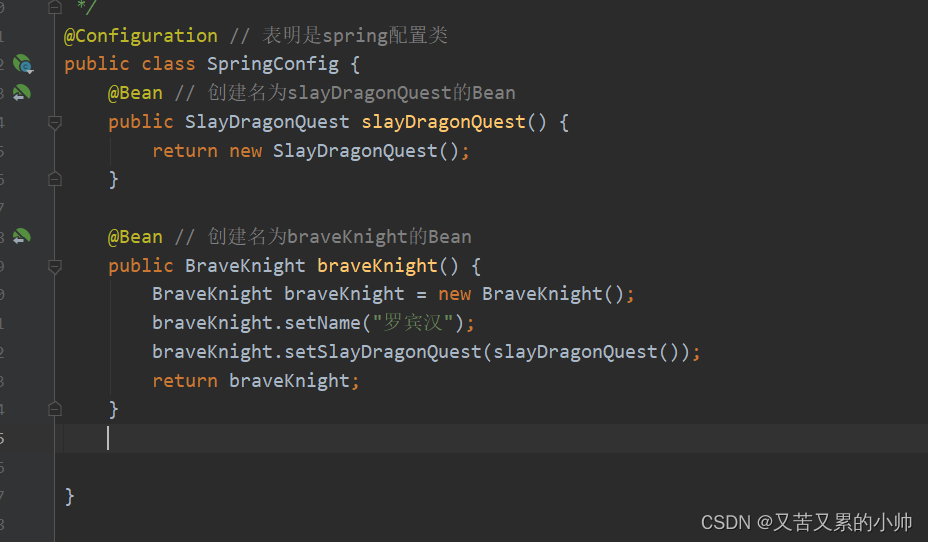
(4)、创建Spring配置类

  • 在day04子包里创建Spring配置类 - SpringConfig
    在这里插入图片描述
  • 使用@Configuration注解表明当前类是一个配置类,这意味着这个类里可能有0个或多个@Bean注解,此处没有使用包扫描,因为所有的Bean都在此类中定义了。
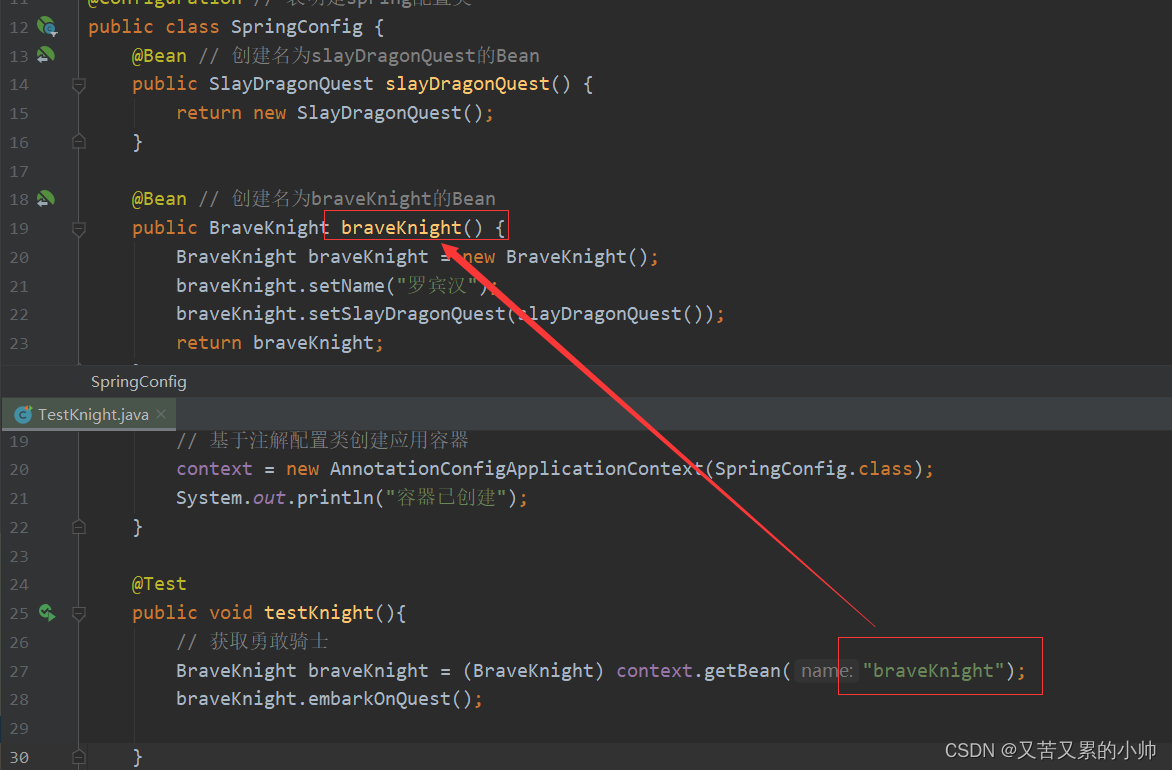
  • 使用@Bean注解,不带参数,声明当前方法的返回值是一个Bean,而Bean的名称就是方法名,当然也可以设置@Bean的参数,用来指定Bean的名称。
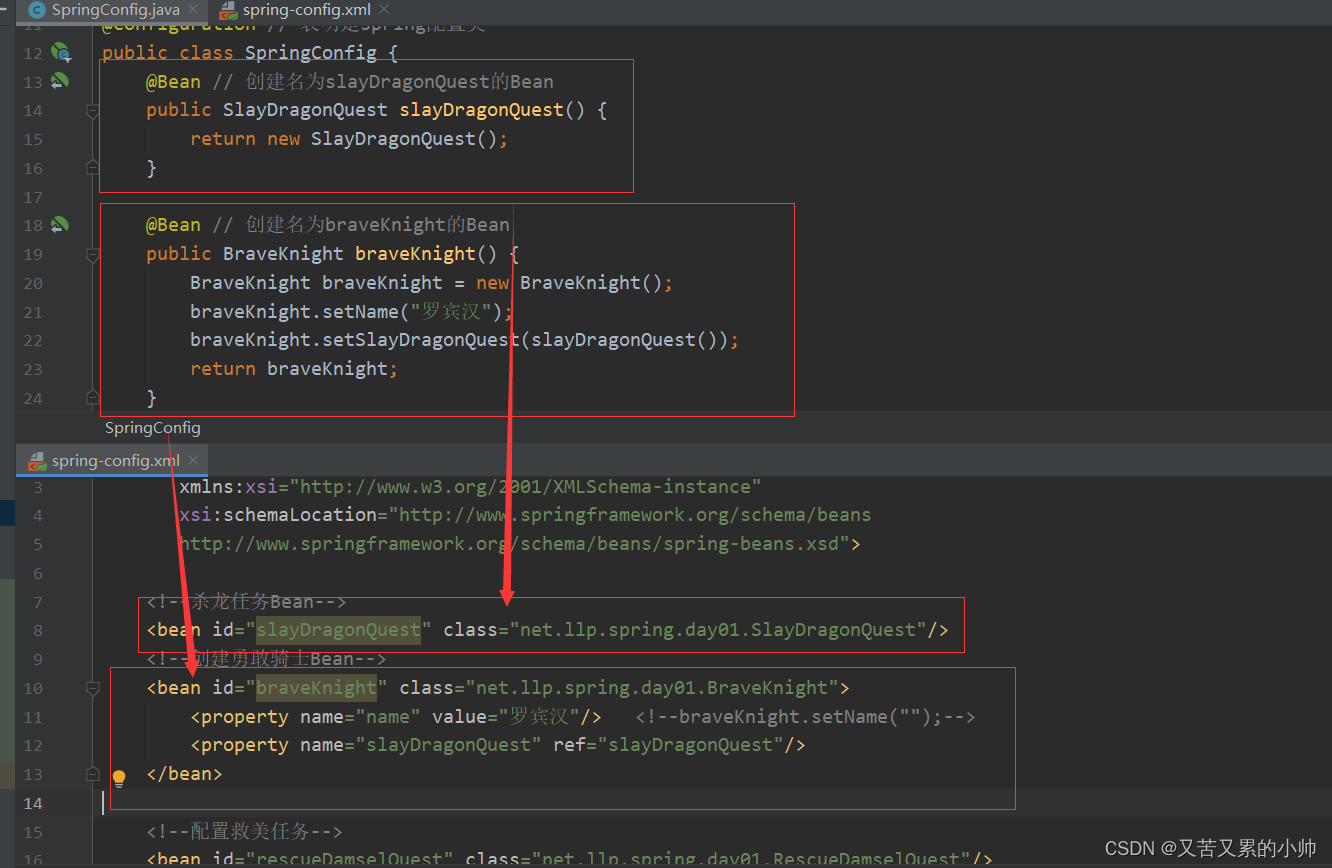
    在这里插入图片描述

(5)、创建测试类

  • 在/test/java里创建net.examlpe.spring.day04包,在包里创建TestKnight
public class TestKnight {
    private AnnotationConfigApplicationContext context; // 基于注解配置类的应用容器

    @Before
    public void init() {
        // 基于注解配置类创建应用容器
        context = new AnnotationConfigApplicationContext(SpringConfig.class);
    }

    @Test
    public void testKnight() {
        // 根据名称从应用容器里获取勇敢骑士对象
        BraveKnight knight = (BraveKnight) context.getBean("braveKnight");
        // 勇敢骑士执行任务
        knight.embarkOnQuest();
    }

    @After
    public void destroy() {
        // 关闭应用容器
        context.close();
    }
}

在这里插入图片描述

(6)、运行测试类

在这里插入图片描述

  • 0
    点赞
  • 1
    收藏
    觉得还不错? 一键收藏
  • 0
    评论
要实现Spring Boot整合Axis1.4实现WebService服务端,可以按照以下步骤进行: 1. 在pom.xml文件中添加以下依赖: ```xml <dependency> <groupId>axis</groupId> <artifactId>axis</artifactId> <version>1.4</version> </dependency> <dependency> <groupId>axis</groupId> <artifactId>axis-jaxrpc</artifactId> <version>1.4</version> </dependency> <dependency> <groupId>axis</groupId> <artifactId>axis-saaj</artifactId> <version>1.4</version> </dependency> <dependency> <groupId>axis</groupId> <artifactId>axis-wsdl4j</artifactId> <version>1.5.1</version> </dependency> ``` 2. 创建一个WebService接口和实现: ```java @WebService public interface HelloWorldService { @WebMethod String sayHello(String name); } @WebService(endpointInterface = "com.example.demo.webservice.HelloWorldService") public class HelloWorldServiceImpl implements HelloWorldService { @Override public String sayHello(String name) { return "Hello, " + name + "!"; } } ``` 3. 在Spring Boot配置中添加以下bean: ```java @Bean(name = "helloWorld") public HelloWorldService helloWorld() { return new HelloWorldServiceImpl(); } @Bean(name = "myServlet") public ServletRegistrationBean axisServlet() { ServletRegistrationBean servlet = new ServletRegistrationBean(new AxisServlet(), "/services/*"); servlet.addInitParameter("axis.servicesPath", "WEB-INF/services"); servlet.addInitParameter("axis.transport.http.address", "http://localhost:8080/services"); servlet.setLoadOnStartup(1); return servlet; } ``` 4. 在`application.properties`文件中添加以下配置: ``` server.port=8080 ``` 5. 启动应用程序,访问`http://localhost:8080/services/HelloWorldService`,即可看到WebService服务的WSDL文档。 注:以上代码仅供参考,具体实现要根据自己的实际情况进行调整。

“相关推荐”对你有帮助么?

  • 非常没帮助
  • 没帮助
  • 一般
  • 有帮助
  • 非常有帮助
提交
评论
添加红包

请填写红包祝福语或标题

红包个数最小为10个

红包金额最低5元

当前余额3.43前往充值 >
需支付:10.00
成就一亿技术人!
领取后你会自动成为博主和红包主的粉丝 规则
hope_wisdom
发出的红包
实付
使用余额支付
点击重新获取
扫码支付
钱包余额 0

抵扣说明:

1.余额是钱包充值的虚拟货币,按照1:1的比例进行支付金额的抵扣。
2.余额无法直接购买下载,可以购买VIP、付费专栏及课程。

余额充值