


我们的 app 页面正常情况下,其实也是 Canvas 绘制出来的对吧?
Canvas 对应的相关 API 肯定也是支持灰度的。
那么是不是我们在控件绘制的时候,比如 draw 之前设置个灰度效果就可以呢?
好像发现了什么玄机。
_1_尝试给 ImageView 上个灰度效果
那么我们首先通过 ImageView 来验证一下灰度效果的可行性。
我们编写个自定义的 ImageView,叫做:GrayImageView
布局文件是这样的:
<LinearLayout xmlns:android=“http://schemas.android.com/apk/res/android”
xmlns:app=“http://schemas.android.com/apk/res-auto”
xmlns:tools=“http://schemas.android.com/tools”
android:layout_width=“match_parent”
android:layout_height=“match_parent”
android:orientation=“vertical”
tools:context=".TestActivity">
<ImageView
android:layout_width=“100dp”
android:layout_height=“wrap_content”
android:src="@mipmap/logo">
<com.imooc.imooc_wechat_app.view.GrayImageView
android:layout_width=“100dp”
android:layout_height=“wrap_content”
android:src="@mipmap/logo" />
很简单,我们放了一个 ImageView 用来做对比。
看下 GrayImageView 的代码:
public class GrayImageView extends AppCompatImageView {
private Paint mPaint = new Paint();
public GrayImageView(Context context, AttributeSet attrs) {
super(context, attrs);
ColorMatrix cm = new ColorMatrix();
cm.setSaturation(0);
mPaint.setColorFilter(new ColorMatrixColorFilter(cm));
}
@Override
public void draw(Canvas canvas) {
canvas.saveLayer(null, mPaint, Canvas.ALL_SAVE_FLAG);
super.draw(canvas);
canvas.restore();
}
}
在分析代码之前,我们看下效果图:
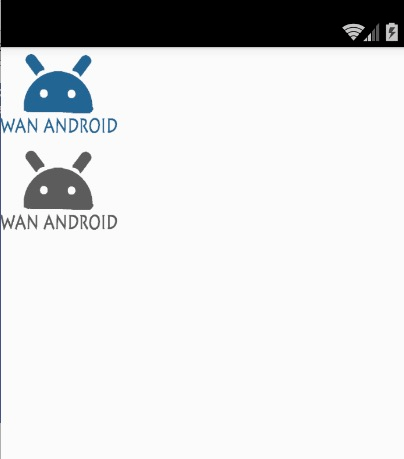
很完美,我们成功把 wanandroid图标搞成了灰色。
看一眼代码,代码非常简单,我们复写了draw 方法,在该方法中给canvas 做了一下特殊处理。
什么特殊处理呢?其实就是设置了一个灰度效果。
在 App中,我们对于颜色的处理很多时候会采用颜色矩阵,是一个4*5的矩阵,原理是这样的:
[ a, b, c, d, e,
f, g, h, i, j,
k, l, m, n, o,
p, q, r, s, t ]
应用到一个具体的颜色[R, G, B, A]上,最终颜色的计算是这样的:
R’ = aR + bG + cB + dA + e;
G’ = fR + gG + hB + iA + j;
B’ = kR + lG + mB + nA + o;
A’ = pR + qG + rB + sA + t;
是不是看起来很难受,没错我也很难受,看到代数就烦。
既然大家都难受,那么Android 就比较贴心了,给我们搞了个ColorMartrix类,这个类对外提供了很多 API,大家直接调用 API 就能得到大部分想要的效果了,除非你有特别特殊的操作,那么可以自己通过矩阵去运算。
像灰度这样的效果,我们可以通过饱和度 API来操作:
setSaturation(float sat)
传入 0 就可以了,你去看源码,底层传入了一个特定的矩阵去做的运算。
ok,好了,忘掉上面说的,就记得你有个 API 能把 canvas 绘制出来的东西搞成灰的就行了。
那么我们已经实现了把 ImageView 弄成了灰度,TextView 可以吗?Button可以吗?
我们来试试TextView、Button。
代码完全一样哈,其实就是换了个实现类,例如 GrayTextView:
public class GrayTextView extends AppCompatTextView {
private Paint mPaint = new Paint();
public GrayTextView(Context context, AttributeSet attrs) {
super(context, attrs);
ColorMatrix cm = new ColorMatrix();
cm.setSaturation(0);
mPaint.setColorFilter(new ColorMatrixColorFilter(cm));
}
@Override
public void draw(Canvas canvas) {
canvas.saveLayer(null, mPaint, Canvas.ALL_SAVE_FLAG);
super.draw(canvas);
canvas.restore();
}
}
没任何区别,GrayButton 就不贴了,我们看布局文件:
<?xml version="1.0" encoding="utf-8"?><LinearLayout xmlns:android=“http://schemas.android.com/apk/res/android”
xmlns:app=“http://schemas.android.com/apk/res-auto”
xmlns:tools=“http://schemas.android.com/tools”
android:layout_width=“match_parent”
android:layout_height=“match_parent”
android:orientation=“vertical”
tools:context=".TestActivity">
<ImageView
android:layout_width=“100dp”
android:layout_height=“wrap_content”
android:src="@mipmap/logo">
<com.imooc.imooc_wechat_app.view.GrayImageView
android:layout_width=“100dp”
android:layout_height=“wrap_content”
android:src="@mipmap/logo" />
<TextView
android:layout_width=“wrap_content”
android:layout_height=“wrap_content”
android:text=“鸿洋真帅”
android:textColor="@android:color/holo_red_light"
android:textSize=“30dp” />
<com.imooc.imooc_wechat_app.view.GrayTextView
android:layout_width=“wrap_content”
android:layout_height=“wrap_content”
android:text=“鸿洋真帅”
android:textColor="@android:color/holo_red_light"
android:textSize=“30dp” />
<Button
android:layout_width=“wrap_content”
android:layout_height=“wrap_content”
android:text=“鸿洋真帅”
android:textColor="@android:color/holo_red_light"
android:textSize=“30dp” />
<com.imooc.imooc_wechat_app.view.GrayButton
android:layout_width=“wrap_content”
android:layout_height=“wrap_content”
android:text=“鸿洋真帅”
android:textColor="@android:color/holo_red_light"
android:textSize=“30dp” />
对应的效果图:
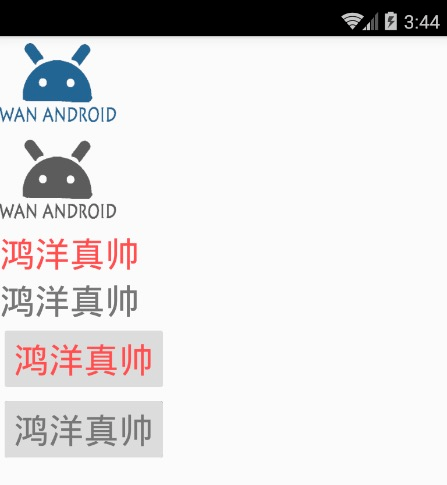
可以看到 TextView,Button 也成功的把红色的字体换成了灰色。
这个时候你是不是忽然感觉自己会了?
其实我们只要把各种相关的 View 换成这种自定义 View,利用 appcompat换肤那一套,不需要 Server 参与了,客户端搞搞就行了。
是吗?我们需要把所有的 View 都换成自定义的 View吗?
这听起来成本也挺高呀。
再想想还有更简单的吗?
虽然刚才的布局文件很简单,但是邀请你再去看一眼刚才的布局文件,我要问你问题了:
看好了吧。
-
请问上面的 xml 中,ImageView的父 View 是谁?
-
TextView 的父 View 是谁?
-
Button 的父 View 是谁?
有没有一点茅塞顿开!
我们需要一个个自定义吗?
父 View 都是 LinearLayout,我们搞个 GrayLinearLayout 不就行了,其内部的 View 都会变成灰色,毕竟 Canvas 对象是往下传递的。
我们来试试:
GrayLinearLayout:
public class GrayLinearLayout extends LinearLayout {
private Paint mPaint = new Paint();
public GrayLinearLayout(Context context, AttributeSet attrs) {
super(context, attrs);
ColorMatrix cm = new ColorMatrix();
cm.setSaturation(0);
mPaint.setColorFilter(new ColorMatrixColorFilter(cm));
}
@Override
public void draw(Canvas canvas) {
canvas.saveLayer(null, mPaint, Canvas.ALL_SAVE_FLAG);
super.draw(canvas);
canvas.restore();
}
@Override
protected void dispatchDraw(Canvas canvas) {
canvas.saveLayer(null, mPaint, Canvas.ALL_SAVE_FLAG);
super.dispatchDraw(canvas);
canvas.restore();
}
}
代码很简单,但是注意有个细节,注意我们也复写了 dispatchDraw,为什么呢?自己思考。
我们更换下 xml:
<?xml version="1.0" encoding="utf-8"?><com.imooc.imooc_wechat_app.view.GrayLinearLayout xmlns:android=“http://schemas.android.com/apk/res/android”
xmlns:app=“http://schemas.android.com/apk/res-auto”
xmlns:tools=“http://schemas.android.com/tools”
android:layout_width=“match_parent”
android:layout_height=“match_parent”
android:orientation=“vertical”
tools:context=".TestActivity">
<ImageView
android:layout_width=“100dp”
android:layout_height=“wrap_content”
android:src="@mipmap/logo" />
<TextView
android:layout_width=“wrap_content”
android:layout_height=“wrap_content”
android:text=“鸿洋真帅”
android:textColor="@android:color/holo_red_light"
android:textSize=“30dp” />
<Button
android:layout_width=“wrap_content”
android:layout_height=“wrap_content”
android:text=“鸿洋真帅”
android:textColor="@android:color/holo_red_light"
android:textSize=“30dp” />
</com.imooc.imooc_wechat_app.view.GrayLinearLayout>
我们放了蓝色 Logo 的 ImageView,红色字体的 TextView 和 Button,看一眼效果:
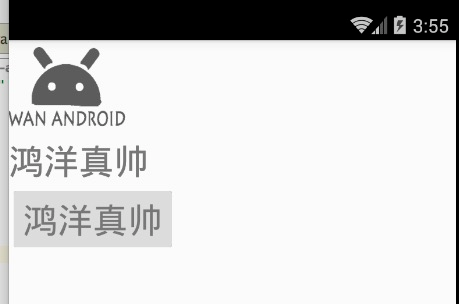
完美!
是不是又有点茅塞顿开!
只要我们换了 我们设置的Activity 的根布局就可以了!
Activity 的根布局可能是 LinearLayout,FrameLayout,RelativeLayout,ConstraintLayout…
换个鸡儿…这得换到啥时候,跟刚才有啥区别。
还有思路吗,没什么确定的 View 吗?
再想想。
我们的设置的 Activity 的根布局会放在哪?
android.id.content
是不是这个 Content View 上?
这个 content view 目前一直是 FrameLayout !
那么我们只要在生成这个android.id.content 对应的 FrameLayout,换成 GrayFrameLayout 就可以了。
怎么换呢?
appcompat 那一套?去搞 LayoutFactory?
确实可以哈,但是那样要设置 LayoutFactory,还需要考虑 appcompat 相关逻辑。
有没有那种不需要去修改什么流程的方案?
还真是有的。
我们的 AppCompatActivity,可以复写 onCreateView 的方法,这个方法其实也是LayoutFactory在构建 View 的时候回调出来的,一般对应其内部的mPrivateFactory。
他的优先级低于 Factory、Factory2,相关代码:
if (mFactory2 != null) {
view = mFactory2.onCreateView(parent, name, context, attrs);
} else if (mFactory != null) {
view = mFactory.onCreateView(name, context, attrs);
} else {
view = null;
}
if (view == null && mPrivateFactory != null) {
view = mPrivateFactory.onCreateView(parent, name, context, attrs);
}
if (view == null) {
final Object lastContext = mConstructorArgs[0];
mConstructorArgs[0] = context;
try {
if (-1 == name.indexOf(’.’)) {
view = onCreateView(parent, name, attrs);
} else {
view = createView(name, null, attrs);
}
} finally {
mConstructorArgs[0] = lastContext;
}
}


 1772
1772


 被折叠的 条评论
为什么被折叠?
被折叠的 条评论
为什么被折叠?
 到【灌水乐园】发言


