


defaultConfig {
// 应用程序包名
applicationId “com.example.creditsystem”
// 最小 sdk 版本
minSdkVersion 15
// 目标 sdk 版本
targetSdkVersion 29
// 版本号
versionCode 1
// 版本名
versionName “1.0”
testInstrumentationRunner “androidx.test.runner.AndroidJUnitRunner”
}
// 指定生成安装文件的配置
buildTypes {
release {
// 是否对代码进行混淆
minifyEnabled false
proguardFiles getDefaultProguardFile(‘proguard-android-optimize.txt’), ‘proguard-rules.pro’
}
}
}
// 指定当前项目的所有依赖关系:本地依赖、库依赖、远程依赖
dependencies {
// 本地依赖:可以对本地Jar包或目录添加依赖关系
implementation fileTree(dir: ‘libs’, include: [’*.jar’])
implementation ‘androidx.appcompat:appcompat:1.1.0’
implementation ‘androidx.constraintlayout:constraintlayout:1.1.3’
testImplementation ‘junit:junit:4.12’
androidTestImplementation ‘androidx.test🏃1.2.0’
androidTestImplementation ‘androidx.test.espresso:espresso-core:3.2.0’
}
可以理解为:根目录下
build.gradle的repositories是用来声明依赖了哪些远程库,app目录下的build.gradle的dependencies是用来声明具体使用了哪些代码库,在Sycn🐘的时候会从远程库中遍历查找并下载依赖的代码库。
使用nexus搭建maven私服
- 下载nexus
brew install nexus
注意: nexus有可能已经被墙了,需要在命令行配置代理才能下载成功。
- 运行nexus
brew services start nexus
- 在浏览器中输入nexus管理地址为
127.0.0.1:8081/nexus - 点击右上角登录按钮,默认管理员帐号密码分别为
admin和admin123 - 关闭nexus
brew services stop nexus
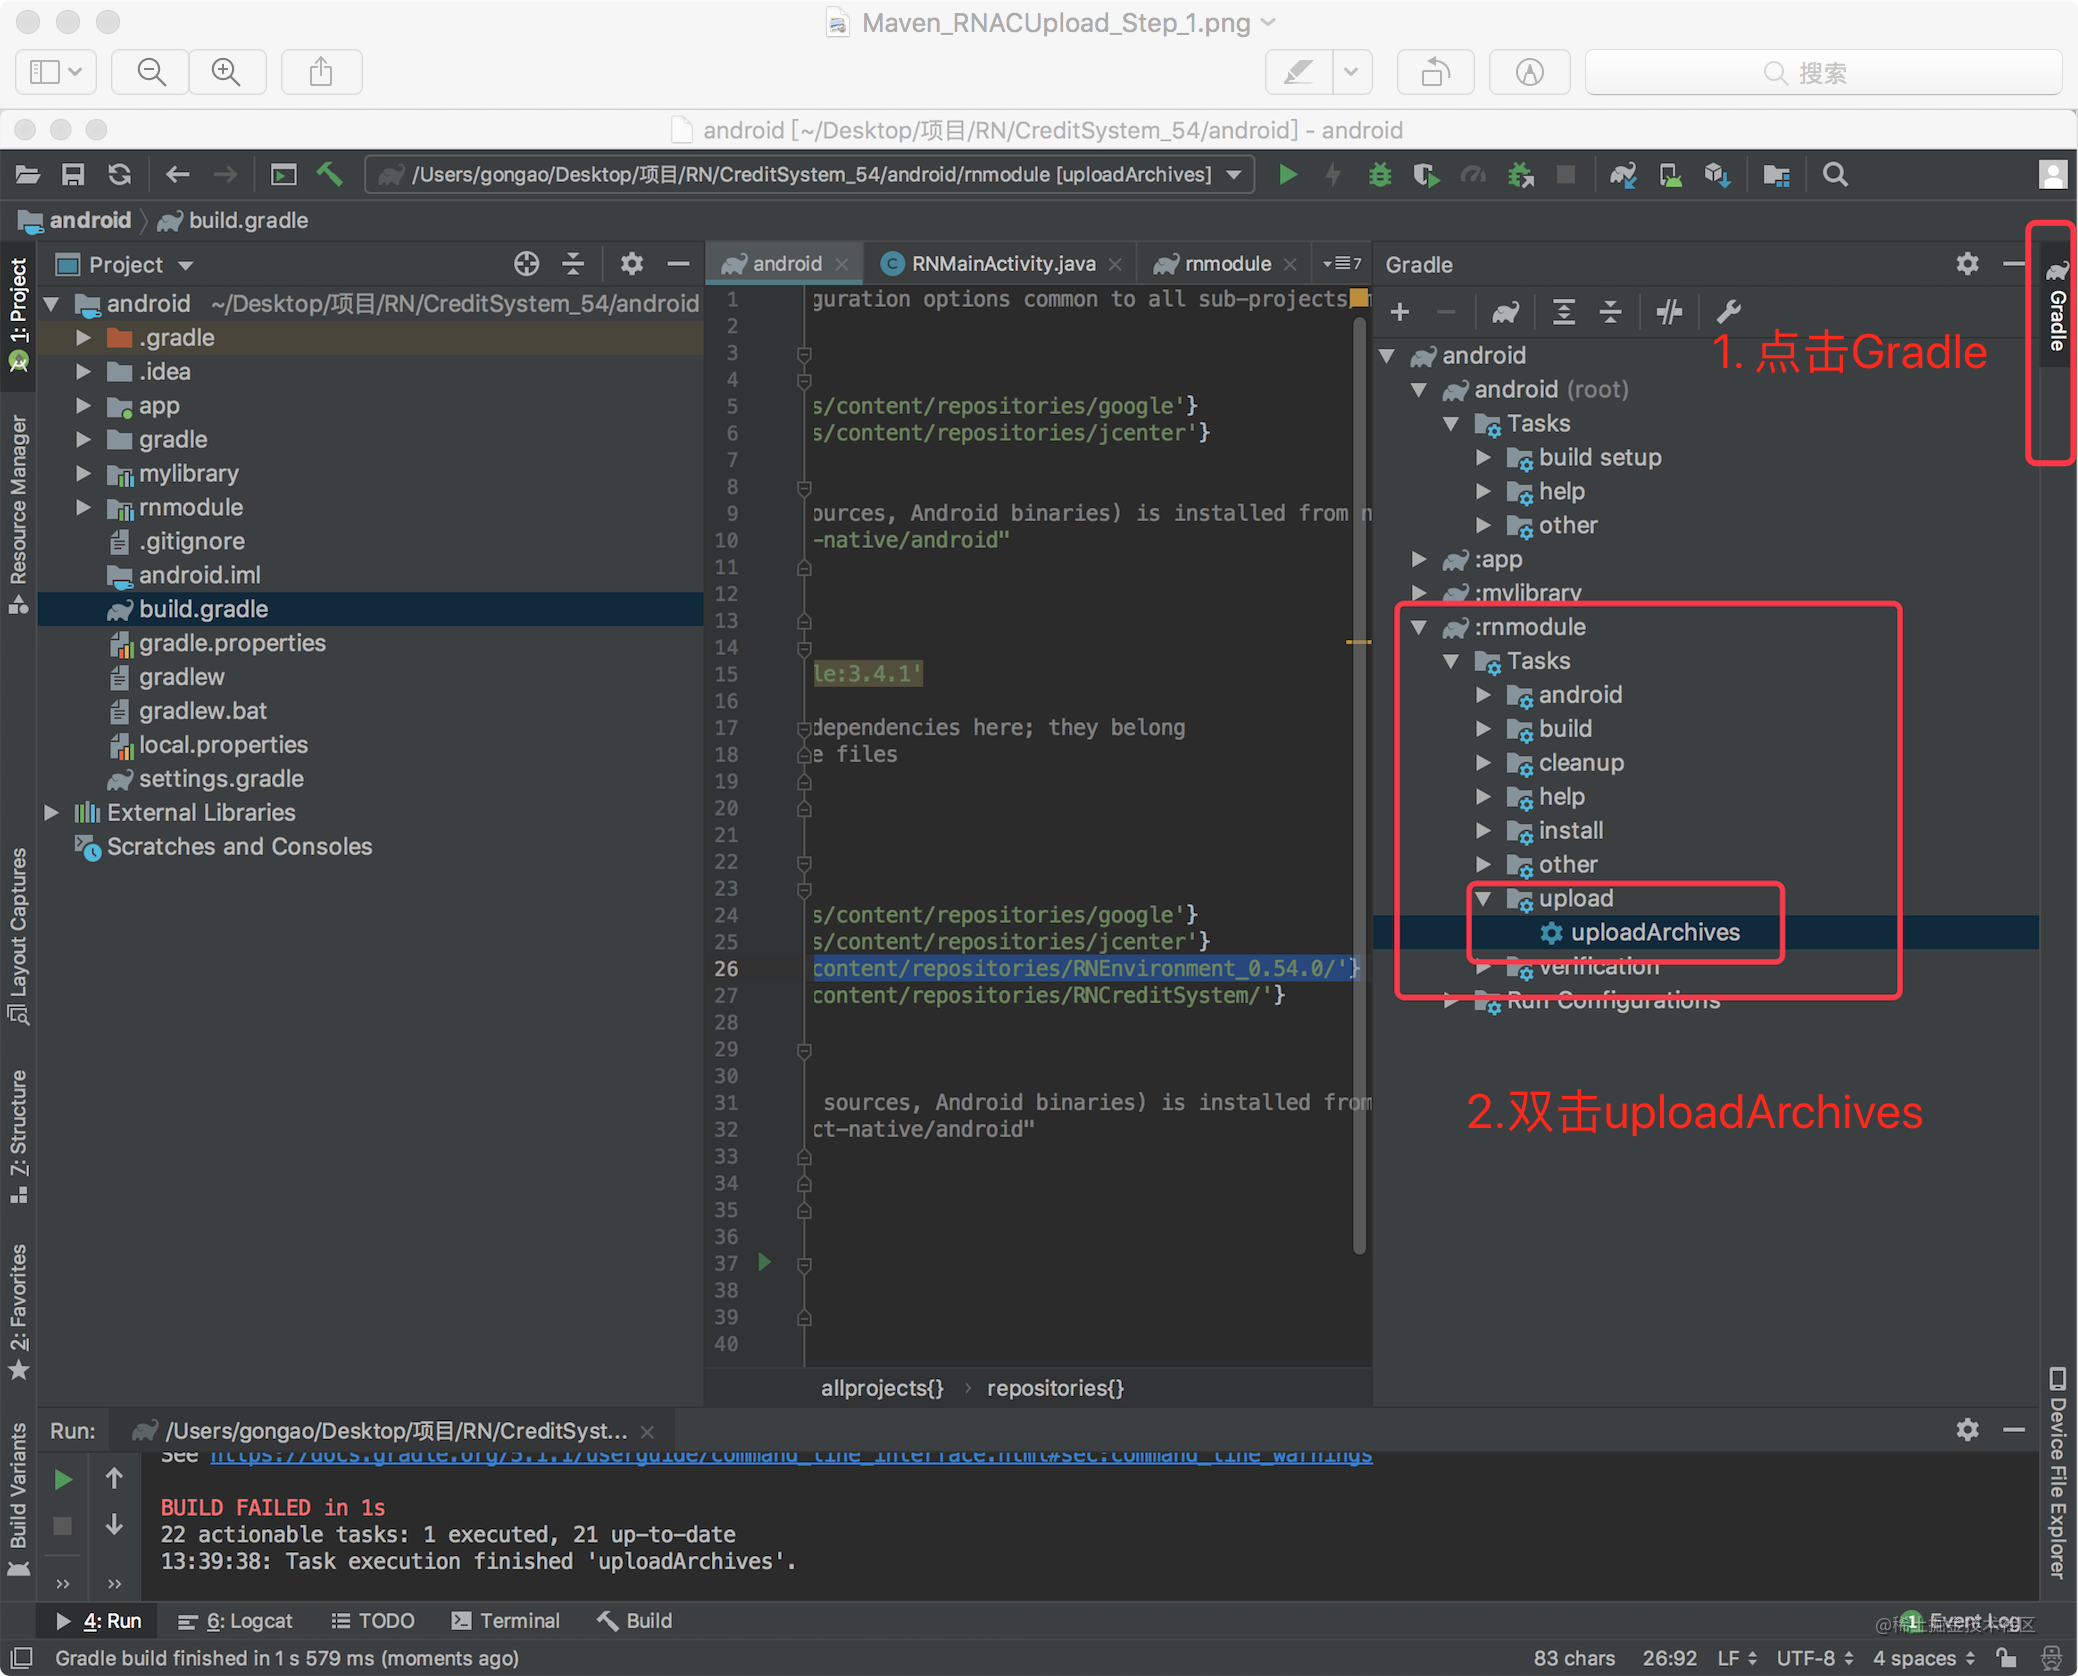
上传到maven私库
如图选中Repositories
 点击Add按钮
 最低0.47元/天 解锁文章


 689
689


 被折叠的 条评论
为什么被折叠?
被折叠的 条评论
为什么被折叠?
 到【灌水乐园】发言


