


一、 实验名称
使用Vuetify构建用户注册页面的UI并实现表单验证。
二、 参考资料
《Vue 3官方网站:https://cn.vuejs.org》、《Vuetify界面设计框架:https://vuetifyjs.com/en/getting-started/release-notes》
三、 实验目的
1. 练习使用Vuetify组件设计界面。
2. 练习对表单数据进行验证。
四、 实验内容
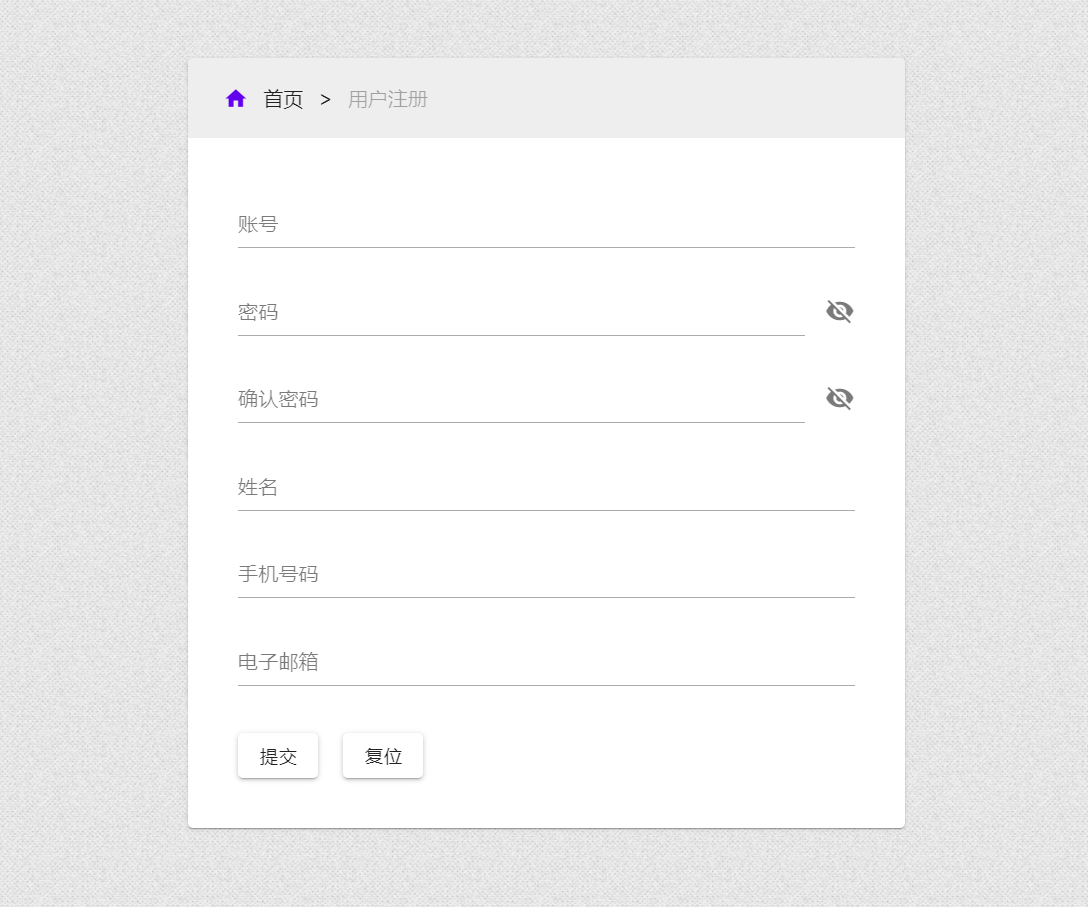
1. 使用Vuetify实现如下图所示的用户注册页面:
2. 在实验四创建的验证规则对账号、密码字段进行数据验证。
3. 在实验四创建的useValidRule.ts文件中添加confirmPasswordRules验证规则,对确认密码字段进行验证。
4. 在useValidRule.ts文件中添加nameRules验证规则,对姓名字段进行验证,要求姓名不能为空。
5. 在useValidRule.ts文件中添加mobileRules验证规则,对手机号码字段进行验证。
6. 在useValidRule.ts文件中添加emailRules验证规则,email字段进行验证。
按照实验任务书的要求完成以下实验报告:
一、程序代码
1. src\hooks目录下的useValidRule.ts文件
import {ref} from "vue"


//导出单个特性

export const username = ref('')

export const password = ref('')

export const confirmpassword = ref('')

export const name = ref('')

export const phone = ref('')

export const email = ref('')


//export const show1 = ref(false)

//export const show2 = ref(false)


export const usernameRules = ref([

     (v: string) => !!v || '必须输入账号!',

     (v: string ) => (v && v.length <= 20 && v.length >= 3) || '账号的长度为3到20个字符!',

])

export const passwordRules = ref([

     (v: string) => !!v || '必须输入密码!',

     (v: string ) => (v && v.length <= 20 && v.length >= 8) || '密码的长度为8到20个字符!',

])

export const confirmPasswordRules = ref([

     (v: string) => !!v || '必须重新输入密码!',

     (v: string) => (v && v.length <= 20 && v.length >=8) || '密码的长度为8到20个字符!',

     (v: string) => v === password.value || '密码和确认密码不一致',

])

export const nameRules = ref([

     (v: string) => !!v || '必须输入姓名!',

     (v: string) => (v && v.length <= 20 && v.length >=5) || '密码的长度为5到20个字符!',

])

export const mobileRules = ref([

     (v: string) => !!v || '必须输入手机号!',

     (v: string) => (v && v.length === 11 || '请输入有效的电话号码-11位'),

])

export const emailRules = ref([

     (v: string) => !!v || '必须输入邮箱!',

     (v: string) => /^[\w-.]+@([\w-]+\.)+[\w-]{2,4}$/.test(v) || '请输入有效的邮箱地址',

])

export const show1 = ref(false)

export const show2 = ref(false)
2.src\ components目录下的UserLogin.vue文件
<script lang="ts" setup>

import { onMounted, ref, getCurrentInstance } from 'vue'

import { login } from '@/api/user'

import { createToast } from 'mosha-vue-toastify'


import {

  passwordRules,

  usernameRules,

  confirmPasswordRules,

  nameRules,

  mobileRules,

  emailRules

} from '@/hooks/useValidRule'

import { username, password, confirmpassword, name, phone, email } from '@/hooks/useValidRule'


const handleLogin = async () => {

  const { valid } = await instance.ctx.$refs.form.validate()

  if (valid) {

    if (username.value == '' || password.value == '') {

      createToast('用户名或密码不能为空!', { position: 'top-center', showIcon: true })

    } else {

      try {

        const res = await login({ username: username.value, password: password.value })

        createToast(res.data.msg, { position: 'top-center', showIcon: true })

      } catch (e) {

        alert(e)

      }

    }

  }

}

let instance: any

onMounted(() => {

  instance = getCurrentInstance()

})

const reset = () => {

  instance.ctx.$refs.from.reset()

}

</script>


<template>

  <v-container class="h-100 d-flex align-center justify-center">

    <v-card width="500">

      <v-card-title>用户登录</v-card-title>

      <v-card-text class="pa-8">

        <v-form ref="form">

          <v-text-field

            variant="underlined"

            v-model="username"

            required

            :counter="20"

            label="账号"

            prepend-icon="person"

            :rules="usernameRules"

          ></v-text-field>


          <v-text-field

            variant="underlined"

            v-model="password"

            required

            :counter="20"

            label="密码"

            prepend-icon="lock"

            type="password"

            :rules="passwordRules"

          ></v-text-field>


          <v-text-field

            variant="underlined"

            v-model="confirmpassword"

            required

            :counter="20"

            label="确认密码"

            prepend-icon="lock"

            type="password"

            :rules="confirmPasswordRules"

          ></v-text-field>


          <v-text-field

            variant="underlined"

            v-model="name"

            required

            :counter="20"

            label="姓名"

            prepend-icon="name"

            type="name"

            :rules="nameRules"

          ></v-text-field>


          <v-text-field

            variant="underlined"

            v-model="phone"

            required

            :counter="20"

            label="电话号码"

            prepend-icon="phone"

            type="phone"

            :rules="mobileRules"

          ></v-text-field>


          <v-text-field

            variant="underlined"

            v-model="email"

            required

            :counter="20"

            label="邮箱"

            prepend-icon="email"

            type="email"

            :rules="emailRules"

          ></v-text-field>


          <v-row class="mt-5">

            <v-btn class="ml-5" @click="handleLogin">提交</v-btn>

            <v-btn class="ml-5" @click="reset">复位</v-btn>

          </v-row>

        </v-form>

      </v-card-text>

    </v-card>

  </v-container>

</template>


<style scoped></style>
二、 实验结果(含程序运行截图)
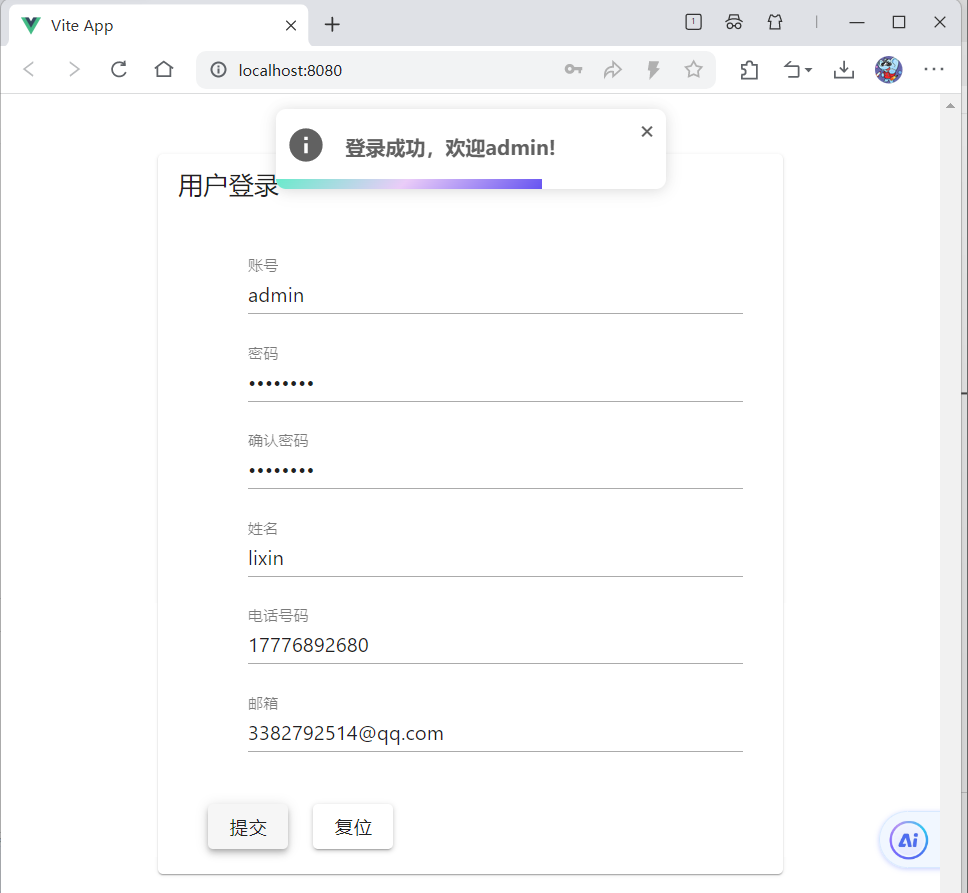
1. 使用Vuetify实现如下图所示的用户注册页面:

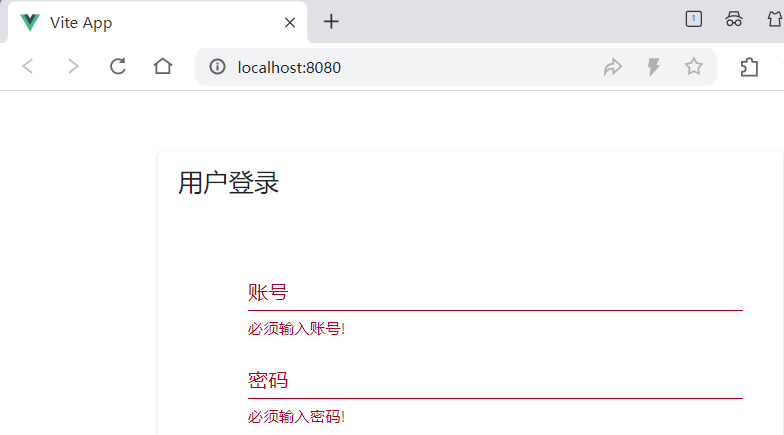
2. 在实验四创建的验证规则对账号、密码字段进行数据验证。
(1)鼠标点击账户或密码后再点击页面的其他地方,将会显示“必须输入账户”或“必须输入密码”;
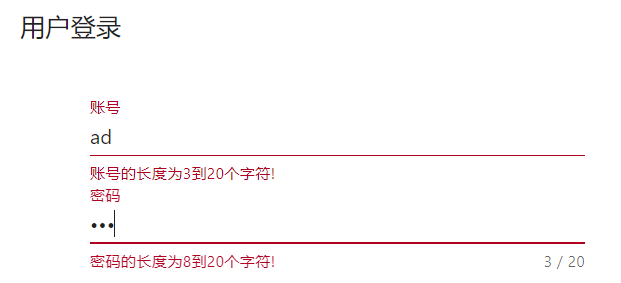
(2)账户密码的位数 验证
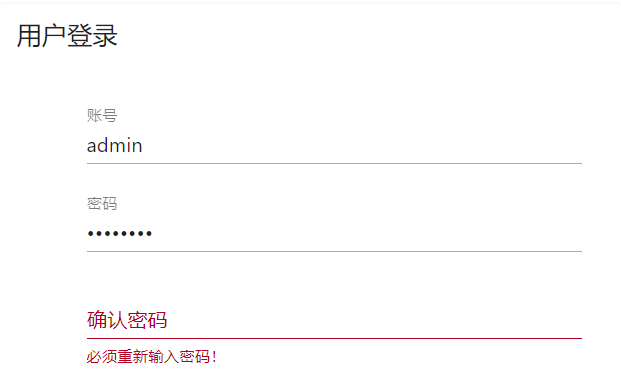
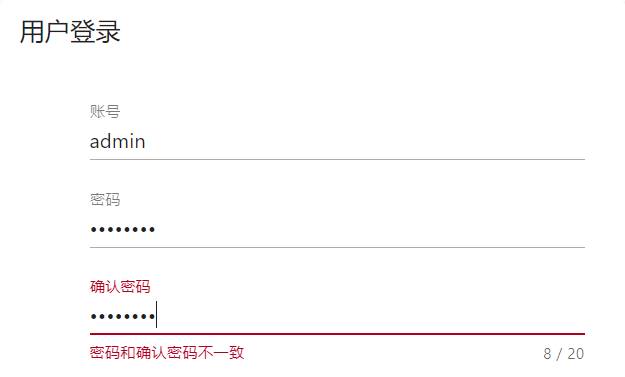
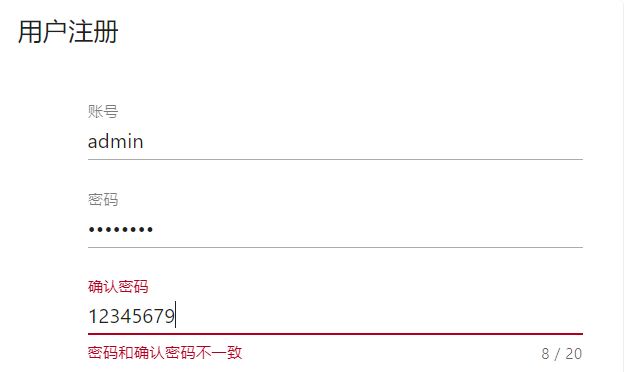
3. 在实验四创建的useValidRule.ts文件中添加confirmPasswordRules验证规则,对确认密码字段进行验证。
(1)确认密码的有无输入-验证
(2)确认密码的位数验证

(3)确认密码与密码的对比-验证
4. 在useValidRule.ts文件中添加nameRules验证规则,对姓名字段进行验证,要求姓名不能为空。
(1)姓名有无输入-验证

(2)姓名输入位数-验证

5. 在useValidRule.ts文件中添加mobileRules验证规则,对手机号码字段进行验证。
(1)手机号有无输入-验证

(2)手机号位数(11位)-验证

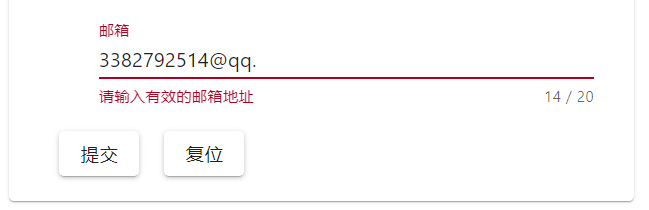
6. 在useValidRule.ts文件中添加emailRules验证规则,email字段进行验证。
(1)邮箱有无输入-验证

(2)邮箱有效-验证
7. 登录验证
三、 出现问题及解决方法
问题1:输入确认密码时,不能将密码隐藏。
解决方法:因为密码和确认密码的类型type要一致,同为password,只需将确认密码的类型type改为password即可
四、 实验心得
Vuetify是一个基于Vue.js和Material Design规范的UI框架。在这次实验中,我主要使用了Vuetify的组件和布局系统来构建登录界面。Vuetify提供的丰富的组件库和灵活的布局系统,让我能够迅速搭建出美观且符合Material Design风格的登录界面。此外,Vuetify还提供了丰富的主题和颜色配置选项,使得界面更加个性化。
1. 练习使用Vuetify组件设计界面,在Vuetify中,有众多的预构建组件可以帮助开发者快速设计用户界面。这些组件遵循Material Design设计规范,使得界面既美观又易于使用。通过本次实验练习使用以下组件:
(1)在szweb4的页面基础上,添加确认号码、姓名、电话号码、邮箱四个字段。其中确认密码不仅需要与密码规则一致,还要相同。使用<v-text-field>组件,其中<v-text-field>常见配置选项除了基本的v-model绑定外,还支持许多配置选项,用来自定义输入框的样式和行为。下面列举了一些常用的配置选项:
label:输入框的标签内容
placeholder:输入框的占位符内容
prefix和suffix:输入框的前缀和后缀
clearable:是否显示清空按钮
outlined:是否显示边框
dense:是否使用紧凑模式
disabled:是否禁用输入框
readonly:是否只读
error:是否显示错误状态
counter:是否显示字符计数器
hide-details:隐藏辅助文本
通过这次实验,我深刻体会到了Vuetify框架在构建UI界面的便利性和强大性。Vuetify的组件和布局系统让我能够快速搭建出美观且功能强大的登录界面。同时,Vuetify的表单验证功能也让我对表单验证有了更深入的理解。
通过练习使用Vuetify组件设计界面和表单数据验证,能够更深入地了解Vuetify框架的功能和优势。能够更自信地使用Vuetify来构建美观、功能强大的Web应用,并提供良好的用户体验。不断实践和探索新的组件和验证技术是提升技能和扩展知识领域的关键。


 403
403

 被折叠的 条评论
为什么被折叠?
被折叠的 条评论
为什么被折叠?
 到【灌水乐园】发言


