


秋招面试专栏推荐 :深度学习算法工程师面试问题总结【百面算法工程师】——点击即可跳转
💡💡💡本专栏所有程序均经过测试,可成功执行💡💡💡
专栏目录 :《YOLOv8改进有效涨点》专栏介绍 & 专栏目录 | 目前已有90+篇内容,内含各种Head检测头、损失函数Loss、Backbone、Neck、NMS等创新点改进——点击即可跳转
本文介绍了一种名为CGNet的轻量级语义分割网络,专为移动设备设计。CGNet通过上下文引导模块有效融合局部和全局上下文信息,提高了分割精度,同时大幅减少了参数数量。文章在介绍主要的原理后,将手把手教学如何进行模块的代码添加和修改,并将修改后的完整代码放在文章的最后,方便大家一键运行,小白也可轻松上手实践。以帮助您更好地学习深度学习目标检测YOLO系列的挑战。
目录
2. 将C2f_ContextGuided 添加到yolov8网络中
1.原理

论文地址:CGNet: A Light-weight Context Guided Network for Semantic Segmentation——点击即可跳转
官方代码:官方代码仓库——点击即可跳转
ContextGuided网络(CGNet)的主要原理是通过一种称为Context Guided(CG)块的模块来高效地捕捉图像中的上下文信息,从而提高语义分割的精度。以下是CGNet的核心思想和原理:
1. 上下文信息的重要性
语义分割不仅需要识别单个像素的类别,还需要考虑像素之间的空间关系和上下文信息。传统的图像分类网络主要关注局部特征,而忽略了语义分割中更重要的上下文信息。CGNet的设计正是为了解决这一问题。
2. Context Guided(CG)块
CG块是CGNet的基础单元,其核心思想是结合局部特征、周围上下文信息和全局上下文信息来进行特征学习。
-
局部特征提取器:提取像素点的局部特征,关注像素周围的局部区域。
-
周围上下文提取器:提取像素点周围的上下文信息,帮助更好地理解当前像素的类别。
-
全局上下文提取器:使用全局的上下文信息对联合特征进行加权,从而增强有用的信息,抑制无用的信息。
通过结合这三种信息,CG块能够更好地捕捉图像中的语义和空间关系,使得在整个网络的各个阶段都能够有效地整合上下文信息。
3. 网络结构设计
CGNet在设计上遵循“深而窄”的原则,采用了轻量化的结构,以减少参数数量和内存占用。与传统的语义分割网络相比,CGNet具有以下特点:
-
减少下采样阶段:CGNet仅有三个下采样阶段,这有助于保留更多的空间信息,避免过度平滑的分割边界。
-
深层和浅层结合:CGNet在网络的所有阶段捕捉上下文信息,从浅层捕获空间信息,从深层捕获语义信息,从而提高分割精度。
4. 轻量化设计
CGNet使用了通道分组卷积等技术来进一步减少计算量,降低模型的复杂度,从而使其适合在移动设备上运行。尽管参数量较少,CGNet仍然能够在语义分割任务中提供较高的精度。
5. 实验验证
CGNet在多个数据集(如Cityscapes和CamVid)上的实验结果表明,在相同参数数量下,CGNet显著优于现有的轻量化语义分割网络。
总的来说,CGNet通过巧妙的上下文信息提取机制和轻量化设计,成功在移动设备上实现了高效且精确的语义分割。
2. 将C2f_ContextGuided 添加到yolov8网络中
2.1 C2f_ContextGuided 代码实现
关键步骤一: 将下面代码粘贴到在/ultralytics/ultralytics/nn/modules/block.py中,并在该文件的__all__中添加“C2f_ContextGuided”
class FGlo(nn.Module):
    """
    the FGlo class is employed to refine the joint feature of both local feature and surrounding context.
    """
    def __init__(self, channel, reduction=16):
        super(FGlo, self).__init__()
        self.avg_pool = nn.AdaptiveAvgPool2d(1)
        self.fc = nn.Sequential(
                nn.Linear(channel, channel // reduction),
                nn.ReLU(inplace=True),
                nn.Linear(channel // reduction, channel),
                nn.Sigmoid()
        )

    def forward(self, x):
        b, c, _, _ = x.size()
        y = self.avg_pool(x).view(b, c)
        y = self.fc(y).view(b, c, 1, 1)
        return x * y

class ContextGuidedBlock(nn.Module):
    def __init__(self, nIn, nOut, dilation_rate=2, reduction=16, add=True):
        """
        args:
           nIn: number of input channels
           nOut: number of output channels,
           add: if true, residual learning
        """
        super().__init__()
        n= int(nOut/2)
        self.conv1x1 = Conv(nIn, n, 1, 1)  #1x1 Conv is employed to reduce the computation
        self.F_loc = nn.Conv2d(n, n, 3, padding=1, groups=n)
        self.F_sur = nn.Conv2d(n, n, 3, padding=autopad(3, None, dilation_rate), dilation=dilation_rate, groups=n) # surrounding context
        self.bn_act = nn.Sequential(
            nn.BatchNorm2d(nOut),
            Conv.default_act
        )
        self.add = add
        self.F_glo= FGlo(nOut, reduction)

    def forward(self, input):
        output = self.conv1x1(input)
        loc = self.F_loc(output)
        sur = self.F_sur(output)

        joi_feat = torch.cat([loc, sur], 1)

        joi_feat = self.bn_act(joi_feat)

        output = self.F_glo(joi_feat)  #F_glo is employed to refine the joint feature
        # if residual version
        if self.add:
            output  = input + output
        return output

class ContextGuidedBlock_Down(nn.Module):
    """
    the size of feature map divided 2, (H,W,C)---->(H/2, W/2, 2C)
    """
    def __init__(self, nIn, dilation_rate=2, reduction=16):
        """
        args:
           nIn: the channel of input feature map
           nOut: the channel of output feature map, and nOut=2*nIn
        """
        super().__init__()
        nOut = 2 * nIn
        self.conv1x1 = Conv(nIn, nOut, 3, s=2)  #  size/2, channel: nIn--->nOut

        self.F_loc = nn.Conv2d(nOut, nOut, 3, padding=1, groups=nOut)
        self.F_sur = nn.Conv2d(nOut, nOut, 3, padding=autopad(3, None, dilation_rate), dilation=dilation_rate, groups=nOut)

        self.bn = nn.BatchNorm2d(2 * nOut, eps=1e-3)
        self.act = Conv.default_act
        self.reduce = Conv(2 * nOut, nOut,1,1)  #reduce dimension: 2*nOut--->nOut

        self.F_glo = FGlo(nOut, reduction)

    def forward(self, input):
        output = self.conv1x1(input)
        loc = self.F_loc(output)
        sur = self.F_sur(output)

        joi_feat = torch.cat([loc, sur],1)  #  the joint feature
        joi_feat = self.bn(joi_feat)
        joi_feat = self.act(joi_feat)
        joi_feat = self.reduce(joi_feat)     #channel= nOut

        output = self.F_glo(joi_feat)  # F_glo is employed to refine the joint feature

        return output

class C3_ContextGuided(C3):
    def __init__(self, c1, c2, n=1, shortcut=False, g=1, e=0.5):
        super().__init__(c1, c2, n, shortcut, g, e)
        c_ = int(c2 * e)  # hidden channels
        self.m = nn.Sequential(*(ContextGuidedBlock(c_, c_) for _ in range(n)))

class C2f_ContextGuided(C2f):
    def __init__(self, c1, c2, n=1, shortcut=False, g=1, e=0.5):
        super().__init__(c1, c2, n, shortcut, g, e)
        self.m = nn.ModuleList(ContextGuidedBlock(self.c, self.c) for _ in range(n))
CGNet处理图像的流程可以分为几个关键步骤,从输入图像到最终生成语义分割结果。以下是详细的流程讲解:
1. 输入图像
首先,输入的是一张RGB图像,通常是分辨率较高的城市场景图像,如Cityscapes数据集中的街景图像。
2. 初步特征提取
输入图像经过初步卷积操作,提取基础的低级别特征。这些特征主要包括边缘、纹理等基本图像信息,类似于传统卷积神经网络中的初始卷积层。
3. 三阶段下采样
CGNet的网络结构设计包含三个下采样阶段,这些阶段旨在逐步减少图像的空间分辨率,同时增加特征图的通道数。每个下采样阶段后,图像的空间尺寸减半,而特征的语义信息逐渐增强。
4. Context Guided(CG)块处理
在每个下采样阶段的卷积操作后,CGNet会使用多个Context Guided(CG)块来处理特征图。这是CGNet的核心步骤,具体分为以下几部分:
-
局部特征提取:在局部区域内(如3x3的卷积核)提取细粒度的特征,关注每个像素及其周围的直接邻域信息。
-
周围上下文提取:使用更大感受野的卷积核(如1x7或7x1)捕获更广泛的空间上下文信息,这有助于识别更大范围的物体和场景背景。
-
全局上下文加权:将提取的局部和周围上下文特征进行融合,然后通过全局上下文信息对这些特征进行加权,强化对分类有帮助的信息,抑制噪声和无关信息。
5. 深层与浅层特征结合
随着下采样阶段的进行,网络逐渐加深。CGNet将深层的高语义特征与浅层的空间特征相结合,这种结合使得网络在保留空间分辨率的同时,也能理解全局语义信息,从而提高语义分割的精度。
6. 上采样和预测
在经过所有下采样阶段和CG块的处理后,CGNet会对特征图进行上采样,以恢复到与输入图像相同的空间分辨率。通过这些特征,网络生成每个像素的分类预测,输出一个与输入图像大小相同的分割图,每个像素对应一个类别标签。
7. 输出语义分割结果
最终,网络输出的分割图像为每个像素分配了一个类别标签,形成完整的语义分割结果。这一结果显示图像中各个区域(如道路、建筑、车辆等)的语义信息,完成了从输入图像到精确分割的过程。
总结来说,CGNet通过逐层提取和融合局部、周围以及全局上下文信息,在不同下采样阶段灵活应用CG块,同时结合深浅层次的特征,实现了高效且精确的语义分割,尤其适用于资源受限的环境中。

2.2 更改init.py文件
关键步骤二:修改modules文件夹下的__init__.py文件,先导入函数

然后在下面的__all__中声明函数

2.3 添加yaml文件
关键步骤三:在/ultralytics/ultralytics/cfg/models/v8下面新建文件yolov8_ C2f_ContextGuided.yaml文件,粘贴下面的内容
- OD【目标检测】
# Ultralytics YOLO 🚀, AGPL-3.0 license
# YOLOv8 object detection model with P3-P5 outputs. For Usage examples see https://docs.ultralytics.com/tasks/detect

# Parameters
nc: 80 # number of classes
scales: # model compound scaling constants, i.e. 'model=yolov8n.yaml' will call yolov8.yaml with scale 'n'
  # [depth, width, max_channels]
  n: [0.33, 0.25, 1024] # YOLOv8n summary: 225 layers,  3157200 parameters,  3157184 gradients,   8.9 GFLOPs
  s: [0.33, 0.50, 1024] # YOLOv8s summary: 225 layers, 11166560 parameters, 11166544 gradients,  28.8 GFLOPs
  m: [0.67, 0.75, 768] # YOLOv8m summary: 295 layers, 25902640 parameters, 25902624 gradients,  79.3 GFLOPs
  l: [1.00, 1.00, 512] # YOLOv8l summary: 365 layers, 43691520 parameters, 43691504 gradients, 165.7 GFLOPs
  x: [1.00, 1.25, 512] # YOLOv8x summary: 365 layers, 68229648 parameters, 68229632 gradients, 258.5 GFLOPs

# YOLOv8.0n backbone
backbone:
  # [from, repeats, module, args]
  - [-1, 1, Conv, [64, 3, 2]] # 0-P1/2
  - [-1, 1, Conv, [128, 3, 2]] # 1-P2/4
  - [-1, 3, C2f_ContextGuided, [128, True]]
  - [-1, 1, Conv, [256, 3, 2]] # 3-P3/8
  - [-1, 6, C2f_ContextGuided, [256, True]]
  - [-1, 1, Conv, [512, 3, 2]] # 5-P4/16
  - [-1, 6, C2f_ContextGuided, [512, True]]
  - [-1, 1, Conv, [1024, 3, 2]] # 7-P5/32
  - [-1, 3, C2f_ContextGuided, [1024, True]]
  - [-1, 1, SPPF, [1024, 5]] # 9

# YOLOv8.0n head
head:
  - [-1, 1, nn.Upsample, [None, 2, "nearest"]]
  - [[-1, 6], 1, Concat, [1]] # cat backbone P4
  - [-1, 3, C2f, [512]] # 12

  - [-1, 1, nn.Upsample, [None, 2, "nearest"]]
  - [[-1, 4], 1, Concat, [1]] # cat backbone P3
  - [-1, 3, C2f, [256]] # 15 (P3/8-small)

  - [-1, 1, Conv, [256, 3, 2]]
  - [[-1, 12], 1, Concat, [1]] # cat head P4
  - [-1, 3, C2f, [512]] # 18 (P4/16-medium)

  - [-1, 1, Conv, [512, 3, 2]]
  - [[-1, 9], 1, Concat, [1]] # cat head P5
  - [-1, 3, C2f, [1024]] # 21 (P5/32-large)

  - [[15, 18, 21], 1, Detect, [nc]] # Detect(P3, P4, P5)
- Seg【语义分割】
# Ultralytics YOLO 🚀, AGPL-3.0 license
# YOLOv8 object detection model with P3-P5 outputs. For Usage examples see https://docs.ultralytics.com/tasks/detect

# Parameters
nc: 80 # number of classes
scales: # model compound scaling constants, i.e. 'model=yolov8n.yaml' will call yolov8.yaml with scale 'n'
  # [depth, width, max_channels]
  n: [0.33, 0.25, 1024] # YOLOv8n summary: 225 layers,  3157200 parameters,  3157184 gradients,   8.9 GFLOPs
  s: [0.33, 0.50, 1024] # YOLOv8s summary: 225 layers, 11166560 parameters, 11166544 gradients,  28.8 GFLOPs
  m: [0.67, 0.75, 768] # YOLOv8m summary: 295 layers, 25902640 parameters, 25902624 gradients,  79.3 GFLOPs
  l: [1.00, 1.00, 512] # YOLOv8l summary: 365 layers, 43691520 parameters, 43691504 gradients, 165.7 GFLOPs
  x: [1.00, 1.25, 512] # YOLOv8x summary: 365 layers, 68229648 parameters, 68229632 gradients, 258.5 GFLOPs

# YOLOv8.0n backbone
backbone:
  # [from, repeats, module, args]
  - [-1, 1, Conv, [64, 3, 2]] # 0-P1/2
  - [-1, 1, Conv, [128, 3, 2]] # 1-P2/4
  - [-1, 3, C2f_ContextGuided, [128, True]]
  - [-1, 1, Conv, [256, 3, 2]] # 3-P3/8
  - [-1, 6, C2f_ContextGuided, [256, True]]
  - [-1, 1, Conv, [512, 3, 2]] # 5-P4/16
  - [-1, 6, C2f_ContextGuided, [512, True]]
  - [-1, 1, Conv, [1024, 3, 2]] # 7-P5/32
  - [-1, 3, C2f_ContextGuided, [1024, True]]
  - [-1, 1, SPPF, [1024, 5]] # 9

# YOLOv8.0n head
head:
  - [-1, 1, nn.Upsample, [None, 2, "nearest"]]
  - [[-1, 6], 1, Concat, [1]] # cat backbone P4
  - [-1, 3, C2f, [512]] # 12

  - [-1, 1, nn.Upsample, [None, 2, "nearest"]]
  - [[-1, 4], 1, Concat, [1]] # cat backbone P3
  - [-1, 3, C2f, [256]] # 15 (P3/8-small)

  - [-1, 1, Conv, [256, 3, 2]]
  - [[-1, 12], 1, Concat, [1]] # cat head P4
  - [-1, 3, C2f, [512]] # 18 (P4/16-medium)

  - [-1, 1, Conv, [512, 3, 2]]
  - [[-1, 9], 1, Concat, [1]] # cat head P5
  - [-1, 3, C2f, [1024]] # 21 (P5/32-large)

  - [[15, 18, 21], 1, Segment, [nc, 32, 256]] # Segment(P3, P4, P5)
温馨提示:因为本文只是对yolov8基础上添加模块,如果要对yolov8n/l/m/x进行添加则只需要指定对应的depth_multiple 和 width_multiple。不明白的同学可以看这篇文章: yolov8yaml文件解读——点击即可跳转
# YOLOv8n
depth_multiple: 0.33  # model depth multiple
width_multiple: 0.25  # layer channel multiple
max_channels: 1024 # max_channels

# YOLOv8s
depth_multiple: 0.33  # model depth multiple
width_multiple: 0.50  # layer channel multiple
max_channels: 1024 # max_channels

# YOLOv8l
depth_multiple: 1.0  # model depth multiple
width_multiple: 1.0  # layer channel multiple
max_channels: 512 # max_channels

# YOLOv8m
depth_multiple: 0.67  # model depth multiple
width_multiple: 0.75  # layer channel multiple
max_channels: 768 # max_channels

# YOLOv8x
depth_multiple: 1.33  # model depth multiple
width_multiple: 1.25  # layer channel multiple
max_channels: 512 # max_channels
2.4 注册模块
关键步骤四:在task.py的parse_model函数中注册

2.5 执行程序
在train.py中,将model的参数路径设置为yolov8_C2f_ContextGuided.yaml的路径
建议大家写绝对路径,确保一定能找到
from ultralytics import YOLO
import warnings
warnings.filterwarnings('ignore')
from pathlib import Path
if __name__ == '__main__':
# 加载模型
model = YOLO("ultralytics/cfg/v8/yolov8.yaml") # 你要选择的模型yaml文件地址
# Use the model
results = model.train(data=r"你的数据集的yaml文件地址",
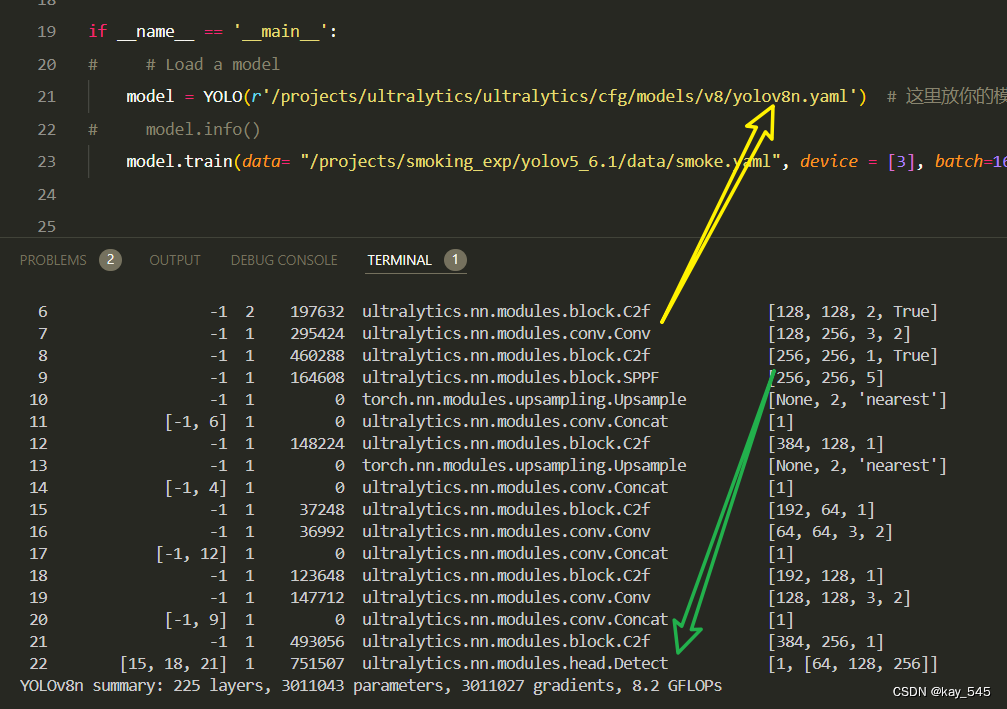
epochs=100, batch=16, imgsz=640, workers=4, name=Path(model.cfg).stem) # 训练模型🚀运行程序,如果出现下面的内容则说明添加成功🚀
  				   from  n    params  module                                       arguments
  0                  -1  1       464  ultralytics.nn.modules.conv.Conv             [3, 16, 3, 2]
  1                  -1  1      4672  ultralytics.nn.modules.conv.Conv             [16, 32, 3, 2]
  2                  -1  1      3073  ultralytics.nn.modules.block.C2f_ContextGuided[32, 32, 1, True]
  3                  -1  1     18560  ultralytics.nn.modules.conv.Conv             [32, 64, 3, 2]
  4                  -1  2     14724  ultralytics.nn.modules.block.C2f_ContextGuided[64, 64, 2, True]
  5                  -1  1     73984  ultralytics.nn.modules.conv.Conv             [64, 128, 3, 2]
  6                  -1  2     56584  ultralytics.nn.modules.block.C2f_ContextGuided[128, 128, 2, True]
  7                  -1  1    295424  ultralytics.nn.modules.conv.Conv             [128, 256, 3, 2]
  8                  -1  1    176904  ultralytics.nn.modules.block.C2f_ContextGuided[256, 256, 1, True]
  9                  -1  1    164608  ultralytics.nn.modules.block.SPPF            [256, 256, 5]
 10                  -1  1         0  torch.nn.modules.upsampling.Upsample         [None, 2, 'nearest']
 11             [-1, 6]  1         0  ultralytics.nn.modules.conv.Concat           [1]
 12                  -1  1    148224  ultralytics.nn.modules.block.C2f             [384, 128, 1]
 13                  -1  1         0  torch.nn.modules.upsampling.Upsample         [None, 2, 'nearest']
 14             [-1, 4]  1         0  ultralytics.nn.modules.conv.Concat           [1]
 15                  -1  1     37248  ultralytics.nn.modules.block.C2f             [192, 64, 1]
 16                  -1  1     36992  ultralytics.nn.modules.conv.Conv             [64, 64, 3, 2]
 17            [-1, 12]  1         0  ultralytics.nn.modules.conv.Concat           [1]
 18                  -1  1    123648  ultralytics.nn.modules.block.C2f             [192, 128, 1]
 19                  -1  1    147712  ultralytics.nn.modules.conv.Conv             [128, 128, 3, 2]
 20             [-1, 9]  1         0  ultralytics.nn.modules.conv.Concat           [1]
 21                  -1  1    493056  ultralytics.nn.modules.block.C2f             [384, 256, 1]
 22        [15, 18, 21]  1    897664  ultralytics.nn.modules.head.Detect           [80, [64, 128, 256]]
YOLOv8 summary: 273 layers, 2693541 parameters, 2693525 gradients, 7.5 GFLOPs
3. 完整代码分享
https://pan.baidu.com/s/1AisVkgfax2urlj5eCEZwPQ?pwd=druk提取码: druk
4. GFLOPs
关于GFLOPs的计算方式可以查看:百面算法工程师 | 卷积基础知识——Convolution
未改进的YOLOv8nGFLOPs
改进后的GFLOPs
5. 进阶
可以与其他的注意力机制或者损失函数等结合,进一步提升检测效果
6. 总结
CGNet的主要原理是在语义分割中充分利用上下文信息,通过引入Context Guided(CG)块来联合提取局部特征、周围上下文和全局上下文信息。CG块首先提取像素的局部特征,然后结合其周围的空间上下文,进而使用全局上下文信息对这些联合特征进行优化,以突出重要信息,抑制无关信息。CGNet在网络的各个阶段都应用CG块,从浅层提取空间信息,从深层捕获语义信息,确保在整个过程中有效融合上下文信息。此外,CGNet通过减少下采样阶段和使用轻量化设计(如通道分组卷积),在保持高分割精度的同时,显著降低了模型的参数量和计算复杂度,使其适合在资源受限的移动设备上运行。


 9260
9260

 被折叠的 条评论
为什么被折叠?
被折叠的 条评论
为什么被折叠?
 到【灌水乐园】发言


