


一、创建GIthub账号
这里默认大家已经创建好了并且有加速器,能正常上网,然后才能进行下面的操作。
二、创建ssh公钥
进入下面的界面:
然后创建新的密钥
三、官方文档
网址:Connecting to GitHub with SSH - GitHub Docs
关于 SSH 密钥密码
您可以使用 SSH(安全外壳协议)访问和写入 GitHub.com 上的存储库中的数据。通过 SSH 连接时,使用本地计算机上的私钥文件进行身份验证。有关详细信息,请参阅“关于 SSH”。
生成 SSH 密钥时,可以添加密码以进一步保护密钥。每当使用密钥时,都必须输入密码。如果您的密钥具有密码短语,并且您不想在每次使用该密钥时都输入密码短语,则可以将密钥添加到 SSH 代理。SSH 代理管理您的 SSH 密钥并记住您的密码。
如果还没有 SSH 密钥,则必须生成新的 SSH 密钥以用于身份验证。如果您不确定是否已有 SSH 密钥,可以检查现有密钥。有关详细信息,请参阅“检查现有 SSH 密钥”。
如果要使用硬件安全密钥向 GitHub 进行身份验证,则必须为硬件安全密钥生成新的 SSH 密钥。使用密钥对进行身份验证时,必须将硬件安全密钥连接到计算机。有关更多信息,请参阅 OpenSSH 8.2 发行说明。
生成新的 SSH 密钥
您可以在本地计算机上生成新的 SSH 密钥。生成密钥后,可以在 GitHub.com 上将公钥添加到您的帐户,以便通过 SSH 为 Git 操作启用身份验证。
**注意:**GitHub 于 2022 年 3 月 15 日删除了旧的不安全密钥类型,从而提高了安全性。
从该日期起,不再支持 DSA 键 ()。您无法在 GitHub.com 上向个人帐户添加新的 DSA 密钥。ssh-dss
2021 年 11 月 2 日之前的 RSA 密钥 () 可以继续使用任何签名算法。在该日期之后生成的 RSA 密钥必须使用 SHA-2 签名算法。某些较旧的客户端可能需要升级才能使用 SHA-2 签名。ssh-rsa``valid_after
-
打开Git Bash.
-
粘贴下面的文本,将示例中使用的电子邮件替换为您的 GitHub 电子邮件地址。
ssh-keygen -t ed25519 -C "your_email@example.com"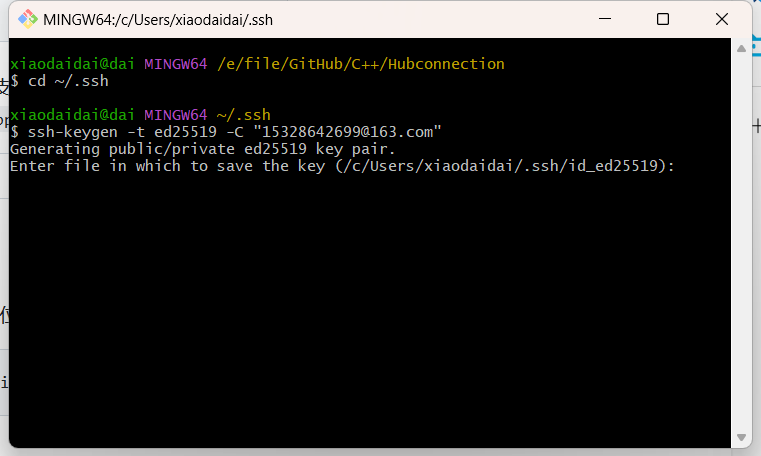
完事之后,两次回车
**注意:**如果您使用不支持 Ed25519 算法的旧系统,请使用:
ssh-keygen -t rsa -b 4096 -C "your_email@example.com"这将创建一个新的 SSH 密钥,使用提供的电子邮件作为标签。
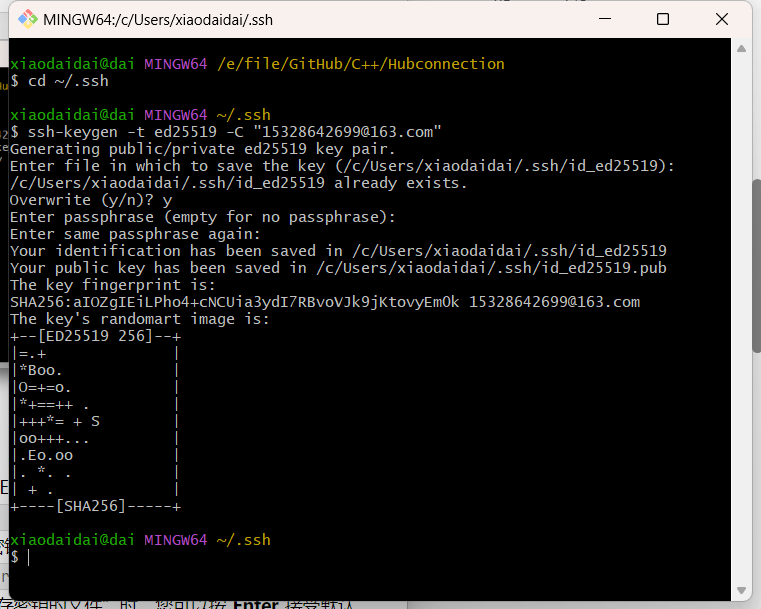
> Generating public/private ALGORITHM key pair.当系统提示您“输入要保存密钥的文件”时,您可以按 Enter 接受默认文件位置。请注意,如果您之前创建了 SSH 密钥,ssh-keygen 可能会要求您重写另一个密钥,在这种情况下,我们建议您创建一个自定义的 SSH 密钥。为此,请键入默认文件位置,并将id_ALGORITHM替换为自定义密钥名称。
> Enter file in which to save the key (/c/Users/YOU/.ssh/id_ALGORITHM):[Press enter] -
在提示符下,键入安全密码。有关详细信息,请参阅“使用 SSH 密钥密码短语”。
> Enter passphrase (empty for no passphrase): [Type a passphrase]
> Enter same passphrase again: [Type passphrase again]
将 SSH 密钥添加到 ssh-agent
在将新的 SSH 密钥添加到 ssh-agent 以管理您的密钥之前,您应该已检查现有的 SSH 密钥并生成新的 SSH 密钥。
如果您安装了 GitHub Desktop,则可以使用它来克隆存储库,而不处理 SSH 密钥。
-
在新的管理员提升的 PowerShell 窗口中,确保 ssh-agent 正在运行。您可以使用“使用 SSH 密钥密码短语”中的“自动启动 ssh-agent”说明,或手动启动它:
# start the ssh-agent in the background Get-Service -Name ssh-agent | Set-Service -StartupType Manual Start-Service ssh-agent -
在没有提升权限的终端窗口中,将 SSH 私钥添加到 ssh-agent。 如果使用其他名称创建了密钥,或者要添加具有不同名称的现有密钥,请将命令中的id_ed25519替换为私钥文件的名称。
ssh-add c:/Users/YOU/.ssh/id_ed25519 -
将 SSH 公钥添加到您在 GitHub 上的帐户。有关详细信息,请参阅“向 GitHub 帐户添加新的 SSH 密钥”。
为硬件安全密钥生成新的 SSH 密钥
如果您使用的是 macOS 或 Linux,则可能需要在生成新的 SSH 密钥之前更新 SSH 客户端或安装新的 SSH 客户端。有关详细信息,请参阅“错误:未知密钥类型”。
-
将硬件安全密钥插入计算机。
-
打开Git Bash 中。
-
粘贴下面的文本,将示例中的电子邮件地址替换为与您在 GitHub 上的帐户关联的电子邮件地址。
ssh-keygen -t ed25519-sk -C "your_email@example.com"**注意:**如果命令失败并且您收到错误,或者您可能正在使用不支持 Ed25519 算法的硬件安全密钥。请改为输入以下命令。
invalid format``feature not supported,ssh-keygen -t ecdsa-sk -C "your_email@example.com" -
出现提示时,触摸硬件安全密钥上的按钮。
-
当系统提示您“输入要保存密钥的文件”时,按 Enter 接受默认文件位置。
> Enter a file in which to save the key (c:\Users\YOU\.ssh\id_ed25519_sk):[Press enter] -
当系统提示您键入密码时,按 Enter。
> Enter passphrase (empty for no passphrase): [Type a passphrase] > Enter same passphrase again: [Type passphrase again] -
将 SSH 公钥添加到您在 GitHub 上的帐户。有关详细信息,请参阅“向 GitHub 帐户添加新的 SSH 密钥”。
-
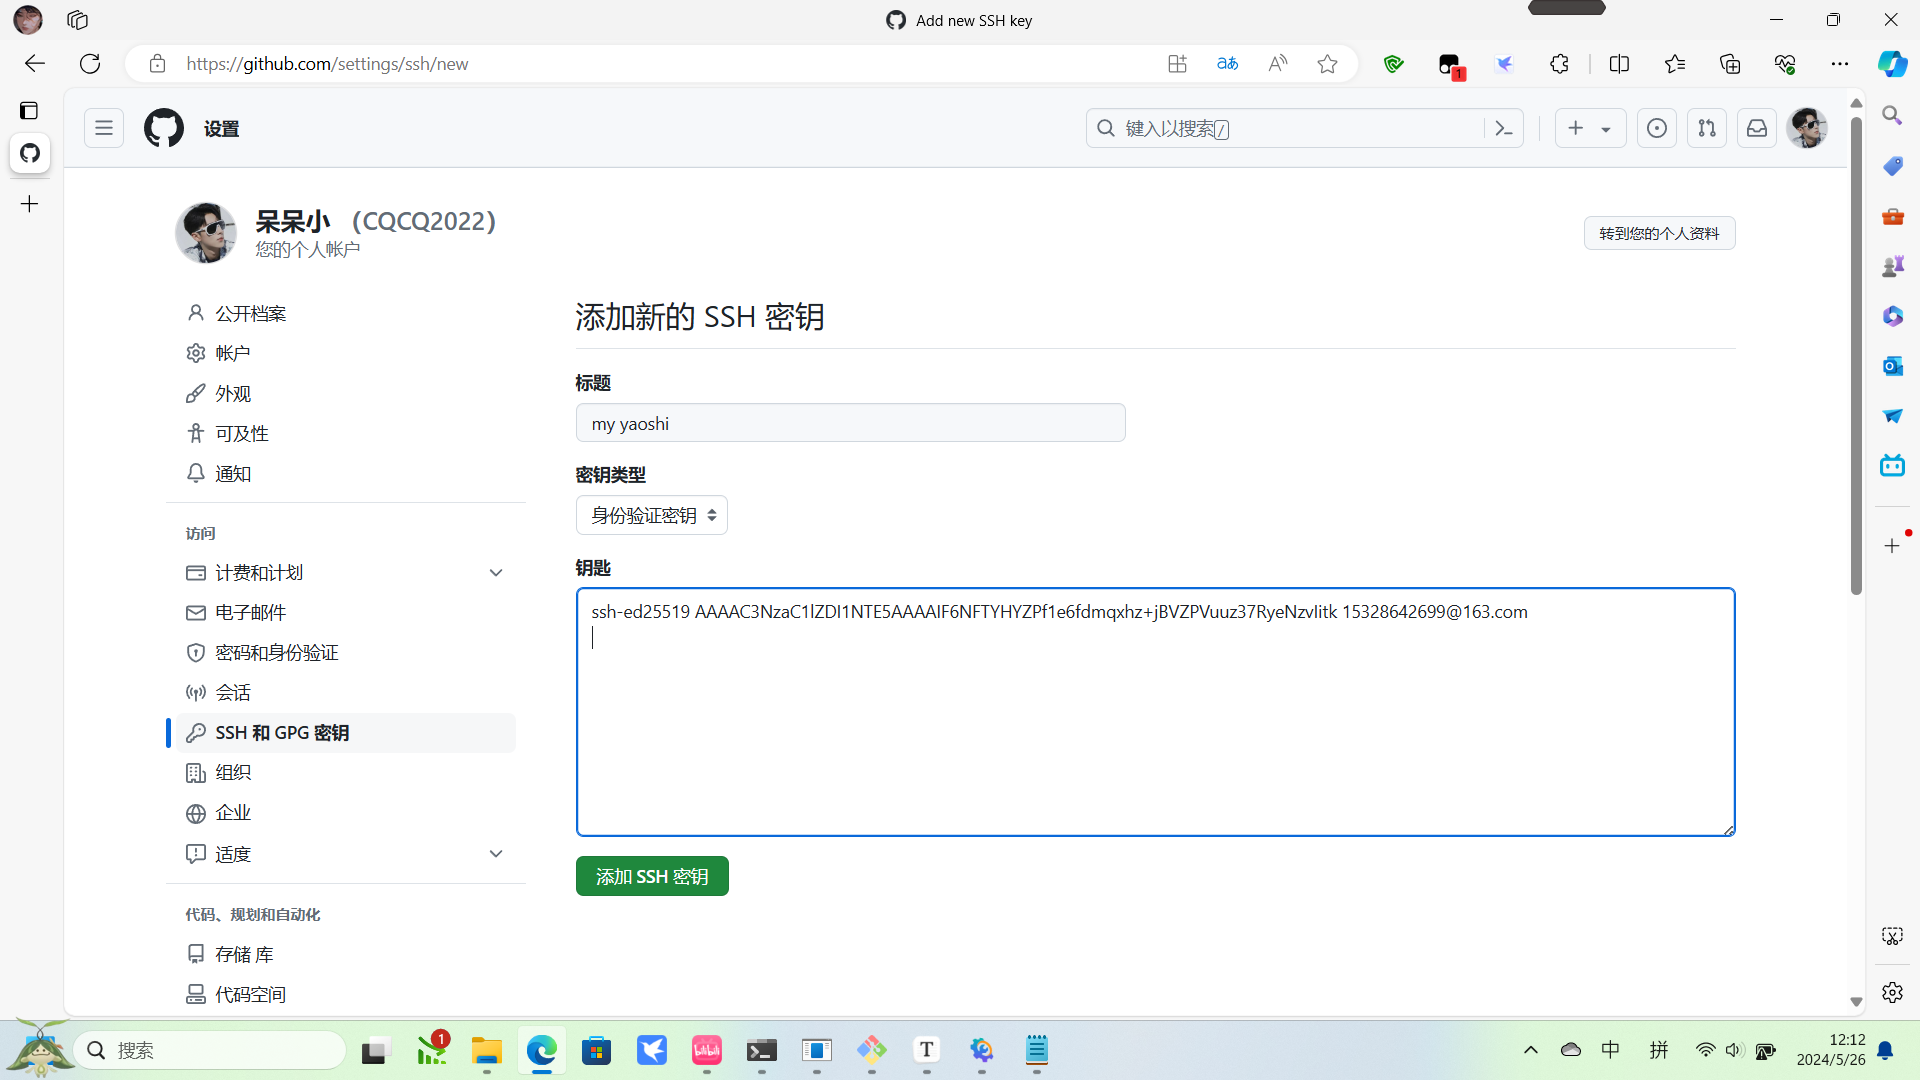
向 GitHub 帐户添加新的 SSH 密钥
要在 GitHub.com 上配置您的帐户以使用新的(或现有的)SSH 密钥,您还需要将密钥添加到您的帐户中。
平台导航
工具导航
在这篇文章中
- 关于将 SSH 密钥添加到您的帐户
- 先决条件
- 向您的帐户添加新的 SSH 密钥
- 延伸阅读
关于将 SSH 密钥添加到您的帐户
您可以使用 SSH(安全外壳协议)访问和写入 GitHub.com 上的存储库中的数据。通过 SSH 连接时,使用本地计算机上的私钥文件进行身份验证。有关详细信息,请参阅“关于 SSH”。
您还可以使用 SSH 对提交和标签进行签名。有关提交签名的详细信息,请参阅“关于提交签名验证”。
生成 SSH 密钥对后,您必须将公钥添加到 GitHub.com,以便为您的账户启用 SSH 访问。
先决条件
在 GitHub.com 上向您的帐户添加新的 SSH 密钥之前,请完成以下步骤。
- 检查现有的 SSH 密钥。有关详细信息,请参阅“检查现有 SSH 密钥”。
- 生成新的 SSH 密钥并将其添加到计算机的 SSH 代理中。有关详细信息,请参阅“生成新的 SSH 密钥并将其添加到 ssh-agent”。
向您的帐户添加新的 SSH 密钥
您可以添加 SSH 密钥并将其用于身份验证和/或提交签名。如果要使用相同的 SSH 密钥进行身份验证和签名,则需要上传两次。
在 GitHub.com 上将新的 SSH 身份验证密钥添加到您的帐户后,您可以重新配置任何本地存储库以使用 SSH。有关详细信息,请参阅“管理远程存储库”。
**注意:**GitHub 于 2022 年 3 月 15 日删除了旧的不安全密钥类型,从而提高了安全性。
从该日期起,不再支持 DSA 键 ()。您无法在 GitHub.com 上向个人帐户添加新的 DSA 密钥。
ssh-dss2021 年 11 月 2 日之前的 RSA 密钥 () 可以继续使用任何签名算法。在该日期之后生成的 RSA 密钥必须使用 SHA-2 签名算法。某些较旧的客户端可能需要升级才能使用 SHA-2 签名。
ssh-rsa``valid_after-
将 SSH 公钥复制到剪贴板。
如果 SSH 公钥文件的名称与示例代码不同,请修改文件名以匹配当前设置。复制密钥时,请勿添加任何换行符或空格。
$ clip < ~/.ssh/id_ed25519.pub
# Copies the contents of the id_ed25519.pub file to your clipboard
笔记:
- 对于适用于 Linux 的 Windows 子系统 (WSL),可以使用 .否则,如果不起作用,您可以找到隐藏的文件夹,在您喜欢的文本编辑器中打开文件,然后将其复制到剪贴板。
clip.exe``clip``.ssh - 在使用 Windows 终端的较新版本的 Windows 上,或使用 PowerShell 命令行的任何其他位置,您可能会收到一条声明,即在这种情况下,应使用以下替代命令:
ParseError``The '<' operator is reserved for future use.``clip
$ cat ~/.ssh/id_ed25519.pub | clip # Copies the contents of the id_ed25519.pub file to your clipboard - 对于适用于 Linux 的 Windows 子系统 (WSL),可以使用 .否则,如果不起作用,您可以找到隐藏的文件夹,在您喜欢的文本编辑器中打开文件,然后将其复制到剪贴板。
-
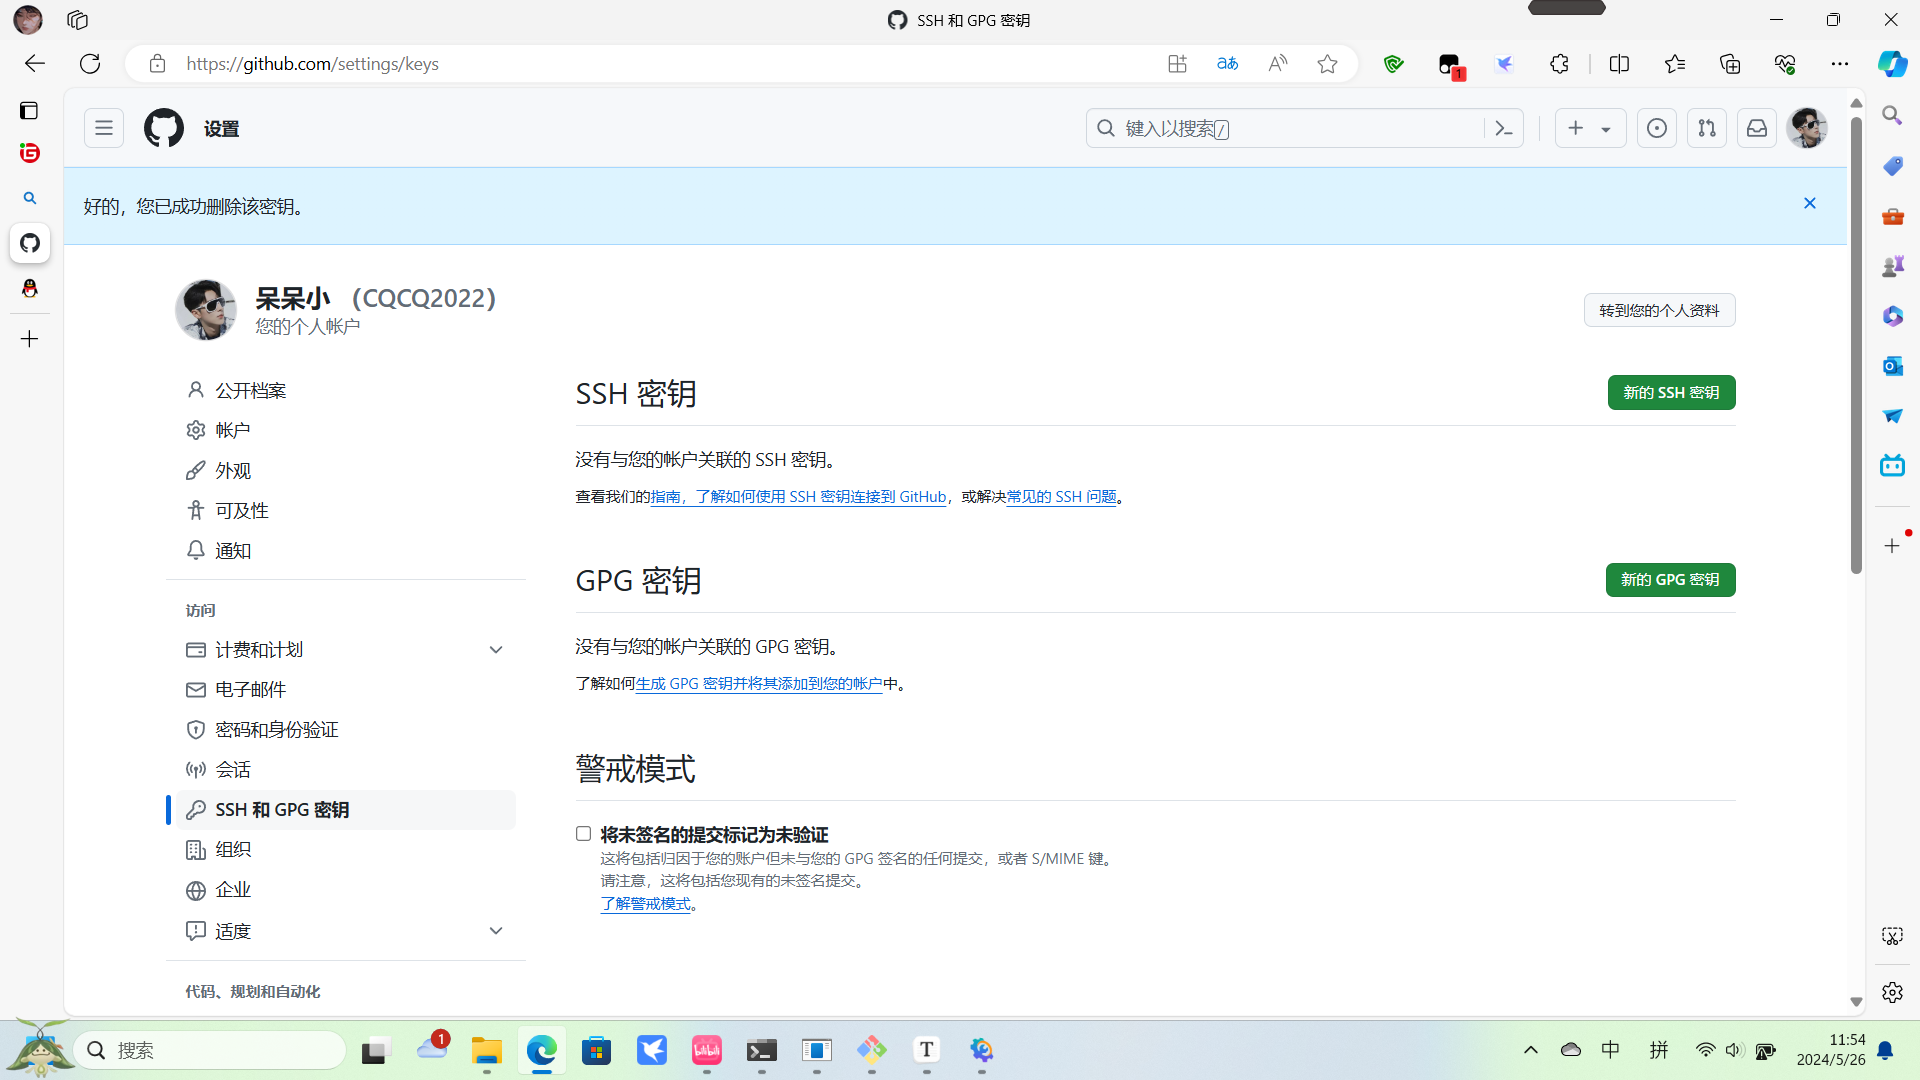
在任何页面的右上角,点击您的个人资料照片,然后点击设置。

-
在边栏的“访问”部分,点按SSH 和 GPG 密钥.
-
单击**“新建 SSH 密钥**”或**“添加 SSH 密钥**”。
-
在“标题”字段中,为新密钥添加描述性标签。例如,如果您使用的是个人笔记本电脑,则可以将此密钥称为“个人笔记本电脑”。
-
选择密钥类型,即身份验证或签名。有关提交签名的详细信息,请参阅“关于提交签名验证”。
-
在“密钥”字段中,粘贴您的公钥。
-
单击添加 SSH 密钥。
-
如果出现提示,请确认访问您在 GitHub 上的帐户。有关详细信息,请参阅“须藤模式”。
将密钥添加到ssh代理
xiaodaidai@dai MINGW64 ~/.ssh
$ ssh-add c:/Users/YOU/.ssh/id_ed25519
Could not open a connection to your authentication agent.

xiaodaidai@dai MINGW64 ~/.ssh
$ clip < ~/.ssh/id_ed25519.pub

xiaodaidai@dai MINGW64 ~/.ssh
$ ls
id_ed25519  id_ed25519.pub  known_hosts

xiaodaidai@dai MINGW64 ~/.ssh
$

找到用户目录:
C:\Users\xiaodaidai.ssh
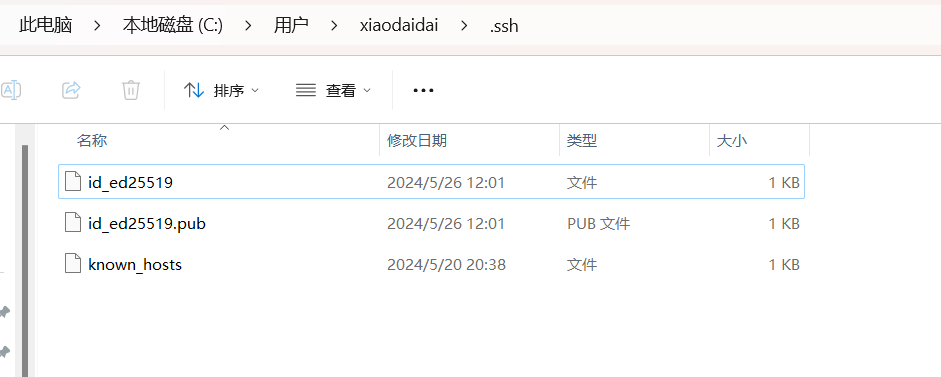
用记事本打开.pub
然后打开网站新建密钥复制即可:
url:Sign in to GitHub · GitHub
报错问题
按道理来说应该快成功了,最后就差把私钥添加到本机就好了但是出现了报错:
> OpenSSH_8.1p1, LibreSSL 2.7.3
> debug1: Reading configuration data /Users/YOU/.ssh/config
> debug1: Reading configuration data /etc/ssh/ssh_config
> debug1: /etc/ssh/ssh_config line 47: Applying options for *
> debug1: Connecting to github.com port 22.
GIT解决 ssh-add ~/.ssh/id_rsa:Could not open a connection to your authentication agent.
解决办法,看官方文档,要把代理打开:地址错误:权限被拒绝(公钥) - GitHub 文档
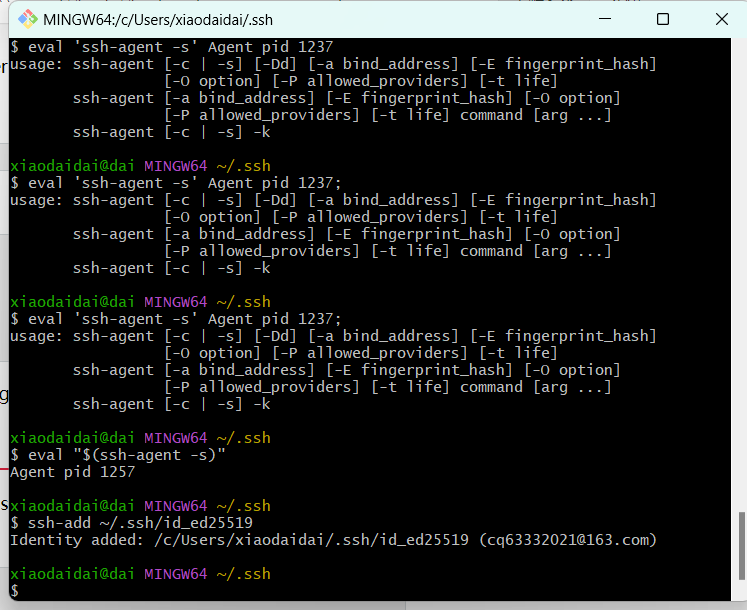
$ eval "$(ssh-agent -s)"
xiaodaidai@dai MINGW64 ~/.ssh
$ eval "$(ssh-agent -s)"
Agent pid 1257

xiaodaidai@dai MINGW64 ~/.ssh
$ ssh-add ~/.ssh/id_ed25519
Identity added: /c/Users/xiaodaidai/.ssh/id_ed25519 (cq63332021@163.com)

xiaodaidai@dai MINGW64 ~/.ssh
错误:权限被拒绝(公钥)
“权限被拒绝”错误表示服务器拒绝了您的连接。 可能有多个原因,最常见的如下所述。
Platform navigation
本文内容
- Should the sudo command or elevated privileges be used with Git?
- Check that you are connecting to the correct server
- Always use the "git" user
- Make sure you have a key that is being used
- Verify the public key is attached to your account
Should the sudo command or elevated privileges be used with Git?
You should not be using the sudo command or elevated privileges, such as administrator permissions, with Git.
If you have a very good reason you must use sudo, then ensure you are using it with every command. If you generate SSH keys without sudo and then try to use a command like sudo git push, you won't be using the same keys that you generated.
Check that you are connecting to the correct server
To make sure you are connecting to the right domain, you can enter the following command:
Shell
ssh -vT git@github.com
You should see this output:
> OpenSSH_8.1p1, LibreSSL 2.7.3
> debug1: Reading configuration data /Users/YOU/.ssh/config
> debug1: Reading configuration data /etc/ssh/ssh_config
> debug1: /etc/ssh/ssh_config line 47: Applying options for *
> debug1: Connecting to github.com port 22.
The connection should be made on port 22, unless you're overriding settings to use SSH over HTTPS.
Always use the "git" user
All connections, including those for remote URLs, must be made as the "git" user. If you try to connect with your GitHub username, it will fail:
$ ssh -T GITHUB-USERNAME@github.com
> Permission denied (publickey).
If your connection failed and you're using a remote URL with your GitHub username, you can change the remote URL to use the "git" user.
You should verify your connection by typing:
Shell
ssh -T git@github.com
You should see this output:
> Hi USERNAME! You've successfully authenticated...
Make sure you have a key that is being used
If you have GitHub Desktop installed, you can use it to clone repositories and not deal with SSH keys.
-
If you are using Git Bash, turn on ssh-agent:
# start the ssh-agent in the background
$ eval "$(ssh-agent -s)"
> Agent pid 59566
If you are using another terminal prompt, such as Git for Windows, turn on ssh-agent:
# start the ssh-agent in the background
$ eval $(ssh-agent -s)
> Agent pid 59566
Note: The eval commands above start ssh-agent manually in your environment. These commands may fail if ssh-agent already runs as a background system service. If that happens, we recommend you check the relevant documentation for your environment.
-
Verify that you have a private key generated and loaded into SSH.
$ ssh-add -l -E sha256
> 2048 SHA256:274ffWxgaxq/tSINAykStUL7XWyRNcRTlcST1Ei7gBQ /Users/USERNAME/.ssh/id_rsa (RSA)
The ssh-add command should print out a long string of numbers and letters. If it does not print anything, you will need to generate a new SSH key and associate it with GitHub.
Tip: On most systems the default private keys (~/.ssh/id_rsa and ~/.ssh/identity) are automatically added to the SSH authentication agent. You shouldn't need to run ssh-add path/to/key unless you override the file name when you generate a key.
Getting more details
You can also check that the key is being used by trying to connect to git@github.com:
Shell
ssh -vT git@github.com
You'll see output like this:
> ...
> debug1: identity file /Users/YOU/.ssh/id_rsa type -1
> debug1: identity file /Users/YOU/.ssh/id_rsa-cert type -1
> debug1: identity file /Users/YOU/.ssh/id_dsa type -1
> debug1: identity file /Users/YOU/.ssh/id_dsa-cert type -1
> ...
> debug1: Authentications that can continue: publickey
> debug1: Next authentication method: publickey
> debug1: Trying private key: /Users/YOU/.ssh/id_rsa
> debug1: Trying private key: /Users/YOU/.ssh/id_dsa
> debug1: No more authentication methods to try.
> Permission denied (publickey).
In this example, SSH did not find any keys.
- "-1" at the end of the "identity file" lines means SSH couldn't find a file to use.
- "Trying private key" lines indicate that no file was found.
If a file existed, those lines would be "1" and "Offering public key", as in this output:
> ...
> debug1: identity file /Users/YOU/.ssh/id_rsa type 1
> ...
> debug1: Authentications that can continue: publickey
> debug1: Next authentication method: publickey
> debug1: Offering RSA public key: /Users/YOU/.ssh/id_rsa
Verify the public key is attached to your account
You must provide your public key to GitHub to establish a secure connection.
-
Open the command line.
-
Start SSH agent in the background.
$ ssh-agent -s > Agent pid 59566 -
Find and take a note of your public key fingerprint.
$ ssh-add -l -E sha256 > 2048 SHA256:274ffWxgaxq/tSINAykStUL7XWyRNcRTlcST1Ei7gBQ /Users/USERNAME/.ssh/id_rsa (RSA) -
In the upper-right corner of any page, click your profile photo, then click Settings.
-
In the "Access" section of the sidebar, click SSH and GPG keys.
-
Compare the list of SSH keys with the output from the
ssh-addcommand.
If you don't see your public key in GitHub, you'll need to add your SSH key to GitHub to associate it with your computer.
Warning: If you see an SSH key you're not familiar with on GitHub, delete it immediately and contact us through the GitHub Support portal for further help. An unidentified public key may indicate a possible security concern. For more information, see "Reviewing your SSH keys."


 2912
2912


 被折叠的 条评论
为什么被折叠?
被折叠的 条评论
为什么被折叠?
 到【灌水乐园】发言


