


Yoga 是 Facebook 打造的一个跨 iOS、Android、Window 平台在内的布局引擎,兼容 Flexbox 布局方式,让界面更加简单。
01如何使用
首先我们在 MainAbility 中定义界面路由:
public class MainAbility extends Ability {
    @Override
    public void onStart(Intent intent) {
        super.onStart(intent);
        super.setMainRoute(MainAbilitySlice.class.getName());
        addActionRoute("action.dydrawnode.slice", DynamicsDrawNodeSlice.class.getName());
        addActionRoute("action.showrow.slice", ShowRowAbilitySlice.class.getName());
        addActionRoute("action.inflate.slice", BenchmarkInflateAbilitySlice.class.getName());
    }
}
然后我们来到 MainAbilitySlice,其实就是做了一个向其他界面跳转的动作,并提前加载 yoga 的 so 库:
public class MainAbilitySlice extends AbilitySlice {


    static {
        System.loadLibrary("yoga");
        System.loadLibrary("yogacore");
        System.loadLibrary("fb");
    }


    @Override
    public void onStart(Intent intent) {
        super.onStart(intent);
        setUIContent(ResourceTable.Layout_main_layout);

        Button btn0= (Button) findComponentById(ResourceTable.Id_btn_1);
        btn0.setClickedListener(component -> {
            Intent intent1 = new Intent();
            Operation operation = new Intent.OperationBuilder()
                    .withAction("action.dydrawnode.slice")
                    .build();
            intent1.setOperation(operation);
            startAbilityForResult(intent1, 1);
        });

        Button btn2= (Button) findComponentById(ResourceTable.Id_btn_2);
        btn2.setClickedListener(component -> {
            Intent intent1 = new Intent();
            Operation operation = new Intent.OperationBuilder()
                    .withAction("action.showrow.slice")
                    .build();
            intent1.setOperation(operation);
            startAbilityForResult(intent1, 1);
        });

        Button btn1= (Button) findComponentById(ResourceTable.Id_btn_3);
        btn1.setClickedListener(component -> {
            Intent intent1 = new Intent();
            Operation operation = new Intent.OperationBuilder()
                    .withAction("action.inflate.slice")
                    .build();
            intent1.setOperation(operation);
            startAbilityForResult(intent1, 1);
        });

    }

    @Override
    public void onActive() {
        super.onActive();
    }

    @Override
    public void onForeground(Intent intent) {
        super.onForeground(intent);
    }


}
第一个演示界面
这里 yoga 向我们展示了动态布局的能力,效果图如下:
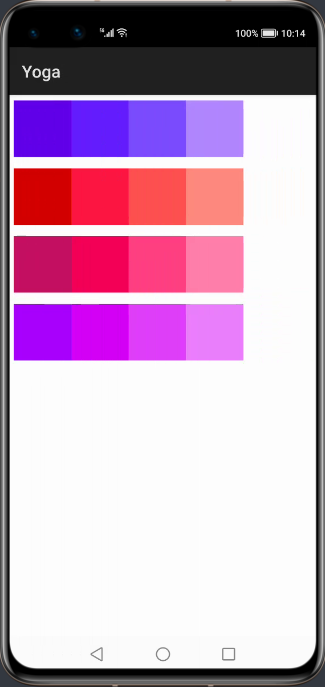
实现的代码如下:
public class DynamicsDrawNodeSlice extends AbilitySlice {


    private static final int VIEW_WIDTH = 200;
    private static final int VIEW_HEIGHT = 200;

    private ArrayList<Component> mViewList = new ArrayList<>();
    private ArrayList<YogaNode> mYogaNodeList = new ArrayList<>();

    private int[][] colors = new int[][]{
            new int[]{0xff6200ea, 0xff651fff, 0xff7c4dff, 0xffb388ff},
            new int[]{0xffd50000, 0xffff1744, 0xffff5252, 0xffff8a80},
            new int[]{0xffc51162, 0xfff50057, 0xffff4081, 0xffff80ab},
            new int[]{0xffaa00ff, 0xffd500f9, 0xffe040fb, 0xffea80fc}
    };

    @Override
    protected void onStart(Intent intent) {
        super.onStart(intent);
        PositionLayout container = new PositionLayout(this);
        DisplayAttributes displayAttributes = DisplayManager.getInstance().getDefaultDisplay(this).get().getAttributes();
        float screenWidth = displayAttributes.width;
        float screenHeight = displayAttributes.height;
        YogaNode root = new YogaNodeJNIFinalizer();
        root.setWidth(screenWidth);
        root.setHeight(screenHeight);
        root.setFlexDirection(YogaFlexDirection.COLUMN);

        createRowNodeAndView(root, 0);
        createRowNodeAndView(root, 1);
        createRowNodeAndView(root, 2);
        createRowNodeAndView(root, 3);

        root.calculateLayout(screenWidth, screenHeight);

        for (int i = 0; i < mViewList.size(); i++) {
            Component component = mViewList.get(i);
            YogaNode yogaNode = mYogaNodeList.get(i);
            YogaNode yogaNodeOwner = yogaNode.getOwner();
            component.setTranslationX(yogaNodeOwner.getLayoutX() + yogaNodeOwner.getLayoutX());
            component.setTranslationY(yogaNodeOwner.getLayoutY() + yogaNodeOwner.getLayoutY());
            component.setLeft((int) (yogaNodeOwner.getLayoutX() + yogaNode.getLayoutX()));
            component.setTop((int) (yogaNodeOwner.getLayoutY() + yogaNode.getLayoutY()));
            container.addComponent(component);
        }

        super.setUIContent(container);
    }

    private void createRowNodeAndView(YogaNode root, int index) {
        YogaNode row = new YogaNodeJNIFinalizer();
        row.setHeight(VIEW_HEIGHT);
        row.setWidth(VIEW_WIDTH * 4);
        row.setFlexDirection(YogaFlexDirection.ROW);
        row.setMargin(YogaEdge.ALL, 20);

        for (int i = 0; i < 4; i++) {
            YogaNode yogaNode = new YogaNodeJNIFinalizer();
            yogaNode.setWidth(VIEW_WIDTH);
            yogaNode.setHeight(VIEW_HEIGHT);
            Component component = createView(colors[index][i]);
            row.addChildAt(yogaNode, i);
            mYogaNodeList.add(yogaNode);
            mViewList.add(component);
        }

        root.addChildAt(row, index);
    }

    private Component createView(int color) {
        Component view = new Component(this);
        ShapeElement background = new ShapeElement();
        background.setRgbColor(convertColor(color));
        view.setBackground(background);
        ComponentContainer.LayoutConfig layoutConfig = new AdaptiveBoxLayout.LayoutConfig(VIEW_WIDTH, VIEW_HEIGHT);
        view.setLayoutConfig(layoutConfig);
        return view;
    }

    /**
     *  转换颜色
     * @param color
     * @return RgbColor
     */
    public RgbColor convertColor(int color) {
        int colorInt = color;
        int red = (colorInt & 0xff0000) >> 16;
        int green = (colorInt & 0x00ff00) >> 8;
        int blue = (colorInt & 0x0000ff);
        return new RgbColor(red, green, blue);
    }
}
代码中定义了一个 root 根布局,宽高为屏幕的宽高,接着定义了四个行布局,并向每个行布局里添加 4 个子布局。
最重要的是在调用 root.calculateLayout(screenWidth, screenHeight)后,便将每个子布局的位置给确定了下来,然后根据获取到的每个布局的参数,给每个 Component 设置位置。
该演示只是借助 yoga 组件来确定每个 Component 位置,真正使渲染生效的还是基于鸿蒙的原生控件。
第二个演示界面
接下来展示如何使用 yoga 组件在 xml 里通过填写属性来控制 item 位置的能力,效果图如下:
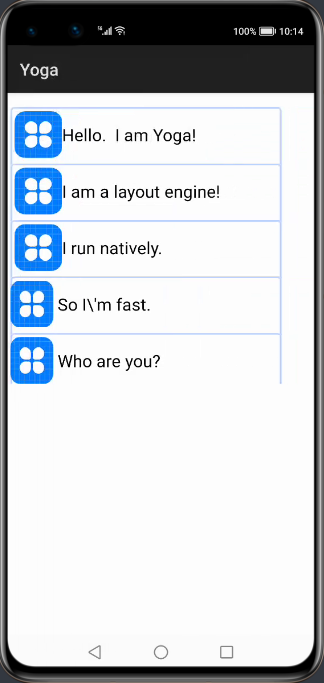
代码如下:
<?xml version="1.0" encoding="utf-8" ?>
<com.facebook.yoga.openharmony.YogaLayout
       xmlns:ohos="http://schemas.huawei.com/res/ohos"
       xmlns:yoga="http://schemas.huawei.com/apk/res-auto"
       ohos:height="match_parent"
       ohos:width="match_parent"
>

   <com.facebook.yoga.openharmony.YogaLayout
           ohos:height="60vp"
           ohos:width="match_content"
           yoga:yg_alignItems="center"
           yoga:yg_flexDirection="row"
           yoga:yg_marginHorizontal="15"
           yoga:yg_marginStart="15"
           yoga:yg_marginTop="50"
           ohos:background_element="$graphic:item_element"
   >


       <Text
               ohos:height="50vp"
               ohos:width="50vp"
               ohos:background_element="$media:icon"
               yoga:yg_flex="0"
               yoga:yg_marginStart="15"
       />


       <Text
               ohos:height="50vp"
               ohos:width="220vp"
               ohos:text="Hello.  I am Yoga!"
               ohos:text_color="#000000"
               yoga:yg_flex="1"
               yoga:yg_marginStart="15"
               ohos:text_size="20fp"
       />
   </com.facebook.yoga.openharmony.YogaLayout>

   <com.facebook.yoga.openharmony.YogaLayout
           ohos:background_element="$graphic:item_element"
           ohos:height="60vp"
           ohos:width="match_content"
           yoga:yg_alignItems="center"
           yoga:yg_flexDirection="row"
           yoga:yg_marginHorizontal="15"
           yoga:yg_marginTop="20"
           yoga:yg_marginStart="15"
   >


       <Text
               ohos:height="50vp"
               ohos:width="50vp"
               ohos:background_element="$media:icon"
               yoga:yg_flex="0"
               yoga:yg_marginStart="15"
       />

       <Text
               ohos:height="50vp"
               ohos:width="250vp"
               ohos:text="I am a layout engine!"
               ohos:text_color="#000000"
               yoga:yg_flex="1"
               yoga:yg_marginStart="15"
               ohos:text_size="20fp"
       />
   </com.facebook.yoga.openharmony.YogaLayout>

   <com.facebook.yoga.openharmony.YogaLayout
           ohos:background_element="$graphic:item_element"
           ohos:height="60vp"
           ohos:width="match_content"
           yoga:yg_alignItems="center"
           yoga:yg_flexDirection="row"
           yoga:yg_marginHorizontal="15"
           yoga:yg_marginTop="20"
   >

       <Text
               ohos:height="50vp"
               ohos:width="50vp"
               ohos:background_element="$media:icon"
               yoga:yg_flex="0"
               yoga:yg_marginStart="15"
       />

       <Text
               ohos:height="50vp"
               ohos:width="250vp"
               ohos:text="I run natively."
               ohos:text_color="#000000"
               yoga:yg_flex="1"
               yoga:yg_marginStart="15"
               ohos:text_size="20fp"
       />
   </com.facebook.yoga.openharmony.YogaLayout>

   <com.facebook.yoga.openharmony.YogaLayout
           ohos:background_element="$graphic:item_element"
           ohos:height="60vp"
           ohos:width="match_content"
           yoga:yg_alignItems="center"
           yoga:yg_flexDirection="row"
           yoga:yg_marginHorizontal="15"
           yoga:yg_marginTop="20"
   >

       <Text
               ohos:height="50vp"
               ohos:width="50vp"
               ohos:background_element="$media:icon"
               yoga:yg_flex="0"
       />

       <Text
               ohos:height="50vp"
               ohos:width="200vp"
               ohos:text="So I\'m fast."
               ohos:text_color="#000000"
               yoga:yg_flex="1"
               yoga:yg_marginStart="15"
               ohos:text_size="20fp"
       />
   </com.facebook.yoga.openharmony.YogaLayout>

   <com.facebook.yoga.openharmony.YogaLayout
           ohos:background_element="$graphic:item_element"
           ohos:height="60vp"
           ohos:width="match_content"
           yoga:yg_alignItems="center"
           yoga:yg_flexDirection="row"
           yoga:yg_marginHorizontal="15"
           yoga:yg_marginTop="20"
   >

       <Text
               ohos:height="50vp"
               ohos:width="50vp"
               ohos:background_element="$media:icon"
               yoga:yg_flex="0"
       />

       <Text
               ohos:height="50vp"
               ohos:width="200vp"
               ohos:text="Who are you?"
               ohos:text_color="#000000"
               yoga:yg_flex="1"
               yoga:yg_marginStart="15"
               ohos:text_size="20fp"
       />
   </com.facebook.yoga.openharmony.YogaLayout>

</com.facebook.yoga.openharmony.YogaLayout>
这里 YogaLayout 其实可以看成 FlexBox(详情请参考附录:FlexBox 科普)。
可以通过参数调节子布局位置,我们可以使用 YogaLayout 上的 yoga:yg_alignItems="center" 属性使得 item 居中显示,并通过 yoga:yg_flexDirection="row" 属性使得之 item 横向排列。
子 item 也可以通过设置 yoga:yg_flex="1" 来调整自己的权重。更多属性的使用大家也可以下载项目亲自体验。
02集成方式
自行编译工程 entity、yoga、yoga_layout、fb 生成 libyoga.so、libfb.so、libyogacore.so。
将其添加到要集成的 libs 文件夹内,在 entity 的 gradle 内添加如下代码。
方式一:通过 library 生成 har 包,添加 har 包到 libs 文件夹内。
在 entry 的 gradle 内添加如下代码:
implementation fileTree(dir:'libs', include:['*.jar','*.har'])
方式二:
allprojects{
    repositories{
        mavenCentral()
    }
}
implementation 'io.openharmony.tpc.thirdlib:yoga-layout:1.0.0'
implementation 'io.openharmony.tpc.thirdlib:yoga-yoga:1.0.0'
implementation 'io.openharmony.tpc.thirdlib:yoga-fb:1.0.0'
附录 1:FlexBox 科普
布局的传统解决方案,基于盒状模型,依赖 display 属性,position 属性,float 属性。
它对于那些特殊布局非常不方便,比如,垂直居中就不容易实现。2009 年,W3C 提出了一种新的方案:flex。
可以简便、完整、响应式地实现各种界面布局。目前,该方案已经得到了所有浏览器的支持。
采用 Flex 布局的元素,称为 Flex 容器(flex container),简称“容器”。它的所有子元素置动成为容器成员,称为 Flex 项目(flex item),简称“项目”。
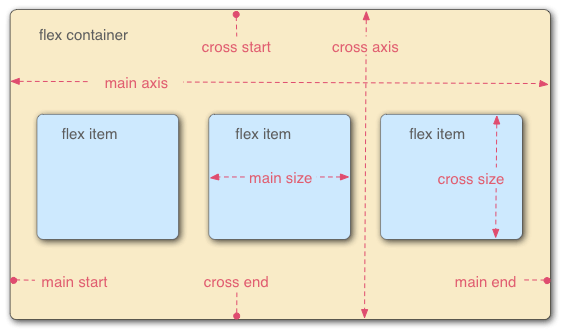
容器默认存在两根轴:水平的主轴(main axis)和垂直的交叉轴(cross axis)
主轴的开始位置(与边框的交叉点)叫 main start,结束位置叫 main end;交叉轴的开始位置叫 cross start,结束位置叫 cross end。
项目默认沿主轴排列。单个项目占据的主轴空间叫 main size,占据的交叉轴空间叫 cross size。
最后
如果你想成为一名鸿蒙开发者,以下这些资料将是十分优质且有价值,让你的鸿蒙开发之路事半功倍!相对于网上那些碎片化的知识内容,这份学习资料的知识点更加系统化,更容易理解和记忆。
内容包含了:【OpenHarmony多媒体技术、Stage模型、ArkUI多端部署、分布式应用开发、音频、视频、WebGL、Napi组件、OpenHarmony内核、Harmony南向开发、鸿蒙项目实战】等技术知识点。
鸿蒙Next全套VIP学习资料←点击领取!(安全链接,放心点击)
1.鸿蒙核心技术学习路线
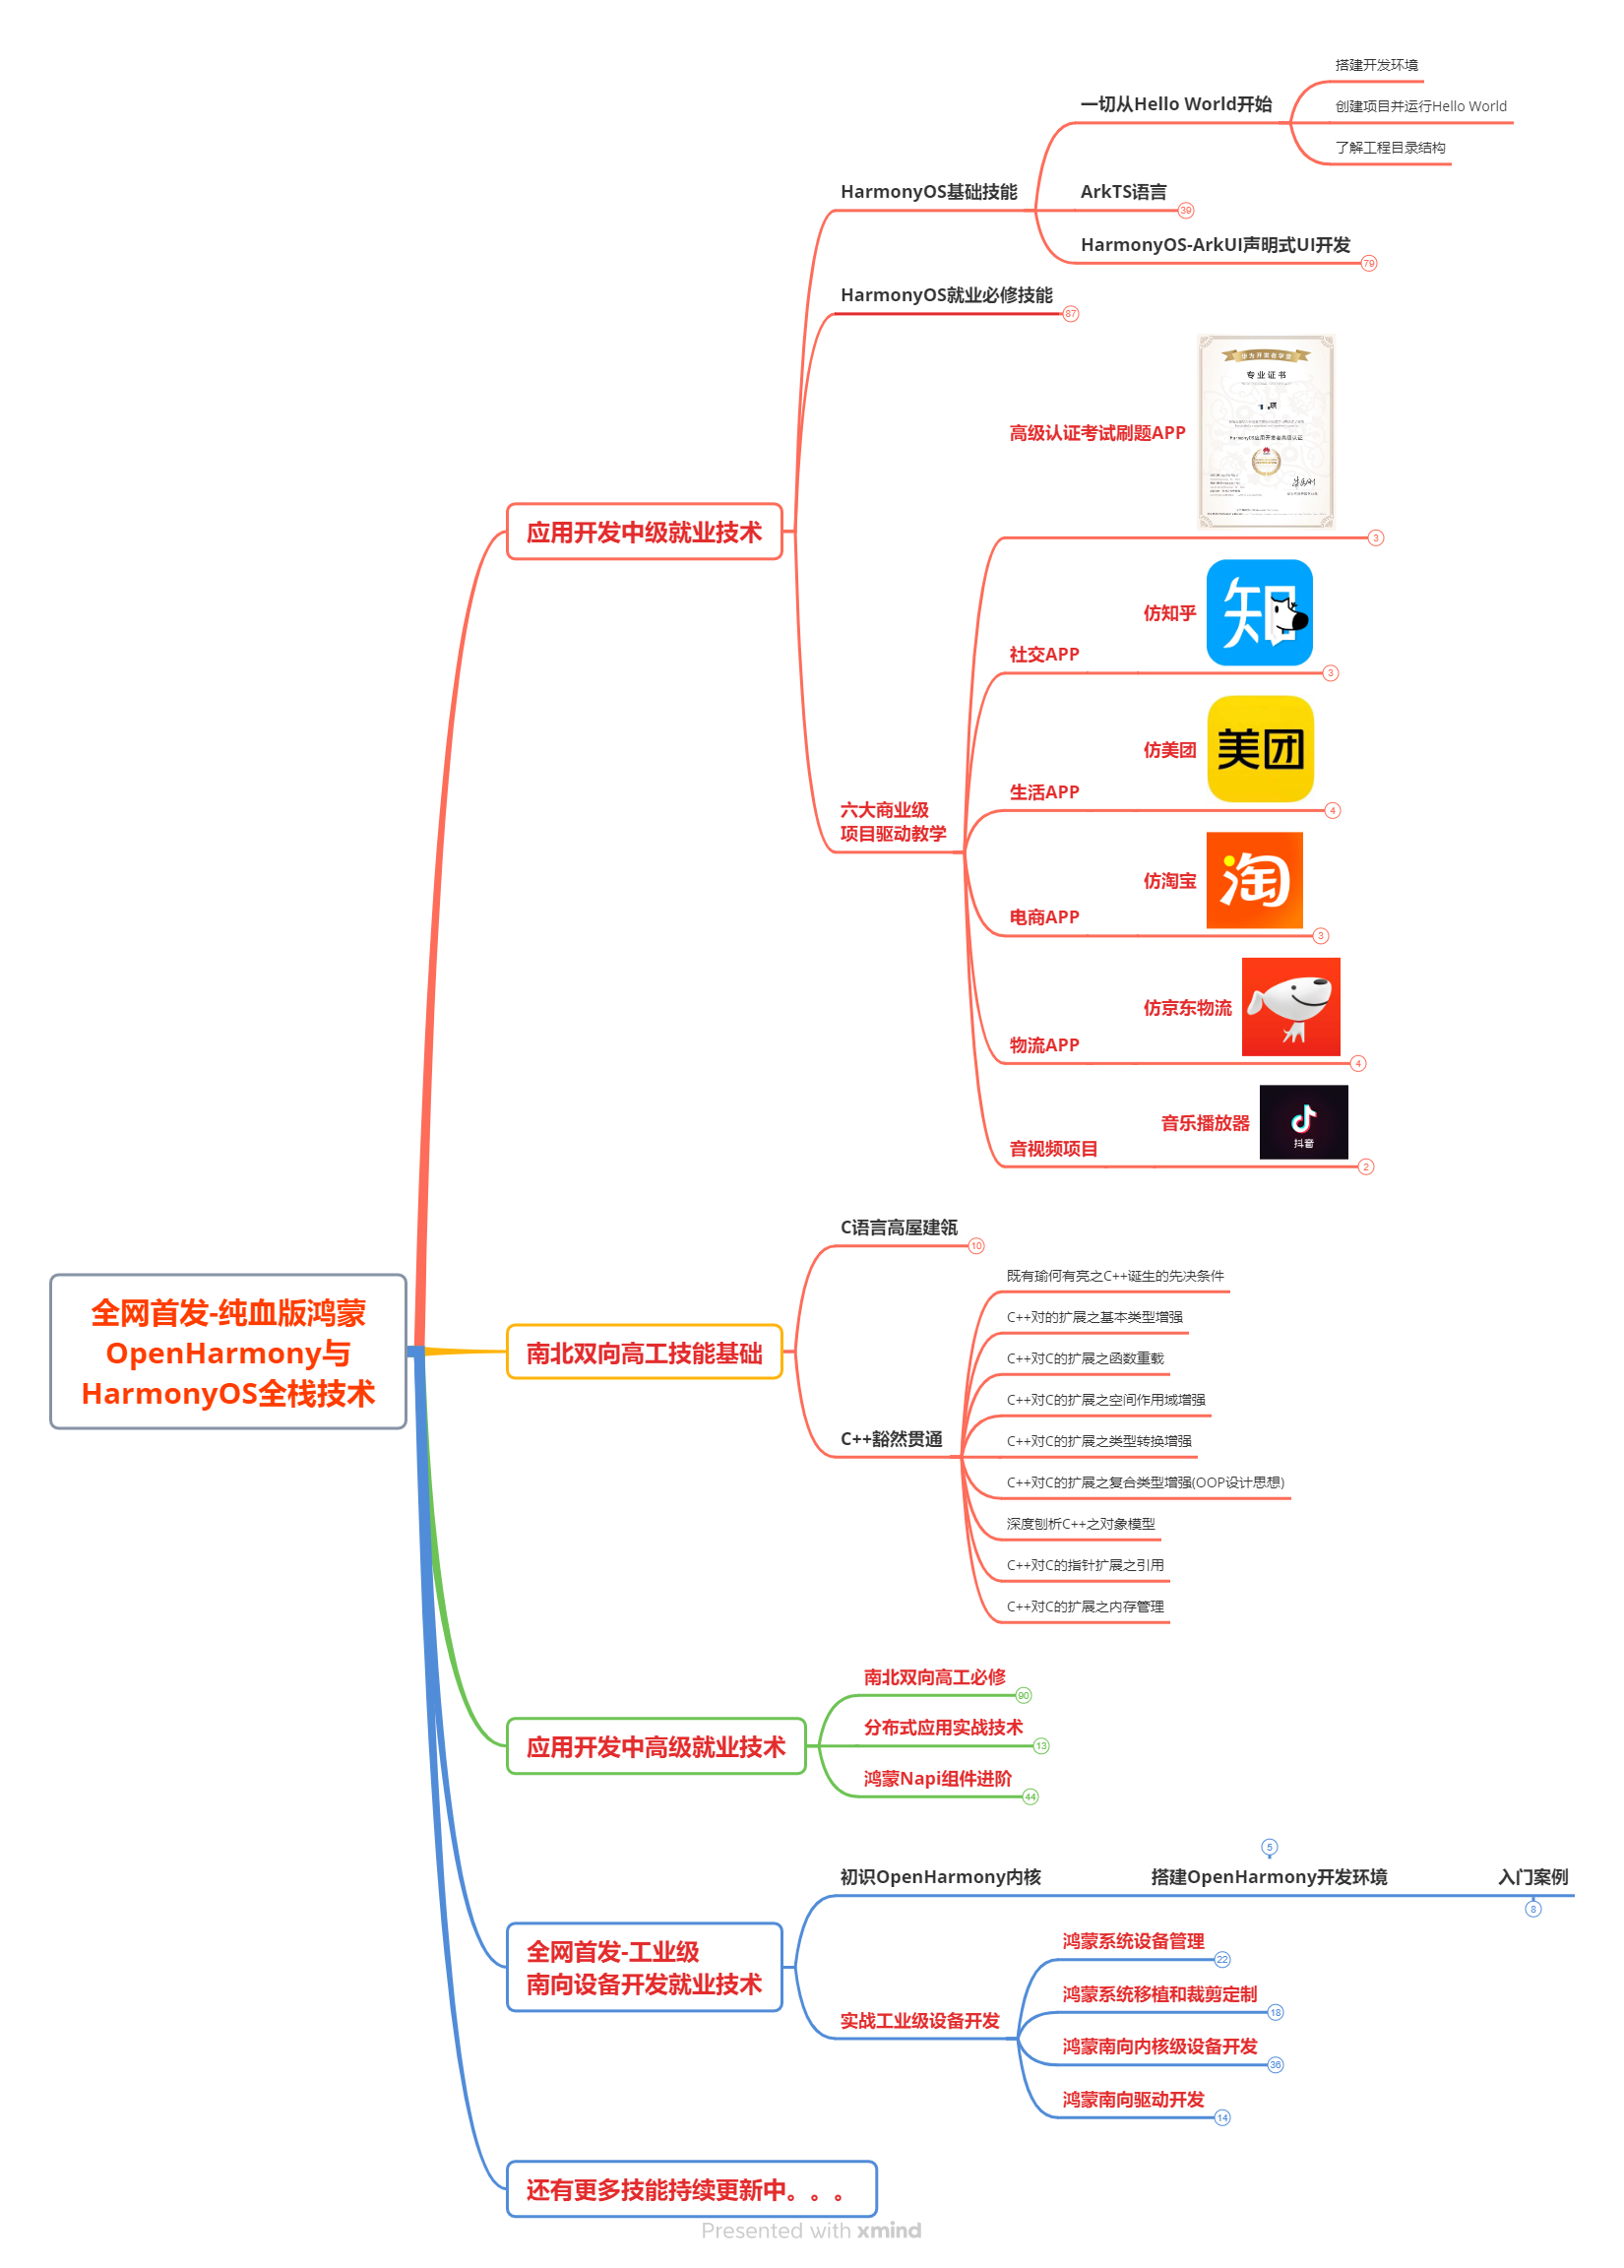
2.大厂面试必问面试题

3.鸿蒙南向开发技术
4.鸿蒙APP开发必备
5.HarmonyOS Next 最新全套视频教程

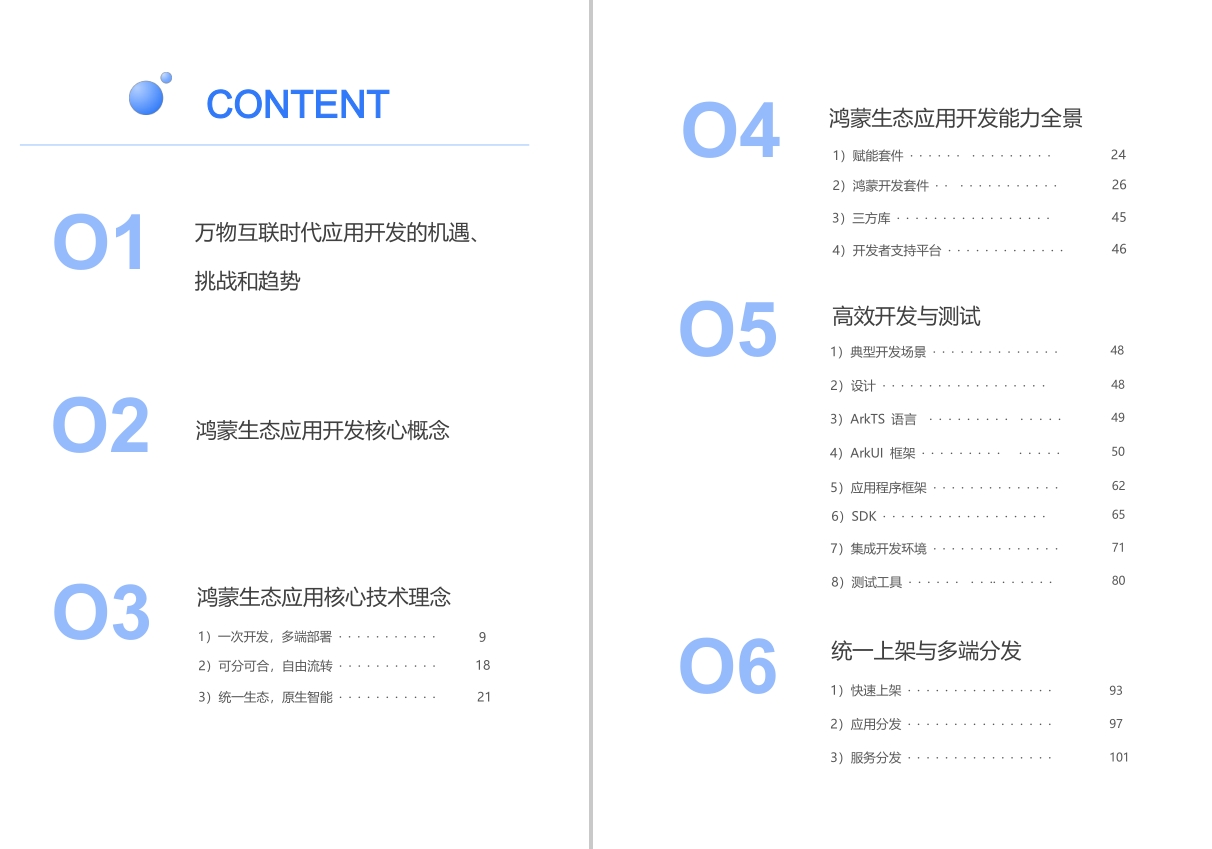
6.鸿蒙生态应用开发白皮书V2.0PDF


 501
501

 被折叠的 条评论
为什么被折叠?
被折叠的 条评论
为什么被折叠?
 到【灌水乐园】发言


