


目录
一:Http、Https是什么
http 超文本传输协议 Hypertext Transfer Protocol
协议: 主要是用在网页传输上,网站访问上使用
传输的数据是明文的,可以被截获,查看里面的内容--》不够安全经常用于 web架构: c/s client --》server
http端口号 80
https 是http协议的加密版本 Hypertext Transfer Protocol Secure
数据传输是经过加密的,比较安全
https端口是 443
是以安全为目标的 HTTP 通道,在HTTP的基础上通过传输加密和身份认证保证了传输过程的安全性,在http基础上有证书: 也就是拥有 ssh 服务: 有公钥和私钥
二:搭建web服务器
1.查看步骤
安装nginx软件: nginx是web服务器软件,可以用来搭建网站https://nginx.org/en/linux_packages.html(这个网站是官方网站,有安装的步骤)
2.操作
第1步: 安装yum-utils工具
[root@localhost dhcp]# sudo yum install yum-utils
第2步: 新建文件用于存放安装源
[root@localhost dhcp]# vim /etc/yum.repos.d/nginx.repo 路径不要错了
[nginx-stable]
name=nginx stable repo
baseurl=http://nginx.org/packages/centos/$releasever/$basearch/
gpgcheck=1
enabled=1
gpgkey=https://nginx.org/keys/nginx_signing.key
module_hotfixes=true[nginx-mainline]
name=nginx mainline repo
baseurl=http://nginx.org/packages/mainline/centos/$releasever/$basearch/
gpgcheck=1
enabled=0
gpgkey=https://nginx.org/keys/nginx_signing.key
module_hotfixes=true
将这一块复制粘贴进nginx.repo 文本文件
第3步: 安装nginx
root@localhost dhcp]# yum install nginx -y
第4步: 启动nginx并且设置开机自启
[root@localhost dhcp]# service nginx start
Redirecting to /bin/systemctl start nginx.service
[root@localhost dhcp]# ps aux|grep nginx
root      17681  0.0  0.0  49064  1160 ?        Ss   15:21   0:00 nginx: master process /usr/sbin/nginx -c /etc/nginx/nginx.conf
nginx     17682  0.0  0.0  49460  1900 ?        S    15:21   0:00 nginx: worker process
nginx     17683  0.0  0.0  49460  1900 ?        S    15:21   0:00 nginx: worker process
root      17685  0.0  0.0 112824   980 pts/0    S+   15:21   0:00 grep --color=auto nginx
[root@localhost dhcp]# netstat -anplut|grep nginx
tcp        0      0 0.0.0.0:80              0.0.0.0:*               LISTEN      17681/nginx: master
可以看到nginx监听了80端口
设置开机自启
[root@localhost dhcp]# systemctl enable nginx
第5步: 设置防火墙规则,开放80和443端口
设置firewalld防火墙规则,开放http服务,对应的端口号是80
[root@localhost dhcp]# firewall-cmd --add-service=http --permanent
success
第六步:查看设置的规则
必须先重新加载firewalld规则
[root@localhost dhcp]# firewall-cmd --reload
success
[root@localhost dhcp]# firewall-cmd --list-all
public (active)
target: default
icmp-block-inversion: no
interfaces: ens33
sources:
services: dhcp dhcpv6-client http ssh ###这里就多了一个http
ports:
protocols:
masquerade: no
forward-ports:
source-ports:
icmp-blocks:
rich rules:
第6步: 测试,访问web服务
查看自己的ip地址,从windows里访问
[root@localhost dhcp]# ip add
1: lo: <LOOPBACK,UP,LOWER_UP> mtu 65536 qdisc noqueue state UNKNOWN group default qlen 1000
link/loopback 00:00:00:00:00:00 brd 00:00:00:00:00:00
inet 127.0.0.1/8 scope host lo
valid_lft forever preferred_lft forever
inet6 ::1/128 scope host
valid_lft forever preferred_lft forever
2: ens33: <BROADCAST,MULTICAST,UP,LOWER_UP> mtu 1500 qdisc pfifo_fast state UP group default qlen 1000
link/ether 00:0c:29:33:d9:c8 brd ff:ff:ff:ff:ff:ff
inet 192.168.203.201/24 brd 192.168.203.255 scope global noprefixroute dynamic ens33
valid_lft 1769sec preferred_lft 1769sec
inet6 fe80::c348:5575:d46e:777e/64 scope link noprefixroute
valid_lft forever preferred_lft forever
[root@localhost dhcp]#在浏览器里输入下面的网址,就可以访问
http://192.168.203.201/
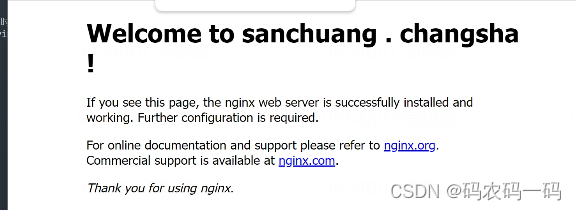
测试结果如图

3.插入图片
第一步:进入首页文件
进入nginx的存放网页文件的目录
index.html 是我们访问网站的时候,看到的第1个页面
[root@localhost dhcp]# cd /usr/share/nginx/html/
[root@localhost html]# ls
50x.html index.html
[root@localhost html]# vim index.html
修改index.html 首页文件
 修改title、hl
效果如图
第二步:装软件传图片
上传图片feng.jpg和wen.jpg到linux系统里的/usr/share/nginx/html/目录
[root@localhost html]# yum install lrzsz -y ##这个软件和Xftp一样可以传文件
[root@localhost html]# rz ##装完后输入rz
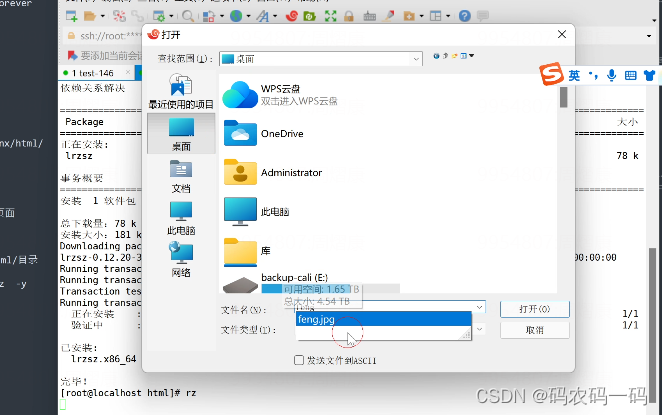
点击打开以后会默认传送到当前目录上
[root@localhost html]# pwd
/usr/share/nginx/html
[root@localhost html]# ls
50x.html feng.jpg index.html
[root@localhost html]# ls
50x.html feng.jpg index.html wen.jpg
第三步: 加入图片

在p标签下边加入一下代码,同时限定长度
<img src=feng.jpg width="400">
第四步:测试
再Ping一下在浏览器里输入下面的网址,就可以访问
http://192.168.203.201/

说明以及制作好网站了(静态网页:固定文字固定图片)


 1万+
1万+


 被折叠的 条评论
为什么被折叠?
被折叠的 条评论
为什么被折叠?
 到【灌水乐园】发言


