


一、概述
springboot是spring家族中的一个全新框架,用来简化spring程序的创建和开发过程。在以往我们通过SpringMVC+Spring+Mybatis框架进行开发的时候,我们需要配置web.xml,spring配置,mybatis配置,然后整合在一起,而springboot抛弃了繁琐的xml配置过程,采用大量默认的配置来简化我们的spring开发过程。
SpringBoot化繁为简,使开发变得更加的简单迅速。
四大核心
自动配置、起步依赖、Actuator、命令行界面。
二、入门程序
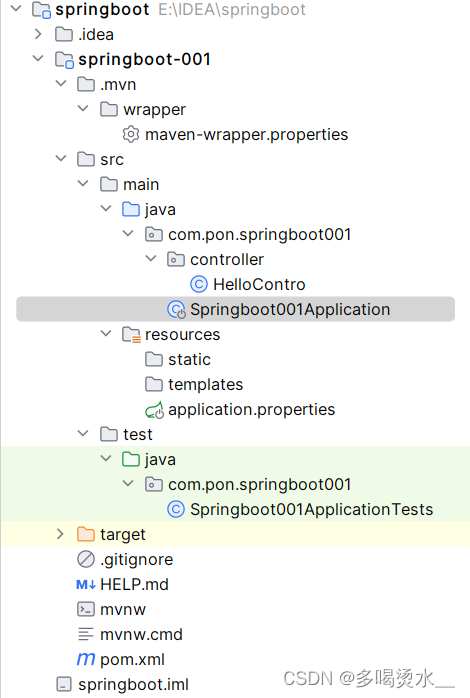
static:存放静态资源。如图片、CSS、JavaScript 等
templates:存放 Web 页面的模板文件
application.properties/application.yml 用于存放程序的各种依赖模块的配置信息,比如 服务端口,数据库连接配置等
.gitignore:使用版本控制工具 git 的时候,设置一些忽略提交的内容
StringbootApplication:SpringBoot 程序执行的入口,执行该程序中的 main 方法,启动当前SpringBoot项目。
1.创建一个 Spring MVC的Spring BootController
(1)创建Springboot类

package com.pon.springboot001.controller;
import org.springframework.web.bind.annotation.RequestMapping;
import org.springframework.web.bind.annotation.RestController;
@RestController
public class HelloContro {
    @RequestMapping("/hello")
    public String hello(){
        return "hello ljx";
    }
}
(2)启动SpringbootApplication
package com.pon.springboot001;
import org.springframework.boot.SpringApplication;
import org.springframework.boot.autoconfigure.SpringBootApplication;
@SpringBootApplication
public class Springboot001Application {
    public static void main(String[] args) {
        SpringApplication.run(Springboot001Application.class, args);
    }

}
可以在控制台上看见tomcat的端口号,可以在浏览器输入地址,访问到你所写的内容。

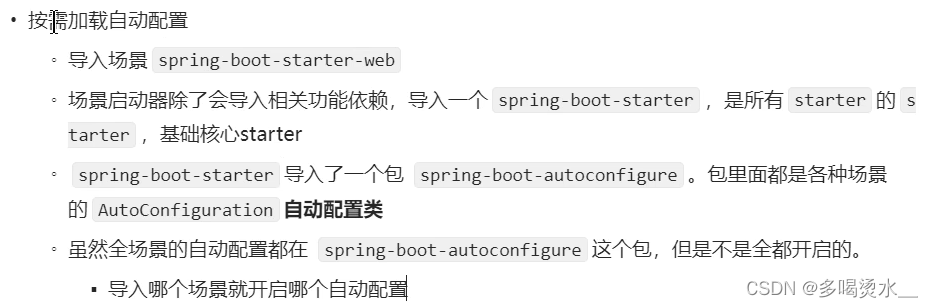
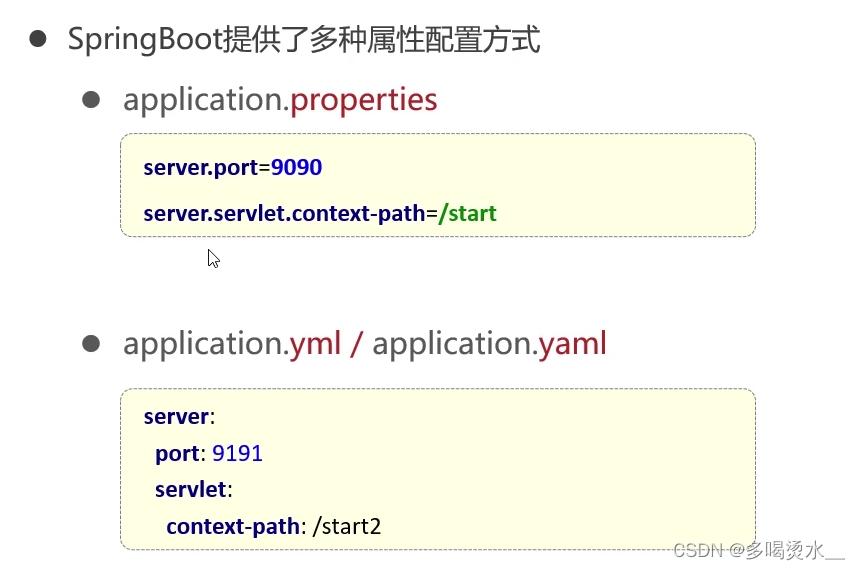
2.Springboot的配置文件
自动配置:
 属性绑定
属性绑定
properties

一个Pig类(实现类):
package com.pon.springboot001.bean;

import org.springframework.boot.context.properties.ConfigurationProperties;
import org.springframework.stereotype.Component;
@ConfigurationProperties(prefix = "pig")
@Component
public class Pig {
    private Long id;
    private String name;
    private Integer age;

    public Long getId() {
        return id;
    }

    public void setId(Long id) {
        this.id = id;
    }

    public String getName() {
        return name;
    }

    public void setName(String name) {
        this.name = name;
    }

    public Integer getAge() {
        return age;
    }

    public void setAge(Integer age) {
        this.age = age;
    }

    @Override
    public String toString() {
        return "Pig{" +
                "id=" + id +
                ", name='" + name + '\'' +
                ", age=" + age +
                '}';
    }
}
在application.properties进行赋值:
pig.id=1
pig.name=小猪
pig.age=3
在main函数进行测试:
package com.pon.springboot001;
import com.pon.springboot001.bean.Pig;
import org.springframework.boot.SpringApplication;
import org.springframework.boot.autoconfigure.SpringBootApplication;
import org.springframework.context.ConfigurableApplicationContext;

@SpringBootApplication
public class Springboot001Application {
    public static void main(String[] args) {
        ConfigurableApplicationContext C = SpringApplication.run(Springboot001Application.class, args);
          Pig p= C.getBean(Pig.class);
          System.out.println(p);
    }

}
在实际开发中,多采用yml文件。
yml中如果要对数组进行赋值:(如下)
person:
arr:
-张三
-李四
yml文件的书写和获取:
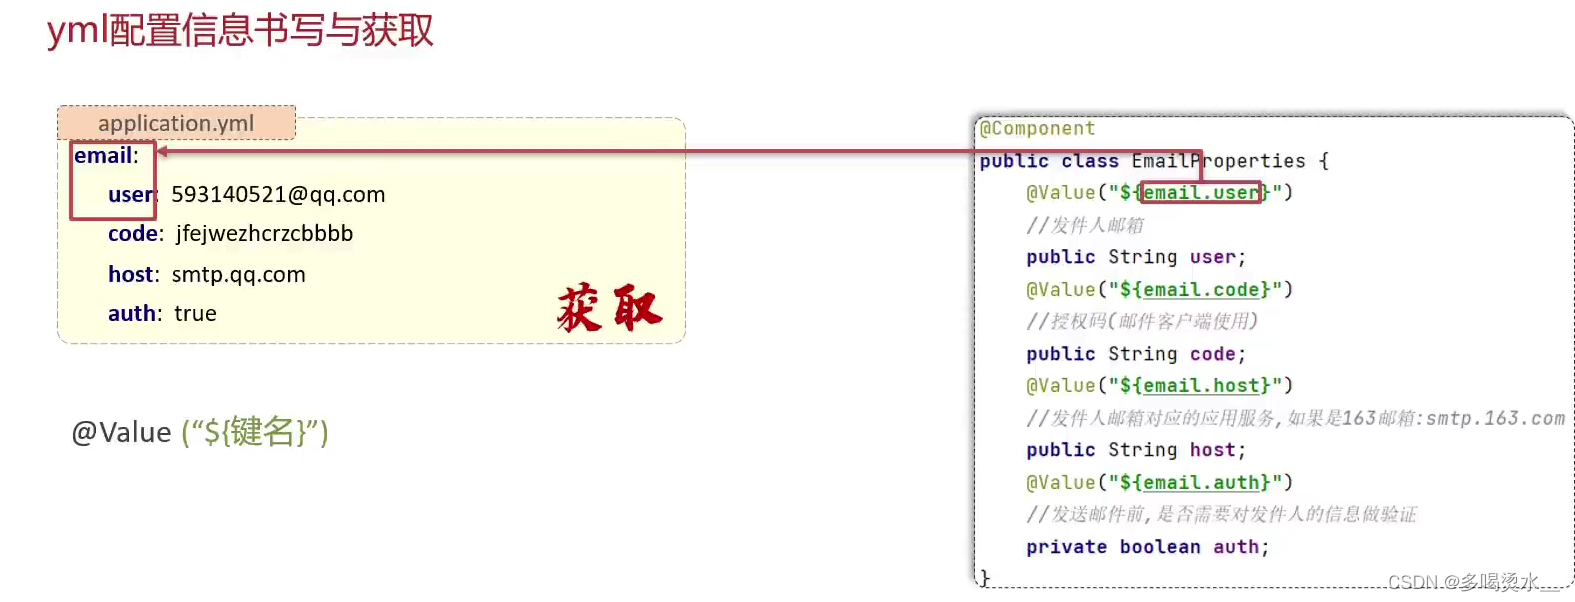

书写:要注意空格
获取:@Value(“${键名}”)或者@ConfigurationPropertise(prefix=“前缀”)
3.SpringBoot整合Mybatis
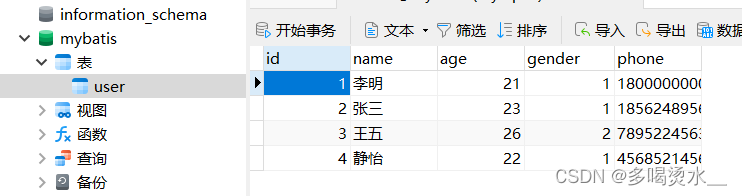
1)在数据库中先创建mybatis数据库,表信息
2)在springboot中的pom.xml引入mybatis依赖和mysql驱动。
 <!-- mysql驱动依赖-->
        <dependency>
            <groupId>com.mysql</groupId>
            <artifactId>mysql-connector-j</artifactId>
            <scope>runtime</scope>
        </dependency>
        <dependency>
            <groupId>org.mybatis.spring.boot</groupId>
            <artifactId>mybatis-spring-boot-starter</artifactId>
            <version>3.0.3</version>
        </dependency>
3)在application.yml中配置数据源信息
spring:
  datasource:
    driver-class-name: com.mysql.cj.jdbc.Driver
    url: jdbc:mysql://localhost:3306/mybatis
    username: root
    password: 123456
这就将mybatis整合上了,下面创建一个方法对其实现,如何获取数据库中的信息。
4)创建pojo(指简单java对象)包,包下创建一个完整javabean类实现数据库的属性
package com.pon.springboot003.pojo;
public class User {
    private Integer id;
    private String name;
    private Short age;
    private Short gender;
    private String phone;
    public User(){

    }
    public User(Integer id, String name, Short age, Short gender, String phone) {
        this.id = id;
        this.name = name;
        this.age = age;
        this.gender = gender;
        this.phone = phone;
    }
    public Integer getId() {
        return id;
    }
    public void setId(Integer id) {
        this.id = id;
    }
    public String getName() {
        return name;
    }
    public void setName(String name) {
        this.name = name;
    }
    public Short getAge() {
        return age;
    }
    public void setAge(Short age) {
        this.age = age;
    }
    public Short getGender() {
        return gender;
    }
    public void setGender(Short gender) {
        this.gender = gender;
    }
    public String getPhone() {
        return phone;
    }
    public void setPhone(String phone) {
        this.phone = phone;
    }
    @Override
    public String toString() {
        return "User{" +
                "id=" + id +
                ", name='" + name + '\'' +
                ", age=" + age +
                ", gender=" + gender +
                ", phone='" + phone + '\'' +
                '}';
    }
}
5)创建一个mapper包,包下创建一个接口,定义查找用户的id,从而获取用户的信息(使用sql语句)
Mapper:Mapper是MyBatis中的概念,用于执行SQL语句并映射结果。在MyBatis中,Mapper通常是一个Java接口,其中定义了与数据库交互的SQL映射语句。
package com.pon.springboot003.mapper;
import com.pon.springboot003.pojo.User;
import org.apache.ibatis.annotations.Mapper;
import org.apache.ibatis.annotations.Select;

@Mapper
public interface UserMapper {
    @Select("select * from user where id=#{id}")
    public User findId(Integer id);
}
6)创建service包,包下创建一个接口,方法与上述方法一致。
service:Service 层通常用于实现应用程序的业务逻辑
package com.pon.springboot003.service;
import com.pon.springboot003.pojo.User;
public interface UserService {
    public User findId(Integer id);
}
7)创建一个实现类
package com.pon.springboot003.service.Lmp;
import com.pon.springboot003.mapper.UserMapper;
import com.pon.springboot003.pojo.User;
import com.pon.springboot003.service.UserService;
import org.springframework.beans.factory.annotation.Autowired;
import org.springframework.stereotype.Service;

@Service
public class UserServiceImp implements UserService {
    @Autowired
    private UserMapper um;
    @Override
    public User findId(Integer id) {
        return um.findId(id);
    }
}
8)创建一个controller包,包下创建一个类
package com.pon.springboot003.controller;
import com.pon.springboot003.pojo.User;
import com.pon.springboot003.service.UserService;
import org.springframework.beans.factory.annotation.Autowired;
import org.springframework.web.bind.annotation.RequestMapping;
import org.springframework.web.bind.annotation.RestController;
@RestController
public class UserController {
@Autowired
private UserService us;
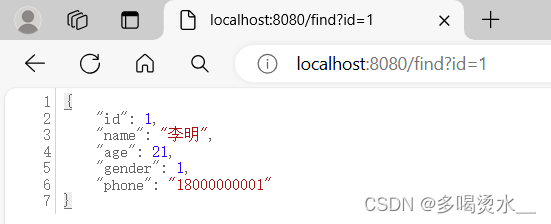
@RequestMapping("/find")
public User findById(Integer id){
return us.findId(id);
}
}
9)启动application主函数
package com.pon.springboot003;
import org.springframework.boot.SpringApplication;
import org.springframework.boot.autoconfigure.SpringBootApplication;
@SpringBootApplication
public class Springboot003Application {
    public static void main(String[] args) {
        SpringApplication.run(Springboot003Application.class, args);
    }

}

三、Bean
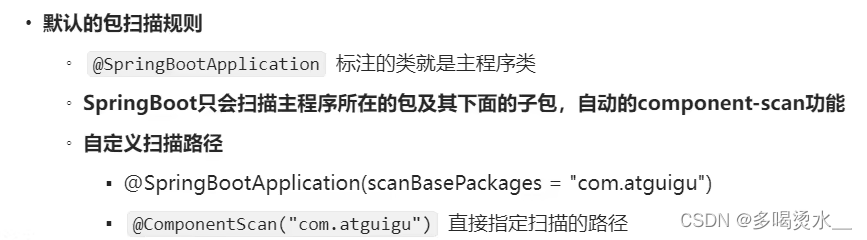
1.Bean扫描
SpringBoot默认扫描启动类所在的包及其自包。

2.Bean注册
在Spring中一般使用那四大注解(Component、Service...)完成bean注册,
 先引入第三方jar包在仓库下,再在pom.xml中引入依赖。
 @Bean依赖
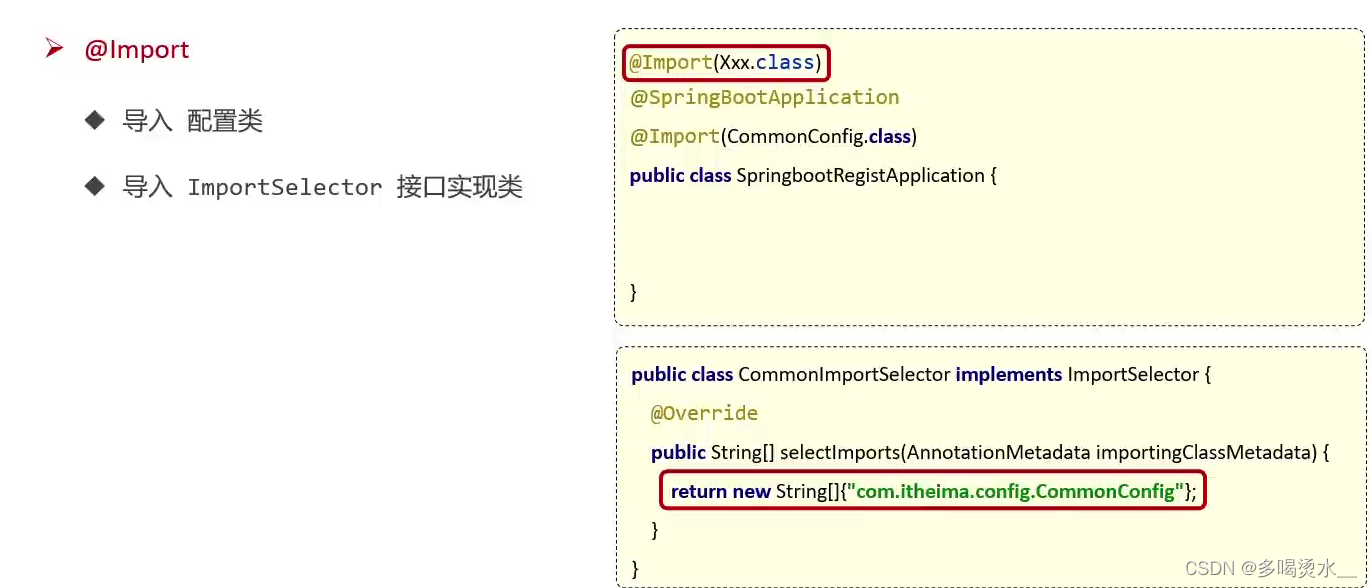
@Configuration是一个配置类

@Import
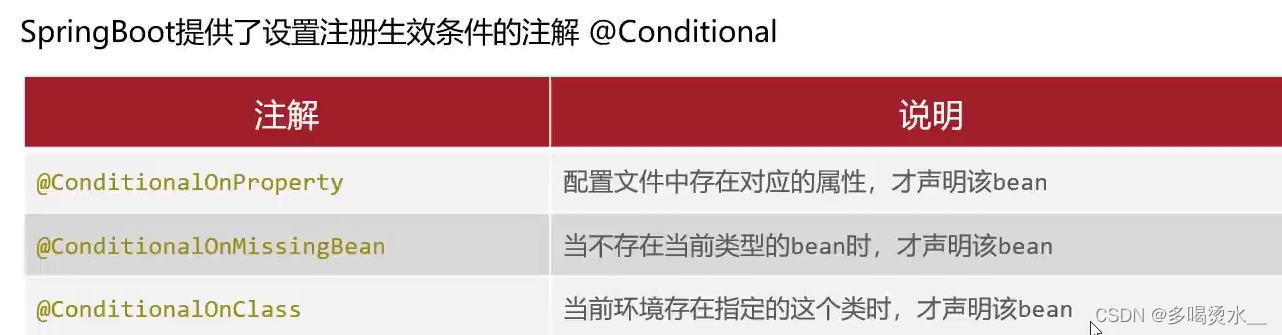
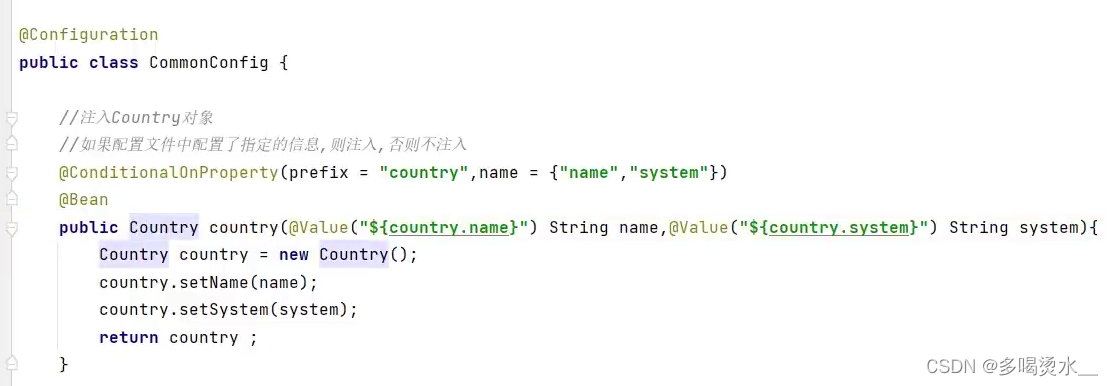
3.注册条件
在一个类中要对属性赋值,但值不能之间写在程序中。需要写在配置文件(application.yml)再用配置文件,对属性进行赋值。

 四、自动配置
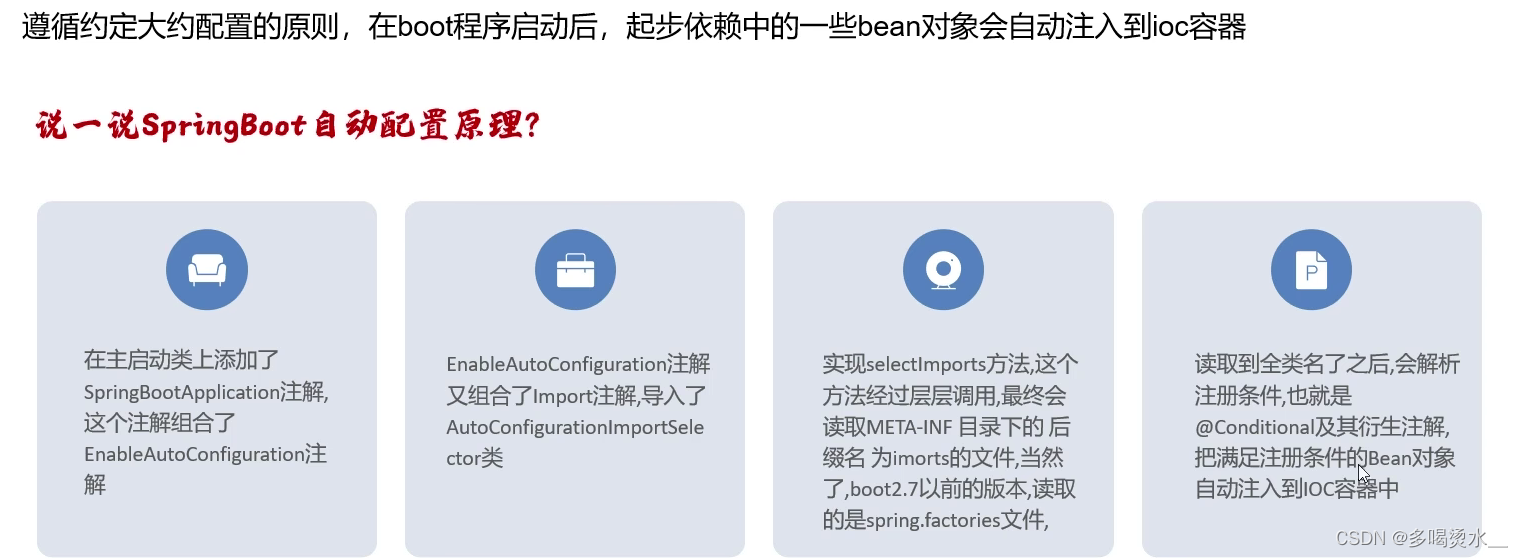


 21万+
21万+


 被折叠的 条评论
为什么被折叠?
被折叠的 条评论
为什么被折叠?
 到【灌水乐园】发言


