


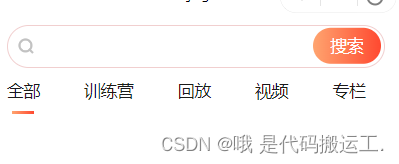
首先老样子喽~先看效果图~
下面就是整体要用到的代码,因为这个功能相对来说是比较简单的,所有我们就不做过多的解释了哈 当然我也会在代码里注释清楚每一步的用途,请大家自行参考哦~
<template>
    <view class="bntThree">
         <p
            class="feedback"
            v-for="(item, index) in opinion"
            :key="item.id"
            :class="{ checked: index === selectedIndex }"
            @click="tabClick(item, index)"
           >
                {{ item.type }}
         </p>
    </view>
</template>

<script>
    export default{
        data(){
            return{
                //tab栏的数据 (这个耶可以根据你自己的项目需求进行调整)
                opinion: [
                {
                    id: 0,
                    type: "全部",
                },
                {
                    id: 1,
                    type: "训练营",
                },
                {
                    id: 2,
                    type: "回放",
                },
                {
                    id: 3,
                    type: "视频",
                },
                {
                    id: 4,
                    type: "专栏",
                },
            ],
            }
        },
        methods:{
            //点击tab栏
            tabClick(item, index) {
                //这个是我们点击tab 需要传给后端获取接口数据的值
                this.ruleForm.feedbackType = item.id;
                //这个就是我们点击tab 要切换的index下标
                this.selectedIndex = index;
            },
        }

    }
</script>

<style>
    //原来(已开始的样式自己根据ui或者产品原型来实现)  这里的css是我们选中后的动态样式
    .checked {
          width: 96px;
          height: 32px;
          font-size: 13px;
          text-align: center;
          line-height: 32px;
          color: #a45829;
          font-weight: 400;
          border-radius: 4px;
          background-color: #f3cdb6;
     }
</style>
好啦,今天的学习到这里就结束啦,希望我的文章可以为你们提供一些价值,感谢阅读~


 2460
2460


 被折叠的 条评论
为什么被折叠?
被折叠的 条评论
为什么被折叠?
 到【灌水乐园】发言


