


这是一篇笔记,用于记录关于用Easy X绘制一个按钮得简单程序,本程序由网络上的 代码整理出。
文件
Widget.h
#pragma once

#include <graphics.h>

// 部件抽象基类
class Widget
{
public:
    Widget(int x = 0, int y = 0, int width = 100, int height = 60);
    void setRect(int x, int y, int width, int height);  // 设置控件矩形
    virtual void show() const = 0;                                                  // 显示函数
    int getX() const;
    int getY() const;
    int getWidth() const;
    int getHeight() const;
    void setX(int x);
    void setY(int y);
    void setWidth(int width);
    void setHeight(int height);

protected:
    int x;        // X 坐标
    int y;        // Y 坐标
    int width;    // 宽度
    int height;   // 高度
};
Widget.cpp
#include "Widget.h"

Widget::Widget(int x, int y, int width, int height) : x(x), y(y), width(width), height(height)
{
}

int Widget::getX() const
{
	// TODO: 在此处插入 return 语句
	return x;
}

int Widget::getY() const
{
	// TODO: 在此处插入 return 语句
	return y;
}

int Widget::getWidth() const
{
	// TODO: 在此处插入 return 语句
	return width;
}

int Widget::getHeight() const
{
	// TODO: 在此处插入 return 语句
	return height;
}

void Widget::setX(int x)
{
	this->x = x;
	show();
}

void Widget::setY(int y)
{
	this->y = y;
	show();
}

void Widget::setWidth(int width)
{
	this->width = width;
	show();
}

void Widget::setHeight(int height)
{
	this->height = height;
	show();
}

void Widget::setRect(int x, int y, int width, int height)
{
	this->x = x;
	this->y = y;
	this->width = width;
	this->height = height;
	show();
}
Button.h
#pragma once
#include "Widget.h"
#include <string>

// 按钮类
class Button :
    public Widget
{
public:
    Button(int x = 0, int y = 0, int width = 100, int height = 60, const std::wstring& text = L"按钮");
    void show() const;                      // 显示按钮
    bool state(const ExMessage& msg);       // 按钮状态,true 表示按钮按下
    const std::wstring& getText() const;    // 获取按钮文本
    void setText(const std::wstring& text); // 设置按钮文本

protected:
    bool isIn(const ExMessage& msg) const;  // 判断鼠标是否在按钮里面
    std::wstring text;                      // 按钮文本
    bool isChange;     // 按钮状态是否改变

public:
    //  关于按钮设计的一些变量
    int linestyle = PS_SOLID;        //线条样式
    int button_color = CYAN;        //按钮颜色
    int in_color = LIGHTBLUE;       //当鼠标在按钮上的颜色
    int click_clolor = LIGHTBLUE;  //当按下按钮时按钮的颜色
};
Button.cpp
#include "Button.h"

// 声明为外部变量,需要在其他源文件中定义
extern int linestyle;
extern int button_color;
extern int in_color;
extern int click_clolor;

Button::Button(int x, int y, int width, int height, const std::wstring& text) : Widget(x, y, width, height), text(text), isChange(false)
{
}

void Button::show() const
{
	// 设置样式
	setlinestyle(linestyle, 2);	//PS_SOLID是指一条由特定颜色的实线,该线的宽度由调用GDI API的参数所指定的宽度决定。
	//PS_SOLID通常用于创建线框,边框或其他需要绘制线条的图形元素
	setfillcolor(button_color);	//按钮的颜色
	settextstyle(25, 0, L"微软雅黑");

	// 绘制按钮
	fillrectangle(x, y, x + width, y + height);

	// 绘制文本
	RECT rect = { x, y, x + width, y + height };
	drawtext(text.c_str(), &rect, DT_CENTER | DT_VCENTER | DT_SINGLELINE);
}

bool Button::state(const ExMessage& msg)
{
	if (msg.message == WM_MOUSEMOVE && isIn(msg))	// 按钮悬浮
	{
		// 设置样式
		setlinestyle(linestyle, 2);
		setfillcolor(in_color);	// 鼠标放上后按钮的颜色
		settextstyle(25, 0, L"微软雅黑");

		// 绘制按钮
		fillrectangle(x, y, x + width, y + height);

		// 绘制文本
		RECT rect = { x, y, x + width, y + height };
		drawtext(text.c_str(), &rect, DT_CENTER | DT_VCENTER | DT_SINGLELINE);

		isChange = true;
		return false;
	}
	else if ((msg.message == WM_LBUTTONDOWN || msg.message == WM_LBUTTONUP) && isIn(msg))	// 按钮被点击
	{
		// 设置样式
		setlinestyle(linestyle, 2);
		setfillcolor(click_clolor);	// 鼠标按下后按钮的颜色
		settextstyle(25, 0, L"微软雅黑");

		// 绘制按钮
		fillrectangle(x, y, x + width, y + height);

		// 绘制文本
		RECT rect = { x, y, x + width, y + height };
		drawtext(text.c_str(), &rect, DT_CENTER | DT_VCENTER | DT_SINGLELINE);

		isChange = true;
		return true;
	}
	else	// 在按钮状态改变的时候,恢复按钮原来的状态,防止屏闪
	{
		if (isChange)
		{
			show();
			isChange = false;
		}
		return false;
	}
}

const std::wstring& Button::getText() const
{
	// TODO: 在此处插入 return 语句
	return text;
}

void Button::setText(const std::wstring& text)
{
	this->text = text;
}

bool Button::isIn(const ExMessage& msg) const
{
	if (msg.x >= this->x && msg.x <= this->x + width && msg.y >= this->y && msg.y <= this->y + height)
	{
		return true;
	}
	return false;
}
示例
把以上文件包含在工程中就可以愉快地使用啦,以下是一个使用示例代码:
main.cpp
#include <conio.h>
#include "Button.h"

//按钮大小
#define W 150
#define H 40

Button* begin;
Button* end;
Button* exi;


int main() {

	//以下是一些基础设置
	initgraph(600, 400, EW_SHOWCONSOLE);//创建窗口并显示控制台
	setbkcolor(WHITE);//设置背景颜色
	setbkmode(TRANSPARENT);//处理字体背景
	setfillcolor(CYAN);//设置填充色,这里是浅青色
	setlinecolor(BLACK); //设置当前线条的颜色为黑色
	cleardevice();//显示背景颜色

	begin = new Button(200, 100, W, H, L"开始");
	end = new Button(200, 150, W, H, L"结束");
	exi = new Button(200, 200, W, H, L"退出");

	begin->show();
	end->show();
	exi->show();

	ExMessage msg;
	bool on = 1;
	while (on)
	{
		msg = getmessage();

		if (begin->state(msg))		// 查看学生
		{
			printf("Begin\n");
		}
		if (end->state(msg))		// 查看学生
		{
			printf("End\n");
		}
		if (exi->state(msg))		// 查看学生
		{
			exit(0);
		}
	}

	_getch();

	return 0;
}
效果图:
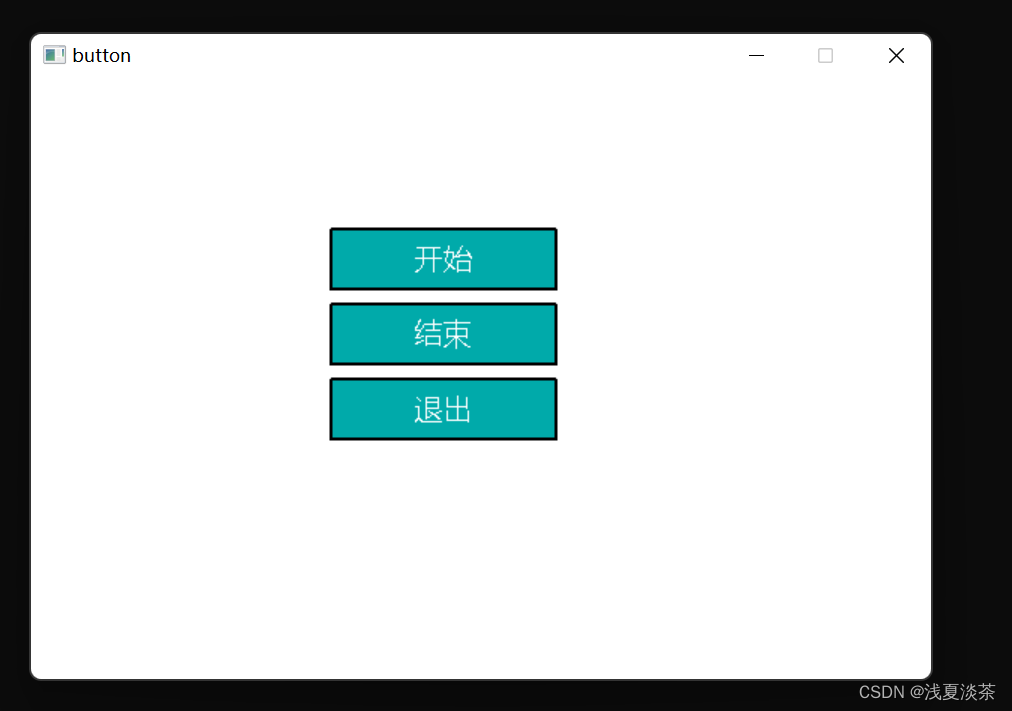
描述:当鼠标放在按钮上时会变色,按“开始”黑窗口上会输出begin,按“结束”会输出end,按“退出”会退出这个窗口,只剩下黑窗口(也可以在main.cpp中把initgraph()中的EW_SHOWCONSOLE去掉,这样就不会有黑窗口了)。
代码解释
1.Button(int x, int y, int width, int height, const std::wstring& text):类的构造函数,初始化按钮的位置和文本内容
2.vodi show() const override:重写了Widget类中的show()函数,用于绘制按钮;
3.bool state(const ExMessage& msg) override:重写了Widget类中的state()函数,用于处理按钮的状态和呈现效果;
4.const std::wstring& getText() const:返回按钮的文本内容;
5.void setText(const std::wstring& text):设置按钮的文本内容;
6.bool isIn(const ExMessage& msg) const:判断鼠标事件是否在该按钮中发生。
自定义按钮样式
Button.h中的:
//  关于按钮设计的一些变量
int linestyle = PS_SOLID;        //线条样式
int button_color = CYAN;        //按钮颜色
int in_color = LIGHTBLUE;       //当鼠标在按钮上的颜色
int click_clolor = LIGHTBLUE;  //当按下按钮时按钮的颜色
可以修改以上变量制作一个适合的按钮。
线条样式:
| 常量 | 线条样式 |
|---|---|
| PS_SOLID | 实线 |
| PS_DASH | 短划线 |
| PS_DOT | 点线 |
| PS_DASHDOT | 短划线加点线 |
| PS_DASHDOTDOT | 短划线加两个点线 |
| PS_NULL | 没有线条相当于透明 |
| PS_INSIDEFRAME | 在矩形框内画线,而不是在边缘上 |
| PS_USERSTYLE | 使用自定义的线形样式 |
| PS_ALTERNATE | 交替线 |
颜色:
| 常量 | 颜色 |
|---|---|
| BLACK | 黑 |
| BLUE | 蓝 |
| GREEN | 绿 |
| CYAN | 青 |
| RED | 红 |
| MAGENTA | 紫 |
| BROWN | 棕 |
| LIGHTGRAY | 浅灰 |
| DARKGRAY | 深灰 |
| LIGHTBLUE | 亮蓝 |
| LIGHTGREEN | 亮绿 |
| LIGHTCYAN | 亮青 |
| LIGHTRED | 亮红 |
| LIGHTMAGENTA | 亮紫 |
| YELLOW | 黄 |
| WHITE | 白 |


 4533
4533


 被折叠的 条评论
为什么被折叠?
被折叠的 条评论
为什么被折叠?
 到【灌水乐园】发言


