初学easyx图形库

        昨天学习了如何用easyx图形库来绘画哆啦A梦,今天继续学习easyx图形库的其他函数如何使用。easyx的图形函数都很直观,从函数名就可以得出这个结论。

        今天学习的函数比较简单,在画布上用数个圆画出一朵花。首先创建一块800*800大小的画布,然后为了方便找点坐标,所以初始化逻辑原点。最后,因为y轴是从上到下的方向,所以需要翻转y轴。之后进行绘画。代码如下:

#include<stdio.h>
#include<easyx.h>
#include<math.h>
#define PI 3.14
int main()
{
	initgraph(800, 800);
	setbkcolor(WHITE);
	cleardevice();
	setorigin(400, 400);
	setaspectratio(1, -1);//等于1方向不变,等于-1方向相反。前参数为x轴,后参数为y轴

	getchar();
	closegraph();
	return 0;
}

接下来我们以逻辑原点为圆心,画一个半径150像素的圆。

    setlinecolor(BLACK);//设直线的颜色
	setlinestyle(PS_SOLID, 10);//设直线的样式和粗细
	circle(0, 0, 150);//画圆

此时,我们需要在这个圆的周围画一圈圆让他们互相交集,产生花的效果。

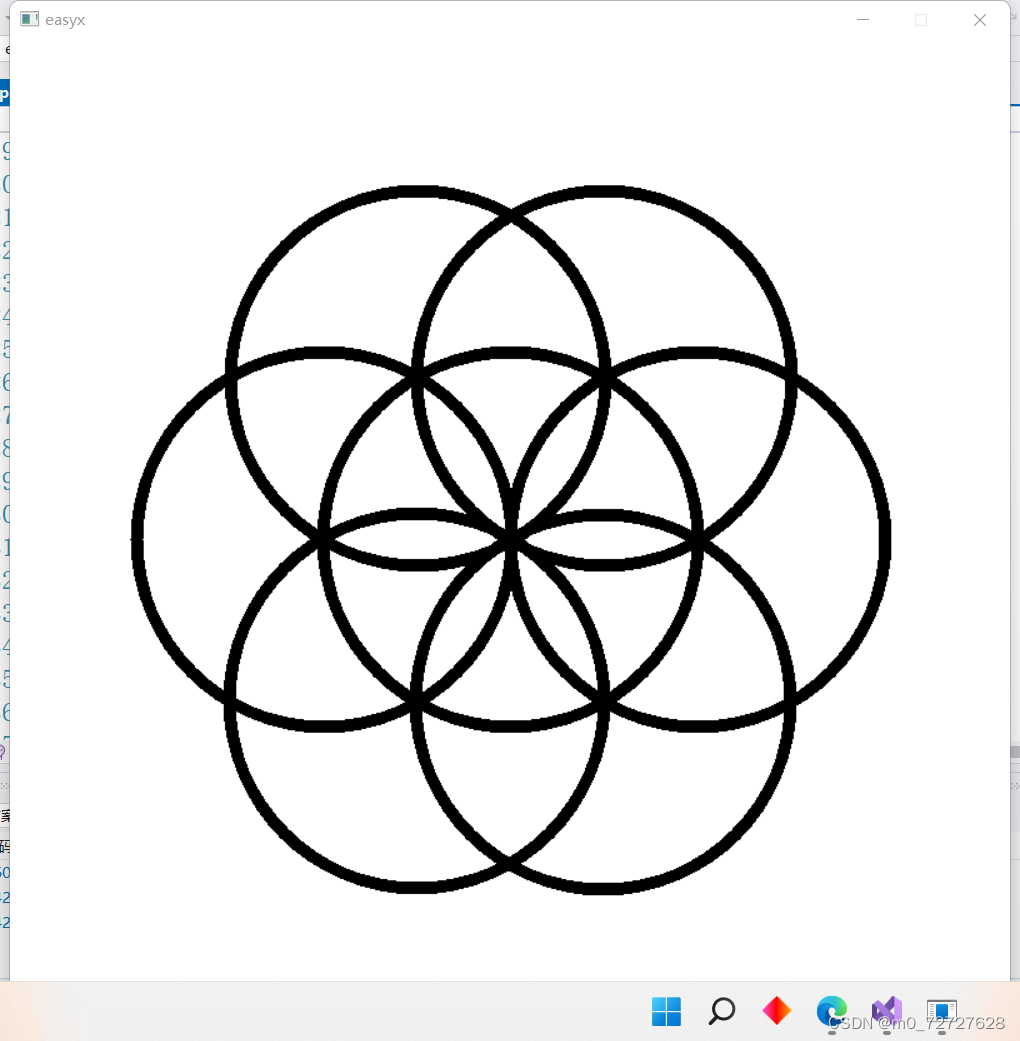
 此时,周围花的圆心都在最开始画的园的边上。我们以x轴0,150位第一个圆的圆心,以60°为间隔画圆。根据三角函数可知:此时各个圆的圆心坐标公式为:x=cos(n*60)*r,y=sin(n*60)*r。那么写成代码需要用到循环,代码如下:

for (int i = 0; i < 6; i++)
	{
		int x = cos(i * PI / 3) * 150;//i为当前圆的下标数,150为半径
		int y = sin(i * PI / 3) * 150;
		circle(x, y, 150);
	}

完整的代码如下:画出来的图与效果图一致

#include<stdio.h>
#include<easyx.h>
#include<math.h>
#define PI 3.14
int main()
{
	initgraph(800, 800);
	setbkcolor(WHITE);
	cleardevice();
	setorigin(400, 400);
	setaspectratio(1, -1);

	setlinecolor(BLACK);
	setlinestyle(PS_SOLID, 10);
	circle(0, 0, 150);

	for (int i = 0; i < 6; i++)
	{
		int x = cos(i * PI / 3) * 150;
		int y = sin(i * PI / 3) * 150;
		circle(x, y, 150);
	}

	getchar();
	closegraph();
	return 0;
}

  • 0
    点赞
  • 3
    收藏
    觉得还不错? 一键收藏
  • 0
    评论
/****************************************************** * EasyX Library for C++ (Ver:20151015(beta)) * http://www.easyx.cn * * graphics.h * 基于 EasyX.h,实现在 VC 下实现简单绘图。 * 同时,为了兼容 Turbo C/C++ 和 Borland C/C++ 等一系 * 列开发环境中的 BGI 绘图库函数,做了相应扩展。 ******************************************************/ #pragma once #include <easyx.h> // 兼容 initgraph 绘图模式的宏定义(无实际意义) #define DETECT 0 #define VGA 0 #define VGALO 0 #define VGAMED 0 #define VGAHI 0 #define CGA 0 #define CGAC0 0 #define CGAC1 0 #define CGAC2 0 #define CGAC3 0 #define CGAHI 0 #define EGA 0 #define EGALO 0 #define EGAHI 0 // BGI 格式的初始化图形设备,默认 640 x 480 HWND initgraph(int* gdriver, int* gmode, char* path); void bar(int left, int top, int right, int bottom); // 画无边框填充矩形 void bar3d(int left, int top, int right, int bottom, int depth, bool topflag); // 画有边框三维填充矩形 void drawpoly(int numpoints, const int *polypoints); // 画多边形 void fillpoly(int numpoints, const int *polypoints); // 画填充的多边形 int getmaxx(); // 获取最大的宽度值 int getmaxy(); // 获取最大的高度值 COLORREF getcolor(); // 获取当前绘图前景色 void setcolor(COLORREF color); // 设置当前绘图前景色 void setwritemode(int mode); // 设置前景的二元光栅操作模式 /////////////////////////////////////////////////////////////////////////////////// // 以下函数仅为兼容早期 EasyX 的接口,不建议使用。请使用相关新函数替换。 // #if _MSC_VER > 1200 #define _EASYX_DEPRECATE(_NewFunc) __declspec(deprecated("This function is deprecated. Instead, use this new function: " #_NewFunc ". See http://www.easyx.cn/help?" #_NewFunc " for details.")) #define _EASYX_DEPRECATE_OVERLOAD(_Func) __declspec(deprecated("This overload is deprecated. See http://www.easyx.cn/help?" #_Func " for details.")) #else #define _EASYX_DEPRECATE(_NewFunc) #define _EASYX_DEPRECATE_OVERLOAD(_Func) #endif // 设置当前字体样式(该函数已不再使用,请使用 settextstyle 代替) // nHeight: 字符的平均高度; // nWidth: 字符的平均宽度(0 表示自适应); // lpszFace: 字体名称; // nEscapement: 字符串的书写角度(单位 0.1 度); // nOrientation: 每个字符的书写角度(单位 0.1 度); // nWeight: 字符的笔画粗细(0 表示默认粗细); // bItalic: 是否斜体; // bUnderline: 是否下划线; // bStrikeOut: 是否删除线; // fbCharSet: 指定字符集; // fbOutPrecision: 指定文字的输出精度; // fbClipPrecision: 指定文字的剪辑精度; // fbQuality: 指定文字的输出质量; // fbPitchAndFamily: 指定以常规方式描述字体的字体系列。 _EASYX_DEPRECATE(settextstyle) void setfont(int nHeight, int nWidth, LPCTSTR lpszFace); _EASYX_DEPRECATE(settextstyle) void setfont(int nHeight, int nWidth, LPCTSTR lpszFace, int nEscapement, int nOrientation, int nWeight, bool bItalic, bool bUnderline, bool bStrikeOut); _EASYX_DEPRECATE(settextstyle) void setfont(int nHeight, int nWidth, LPCTSTR lpszFace, int nEscapement, int nOrientation, int nWeight, bool bItalic, bool bUnderline, bool bStrikeOut, BYTE fbCharSet, BYTE fbOutPrecision, BYTE fbClipPrecision, BYTE fbQuality, BYTE fbPitchAndFamily); _EASYX_DEPRECATE(settextstyle) void setfont(const LOGFONT *font); // 设置当前字体样式 _EASYX_DEPRECATE(gettextstyle) void getfont(LOGFONT *font); // 获取当前字体样式 // 以下填充样式不再使用,新的填充样式请参见帮助文件 #define NULL_FILL BS_NULL #define EMPTY_FILL BS_NULL #define SOLID_FILL BS_SOLID // 普通一组 #define BDIAGONAL_FILL BS_HATCHED, HS_BDIAGONAL // /// 填充 (对应 BGI 的 LTSLASH_FILL) #define CROSS_FILL BS_HATCHED, HS_CROSS // +++ 填充 #define DIAGCROSS_FILL BS_HATCHED, HS_DIAGCROSS // xxx 填充 (heavy cross hatch fill) (对应 BGI 的 XHTACH_FILL) #define DOT_FILL (BYTE*)"\x80\x00\x08\x00\x80\x00\x08\x00" // xxx 填充 (对应 BGI 的 WIDE_DOT_FILL) #define FDIAGONAL_FILL BS_HATCHED, HS_FDIAGONAL // \\\ 填充 #define HORIZONTAL_FILL BS_HATCHED, HS_HORIZONTAL // === 填充 #define VERTICAL_FILL BS_HATCHED, HS_VERTICAL // ||| 填充 // 密集一组 #define BDIAGONAL2_FILL (BYTE*)"\x44\x88\x11\x22\x44\x88\x11\x22" #define CROSS2_FILL (BYTE*)"\xff\x11\x11\x11\xff\x11\x11\x11" // (对应 BGI 的 fill HATCH_FILL) #define DIAGCROSS2_FILL (BYTE*)"\x55\x88\x55\x22\x55\x88\x55\x22" #define DOT2_FILL (BYTE*)"\x88\x00\x22\x00\x88\x00\x22\x00" // (对应 BGI 的 CLOSE_DOT_FILL) #define FDIAGONAL2_FILL (BYTE*)"\x22\x11\x88\x44\x22\x11\x88\x44" #define HORIZONTAL2_FILL (BYTE*)"\x00\x00\xff\x00\x00\x00\xff\x00" #define VERTICAL2_FILL (BYTE*)"\x11\x11\x11\x11\x11\x11\x11\x11" // 粗线一组 #define BDIAGONAL3_FILL (BYTE*)"\xe0\xc1\x83\x07\x0e\x1c\x38\x70" // (对应 BGI 的 SLASH_FILL) #define CROSS3_FILL (BYTE*)"\x30\x30\x30\x30\x30\x30\xff\xff" #define DIAGCROSS3_FILL (BYTE*)"\xc7\x83\xc7\xee\x7c\x38\x7c\xee" #define DOT3_FILL (BYTE*)"\xc0\xc0\x0c\x0c\xc0\xc0\x0c\x0c" #define FDIAGONAL3_FILL (BYTE*)"\x07\x83\xc1\xe0\x70\x38\x1c\x0e" #define HORIZONTAL3_FILL (BYTE*)"\xff\xff\x00\x00\xff\xff\x00\x00" // (对应 BGI 的 LINE_FILL) #define VERTICAL3_FILL (BYTE*)"\x33\x33\x33\x33\x33\x33\x33\x33" // 其它 #define INTERLEAVE_FILL (BYTE*)"\xcc\x33\xcc\x33\xcc\x33\xcc\x33" // (对应 BGI 的 INTERLEAVE_FILL)

“相关推荐”对你有帮助么?

  • 非常没帮助
  • 没帮助
  • 一般
  • 有帮助
  • 非常有帮助
提交
评论
添加红包

请填写红包祝福语或标题

红包个数最小为10个

红包金额最低5元

当前余额3.43前往充值 >
需支付:10.00
成就一亿技术人!
领取后你会自动成为博主和红包主的粉丝 规则
hope_wisdom
发出的红包
实付
使用余额支付
点击重新获取
扫码支付
钱包余额 0

抵扣说明:

1.余额是钱包充值的虚拟货币,按照1:1的比例进行支付金额的抵扣。
2.余额无法直接购买下载,可以购买VIP、付费专栏及课程。

余额充值