


往期鸿蒙5.0全套实战文章必看:(文中附带鸿蒙5.0全栈学习资料)
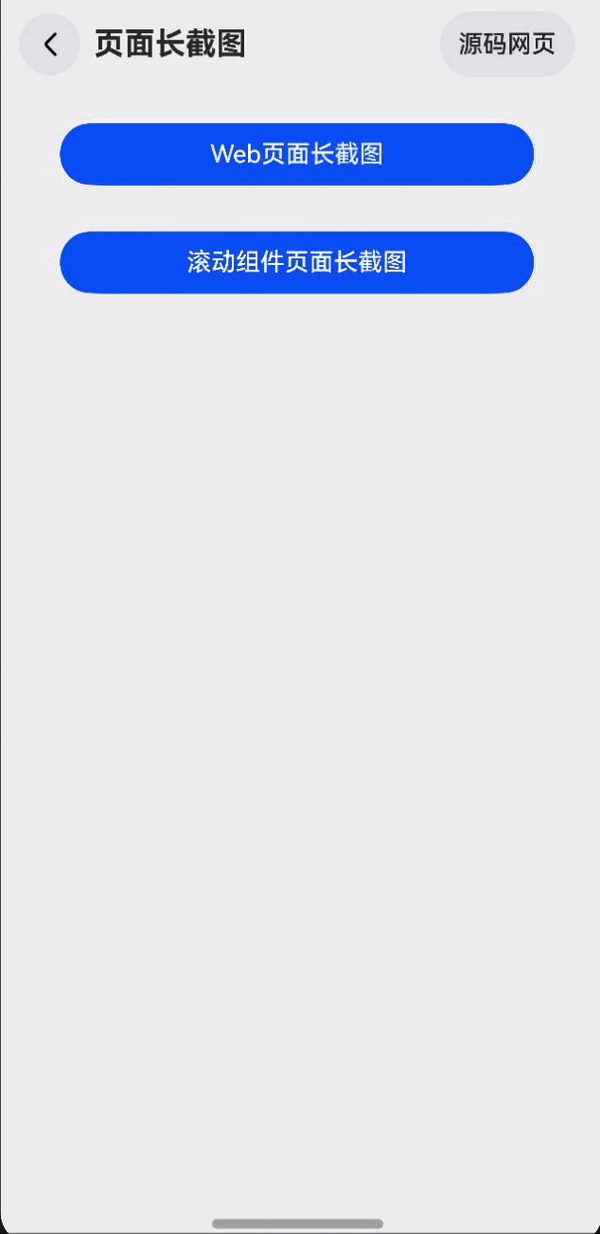
页面长截图
介绍
本案例实现了Web组件网页长截图、网页打印和可滚动组件的长截图方案。支持截图后展示大小浮窗预览、保存图片到相册、手势左滑关闭等功能。Web组件页面支持截图至当前滚动位置,支持使用Web组件打印前端页面的功能。滚动组件页面支持一键截图整个组件页面,支持滚动截图至当前位置。
- 使用场景:Web组件长截图适用于Web组件组织的页面。一键截图适用于滚动组件组织使用ForEach场景。滚动截图适用于滚动组件组织使用LazyForEach/ForEach场景。
效果图预览
使用说明
1、点击Web页面长截图后跳转至Web页面,左/右滑返回主页面(页面长截图),点击滚动组件页面长截图后跳转至滚动组件页面。
2、在Web页面,将页面滑动至想要长截图截取的位置,点击截图,稍等片刻后将弹出长截图缩略图(在取消或左滑返回前不允许滚动Web页面),左滑缩略图可直接返回Web页面,点击缩略图后截图放大至屏幕中间预览,可滑动预览或点击保存/取消。
3、在Web页面,点击打印,将调起系统打印弹窗,可选择与打印机交互打印页面。
4、在滚动组件页面,点击一键截图,稍等后自动生成整个滚动组件页面长截图缩略图,缩略图操作与步骤2相同。
5、在滚动组件页面,滑动至想要长截图截取的位置,点击滚动截图,稍等生成截取到当前位置的长截图缩略图,缩略图操作与步骤2相同。
实现思路
本解决方案通过Navigation组件实现页面路由,NavDestination作为Web子页面和滚动组件子页面的根容器。
- Web页面长截图通过循环滚动Web组件,每次滚动截取当前状态后拼接到离屏画布,最后一次性转为PixelMap图片并显示在全屏模态窗口中。再通过安全控件SaveButton以免权限申请的方式保存到用户的相册中。
- 滚动组件页面长截图“一键截图”方案通过循环滚动记录每轮滚动获取的buffer,滚动至底部后拼接生成长截图;“滚动截图”方案、图片显示与Web页面类似此处不再赘述。另外案例中滚动组件以List组件为例,Grid、Scroll和WaterFlow组件与List组件实现方式类似。
1、Web组件页面长截图及打印功能实现思路
(1) Web子页面创建Web组件加载指定的网页,获取Web组件和网页的实际尺寸,并给Web组件绑定自定义的id。
由于Web组件为自适应填充剩余空间,所以通过onAreaChange接口来获取Web组件的实际尺寸。 Web网页加载完成后在onPageEnd回调中通过WebviewController的接口runJavaScriptExt执行javascript代码以获取网页的实际大小。
Web({
  src: this.webPageUrl,
  controller: this.webviewController
})
  .id(Constants.WEB_ID)
  .onAreaChange((oldValue, newValue) => {
    this.webWidth = newValue.width as number;
    this.webHeight = newValue.height as number;
    logger.info(TAG, `Web component width: ${this.webWidth}, height: ${this.webHeight}`);
  })
  .onPageEnd(() => {
    const script = '[document.documentElement.scrollWidth, document.documentElement.scrollHeight]';
    this.webviewController.runJavaScriptExt(script).then((result) => {
      switch (result.getType()) {
        case webview.JsMessageType.ARRAY:
          this.h5Width = (result.getArray() as number[])[0]; // 这里的单位是vp
          this.h5Height = (result.getArray() as number[])[1];
          logger.info(TAG, `h5Width = ${this.h5Width}, h5Height = ${this.h5Height}`);
          break;
        default:
          logger.error(TAG, `Get web page size tyep error.`);
          break;
      }
    });
  })
(2) 创建截图函数,执行滚动截图并拼接。
截图的次数为网页高度/Web组件高度向上取整的结果。 最后一次截图的图片需要特殊处理,去除重复的部分,重复的部分高度即网页高度/Web组件高度取余。通过PixelMap对象的接口crop进行裁剪。
const snipTimes = Math.ceil(this.h5Height / this.webHeight);
for (let i = 0; i < snipTimes; i++) {
  const curSnip = await componentSnapshot.get(Constants.WEB_ID);
  // 最后一次截图需要特殊处理,去除重复部分
  if (i === lastTime) {
    logger.info(TAG, `The last snapshot image height ${leftoverHeight}`);
    await curSnip.crop(cropLeftover);
    offCanvasCtx.drawImage(curSnip, 0, this.webHeight * i, this.webWidth, leftoverHeight);
  } else {
    offCanvasCtx.drawImage(curSnip, 0, this.webHeight * i, this.webWidth, this.webHeight);
  }
  // Web通过webviewController实现滚动
  this.webviewController.scrollBy(0, this.webHeight);
  // 延时保证滚动完成
  await sleep(Constants.SCROLL_DURATION);
}
这里图片拼接的方案选择的是离屏画布渲染对象OffscreenCanvasRenderingContext2D,离屏绘制会将需要绘制的内容先绘制在缓存区,加快绘制速度。
为什么不使用PixelMap首尾拼接?
虽然componentSnapshot.get接口能够直接获取PixelMap对象,但是如果选择直接处理PixelMap需要手动将其转换为ArrayBuffer格式,再转为Uint8Array通过set接口拼接。 整个过程非常繁琐,且消耗资源,并且目前PixelMap接口还有格式限制,影响图片输出。
而使用画布组件,只需要
// 截图时拼接图片
offCanvasCtx.drawImage(curSnip, 0, this.webHeight * i, this.webWidth, this.webHeight);
...
// 截图完即可输出完整的长截图
this.mergedImage = offCanvasCtx.getPixelMap(0, 0, this.h5Width, this.h5Height);
(3) 使用Web组件打印前端页面的功能,可以通过print模块调起系统弹窗,与打印机交互进行打印。 要点:print模块需要申请ohos.permission.PRINT权限。
async webPrint() {
  // TODO: 知识点:通过print模块调起系统弹窗,与打印机交互进行打印。
  try {
    let webPrintDocadapter = this.webviewController.createWebPrintDocumentAdapter('example.pdf');
    print.print('example_jobid', webPrintDocadapter, null, getContext());
  } catch (error) {
    logger.error(`ErrorCode: ${(error as BusinessError).code},  Message: ${(error as BusinessError).message}`);
  }
}
2、可滚动页面组件长截图实现思路
(1) 滚动组件页面创建List组件(滚动组件)并给List组件绑定自定义的id,绑定Scroller控制器,以ForEach为例获取List组件中每项数据,通过滚动组件通用接口onDidScroll()获取当前组件的滚动量。
List({
  space: Constants.LIST_ELEMENT_VERTICAL_SPACE,
  scroller: this.scroller
}) {
  /*
  * TODO 性能知识点:列表中数据较多且不确定的情况下,使用LazyForEach进行数据循环渲染。
  * 当组件滑出可视区域外时,框架会进行组件销毁回收以降低内存占用。
  * 文档参考链接:https://developer.huawei.com/consumer/cn/doc/harmonyos-guides-V2/arkts-rendering-control-lazyforeach-0000001524417213-V2
  * 案例中使用:ForEach(this.commentArray, (item: Comment) => { ... } 实际业务中建议使用LazyForEach获取迭代数据:LazyForEach(this.commentData, (item: Comment) => { ... }
  */
  ForEach(this.commentArray, (item: Comment) => {
    ListItem() {
      CommentView({ comment: item })
        .backgroundColor($r('app.string.web_page_snap_shot_list_background_color'))
    }
  }, (item: Comment) => item.id)
}
.id(Constants.COMPONENT_ID)
.listDirection(Axis.Vertical)
.scrollBar(BarState.Off)
...
.onDidScroll((currentScrollOffset: number, currentScrollState: ScrollState) => {
  this.curYOffset = this.scroller.currentOffset().yOffset;
  logger.debug(TAG, `scrollable component page current position (y : ${this.curYOffset})`);
})
.onAreaChange((oldValue, newValue) => {
  // TODO: 高性能知识点: onAreaChange为高频回调,组件变动时每帧都会调用,避免冗余和耗时操作。
  this.listComponentWidth = newValue.width as number; // vp
  this.listComponentHeight = newValue.height as number; // vp
  // 初始化长截图宽高
  this.snapWidth = this.listComponentWidth;
  this.snapHeight = this.listComponentHeight
})
(2) 一键截图函数执行滚动截图,在递归调用时到判断已经滚动到底部后进行拼接
// 记录滚动量数组
this.scrollOffsets.push(this.scroller.currentOffset().yOffset);
// 调用组件截图接口获取当前截图
componentSnapshot.get(Constants.COMPONENT_ID, async (error: Error, pixmap: PixelMap) => {
  if (this.listWidth === 0) {
    let imageInfo = pixmap.getImageInfoSync();
    this.listWidth = imageInfo.size.width;
    this.listHeight = imageInfo.size.height;
    this.stride = pixmap.getBytesNumberPerRow();
  }
  let bytesNumber = pixmap.getPixelBytesNumber();
  let buffer: ArrayBuffer = new ArrayBuffer(bytesNumber);
  let area: image.PositionArea = {
    pixels: buffer,
    offset: 0,
    stride: this.stride,
    region: { size: { width: this.listWidth, height: this.listHeight }, x: 0, y: 0 }
  }
  // TODO: 知识点: readPixels、readPixelsSync均使用BGRA_8888像素格式,需搭配writePixels、writePixelsSync使用。
  pixmap.readPixelsSync(area);
  this.areaArray.push(area);
  // 循环过程中判断是否到达底部
  if (!this.scroller.isAtEnd()) {
    this.scroller.scrollPage({ next: true });
    await sleep(Constants.SCROLL_DURATION);
    await this.getPixelMapData();
  } else { // 滚动到底部后,通过每轮滚动获取的buffer,拼接生成长截图
    this.gitPixelMap();
    await this.afterSnapshot();
  }
})
(3) 滚动截图通过snapShotToOffset截图函数,执行滚动截图并拼接。
截图的次数为截图高度/滚动组件高度向上取整的结果。 最后一次截图的图片需要特殊处理,去除重复的部分,重复的部分高度即截图高度/滚动组件高度取余。 如果可滚动组件在最后一次滚动截图时触底,重复的部分高度为滚动组件高度减去截图高度/组件高度取余后再减去当前滚动量和滚动前滚动量的差值。 通过PixelMap对象的接口crop进行裁剪。
for (let i = 0; i < snipTimes; i++) {
      const curSnip = await componentSnapshot.get(Constants.COMPONENT_ID);
      // 最后一次截图需要特殊处理,去除重复部分
      if (i === lastTime) {
        await curSnip.crop(cropLeftover);
        offCanvasCtx.drawImage(curSnip, 0, this.listComponentHeight * i, this.listComponentWidth, leftoverHeight);
      } else {
        offCanvasCtx.drawImage(curSnip, 0, this.listComponentHeight * i, this.listComponentWidth, this.listComponentHeight);
      }
      // debug使用,否则影响性能
      logger.debug(TAG, `Screenshot ${i}: ${JSON.stringify(await curSnip.getImageInfo())}`);
      // 继续滚动
      this.scroller.scrollBy(0, this.listComponentHeight);
      // 延时保证滚动完成
      await sleep(Constants.SCROLL_DURATION);
      // 可滚动组件在最后一次滚动截图时触底,并且开始截图时未触底,需单独处理
      if (this.scroller.isAtEnd() && !scrollerTouchBottom) {
        cropLeftover.y = vp2px(this.listComponentHeight - leftoverHeight - (this.curYOffset - this.yOffsetBefore));
        logger.debug(TAG, `cropLeftover y ${cropLeftover.y}`);
      }
    }
    // 截图后的操作
    await this.afterSnapshot();
    // 获取pixelMap
    this.mergedImage = offCanvasCtx.getPixelMap(0, 0, this.snapWidth, this.snapHeight);
    // 拼接之后修改可动画变量
    this.afterGeneratorImage();
  }
3、截图后弹出预览窗口,可以滚动查看完整的截图,并保存图片到用户相册中。
本案例使用全屏模态窗口,开始截图后即弹出。截图未完成时,提示用户正在截图,截图完成后转为图片预览窗口,并且支持切换大小窗口。
预览窗口组件,参数通过@Status和@Link装饰器实现父(Web页面/滚动组件页面)子(预览弹窗)双向同步
@Component
export struct PreviewWindowComponent {
  ...
  // 截图后生成的图片,与父组件双向同步
  @Link mergedImage: PixelMap | undefined;
  // 截图后小窗大小,与父组件双向同步
  @Link snapPopupWidth: number;
  @Link snapPopupHeight: number;
  @Link snapPopupPosition: Position;
  // 是否显示预览窗口,与父组件双向同步
  @Link @Watch('onShowChanged') isShowSnapPopup: boolean;
  @Link showPreview: boolean;
  ...
}
窗口位置通过position属性设置,结合属性动画可以形成切换时的动画效果。
// 设置弹窗居中示例:
this.snapPopupPosition = PopupPosition.calculatePopupCenter(this.displayWidth, this.displayHeight, this.snapPopupWidth, this.snapPopupHeight)

/**
 * 设置弹窗居中。
 * @param displayWidth
 * @param displayHeight
 * @param snapPopupWidth
 * @param snapPopupHeight
 * @returns
 */
static calculatePopupCenter(displayWidth: number, displayHeight: number, snapPopupWidth: number,
snapPopupHeight: number): Position {

  return {
    x: (displayWidth - snapPopupWidth) / 2,
    y: (displayHeight - snapPopupHeight) / 2
  }
}
/**
 * 设置弹窗位置为左下。
 * @param displayHeight
 * @param snapPopupHeight
 * @returns
 */
static calculatePopupBottomLeft(displayHeight: number, snapPopupHeight: number): Position {

  return {
    x: Constants.POPUP_MARGIN_LEFT,
    y: displayHeight - snapPopupHeight - Constants.POPUP_MARGIN_BOTTOM
  }
}
保存图片相册使用SaveButton安全控件,该接口可以免申请读写相册权限,临时获取存储权限。
// 安全控件的UI有严格的限制,智能使用系统提供的属性
SaveButton({
  icon: SaveIconStyle.FULL_FILLED,
  text: SaveDescription.SAVE_IMAGE,
  buttonType: ButtonType.Capsule
})
  .onClick(async (event, result) => {
    this.saveSnapshot(result);
  })

/**
 * 保存图片到相册。
 */
async saveSnapshot(result: SaveButtonOnClickResult) {
  // TODO: 知识点:使用SaveButton组件可以免申请权限,用户点击后,临时将文件存入系统目录
  if (result == SaveButtonOnClickResult.SUCCESS) {
    let helper = photoAccessHelper.getPhotoAccessHelper(this.context);
    // 使用保存控件
    try {
      // onClick触发后10秒内通过createAsset接口创建图片文件,10秒后createAsset权限收回。
      let uri = await helper.createAsset(photoAccessHelper.PhotoType.IMAGE, 'png');
      // 使用uri打开文件,可以持续写入内容,写入过程不受时间限制
      let file = await fs.open(uri, fs.OpenMode.READ_WRITE | fs.OpenMode.CREATE);
      const imagePackerApi: image.ImagePacker = image.createImagePacker();
      let packOpts: image.PackingOption = {
        format: Constants.SAVE_IMAGE_FORMAT,
        quality: Constants.SAVE_IMAGE_QUALITY,
      };
      imagePackerApi.packToFile(this.mergedImage, file.fd, packOpts).then(() => {
        logger.info(TAG, `Succeeded in packToFile`);
        promptAction.showToast({
          message: $r('app.string.saved_to_album'),
          duration: Constants.SAVED_TO_ALBUM_PROMPT_DURATION
        })
      }).catch((error: BusinessError) => {
        logger.error(TAG, `Failed to packToFile. Error code is ${error.code}, message is ${error.message}`);
      })
    } catch (error) {
      const err: BusinessError = error as BusinessError;
      logger.error(TAG, `Failed to save photo. Error code is ${err.code}, message is ${err.message}`);
    }
  }
  this.closeSnapPopup();
}
本案例还支持左滑关闭预览小窗口的手势特性。窗口组件使用gesture通用属性绑定滑动手势,结合属性动画实现滑动窗口效果。
.gesture(
  PanGesture(this.panOption)
    .onActionStart(() => {
      // 保存滑动前的位置,以便用于恢复状态
      this.xPositionBefore = this.snapPopupPosition.x as number;
    })
    .onActionUpdate((event) => {
      // 左滑弹窗关闭,但允许向右滑动一小部分,形成弹性效果,提升操作手感
      if (event.offsetX < Constants.POPUP_RIGHT_PAN_GESTURE) {
        this.snapPopupPosition.x = this.xPositionBefore + event.offsetX;
      }
    })
    .onActionEnd((event) => {
      // 左滑超过一定阈值才会触发关闭弹窗,提升用户体验
      if (event.offsetX < Constants.POPUP_LEFT_PAN_GESTURE && !this.showPreview) {
        // 避免瞬间消失,而是平移动画后消失
        this.snapPopupPosition.x = Constants.POPUP_LEFT_SCREEN;
        sleep(Constants.ANIMATE_DURATION).then(() => {
          this.isShowSnapPopup = false;
        })
      } else if (!this.showPreview) {
        // 小窗预览时,右滑或者左滑没有达到阈值时恢复弹窗位置,结合动画属性形成弹性效果
        this.setPopupBottomLeft();
      }
    })
)
其他窗口UI及效果详见代码。
高性能知识点
- 本案例使用了Web预加载接口initializeWebEngine提前加载webview内核,并且使用prepareForPageLoad对目标网页进行预连接,提升打开网页的速度。
- 本案例使用了离屏渲染对象来拼接截图,将需要绘制的内容先绘制在缓存区,然后将其转换成图片,加快了绘制速度。
- 本案例使用了onAreaChange接口动态获取Web组件的尺寸,该接口属于高频回调接口,避免在该回调中调用冗余和耗时操作。还应尽可能的减少对状态变量的修改以避免触发大量UI重绘和动效耗时。
工程结构&模块类型
webpagesnapshot                      // har类型
├───mainpage
│   ├───MainPage.ets                 // ArkTS导航页面
│   ├───ScrollableComponentPage.ets  // 滚动组件页面
│   ├───WebPage.ets                  // Web页面
├───mock
│   ├───ListCommentData.ets          // 生成List数据
├───model
│   ├───BasicDataSource.ets          // IDataSource处理数据监听
│   ├───DataModel.ets                // List子项属性及数据源
│   ├───PopupPosition.ets            // 预览弹窗位置类
├───viewmodel
│   ├───PreviewWindowComponent.ets   // 预览页面
├───common
│   ├───Constants.ets                // 常量
│   └───Utils.ets                    // 通用工具
│


 1万+
1万+

 被折叠的 条评论
为什么被折叠?
被折叠的 条评论
为什么被折叠?
 到【灌水乐园】发言


