


靶场搭建
大家可以到GitHub上下载也可以按照我接下来的步骤
我是在kali上搭建的靶场我看网上很多都在ubuntu上,我ubuntu搭了好久的环境没成功
第一步先在kali上下载docker
我借鉴了这个链接https://blog.csdn.net/aodechudawei/article/details/122450720?spm=1001.2014.3001.5506
大家可以看看
第一步:添加Docker官方的GPG密钥
curl -fsSL https://download.docker.com/linux/debian/gpg | sudo apt-key add -
若果出现
您也许需要运行“apt --fix-broken install”来修正上面的错误。
下列软件包有未满足的依赖关系:
curl : 依赖: libcurl4 (= 7.80.0-3) 但是 7.74.0-1 正要被安装
software-properties-common : 依赖: gir1.2-packagekitglib-1.0 (>= 1.1.0-2) 但是它将不会被安装
推荐: packagekit 但是它将不会被安装
E: 有未能满足的依赖关系。请尝试不指明软件包的名字来运行“apt --fix-broken install”(也可以指定一个解决办法)。
可以尝试sudo dpkg -r 加上软件包的名称就可以啦
第二步更新源
echo 'deb https://download.docker.com/linux/debian stretch stable'> /etc/apt/sources.list.d/docker.list
第三步直接导入证书
apt-get install apt-transport-https ca-certificates curl gnupg2 software-properties-common
第四步更新
apt-get update
这时候可能会出现
E: 仓库 “http://mirrors.aliyun.com/kali-security kali-rolling Release” 没有 Release 文件。
N: 无法安全地用该源进行更新,所以默认禁用该源。
N: 参见 apt-secure(8) 手册以了解仓库创建和用户配置方面的细节。
这时候我们需要进入
cd /etc/apt/sources.list.d
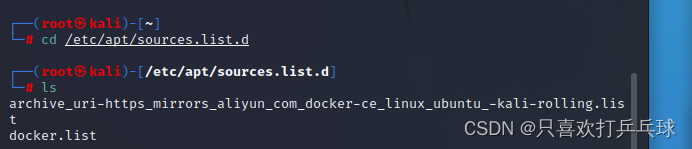
打开第一个文件
vim archive_uri-https_mirrors_aliyun_com_docker-ce_linux_ubuntu_-kali-rolling.list

把里面的源都注释掉保存退出就可以啦
继续更新
apt-get update
第五步: 安装docker 镜像
sudo apt install docker.io
安装docker之后来安装靶场吧
这个文章写的很细节
第一步克隆
sudo git clone https://github.com/zhl2008/awd-platform.git
这里可能在kali上会出现fatal:无法访问的问题
这个时候可以在中间加上gitclone.com
sudo git clone https://gitclone.com/github.com/zhl2008/awd-platform.git
第二步进入目录
cd awd-platform/
第三步下载镜像
sudo docker pull zhl2008/web_14.04
第四步开启靶机
python2 batch.py web_yunnan_simple 3
python2 start.py ./ 3
第五步连接裁判机,启动check脚本
1.docker attach check_server
2.敲一下回车键
3.python2 check.py
第六步修改check.py文件
#!/usr/bin/env python
# -*- coding:utf8 -*-
'''
'''
import hashlib
import base64
sleep_time = 300
debug = True
headers = {"User-Agent":"Mozilla/5.0 (Windows NT 6.1; Win64; x64) AppleWebKit/537.36 (KHTML, like Gecko) Chrome/60.0.3112.90 Safari/537.36"}
import time
import httplib
import urllib2
import ssl
my_time = 'AAAA'
__doc__ = 'http(method,host,port,url,data,headers)'
flag_server = '172.17.0.1'
key = '744def038f39652db118a68ab34895dc'
hosts = open('host.lists','r').readlines()
user_id = [host.split(':')[0] for host in hosts]
hosts = [host.split(':')[1] for host in hosts]
port = 80
def http(method,host,port,url,data,headers):
con=httplib.HTTPConnection(host,port,timeout=2)
if method=='post' or method=='POST':
headers['Content-Length']=len(data)
headers['Content-Type']='application/x-www-form-urlencoded'
con.request("POST",url,data,headers=headers)
else:
headers['Content-Length'] = 0
con.request("GET",url,headers=headers)
res = con.getresponse()
if res.getheader('set-cookie'):
#headers['Cookie'] = res.getheader('set-cookie')
pass
if res.getheader('Location'):
print "Your 302 direct is: "+res.getheader('Location')
a = res.read()
con.close()
return a
def https(method,host,port,url,data,headers):
url = 'https://' + host + ":" + str(port) + url
req = urllib2.Request(url,data,headers)
response = urllib2.urlopen(req)
return response.read()
def get_score():
res = http('get',flag_server,8080,'/score.php?key=%s'%key,'',headers)
print res
user_scores = res.split('|')
print "******************************************************************"
res = ''
print res
print "******************************************************************"
return user_scores
def write_score(scores):
scores = '|'.join(scores)
res = http('get',flag_server,8080,'/score.php?key=%s&write=1&score=%s'%(key,scores),'',headers)
if res == "success":
return True
else:
print res
raise ValueError
class check():
def index_check(self):
res = http('get',host,port,'/index.php?file=%s'%str(my_time),'',headers)
if 'perspi' in res:
return True
if debug:
print "[fail!] index_fail"
return False
def server_check():
try:
a = check()
if not a.index_check():
return False
return True
except Exception,e:
print e
return False
game_round = 0
while True:
scores = get_score()
scores = []
print "--------------------------- round %d -------------------------------"%game_round
for host in hosts:
print "---------------------------------------------------------------"
host = host[:-1]
if server_check():
print "Host: "+host+" seems ok"
scores.append("0")
else:
print "Host: "+host+" seems down"
scores.append("-10")
game_round += 1
write_score(scores)
time.sleep(sleep_time)
第六步flag刷新时间修改
/awd-platform/check_server/gen_flag.py 的time_span 变量设置为5*60
/awd-platform/flag_server/config.php 的 min_time_span变量设置为300
/awd-platform/flag.py 变量time_span设置为5*60
第七步修改score.txt和result.txt权限为777
chmod 777 score.txt result.txt
第八步计分板解压
资源下载地址如下:
https://pan.baidu.com/s/18KlIeluaTtm-kT3KuXHseQ 密码:cvdn
将计分板文件拷贝至awd-platform下的flag_server文件夹下,执行以下命令解压:
第九步需要将index.php中的result的IP地址改为kali的地址
有的会有两个index.php的文件你们可以把里面写有“...hack”的删掉
然后就可以啦记得解压到flag_server目录下

打开就是这个样子好看
到这里就差不多了但是还有一个小bug
就是无限提交flag的bug我借鉴了网上博主的一个文本谢谢啦
<?php
require 'config.php';
#require 'pass.php';
$now_time = time();
$flag_file = 'xxxxxxxx_flag';
function check_time($attack_uid,$victim_uid){
global $time_file;
global $min_time_span;
global $now_time;
global $team_number;
$old_times = explode('|' , file_get_contents($time_file));
$id = $attack_uid * $team_number + $victim_uid;
if ($now_time - $old_times[$id] < $min_time_span){
die("error: submit too quick ". ($min_time_span + $old_times[$id] - $now_time). " seconds left");
}else{
return True;
}
}
function update_time($attack_uid,$victim_uid){
global $time_file;
global $now_time;
global $team_number;
$old_times = explode('|' , file_get_contents($time_file));
$id = $attack_uid * $team_number + $victim_uid;
$old_times[$id] = $now_time;
$now_times = $old_times;
file_put_contents($time_file,implode('|' , $now_times));
}
function match_flag($flag,$flag_file){
$flags = explode("\n",file_get_contents($flag_file));
foreach ($flags as $real_flag) {
$tmp = explode(":",$real_flag);
$host = $tmp[0];
$real_flag = $tmp[1];
if($flag==$real_flag){
return $host;
}
}
return '';
}
function check_flag($attack_id,$flag){
$flags = explode("\n",file_get_contents('submit_flag.txt'));
foreach ($flags as $sub_flag) {
$tmp = explode(":",$sub_flag);
$attacker = $tmp[0];
$real_flag = $tmp[1];
$submit_status = $tmp[2];
if($flag==$real_flag && $attack_id == $attacker){
return '';
}
}
return $flag;
}
if(isset($_REQUEST['token']) && isset($_REQUEST['flag'])){
$token = $_REQUEST['token'];
$flag = $_REQUEST['flag'];
//$ip = isset($_REQUEST['test_ip'])?$_REQUEST['test_ip']:$_SERVER['REMOTE_ADDR'];
if(!array_key_exists($token , $token_list)){
die('error: no such token');
}
$ip = match_flag($flag,$flag_file);
if(!$ip){
die('error: no such flag');
}
$attack_id = $token_list[$token];
$victim_id = $ip_list[$ip];
if($attack_id === $victim_id){
die('error: do not attack yourself');
}
$flag_validity = check_flag($attack_id,$flag);
if(!$flag_validity){
die('error: The flag has already been submitted');
}
file_put_contents('submit_flag.txt',$attack_id . ':' . $flag . "\n", FILE_APPEND);
for($i=0;$i<$team_number;$i++){
$scores[$i] = 0;
}
$scores[$attack_id] = 2;
$scores[$victim_id] = -2;
check_time($attack_id,$victim_id);
$score = implode('|',$scores);
file_put_contents('result.txt',$user_list[$attack_id] . ' => ' . $user_list[$victim_id]."\n", FILE_APPEND);
$cmd = 'curl "127.0.0.1/score.php?key='.$key.'&write=1&score='.$score.'"';
system($cmd);
update_time($attack_id,$victim_id);
}else {
die("error: empty token or empty target");
}
这个脚本好好用主要的修改为增加了check_flag()函数和判断代码
除替换awd-platform/flag_server/flag_file.php外还需要在awd-platform/flag_server/目录下执行以下操作:
touch submit_flag.txt
chmod 777 submit_flag.txt
到这里就搭建完成了
接下来在数一下连接MobaXterm的问题吧
总共是3个队
积分大屏的IP是
192.168.43.150:8080
队伍的IP
team1-192.168.43.150:8801
team2-192.168.43.150:8802
team3-192.168.43.150:8803
ssh连接的IP是
team1-192.168.43.150:2201
team2-192.168.43.150:2202
team3-192.168.43.150:2203
用户名和密码在pass.txt文件里
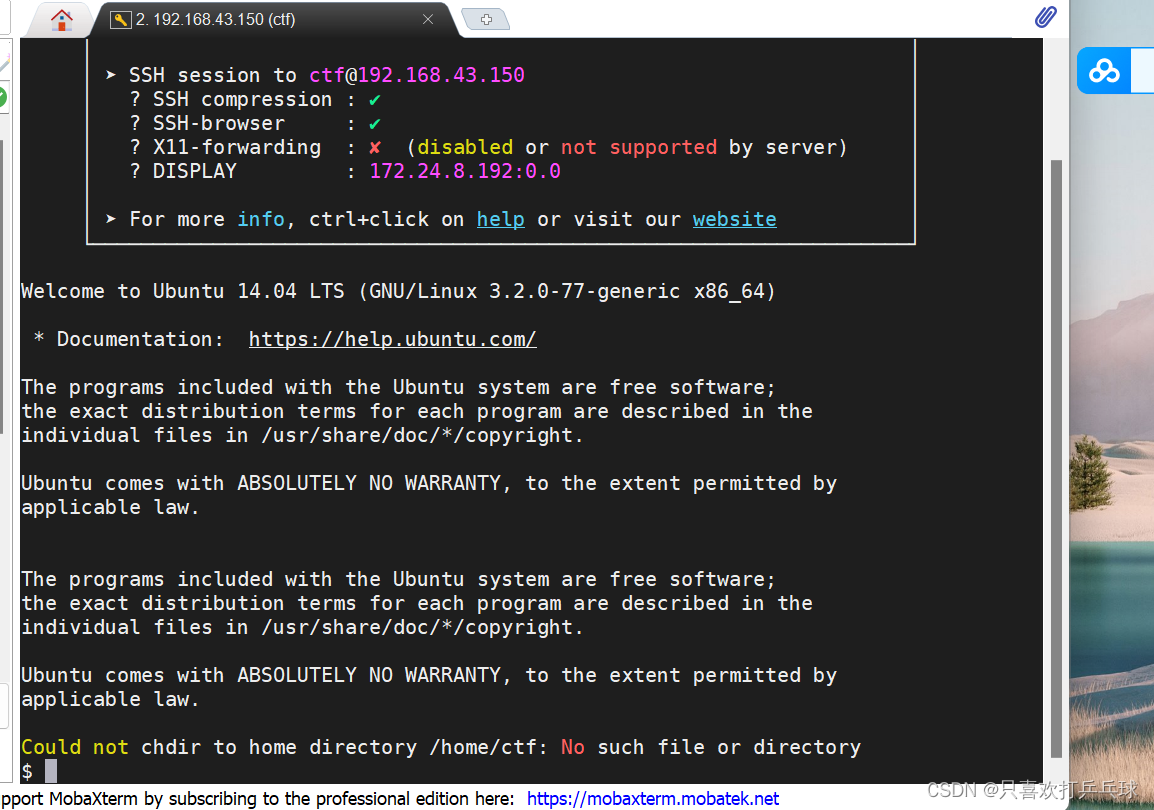
连接后就是这个样子
如果感觉看不清文件目录的话
使用
python3 -c 'import pty;pty.spawn("/bin/bash")'
就可以了


 460
460


 被折叠的 条评论
为什么被折叠?
被折叠的 条评论
为什么被折叠?
 到【灌水乐园】发言


