


主要技术
VUE3、pinia、ts、Spring Boot
一、下载需要的开发工具
-
HBuilderX
- 微信开发者工具
HBuilderX

微信开发者工具

二、新建项目
通过vue-cli命令行创建项目
参考:
2.1全局安装 vue-cli
npm install -g @vue/cli--查看是否已经安装成功
vue -version
2.2 创建uni-app
创建以 typescript 开发的工程(模板项目存放于 Github,由于国内网络环境问题,可能下载失败,如果下载失败,你可以直接使用下面的压缩包解压就可以了)
npx degit dcloudio/uni-preset-vue#vite-ts my-vue3-project2.3用HB打开项目,安装依赖
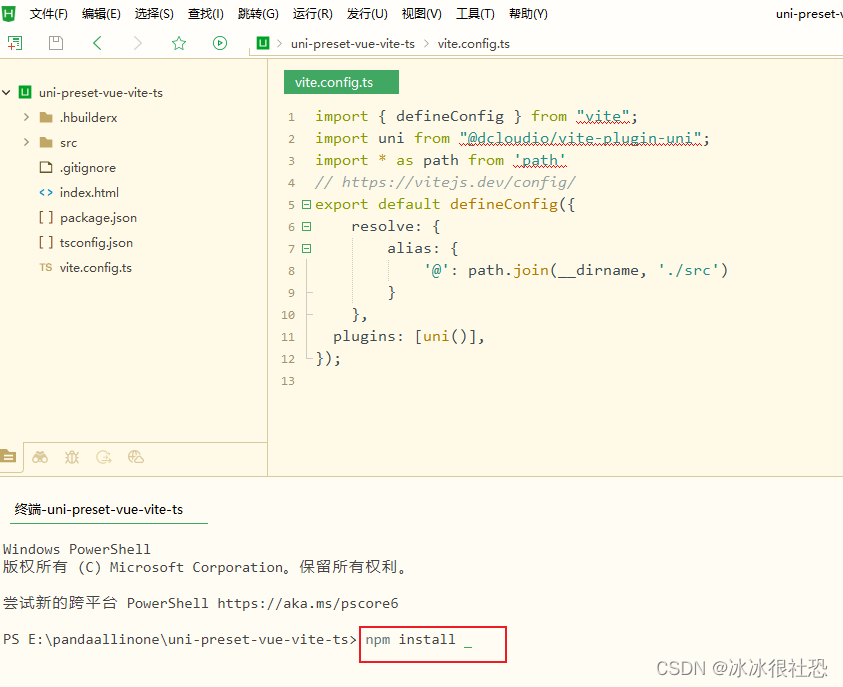
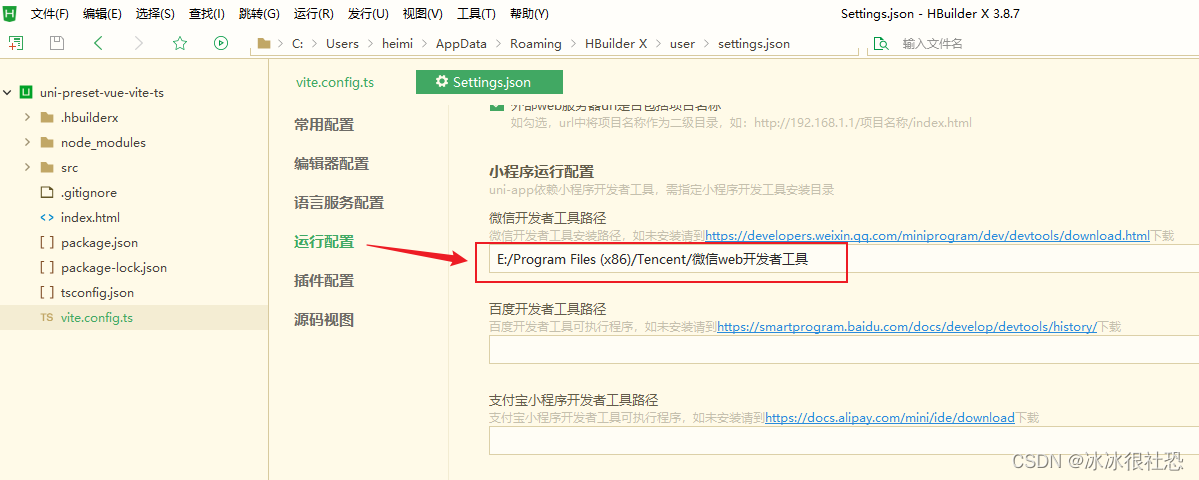
2.4 设置微信开发工具地址

此处设置你第一步安装微信开发工具的路径,一定不能错
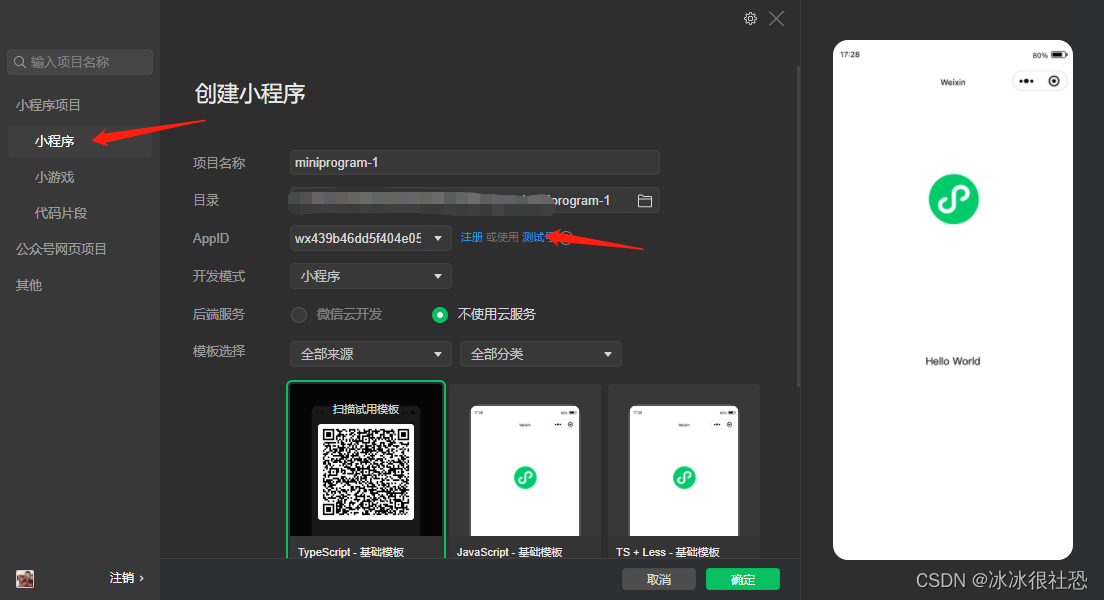
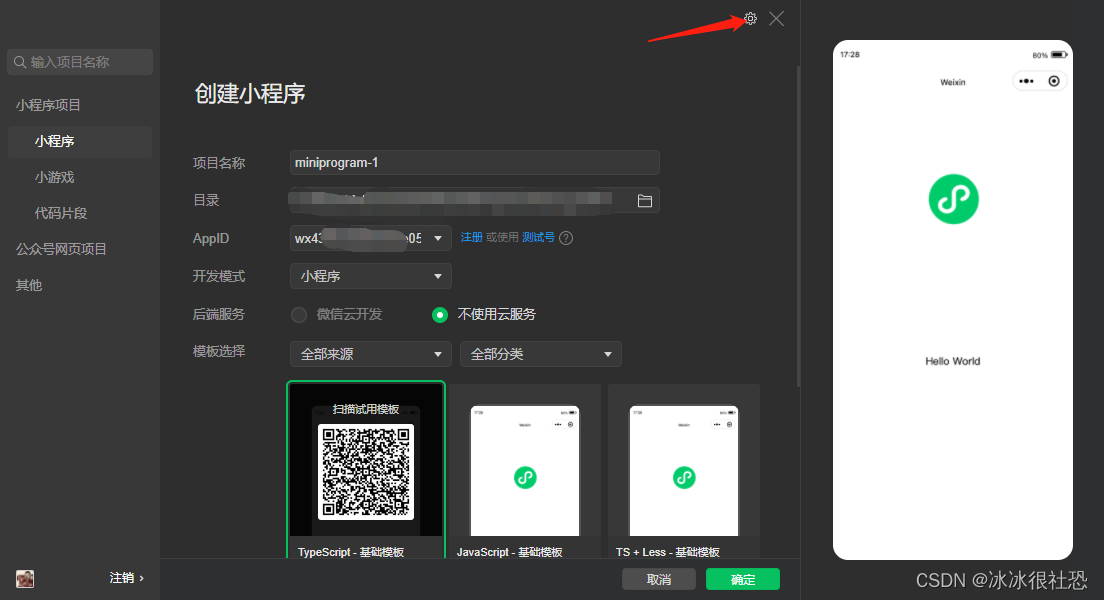
2.5打开微信开发者工具,点击小程序->点击+号创建小程序(注意这步操作只是拿到测试的appid,不需要真的创建,复制号测试appid)
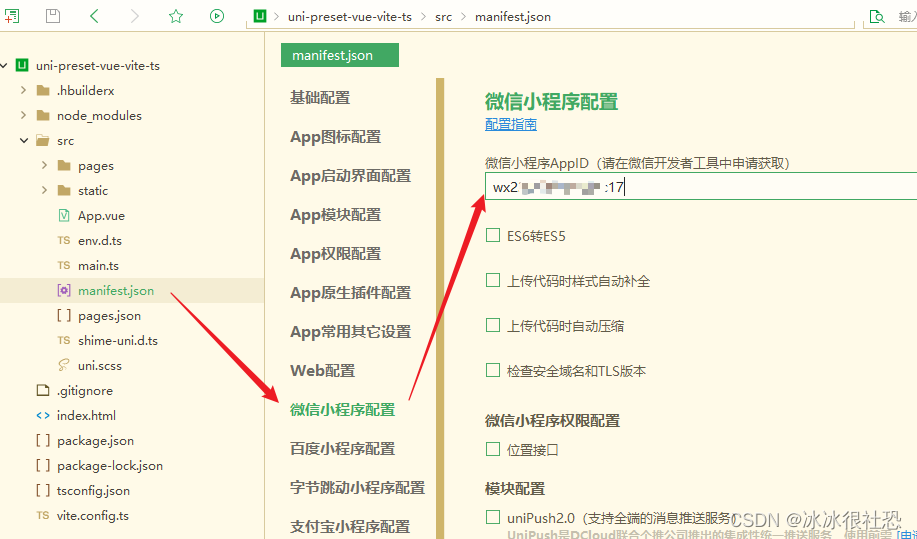
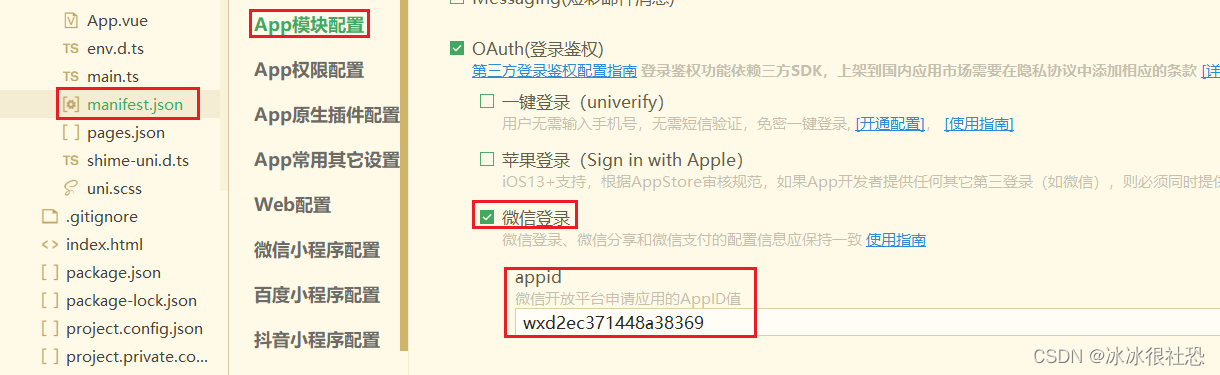
2.6将获得的appid配置到uniapp项目的manifest.json文件中:
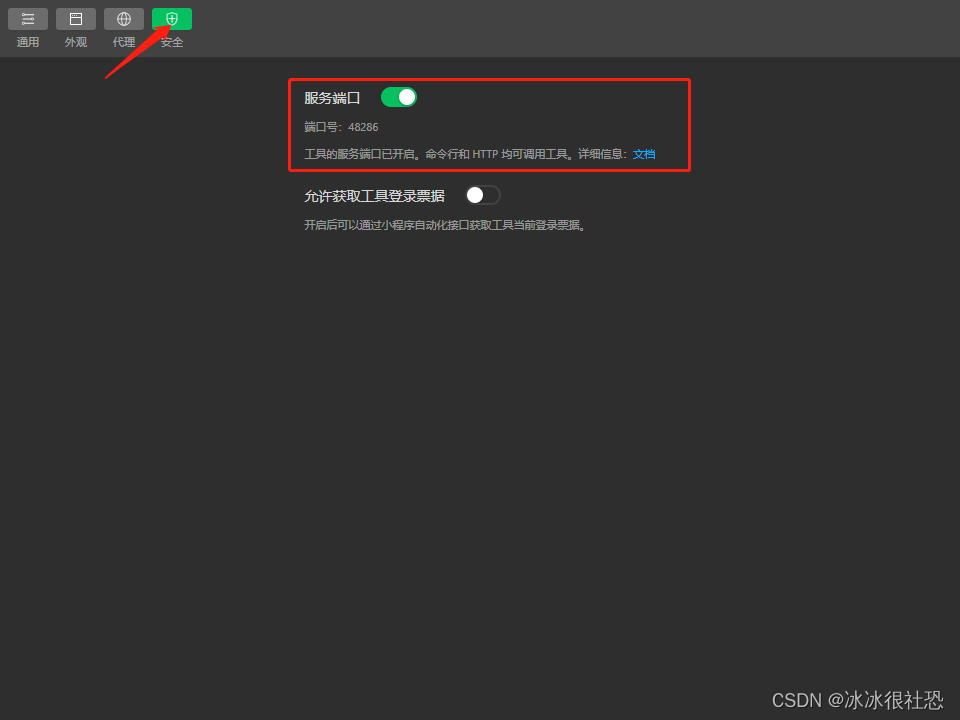
 2.7 微信开发者工具的设置,找到安全设置,将服务端口打开
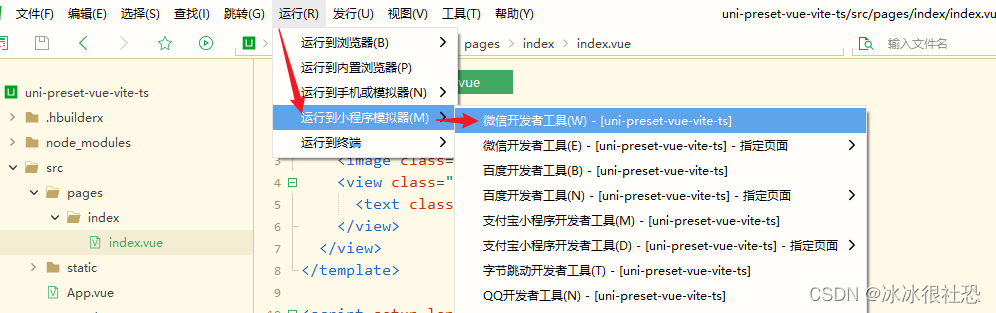
2.8回到HBuilderX 点击运行到微信开发者工具就可以了

三、uni-app实现页面间的跳转并传递参数(switchTab、navigateTo)
目标:

3.1 switchTab跳转
设置跳转页面

about.vue
<template>
  <!-- 页面内容 -->
  <view class=".text-area">
	  <text>switchTab接收:{{testValue}}</text>
  </view>
</template>

<script lang="ts" setup>
import { onMounted,ref,watch} from 'vue'
import useStore from '../../store/store'
const storeWx=useStore();
const testValue=ref()
onMounted(() => {
	showValue();
})
watch(()=>storeWx.deliver,()=>{
	showValue();
})
const showValue=()=>{
	testValue.value=storeWx.deliver
}
</script>
<style scoped>
	.text-area{
		position: fixed;
		top: 340px; /* 距离顶部10像素 */
		left: 50%;
		transform: translateX(-50%); /* 水平居中 */
	}
</style>
index.vue
<template>
  <view class="text-area">
    <input
      class="custom-input"
      type="text"
      v-model="inputValue"
      placeholder="请在此输入"
    />
    <view class="button-container">
      <button @click="switchTabtiaozhuan">switchTab跳转到关于页面</button>
	  <button @click="navigaTotiaozhuan">navigaTo跳转到关于页面</button>
    </view>
  </view>
</template>

<script lang="ts" setup>
import { onMounted, ref,watch } from 'vue';
import useStore from '../../store/store'

const storeWx=useStore();
const inputValue = ref('');

onMounted(() => {
})

const switchTabtiaozhuan = () => {
	storeWx.deliver=inputValue,
	uni.switchTab({
	  url: '/pages/about/about'
	});
}

const navigaTotiaozhuan = () => {
	    uni.navigateTo({
	                url: `/pages/log/log?key1=${(inputValue.value)}`,
	                fail: (err) => {
	                    console.log(err)
	                }
	            });
}
</script>
<style scoped>
.text-area {
  position: fixed;
  top: 340px;
  left: 50%;
  transform: translateX(-50%);
  padding-bottom: 16px; /* 为整个.text-area添加底部内边距,使输入框和按钮之间有一定空间 */
}

.custom-input {
  border-color: #3cc51f;
  box-shadow: 0 0 0 2px rgba(60, 197, 31, 0.3);
  width: 300px;
  height: 40px;
}

/* 为按钮添加上外边距 */
.view.button-container {
  margin-top: 16px; /* 添加上外边距,使得按钮与输入框之间有间隔 */
}

/* 如果没有给按钮单独设置类名,可以使用伪类 nth-child 选择器 */
.text-area > view:nth-child(2) {
  margin-top: 16px;
}
</style>
mine.vue
<template>
	<view class="text-area">
	  <text class="title">我的</text>
	</view>
</template>
进入page.json注册页面
{
  "pages": [
	  {
	        "path": "pages/index/index",
	        "style": {
	          "navigationBarTitleText": "uni-app"
	        }
	      },
		  {
		        "path": "pages/home/home",
		        "style": {
		          "navigationBarTitleText": "主页"
		        }
		      },
	      {
	        "path": "pages/mine/mine",
	        "style": {
	          "navigationBarTitleText": "我的"
	        }
	      } ,
		  {
		    "path": "pages/about/about",
		    "style": {
		      "navigationBarTitleText": "关于"
		    }
		  }
  ],
  "tabBar": {
    "color": "#7A7E83",
    "selectedColor": "#3cc51f",
    "borderStyle": "black",
    "list": [
      {
        "pagePath": "pages/index/index",
        "text": "首页",
        "iconPath": "static/index.png",
        "selectedIconPath": "static/index1.png"
      },
      {
        "pagePath": "pages/about/about",
        "text": "关于",
        "iconPath": "static/about.png",
        "selectedIconPath": "static/about1.png"
      },
	  {
	    "pagePath": "pages/mine/mine",
	    "text": "我的",
	    "iconPath": "static/mine.png",
	    "selectedIconPath": "static/mine1.png"
	  }
    ]
  }
}
3.2 navigateTo跳转
设置页面
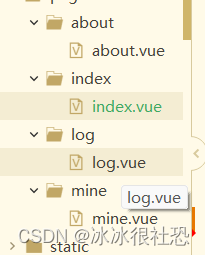
index.vue

log.vue
<template>
  <!-- 页面内容 -->
  <view class=".text-area">
    <text>navigateTo接受到的数据:{{ testNavigateTo }}</text>
  </view>
</template>

<script lang="ts" setup>
import { onMounted, ref} from 'vue';
import { onLoad } from '@dcloudio/uni-app';

const testNavigateTo = ref('');

onLoad((params) => {
		testNavigateTo.value = params.key1;
  console.log(params.key1);
});
</script>
<style scoped>
.text-area {
  position: fixed;
  top: 340px; /* 距离顶部10像素 */
  left: 50%;
  transform: translateX(-50%); /* 水平居中 */
}
</style>
<style scoped>
	.text-area{
		position: fixed;
		top: 340px; /* 距离顶部10像素 */
		left: 50%;
		transform: translateX(-50%); /* 水平居中 */
	}
</style>
page.json注册
{
  "pages": [
	  {
	        "path": "pages/index/index",
	        "style": {
	          "navigationBarTitleText": "uni-app"
	        }
	      },
	      {
	        "path": "pages/mine/mine",
	        "style": {
	          "navigationBarTitleText": "我的"
	        }
	      } ,
		  {
		    "path": "pages/about/about",
		    "style": {
		      "navigationBarTitleText": "关于"
		    }
		  } ,
		  {
		    "path": "pages/log/log",
		    "style": {
		      "navigationBarTitleText": "日志"
		    }
		  }
  ],
  "tabBar": {
    "color": "#7A7E83",
    "selectedColor": "#3cc51f",
    "borderStyle": "black",
    "list": [
      {
        "pagePath": "pages/index/index",
        "text": "首页",
        "iconPath": "static/index.png",
        "selectedIconPath": "static/index1.png"
      },
      {
        "pagePath": "pages/about/about",
        "text": "关于",
        "iconPath": "static/about.png",
        "selectedIconPath": "static/about1.png"
      },
	  {
	    "pagePath": "pages/mine/mine",
	    "text": "我的",
	    "iconPath": "static/mine.png",
	    "selectedIconPath": "static/mine1.png"
	  }
    ]
  }
}
四、微信小程序登录
设置Hbuildder微信登录
1 微信模块配置
2 微信小程序配置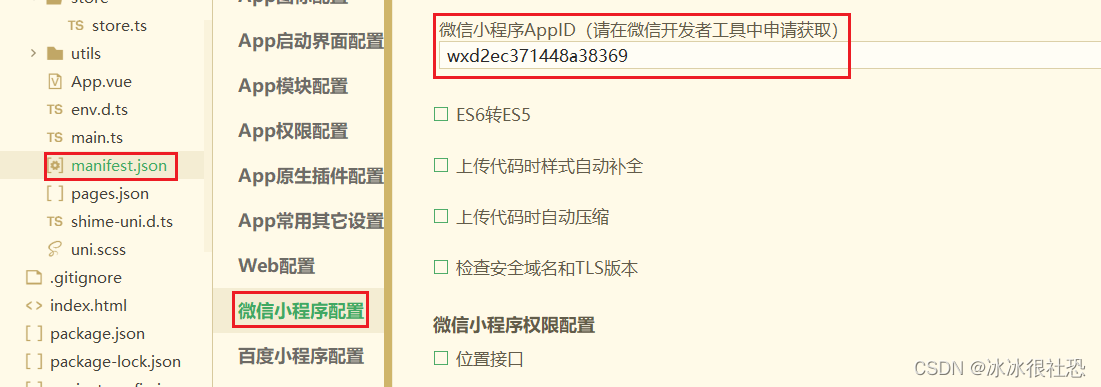
再我的页面设置登录逻辑,因为我们使用到了pinia,所以我们先下载一个pinia的插件
问题:pinia可能于vue-demi版本冲突,所以本项目使用2.0.35版本的pinia

npm install pinia@2.0.35将pinia导入项目

import { createSSRApp } from "vue";
import App from "./App.vue";
import * as Pinia from 'pinia';
export function createApp() {
  const app = createSSRApp(App);
  	app.use(Pinia.createPinia());
  return {
    app,
	Pinia, // 此处必须将 Pinia 返回
  };
}
创建pinia仓库

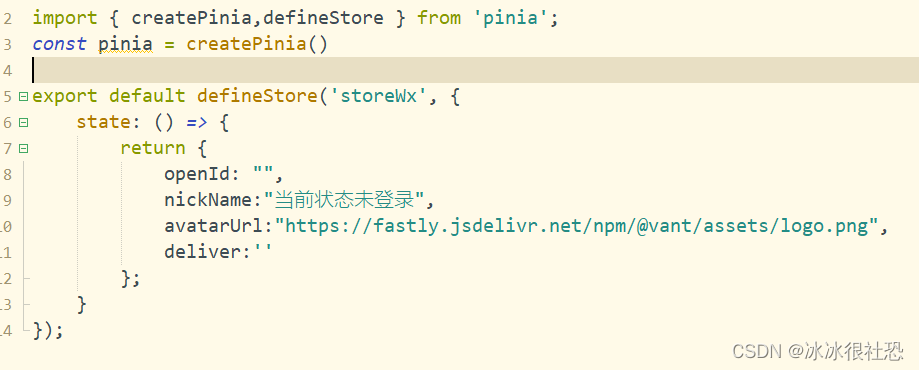
import { createPinia,defineStore } from 'pinia';
const pinia = createPinia()

export default defineStore('storeWx', {
	state: () => {
		return {
			openId: "",
			nickName:"当前状态未登录",
			avatarUrl:"https://fastly.jsdelivr.net/npm/@vant/assets/logo.png",
			deliver:''
		};
	}
});
uni-app的uni.login获取openid,我们可以先判断openid是否已经存在,若不存在,就像后端发送请求获取openid

目标样式:


前端逻辑代码:
mine.vue
<template>
	<view>
		<view>
			<image class="avatar-background" :src="storeWx.avatarUrl" style="position:absolute; z-index:-1; top:0; left:0; width:100%; height:40%; object-fit:cover;"></image><br>
			<text class="nickname">用户昵称:{{storeWx.nickName}}</text>
			<a href="storeWx.nickName"></a>
		</view><br>


		<button class="button-style" @click="wxLogin" v-if="storeWx.openId==''">微信登录</button>
	</view>
</template>

<script lang="ts" setup>
import { onMounted, reactive, ref } from 'vue'
import useStore from '../../store/store';
  const storeWx = useStore();
	onMounted(() => {

	})
	const wxLogin = () => {
						uni.login({
						  provider: 'weixin',
						  success: function (loginRes) {
						    const code = loginRes.code;
						    uni.request({
						      url: "http://localhost:8080/api/weixin/access_token",
						      method: "GET",
						      data: {
						        code: code,
						        // 其他可能需要的参数,如appid、secret等
						      },
						      success: (response) => {
						        console.log(response);
								storeWx.openId=response.data.openid,
						        console.log("向后端请求成功");
								 // 获取用户信息
								    uni.getUserInfo({
								      provider: 'weixin',
								      success: function (infoRes) {
										  storeWx.nickName=infoRes.userInfo.nickName,
										  storeWx.avatarUrl=infoRes.userInfo.avatarUrl,
										  //登录后隐藏按钮
										  console.log(infoRes)
								        // console.log('用户昵称为:' + infoRes.userInfo.avatarUrl);
								      }
								    });
						      },
						    });
						  },
						});
	}
</script>

<style scoped>

.nickname {
  position: fixed;
  top: 280px; /* 距离顶部10像素 */
  left: 50%;
  transform: translateX(-50%); /* 水平居中 */
  /* 其他文本样式 */
}
.button-style{
	position: fixed;
	top: 340px; /* 距离顶部10像素 */
	left: 50%;
	transform: translateX(-50%); /* 水平居中 */
}
</style>
后端逻辑代码:
@RestController
@RequestMapping("/api/weixin")
public class WeChatController {

    private final  String appid ="wx84e44fcb3a08e24c";
    private final  String secret ="1e6d37e46955fa63577d55534a384e46";
    @GetMapping("/access_token")
    public JSONObject getOpenId(@RequestParam String code){

        String url="https://api.weixin.qq.com/sns/jscode2session?appid="
                +appid+"&secret="+secret+"&js_code="+code+"&grant_type=authorization_code";

        String s = HttpUtil.get(url);
        JSONObject entries = JSONUtil.parseObj(s);
        return entries;
    }
}
要注意的依赖JSONUtil:
        <dependency>
            <groupId>cn.hutool</groupId>
            <artifactId>hutool-all</artifactId>
            <version>5.8.16</version>
        </dependency>


 1万+
1万+


 被折叠的 条评论
为什么被折叠?
被折叠的 条评论
为什么被折叠?
 到【灌水乐园】发言


