


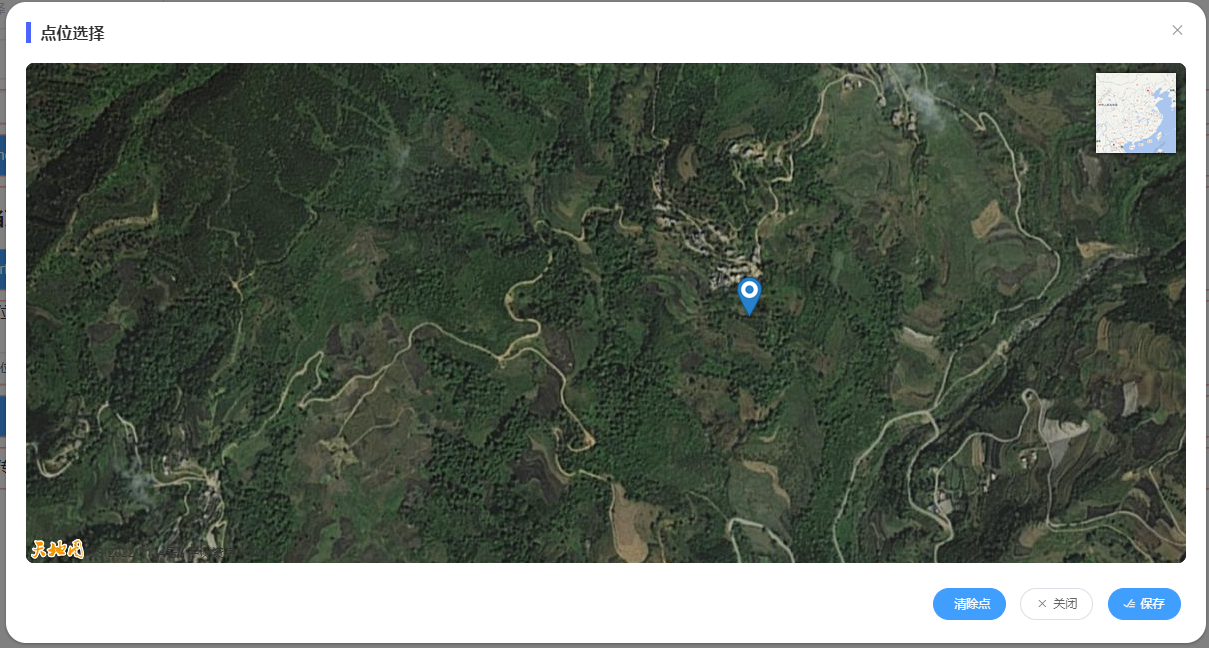
效果
@desc: 弹窗获取点位后,父组件获取点位数据。
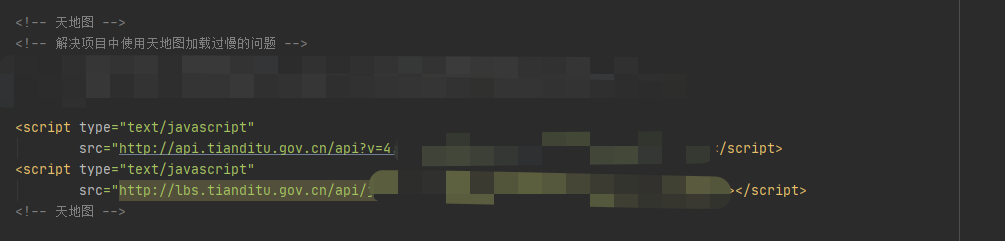
index.html (天地图官网申请key)
弹窗核心代码
<template>
  <div v-if="visible" class="add--user">
    <el-dialog
      :visible.sync="visible"
      :before-close="hideDialog"
      :modal-append-to-body="false"
      append-to-body
      width="1200px"
      class="my-dialog-map-mark"
      title="点位选择"
    >
      <div id="MarkMapDiv" class="map-box"></div>
      <div class="footer">
        <el-button
          v-if="mapPointArr.length === 0"
          @click="markPoint"
          size="small"
          round
          type="primary"
          icon="el-icon-location-information"
          >开始打点
        </el-button>
        <el-button
          v-if="mapPointArr.length > 0"
          @click="clearPoint"
          size="small"
          round
          type="primary"
          icon="el-icon-delete-locationn"
          >清除点
        </el-button>
        <el-button @click="close" size="small" round icon="el-icon-close"
          >关闭</el-button
        >
        <el-button
          @click="save"
          size="small"
          round
          type="primary"
          icon="el-icon-finished"
          >保存</el-button
        >
      </div>
    </el-dialog>
  </div>
</template>

<script>
let map;
const zoom = 14;
const handler = [];
let img;
export default {
  name: "mapMarkers1",
  components: {},
  props: {},
  computed: {},
  filters: {},
  watch: {},
  data() {
    return {
      arr: [],
      visible: false,
      mapPointArr: [],
      img_nj: "",
      img_jzs: "",
      index: 0
    };
  },
  methods: {
    markPoint() {
      if (this.mapPointArr > 0) {
        return false;
      }
      if (handler[this.index]) handler[this.index].close();
      handler[this.index] = new T.MarkTool(map, { follow: true });
      handler[this.index].open();
      handler[this.index].addEventListener("mouseup", e => {
        console.log(e);
        this.mapPointArr.push(e.currentLnglat);
        // this.index += 1;
      });
    },

    clearPoint() {
      this.mapPointArr = [];
      map.clearOverLays();
      this.setMapImg();
    },

    hideDialog() {
      this.close();
    },

    showDialog(pointArr) {
      console.log(this.mapPointArr);
      // pointArr: [{lng:104.55,lat:22.9}]
      this.mapPointArr = pointArr || [];
      this.visible = true;
      this.$nextTick(() => {
        this.showMap();
      });
      if (this.mapPointArr[0].lat === null) {
        this.mapPointArr.length = 0;
      }
    },

    showMap() {
      // ??? 填入申请的秘钥即可
      const imageURL =
        "http://t0.tianditu.gov.cn/img_w/wmts?SERVICE=WMTS&REQUEST=GetTile&VERSION=1.0.0&LAYER=img&STYLE=default&TILEMATRIXSET=w&FORMAT=tiles&TILEMATRIX={z}&TILEROW={y}&TILECOL={x}&tk=你的秘钥";
      //创建自定义图层对象
      const lay = new T.TileLayer(imageURL, { minZoom: 13, maxZoom: 18 });
      map = new T.Map("MarkMapDiv", { layers: [lay] });
      console.log(map);
      map.centerAndZoom(new T.LngLat(104.55, 22.9), zoom);

      const typeArr = [
        {
          // title: '卫星',
          title: "",
          icon:
            " http://api.tianditu.gov.cn/v4.0/image/map/maptype/satellite.png",
          layer: TMAP_SATELLITE_MAP
        },
        {
          // title: '地图', //地图控件上所要显示的图层名称
          title: "", //地图控件上所要显示的图层名称
          icon: "http://api.tianditu.gov.cn/v4.0/image/map/maptype/vector.png", //地图控件上所要显示的图层图标(默认图标大小80x80)
          layer: TMAP_NORMAL_MAP //地图类型对象,即MapType。
        }
      ];
      const ctrl = new T.Control.MapType(typeArr);
      //添加控件
      map.addControl(ctrl);

      map.addEventListener("maptypechange", e => {
        console.log(e);
        //e.mapType 就是 当前切换的MapType 配置的地图
        if (e.mapType.name == "TMAP_NORMAL_MAP") {
          // 普通地图 覆盖图隐藏
          this.img_nj.hide();
          this.img_jzs.hide();
        } else {
          this.img_nj.show();
          this.img_jzs.show();
        }
      });

      map.setMinZoom(13);
      map.setMaxZoom(18);

      map.setMaxBounds(
        new T.LngLatBounds(
          new T.LngLat(104.45, 22.84),
          new T.LngLat(104.65, 22.96)
        )
      );

      this.setMapImg();

      this.mapPointArr &&
        this.mapPointArr.forEach(item => {
          const marker = new T.Marker(new T.LngLat(item.lng, item.lat));
          //向地图上添加标注
          map.addOverLay(marker);
        });

      const config = {
        showLabel: true,
        color: "#f14343",
        weight: 2,
        opacity: 1,
        fillColor: "#f14343",
        fillOpacity: 0.2
      };
      //创建标注工具对象
      const polygonTool = new T.PolygonTool(map, config);
    },

    setMapImg() {
      const bd = new T.LngLatBounds(
        new T.LngLat(104.5548, 22.8871),
        new T.LngLat(104.5648, 22.8924)
      );
      this.img_jzs = new T.ImageOverlay("map/img/map-s-jzs.png", bd, {
        opacity: 1,
        alt: "" // 名称
      });
      map.addOverLay(this.img_jzs);

      const bd_nj = new T.LngLatBounds(
        new T.LngLat(104.5573, 22.8752),
        new T.LngLat(104.5773, 22.8856)
      );
      this.img_nj = new T.ImageOverlay("map/img/map-s-nj.png", bd_nj, {
        opacity: 1,
        alt: "" // 名称
      });
      map.addOverLay(this.img_nj);
    },

    close() {
      this.visible = false;
    },

    save() {
      const data = this.mapPointArr;
      console.log(data);
      this.$emit("backData", data);
      this.hideDialog();
    }
  },
  created() {},
  mounted() {}
};
</script>

<style lang="scss" scoped>
::v-deep .tdt-left {
  display: none;
}

::v-deep .tdt-iconLayers-layer {
  width: 40px;
  height: 40px;
  border-radius: 8px;
  overflow: hidden;
}

.map-box {
  height: 500px;
  border-radius: 8px;
}
</style>
<style lang="scss">
* {
  .my-dialog-map-mark {
    .el-dialog {
      border-radius: 20px;
      background: #ffffff;

      .el-dialog__body {
        padding-top: 10px;
        padding-bottom: 0;
      }

      .el-dialog__title {
        border-left: 5px solid #4c64fe;
        text-indent: 10px;
        display: inline-block;
        line-height: unset;
        font-size: 16px;
        font-weight: 600;
      }
    }
  }

  .icon_color {
    color: #4c64fe;
    margin-right: 5px;
  }

  /* 底部按钮区域 */
  .footer {
    height: 80px;
    line-height: 80px;
    max-width: calc(100% - (100% - 1140px) / 2);
    margin: 0 auto;
    text-align: right;
  }
}
</style>
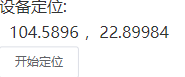
父组件
<mapMarkers1 ref="mapMarkers1" @backData="getMapPoint" />
import mapMarkers1 from "./mapMarkers1.vue"; // 注册
components: {
mapMarkers1,
},
<el-button @click="openMap" size="small"> 开始定位</el-button>
<mapMarkers1 ref="mapMarkers1" @backData="getMapPoint" /> // 使用
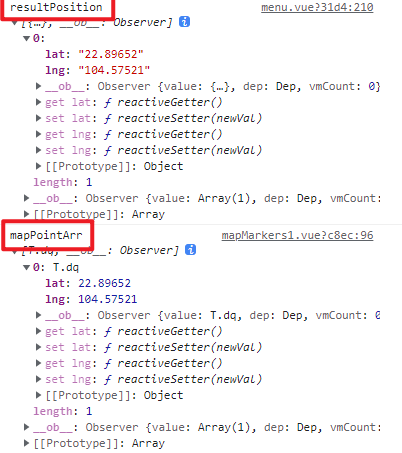
resultPosition: [
{
lat: "", // 纬度
lng: "" // 经度
}
]
methods: {
openMap() {
const refName = "mapMarkers1";
const dialog = this.$refs[refName];
dialog.showDialog(this.resultPosition);
},
getMapPoint(data) {
if (data.length > 0) {
this.$set(this.resultPosition[0], "lat", data[0].lat.toString());
this.$set(this.resultPosition[0], "lng", data[0].lng.toString());
} else {
this.resultPosition = [];
}
console.log('resultPosition', this.resultPosition);
},
}


 3180
3180


 被折叠的 条评论
为什么被折叠?
被折叠的 条评论
为什么被折叠?
 到【灌水乐园】发言


