


(一)父子组件之 props
props 是一个单向的数据流,只允许父组件向子组件传值,值类型可以是一个数值、字符、布尔值、数值、对象,子组件需要显式地用 props 选项声明 "prop"。
<!DOCTYPE html>
<html lang="en">
  <head>
    <meta charset="UTF-8" />
    <meta name="viewport" content="width=device-width, initial-scale=1.0" />
    <meta http-equiv="X-UA-Compatible" content="ie=edge" />
    <title>vue</title>
    <script src="vue.min.js"></script>
  </head>

  <body>
    <div id="app">
      <title-component post-title="syl1"></title-component>
      <title-component post-title="syl2"></title-component>
      <title-component post-title="syl3"></title-component>
    </div>
    <script>
      // 注册一个 title 组件,通过传入不同的 title 值,渲染不同的东西
      // 组件上 传递的 props 属性名为 kebab-case(短横线分隔命名)的要转换为驼峰命名
      Vue.component("title-component", {
        props: ["postTitle"], // post-title 转换为驼峰命名
        template: "<p>{{postTitle}}</p>",
      });
      var app = new Vue({
        el: "#app",
      });
    </script>
  </body>
</html>注意:HTML 中的特性名是大小写不敏感的,所以浏览器会把所有大写字符解释为小写字符。这意味着当你使用 DOM 中的模板时,camelCase (驼峰命名法) 的 prop 需要使用其等价的 kebab-case (短横线分隔命名) 命名
到这里,我们只看到了以字符串数组形式列出的 prop:
props: ["postTitle"];
但是,通常你希望每个 prop 都有指定的值类型。这时,你可以以对象形式列出 prop,这些属性的名称和值分别是 prop 各自的名称和类型:
props:{
    title:String,
    id:Number,
    content:String
}
<!DOCTYPE html>
<html lang="en">
  <head>
    <meta charset="UTF-8" />
    <meta name="viewport" content="width=device-width, initial-scale=1.0" />
    <meta http-equiv="X-UA-Compatible" content="ie=edge" />
    <title>vue</title>
    <script src="vue.min.js"></script>
  </head>

  <body>
    <div id="app">
      <child-component
        id="1"
        title="hello syl"
        content="you are welcom"
      ></child-component>
    </div>
    <script>
      // 注册一个子组件
      Vue.component("child-component", {
        // props 对象形式,传递属性值 进行类型检测,在脚手架环境中很有用
        props: {
          id: Number,
          title: String,
          content: String,
        },
        // 使用 es6 模板字符串书写格式更优美
        template: `<div><p>id:{{id}}</p><p>title:{{title}}</p><p>content:{{content}}</p></div>`,
      });
      var app = new Vue({
        el: "#app",
      });
    </script>
  </body>
</html>
上面例子我们传值都是直接传的固定值,其实动态传值我们也支持,生成动态组件,使用 v-bind 动态绑定 props 值。
例子:
<!DOCTYPE html>
<html lang="en">
<head>
<meta charset="UTF-8" />
<meta name="viewport" content="width=device-width, initial-scale=1.0" />
<meta http-equiv="X-UA-Compatible" content="ie=edge" />
<title>vue</title>
<script src="vue.min.js"></script>
</head>
<body>
<div id="app">
<!-- 使用 v-bind 简写模式 动态绑定 props 值 -->
<child-component
:name="name"
:age="age"
:height="height"
></child-component>
<child-component
:name="name+'2'"
:age="age+1"
:height="height"
></child-component>
</div>
<script>
// 定义一个子组件
Vue.component("child-component", {
// 使用属性类型检测
props: {
name: String,
age: Number,
height: String,
},
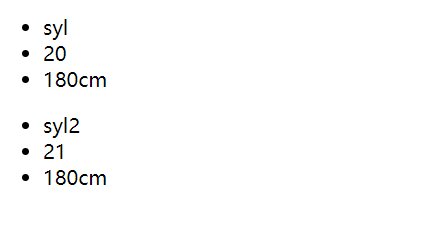
template: `
<ul>
<li>{{name}}</li>
<li>{{age}}</li>
<li>{{height}}</li>
</ul>
`,
});
var app = new Vue({
el: "#app",
data() {
return {
name: "syl",
age: 20,
height: "180cm",
};
},
});
</script>
</body>
</html>
运行结果:
(二) 子父组件通信之 emit
上面提到 props 实现父向子组件传递数据是单向流的,那么,如何实现子组件向父组件通信呢?这里要使用自定义事件 emit 方法,通过自定义事件来由下到上的数据流动。
语法如下:
this.$emit('自定义事件名',参数)
<!DOCTYPE html>
<html lang="en">
  <head>
    <meta charset="UTF-8" />
    <meta name="viewport" content="width=device-width, initial-scale=1.0" />
    <meta http-equiv="X-UA-Compatible" content="ie=edge" />
    <title>vue</title>
    <script src="vue.min.js"></script>
  </head>

  <body>
    <div id="app">
      <child-component v-on:send-msg="getMsg"></child-component>
    </div>
    <script>
      // 定义一个子组件,template 绑定 click 事件
      // 当 click 事件触发就使用 emit 自定义一个事件 send-msg,传入参数 “我是子组件请求与你通信”
      // $emit('send-msg','我是子组件请求与你通信')
      // 子组件标签上绑定自定义事件 send-msg,并绑定上父级的方法 getMsg,即可完成了子父组件通信
      // <child-component v-on:send-msg="getMsg"></child-component>
      Vue.component("child-component", {
        template: `
                <button v-on:click="$emit('send-msg','我是子组件请求与你通信')">
                Click me
                </button>
                `,
      });
      var app = new Vue({
        el: "#app",
        methods: {
          getMsg: function (msg) {
            // 弹出子组件传递的信息
            alert(msg);
          },
        },
      });
    </script>
  </body>
</html>
运行结果:
子组件向父组件数据传递套路:
第一步:子组件绑定事件。
第二步:子组件绑定事件触发,使用 $emit 创建自定义事件并传入需要传值给父组件的数据。
第三步:在子组件标签上 用 v-on 绑定自定义事件,在父组件中声明自定义事件处理的方法。
第四步:父组件方法,接受自定义事件传的参数,就完成了整个由下到上的数据流。
(三)兄弟组件通信
1,bus总线传值
//bus.js
import Vue from 'vue';
export default new Vue;
//使用 兄弟A 传值
import bus from '路径'
bus.$emit('自定义事件名称',输出数据)
//使用 兄弟B 接值
import bus from '路径'
bus.on('自定义事件名',(res)=>{})
一. bus总线传值的使用:
1,在项目中创建一个单独的eventBus.js文件
2,该js文件的内容很简单,就是暴露一个vue实例而已。
有人喜欢在main.js全局引入该js文件,我一般在需要使用到组件中引入。
3,创建相关组件:
4,父组件中注册并使用子组件:
5,分别在子组件one和two中引入eventBus.js
6,one组件向two组件传值:(传值使用$emit)
7,two组件接收到one组件的值:(接收值使用$on)
到这里其实使用bus总线实现兄弟组件之间的传值已经完成。


 4万+
4万+


 被折叠的 条评论
为什么被折叠?
被折叠的 条评论
为什么被折叠?
 到【灌水乐园】发言


