


一.购物车页面
vant组件库引入
在vant-weapp找到提交订单栏,"van-submit-bar": "@vant/weapp/submit-bar/index"将这些代码复制到app.json中的"usingComponents": {}里面
 "usingComponents": {
    "van-action-sheet": "@vant/weapp/action-sheet/index"
  }
card.wxml配置
<view bindtap="onSwipeCellPage">
  <!-- 购物车列表结构 -->
  <view
    wx:if="{{ token && cartList.length }}"
    class="container goods-wrap"
    bindtap="onSwipeCellPageTap"
  >
    <view class="goods-item" wx:for="{{ cartList }}" wx:key="goodsId">
      <van-swipe-cell
        class="goods-swipe"
        right-width="{{ 65 }}"
        id="swipe-cell-{{ item.goodsId }}"
        bind:open="swipeCellOpen"
        bind:click="onSwipeCellClick"
      >
        <van-cell-group border="{{ false }}">
          <view class="goods-info">
            <view class="left">
              <van-checkbox
                checked-color="#FA4126"
                value="{{ item.isChecked }}"
                bindchange="updateChecked"
                data-id="{{ item.goodsId }}"
                data-index="{{ index }}"
              ></van-checkbox>
            </view>
            <view class="mid">
              <image class="img" src="{{ item.imageUrl }}" />
            </view>
            <view class="right">
              <view class="title"> {{ item.name }} </view>
              <view class="buy">
                <view class="price">
                  <view class="symbol">¥</view>
                  <view class="num">{{ item.price }}</view>
                </view>
                <view class="buy-btn">
                  <van-stepper
                    min="1"
                    max="200"
                    integer
                    value="{{ item.count }}"
                    data-id="{{ item.goodsId }}"
                    data-index="{{ index }}"
                    data-oldbuynum="{{ item.count }}"
                    bindchange="changeBuyNum"
                  />
                </view>
              </view>
            </view>
          </view>
        </van-cell-group>
        <view
          slot="right"
          class="van-swipe-cell__right"
          bindtap="delCartGoods"
          data-id="{{ item.goodsId }}"
          >删除</view
        >
      </van-swipe-cell>
    </view>
  </view>

  <!-- 购物车列表为空展示的结构 -->
  <van-empty wx:else description="{{ emptyDes }}">
    <navigator
      url="/pages/index/index"
      open-type="switchTab"
      wx:if="{{ token && cartList.length === 0 }}"
    >
      <van-button round type="danger" class="bottom-button">去购物</van-button>
    </navigator>

    <navigator url="/pages/login/login" wx:else>
      <van-button round type="danger" class="bottom-button">去登录</van-button>
    </navigator>
  </van-empty>

  <!-- 底部工具栏 -->
  <!-- 底部工具栏组件展示价格,默认是以 分 的形式进行展示,如果需要以 元 的方式进行展示 -->
  <van-submit-bar
    wx:if="{{ cartList.length }}"
    price="{{ totalPrice * 100 }}"
    button-text="去结算"
    tip="{{ true }}"
    bind:submit="toOrder"
  >
    <van-checkbox
      value="{{ selectAllStatus }}"
      checked-color="#FA4126"
      bindchange="selectAllStatus"
    >
      全选
    </van-checkbox>
  </van-submit-bar>
</view>
card.scss 样式配置
// 商品列表样式
.goods-wrap {
  padding: 16rpx 16rpx 100rpx 16rpx;

  .goods-item {
    .goods-swipe {
      width: 100%;

      .goods-info {
        display: flex;
        align-items: center;
        padding: 24rpx 16rpx;
        border-radius: 16rpx;
        margin-bottom: 16rpx;
        background-color: white;
        box-sizing: border-box;
        transition: transform 1s cubic-bezier(0.18, 0.89, 0.32, 1) !important;

        .left {
          /* width: 56px; */
          display: flex;
          align-items: center;
          justify-content: center;
        }

        .mid {
          width: 114px;
          height: 125px;

          .img {
            height: 100%;
          }
        }

        .right {
          height: 125px;
          flex: 1;
          display: flex;
          flex-direction: column;
          justify-content: space-between;
          margin-left: 10px;

          .title {
            flex: 1;
            flex-shrink: 0;
            font-size: 26rpx;
            color: #333;
            line-height: 44rpx;
            font-weight: 400;
            overflow: hidden;
            word-break: break-word;
          }

          .buy {
            display: flex;
            justify-content: space-between;

            .price {
              display: flex;
              color: #fa4126;
              font-size: 36rpx;

              .symbol {
                font-size: 10px;
                margin-right: 2px;
                margin-top: 8px;
              }
            }
          }
        }
      }

      .van-swipe-cell__right {
        background-color: #fa4126;
        text-align: center;
        display: flex;
        align-items: center;
        justify-content: center;
        width: 130rpx;
        color: #fff;
        font-size: 24rpx;
        height: 100%;
      }
    }
  }
}

// 提交订单栏样式
.submit-footer {
  display: flex;
  position: fixed;
  left: 0;
  bottom: 0;
  width: 100%;
  background-color: white;
  padding: 12px 8px;
  align-items: center;
  justify-content: space-between;
  z-index: 10;

  .right {
    display: flex;
    margin-right: 16px;
    align-items: center;
    justify-content: center;
  }
}
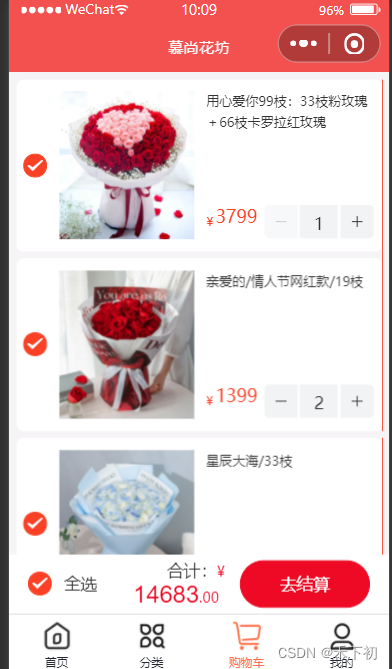
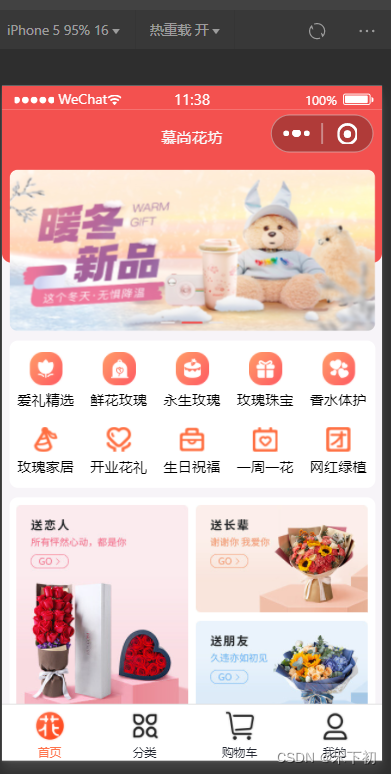
效果展示图
二.我的页面
my.js配置
// pages/info/info.js

import { ComponentWithStore } from 'mobx-miniprogram-bindings'
import { userStore } from '@/stores/userstore'

ComponentWithStore({
  // 页面的初始数据
  data: {
    // 初始化第二个面板数据
    initpanel: [
      {
        url: '/modules/orderPayModule/pages/order/list/list',
        title: '商品订单',
        iconfont: 'icon-dingdan'
      },
      {
        url: '/modules/orderPayModule/pages/order/list/list',
        title: '礼品卡订单',
        iconfont: 'icon-lipinka'
      },
      {
        url: '/modules/orderPayModule/pages/order/list/list',
        title: '退款/售后',
        iconfont: 'icon-tuikuan'
      }
    ]
  },

  storeBindings: {
    store: userStore,
    fields: ['token', 'userInfo']
  },

  methods: {
    // 跳转到登录页面
    toLoginPage() {
      wx.navigateTo({
        url: '/pages/login/login'
      })
    }
  }
})
my.wxml配置
<!--pages/info/info.wxml-->
<view class="container">
  <!-- 顶部展示图 -->
  <view class="top-show">
    <image mode="widthFix" class="top-show-img" src="/assets/images/banner.jpg"></image>
  </view>

  <view class="bottom-show">
    <!-- 未登录面板 -->
    <view wx:if="{{ !token }}" class="user-container section" bindtap="toLoginPage">
      <view class="avatar-container">
        <image src="/assets/images/avatar.png"></image>
        <view class="no-login">
          <text class="ellipsis">未登录</text>
          <text>点击授权登录</text>
        </view>
      </view>
    </view>

    <!-- 登录以后得面板 -->
    <view wx:else class="user-container section">
      <view class="avatar-container">
        <image src="{{ userInfo.headimgurl }}"></image>
        <view class="no-login">
          <text class="ellipsis">{{ userInfo.nickname }}</text>
        </view>
      </view>
      <view class="setting">
        <navigator url="/modules/settingModule/pages/settings/settings"> 设置 </navigator>
      </view>
    </view>

    <!-- 订单面板 -->
    <view class="order section">
      <view class="order-title-wrap">
        <text class="title">我的订单</text>
        <text class="more">查看更多></text>
      </view>

      <view class="order-content-wrap">
        <view class="order-content-item" wx:for="{{ initpanel }}" wx:key="index">
          <navigator url="{{ token ? item.url : '/pages/login/login' }}">
            <view class="iconfont {{ item.iconfont }}"></view>
            <text>{{ item.title }}</text>
          </navigator>
        </view>
      </view>
    </view>

    <!-- 关于售前售后服务面板 -->
    <view class="after-scale section">
      <view class="order-title-wrap">
        <text class="title">关于售前售后服务</text>
      </view>
      <view class="after-scale-item">
        <view class="iconfont icon-kefufenxiermaikefu"></view>
        <text>可与小程序客服实时聊天或电话咨询</text>
      </view>
      <view class="after-scale-item">
        <view class="iconfont icon-shijian"></view>
        <text>小程序客服工作时间为: 8:30 ~ 20:30</text>
      </view>
      <view class="after-scale-item">
        <view class="iconfont icon-dizhiguanli"></view>
        <text>鲜花制作完毕情况下暂不支持退款</text>
      </view>
      <view class="after-scale-item">
        <view class="iconfont icon-zhangben"></view>
        <text>鲜花可以提前7-15天预订重大节假日不支持定时配送</text>
      </view>
    </view>

    <!-- 底部面板 -->
    <view class="info-footer"> 尚硅谷技术支持 </view>
  </view>
</view>
my.scss样式配置
.container {
  padding: 0rpx !important;
}

.top-show {
  width: 100%;
  height: 360rpx;

  .top-show-img {
    width: 100%;
    height: 100%;
  }
}

.bottom-show {
  margin: 0 16rpx;

  .section {
    background-color: #fff;
    border-radius: 20rpx;
    padding: 20rpx;
  }

  .user-container {
    display: flex;
    justify-content: space-between;
    align-items: center;
    margin-top: -86rpx;
    color: #999;

    .avatar-container {
      display: flex;
      align-items: center;

      image {
        width: 120rpx;
        height: 120rpx;
        border-radius: 50%;
        margin-right: 20rpx;
      }

      .no-login {
        display: flex;
        flex-direction: column;
        font-size: 24rpx;

        text:first-child {
          font-size: 28rpx;
        }

        .ellipsis {
          width: 400rpx;
          overflow: hidden;
          text-overflow: ellipsis;
          overflow: hidden;
          white-space: nowrap;
        }
      }
    }
  }

  .order {
    background-color: #fff;
    margin-top: 20rpx;

    .order-title-wrap,
    .order-content-wrap {
      padding: 20rpx;
      display: flex;
      justify-content: space-between;
    }

    .order-title-wrap {
      .title {
        color: #444;
        // font-weight: 700;
      }

      .more {
        color: #ccc;
        font-size: 24rpx;
      }
    }

    .order-content-wrap {
      display: flex;

      .iconfont {
        font-size: 60rpx;
        text-align: center;
      }

      text {
        font-size: 25rpx;
        margin-top: 20rpx;
      }
    }

    .order-content-item {
      display: flex;
      flex-direction: column;
      align-items: center;
    }
  }

  .after-scale {
    margin-top: 30rpx;

    .order-title-wrap {
      line-height: 50rpx;
    }

    .after-scale-item {
      display: flex;
      margin: 25rpx 15rpx;
      color: #999;
      line-height: 50rpx;

      text {
        font-size: 25rpx;
        margin-left: 20rpx;
      }

      .iconfont {
        color: #a2b364;
      }
    }
  }

  .info-footer {
    height: 100rpx;
    line-height: 100rpx;
    text-align: center;
    color: #aaa;
    font-size: 25rpx;
  }
}
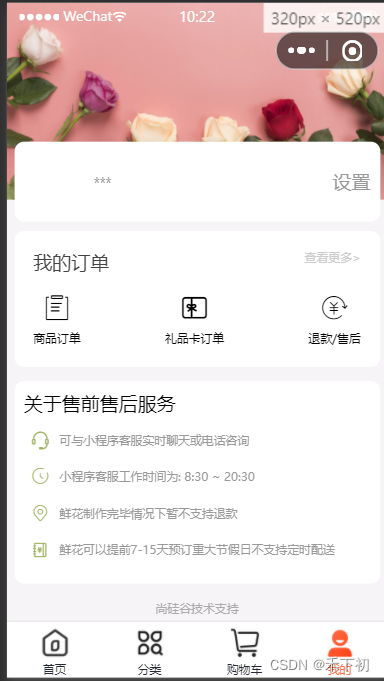
效果展示图
三.商品列表页面
list.wxml配置
<view class="container">
<!-- 商品列表区域 -->
  <view class="goods-list">
    <block>
      <goods-card></goods-card>
      <goods-card></goods-card>
      <goods-card></goods-card>
      <goods-card></goods-card>
    </block>
  </view>
  <!-- 文字区域 -->
  <!-- hidden属性控制文字的显示与隐藏 -->
  <!-- 当数据加载完毕,isFinsh为trun,!isFinsh为false,则这句话不隐藏,用户能看到这句话 -->
  <view class="finish" hidden="{{ !isFinsh}}">数据加载完毕</view>
</view>
list.scss样式配置
.container {

  .goods-list {
    padding: 15rpx;
    display: flex;
    //设置换行
    flex-wrap: wrap;
    //设置元素在主轴上的排列方式
    justify-content: space-between;
  }

  .finish {
    // 文本居中对齐
    text-align: center;
    font-size: 25rpx;
    color: green;
    line-height: 70rpx;
    border-top: 1px solid black;
  }
}
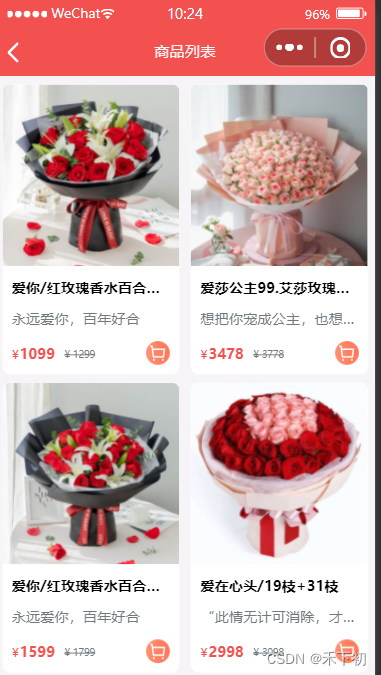
效果展示图
四.商品细节页面
detail.js配置
// pages/detail/detail.js
Page({

  /**
   * 页面的初始数据
   */
  data: {

  },
  // 点击按钮事件,控制面板显示
  handelSheet(){
    this.setData({
      show:true
    })
  },

  onClose(){
    this.setData({
      show:false
    })
  },
detail.wxml配置
<!--pages/detail/detail.wxml-->
<view class="container">
  <!-- 商品大图 -->
  <view class="banner-img">
    <image src="../../assets/images/floor-img.jpg" mode="" />
  </view>

  <!-- 商品基本信息 -->
  <view class="content">
    <!-- 商品的价钱 -->
    <view class="price">
      <view class="price-num">¥299</view>
      <view class="price-origin-unm">¥399</view>
    </view>
    <!-- 商品的标题 -->
    <view class="title">99支红玫瑰/99支红玫瑰/99支红玫瑰</view>
    <!-- 详细信息 -->
    <view class="info">爱她,就送她99只玫瑰</view>
  </view>
  <!-- 商品详细信息 -->
  <view class="detail">
    <image src="../../assets/images/floor-img.jpg" mode="" />
    <image src="../../assets/images/floor-img.jpg" mode="" />
    <image src="../../assets/images/floor-img.jpg" mode="" />
  </view>

  <!-- 商品底部导航栏 -->
  <van-goods-action>
    <!--  如果navigator标签跳转到tabber栏 则需要加open-type -->
    <navigator url="/pages/index/index" open-type="switchTab">
      <van-goods-action-icon icon="wap-home" text="主页" info="" />
    </navigator>

    <navigator url="/pages/cart/cart" open-type="switchTab">
      <van-goods-action-icon icon="cart-o" text="购物车" info="" />
    </navigator>

    <navigator url="/pages/my/my" open-type="switchTab">
      <van-goods-action-icon icon="user-circle-o" text="我的" />
    </navigator>

    <van-goods-action-button text="加入购物车" type="warning" bindtap="handelSheet" />

    <!-- handelSheet为点击按钮事件 -->
    <van-goods-action-button text="立即购买" bindtap="handelSheet" />
  </van-goods-action>

  <!-- 自定义盒子 -->
  <!-- bind:close为面板关闭事件 -->
  <van-action-sheet show="{{ show }}" title="" bind:close="onClose">
    <view class="sheet-container">
      <!-- 图片区域 -->
      <view class="img">
        <image src="../../assets/images/floor-img.jpg" mode="" />
      </view>
      <!-- 商品基本信息区域 -->
      <view class="baseInfo">
        <!-- 商品名称 -->
        <view class="title">买花就送女友/送爱人/送老婆</view>
        <!-- 商品价钱区域 -->
        <view class="buy">
          <view class="price">
            <view class="symbol">¥</view>
            <view class="num">100</view>
          </view>

          <view class="buyBtn">
            <van-stepper value="{{ 1 }}" bind:change="onChange" />
          </view>
        </view>
      </view>
    </view>
    <!-- 商品祝福语区域 -->
    <view class="textArea">
      <view class="title">祝福语</view>
      <!-- 占位符 -->
      <textarea value="" placeholder="请输入你的祝福" class="box"/>

    </view>

    <view class="btn">
    <!-- round 设置圆角弧度 -->
      <van-button type="primary" round size="large">确定</van-button>
    </view>


  </van-action-sheet>
</view>
detail.scss样式配置
.container {
  background-color: whitesmoke;
  height: 100vh;

  .banner-img {
    // 高度
    height: 800rpx;
    image {
      height: 100%;
    }
  }

  // 商品基本信息
  .content {
    background-color: white;
    // margin 设置框外边距
    margin: 0 46rpx;
    // padding 设置内边距
    padding: 40rpx; //框内
    // 设置圆角弧度
    border-radius: 20rpx;

    // 相对于原本的位置发生改变是相对定位
    // 相对于父盒子位置发生改变是绝对定位
    position: relative; //相对定位
    top: -200rpx; //上下平移


    .price {
      // 将块级元素一行显示
      display: flex;

      // 299
      .price-num {
        color: red;
        // 字体加粗
        font-weight: bolder;
        // 字体大小
        font-size: 18px;
      }

      // 399
      .price-origin-unm {

        color: #b4babf;
        text-decoration: line-through; //399数字有横线
        // 字体大小
        font-size: 12px;
        margin-left: 15px; //399离299距离
        margin-top: 5px; // 399数字上下
      }
    }

    .title {
      // 溢出隐藏
      overflow: hidden;
      // 超过一行就算溢出
      white-space: nowrap;
      // 溢出之后的文本
      text-overflow: ellipsis;
      font-size: 16px; // 字体大小
      font-weight: bolder; // 字体加粗
    }

    .info {
      color: #b4babf;
      // 溢出隐藏
      overflow: hidden;
      // 超过一行就算溢出
      white-space: nowrap;
      // 溢出之后的文本
      text-overflow: ellipsis;
      font-size: 12px; // 字体大小
    }
  }

  // 商品详细信息
  .detail {
    background-color: white;
    padding: 20rpx; // padding 设置内边距
    margin: -150rpx 20rpx 0 20rpx;
    border-radius: 20rpx; // 设置圆角弧度

    image {
      width: 100%; // 框
      height: 700rpx; //高
    }
  }

  .sheet-container {
    margin: 20rpx; // margin 设置框外边距
    padding: 20rpx; // padding 设置内边距
    border-radius: 20rpx;
    display: flex;

    .img {
      height: 400rpx;
      width: 350rpx;

      image {
        width: 100%;
        height: 100%;
      }
    }

    .buy {
      display: flex;

      .price {
        display: flex;
        color: red;
      }
    }

    .baseInfo {
      display: flex;
      // 设置主轴方向
      flex-direction: column;
      // 设置主轴上的排序列方式
      justify-content: space-between;
      margin-left: 20rpx;

      .title {
        font-size: 14px;  // 字体大小
      }
    }
  }

  .textArea {
    background-color: white;
    margin: 0 20rpx;

    .title {
      margin-right: 20rpx; //左边距
      margin-bottom: 20rpx;
    }

    .box {
      background-color: whitesmoke;
      width: 95%;
      margin: 0 auto; //左右自动对齐
      margin: 10rpx 10rpx;
      border-radius: 20rpx;
      padding: 20rpx;  // padding 设置内边距
    }
  }

  .btn {
    width: 90%;
    margin: 20rpx auto;
  }
}
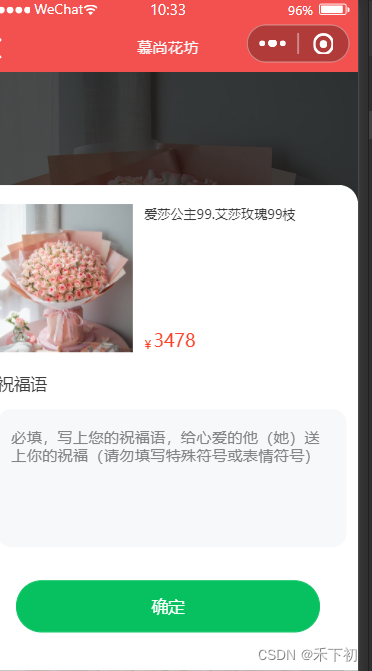
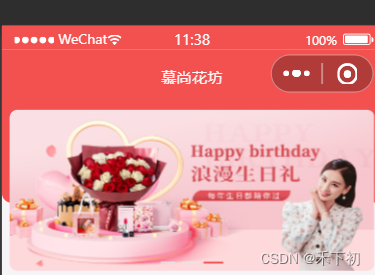
效果展示图
五.订单页面
dingdan.wxml配置
<!--pages/orders/orders.wxml-->
<view class="order-container container">
  <view class="order-list">
    <view class="order-item" wx:for="{{3}}" wx:key="index">

      <!-- 订单 -->
      <view class="order-item-header list-flex">
        <view class="orderno">订单号1008686<text></text></view>
        <view class="order-status"> 已支付</view>
      </view>
      <view class="goods-item list-flex">
        <view class="left">
          <image src="../../assets/images/floor-img.jpg" mode="widthFix" class="img" />
        </view>

        <!-- 文字 -->
        <view class="zi">
          <view class="zi1">不变的承诺</view>
          <view class="zi2">不变的承诺</view>
        </view>

        <view class="qian">
          <view class="qian1">¥299</view>
          <view class="qian2">x1</view>
        </view>
      </view>

      <view class="shifu">
        <view class="abc list-flex">
          <text class="abc1">实付</text>
          <text class="abc2"><text>¥</text>199</text>
        </view>
      </view>
    </view>
  </view>
</view>
dingdan.scss样式配置
/* pages/order/list/index.wxss */
.order-container {
  background-color: whitesmoke;

  .order-item {
    background-color: white;
    padding: 25rpx 30rpx 25rpx; // padding 设置内边距
    margin-top: 12rpx; //上下

    .order-item-header {
      margin-bottom: 24rpx;
      align-items: center;
      justify-content: space-between;
    }

    .list-flex {
      display: flex;
      background-color: white;
    }

    .dingdan {
      color: #333333;
      font-size: 20rpx; // 字体大小
      line-height: 40rpx;
      align-items: center;
      font-weight: normal;
      display: flex;

    }

    .order-status {
      font-weight: bolder; // 字体加粗
      font-size: 38rpx; // 字体大小
      line-height: 40rpx;
    }

    .order-active {
      color: #fa4126;
    }

    .goods-item {
      padding: 16rpx 0; // padding 设置内边距

      .left {
        width: 200rpx;
        height: 190rpx;

        .img {
          border-radius: 20rpx;
          width: 220rpx;
          height: rpx;
        }
      }

      .zi {
        position: relative; //相对定位
        top: 20rpx; //上下平移
        flex: 1;
        margin: 0 20px; // margin 设置框外边距

        .zi1 {
          color: #333;
          font-size: 30rpx; // 字体大小

          line-height: 50rpx;
          font-weight: 400;
        }

        .zi2 {
          color: #999999;
          font-size: 28rpx; // 字体大小
          height: 32rpx;


          margin: 10rpx 0rpx;
        }
      }

      .qian {
        .qian1 {

          color: #fa4126;
          font-size: 24rpx; // 字体大小
          line-height: 48rpx;
        }

        .qian2 {
          order: 4;
          text-align: right;
          font-size: 24rpx; // 字体大小
          color: #999;
          margin: 20rpx 0 0 auto;
        }
      }
    }

    .shifu {
      .abc {
        justify-content: flex-end;
        align-items: center;
      }

      .abc1 {
        font-size: 28rpx; // 字体大小
        line-height: 40rpx;
        color: #333333;
        margin-right: 4px;
      }

      .abc2 {
        color: #fa4126;
        font-weight: bolder; // 字体加粗
        font-size: 35rpx; // 字体大小
      }
    }

  }
}
效果展示图
六.通用模块封装
1.消息提示模块封装
const toast = ({title="数据加载中",icon="none",duration=2000,mask=true} = {}) =>
{
 wx.showToast({
 title,
 icon,
 duration,
 mask
 })
 }
export { toast }
import { toast } from './extendApi'
toast()
toast({ title: '数据加载失败....', mask: true })
wx.toast = toast

import './utils/extendApi'

wx.toast()
wx.toast({ title: '数据加载失败....', mask: true })
封装步骤
 // function toast () {}

 // 在使⽤toast⽅法时,可以传⼊参数,也可以不传⼊参数。
 // 如果需要传⼊参数,要传⼊对象作为参数。
 // const toast = (option = {}) => { }

 // 在形参数、位置通过解构的⽅式获取⽤户传⼊的参数,同时设置默认
 const toast = ({title="数据加载中",icon="none",duration=2000,mask=true} = {}) =>
{
 wx.showToast({
 title,
 icon,
 duration,
 mask
 })
 }

 // 局部暴露toast⽅法
 export { toast }

 // 如果其他.js⽂件,需要使⽤toast⽅法,需要导⼊toast,然后进⾏调⽤才可以。

 // 如果有很多的.js⽂件,都需要调⽤toast⽅法
 // 每次使⽤都需要导⼊toast再调⽤,太麻烦了
 // 可以将toast⽅法挂载到wx全局对象上
 // 全局挂载⽅法
 wx.toast = toast
c:调用步骤
 // app.js
 // import { toast } from './utils/extendApi'
 // import './utils/extendApi'

 App({
 // ⻚⾯显示⽣命周期函数
 onShow() {

 // 局部导⼊
 // 不传参数
 // toast()
 // 传⼊参数,传⼊的参数会覆盖默认的参数。
 // toast({title:'数据加载完毕', icon:'success'})

 // 全局导⼊
 // wx.toast()
 // wx.toast({ title: '数据加载失败....', mask: true })

 }
 })
2.模块对话框封装
// exendApi.js

 // function toast () {}

 // 在调⽤modal⽅法时,可以传递参数,也可以不传递参数。
 // 如果不传递参数,默认值就是空对象。
 // 如果传递参数,参数需要时⼀个对象,对象中的属性需要和wx.showModal参数保持⼀致。
 const modal = (options = {}) => {
 // 在⽅法内部需要通过Promise返回⽤户的操作
 // 如果⽤户点击了确认,需要通过resolve返回true
 // 如果⽤户点击了取消,需要通过resolve返回false

 return new Promise((resolve) => {
 // 默认的参数
 const defaultOpt = {
 title: '提示', // 提示的标题
 content: '您确定执⾏该操作吗?', // 提示的内容
 confirmColor: '#f3514f',
 // 接⼝调⽤结束的回调函数(调⽤成功、失败都会执⾏)
 complete({ confirm, cancel }) {
 confirm && console.log('点击了确定')
 cancel && console.log('点击了取消')
 }
 }

 // 通过object.assgin⽅法将参数进⾏合并
 // 需要使⽤传⼊的参数覆盖默认的参数
 // 为了不影响默认的参数,需要将合并以后的参数赋值给⼀个空对象
 const opts = Object.assign({}, defaultOpt, options)

 wx.showModal({
 // 将合并以后的参数通过展开运算符赋值给wx.showModal对象
 ...opts,
 complete({ confirm, cancel }) {
 // 如果⽤户点击了确定,通过 resolve 抛出 true
 // 如果⽤户点击了取消,通过 resolve 抛出 false
 confirm && resolve(true)
 cancel && resolve(false)
 }
 })
 })
 }

 export { modal }

 wx.modal = modal

 // app.js

 // app.js
 // import { toast } from './utils/extendApi'
 import './utils/extendApi'

 App({
 // ⻚⾯显示⽣命周期函数
 async onShow() {

 // wx.showModal({
 // title: '提示', // 提示的标题
 // content: '您确定执⾏该操作吗?', // 提示的内容
 // confirmColor: '#f3514f',
 // // 接⼝调⽤结束的回调函数(调⽤成功、失败都会执⾏)
 // complete({ confirm, cancel }) {
 // confirm && console.log('点击了确定')
 // cancel && console.log('点击了取消')
 // }
 // })

 // 不传⼊参数
 // const res = await wx.modal()

 // 传⼊参数
 const res = await wx.modal({
 title:'新的提示',
 showCancel:false
 })

 console.log(res);

 }

 })
3.封装本地存储API
1 // utils/storage.js
2
3 /**
4 * @description 存储数据
5 * @param {*} key 本地缓存中指定的 key
6 * @param {*} value 需要缓存的数据
7 */
8 export const setStorage = (key, value) => {
9 try {
10 wx.setStorageSync(key, value)
11 } catch (e) {
12 console.error(`存储指定 ${key} 数据发⽣错误:`, e)
13 }
14 }
15
16 /**
17 * @description 从本地读取对应 key 的数据
18 * @param {*} key
19 */
20 export const getStorage = (key) => {
21 try {
22 const value = wx.getStorageSync(key)
23 if (value) {
24 return value
25 }
26 } catch (e) {
27 console.error(`获取指定 ${key} 数据发⽣错误:`, e)
28 }
29 }
30
31 /**
32 * @description 从本地移除指定 key 数据
33 * @param {*} key
34 */
35 export const removeStorage = (key) => {
36 try {
37 wx.removeStorageSync(key)
38 } catch (err) {
39 console.error(`移除指定 ${key} 数据发⽣错误:`, e)
40 }
41 }
42
43 /**
44 * @description 从本地清空全部的数据
45 */
46 export const clearStorage = () => {
47 try {
48 wx.clearStorageSync()
49 } catch (e) {
50 console.error("清空本地存储时发⽣错误:", e);
51 }
52 }
53
1 // app.js
2
3 import {setStorage,getStorage,removeStorage,clearStorage} from './utils/storage'
4
5 App({
6 // ⻚⾯显示⽣命周期函数
7 async onShow() {
8
9 setStorage('name','tom'),
10 setStorage('age',10)
11
12 const name = getStorage('name')
13 console.log(name);
14
15 removeStorage('name')
16
17 clearStorage()
18
19 }
20
21 })
22
七. 网络请求封装
1.请求封装-request⽅法
1 // utils/request.js
2
3 // 创建 WxRequest 类
4 // 通过类的⽅式来进⾏封装,会让代码更加具有复⽤性
5 // 也可以⽅便添加新的属性和⽅法
6
7 class WxRequest {
8
9 // ⽤于创建和初始化类的属性以及⽅法
10 constructor(){}
11
12 // request实例⽅法接受⼀个对象类型的参数
13 // 属性值和wx.request⽅法调⽤时传递的参数保持⼀致
14 request(options){
15
16 // 需要通过Promise封装wx.requset,处理异步请求
17 return new Promise((resolve,reject) => {
18
19 wx.request({
20 ...options,
21
22 // 当接⼝调⽤成功时会触发 success 回调函数
23 success:(res) => {
24 resolve(res)
25 },
26
27 // 当接⼝调⽤失败时会触发 fail 回调函数
28 fail:(err) => {
29 reject(err)
30 }
31 })
32 })
33 }
34 }
35
b:request⽅法使⽤
1 <!--pages/test/test.wxml-->
2 <!-- <text>pages/test/test.wxml</text> -->
3
4 <view class="box">
5 <button type="warn" plain size="mini" bindtap="handler">测试发送请求</button>
6 </view>
1 /* pages/test/test.wxss */
2
3 .box {
4 display: flex;
5 height: 200rpx;
6 justify-content: center;
7 align-items: center;
8 }
1 // test.js
2
3 import instance from '../../utils/request'
4
5 Page({
6
7 // 点击按钮触发 handler ⽅法
8 async handler() {
9
10 // 第⼀种调⽤⽅式:通过 then 和 catch 接收返回的值
11 instance
12 .request({
13 url: 'https://gmall-prod.atguigu.cn/mall-api/index/findBanner',
14 method: 'GET'
15 })
16 .then((res) => {
17 console.log(res)
18 })
19 .catch((err) => {
20 console.log(err)
21 })
22
23 // 第⼆种调⽤⽅式:通过 await 和 async 接收返回的值
24 // const res = await instance.request({
25 // url: 'https://gmall-prod.atguigu.cn/mall-api/index/findBanner',
26 // method: 'GET'
27 // })
28
29 console.log(res)
30 }
31
32 })
33
2.请求封装——设置请求参数
1 // 默认参数对象
2 defaults = {
3 baseURL: '', // 请求基准地址
4 url: '', // 开发者服务器接⼝地址
5 data: null, // 请求参数
6 method: 'GET',// 默认请求⽅法
7 // 请求头
8 header: {
9 'Content-type': 'application/json' // 设置数据的交互格式
10 },
11 timeout: 60000 // ⼩程序默认超时时间是 60000,⼀分钟
12 // 其他参数...
13 }
1 // 对 WxRequest 进⾏实例化
2 const instance = new WxRequest({
3 baseURL: 'https://gmall-prod.atguigu.cn/mall-api', // 请求基准地址
4 timeout: 10000 // 微信⼩程序 timeout 默认值为 60000
5 })
6
在通过实例,调⽤ request 实例⽅法时也会传⼊相关的请求参数。
1 const res = await instance.request({
2 url: '/index/findBanner',
3 method: 'GET'
4 })
5
3.封装请求快捷⽅法
1 const res = await instance.request({
2 url: '/index/findBanner',
3 method: 'GET'
4 })
1 instance.get('请求地址', '请求参数', '请求配置')
2 instance.delete('请求地址', '请求参数', '请求配置')
3 instance.post('请求地址', '请求参数', '请求配置')
4 instance.put('请求地址', '请求参数', '请求配置')
1 class WxRequest {
2
3 // coding...
4
5 + // 封装 GET 实例⽅法
6 + get(url, data = {}, config = {}) {
7 + return this.request(Object.assign({ url, data, method: 'GET' }, config))
8 + }
9
10 + // 封装 POST 实例⽅法
11 + post(url, data = {}, config = {}) {
12 + return this.request(Object.assign({ url, data, method: 'POST' }, config))
13 + }
14
15 + // 封装 PUT 实例⽅法
16 + put(url, data = {}, config = {}) {
17 + return this.request(Object.assign({ url, data, method: 'PUT' }, config))
18 + }
19
20 + // 封装 DELETE 实例⽅法
21 + delete(url, data = {}, config = {}) {
22 + return this.request(Object.assign({ url, data, method: 'DELETE' },
config))
23 + }
24 }
25
26 // ----------------- 实例化 ----------------------
27
28 // 对 WxRequest 进⾏实例化
29 const instance = new WxRequest({
30 baseURL: 'https://gmall-prod.atguigu.cn/mall-api',
31 timeout: 15000
32 })
33
34 // 将 WxRequest 的实例通过模块化的⽅式暴露出去
35 export default instance
36
1 utils/request.js
2
3 class WxRequest {
4
5 // coding...
6
7 + // 封装 GET 实例⽅法
8 + get(url, data = {}, config = {}) {
9 + return this.request(Object.assign({ url, data, method: 'GET' }, config))
10 + }
11
12 + // 封装 POST 实例⽅法
13 + post(url, data = {}, config = {}) {
14 + return this.request(Object.assign({ url, data, method: 'POST' }, config))
15 + }
16
17 + // 封装 PUT 实例⽅法
18 + put(url, data = {}, config = {}) {
19 + return this.request(Object.assign({ url, data, method: 'PUT' }, config))
20 + }
21
22 + // 封装 DELETE 实例⽅法
23 + delete(url, data = {}, config = {}) {
24 + return this.request(Object.assign({ url, data, method: 'DELETE' },
config))
25 + }
26 }
27
28 // ----------------- 实例化 ----------------------
29
30 // 对 WxRequest 进⾏实例化
31 const instance = new WxRequest({
32 baseURL: 'https://gmall-prod.atguigu.cn/mall-api',
33 timeout: 15000
34 })
35
36 // 将 WxRequest 的实例通过模块化的⽅式暴露出去
37 export default instance
38
1 /pages/test/test.js
2
3 // 导⼊创建的实例
4 import instance from '../../utils/wx-request'
5
6 Page({
7 async handler() {
8
9 // 第⼀种调⽤⽅式:通过 then 和 catch 接收返回的值
10 // instance
11 // .request({
12 // url: 'https://gmall-prod.atguigu.cn/mall-api/index/findBanner',
13 // method: 'GET'
14 // })
15 // .then((res) => {
16 // console.log(res)
17 // })
18 // .catch((err) => {
19 // console.log(err)
20 // })
21
22 // 第⼆种调⽤⽅式
23 // 通过实例调⽤ request ⽅法发送请求
24 // const res = await instance.request({
25 // url: '/index/findBanner',
26 // method: 'GET'
27 // })
28 // console.log(res)
29
30 // 第三种调⽤⽅式:通过调⽤快捷⽅式接收返回的值
31 const res = await instance.get('/index/findBanner')
32 console.log(res)
33 }
34 })
35
添加参数
1 //test.js
2
3 const res = await instance.get('/index/findBanner',{test:111},{timeout:20000})
4
5 console.log(res)
1 // request.js
2
3 // 合并请求参数
4 options = { ...this.defaults, ...options }
5
6 +console.log(options);
4.定义请求/响应拦截器
1 // 请求拦截器
2 instance.interceptors.request = (config) => {
3
4 // 在发送请求之前做些什么
5 return config
6 }
7
8 // 响应拦截器
9 instance.interceptors.response = (response) => {
10
11 // 对响应数据做点什么
12 return response
13 }
八.商品首页
分析轮播图区域并渲染
1 {
2 "usingComponents": {
3 "banner": "./banner/banner"
4 }
5 }
1 <!--pages/index/banner/banner.wxml-->
2
3 <!-- 轮播图 -->
4 <view class="swiper-box">
5 <!-- swiper 滑块视图容器 -->
6 <swiper
7 autoplay
8 class="swiper"
9 indicator-active-color="#FF734C"
10 interval="2000"
11 duration="1000"
12 indicator-color="rgba(0, 0, 0, .3)"
13 >
14 <!-- 使⽤ block 标签实现通过数组进⾏列表渲染 -->
15 <block wx:for="{{ bannerList }}" wx:key="index">
16 <!-- swiper-item 单个滑块视图容器 -->
17 <swiper-item class="swiper-item">
18 <!-- 通过 navigator 组件跳转的链接 -->
19 <navigator
20 class="navigator"
21 url="/pages/goods/detail/detail?goodsId=id"
22 >
23 <image class="img" src="{{ item }}"></image>
24 </navigator>
25 </swiper-item>
26 </block>
27 </swiper>
28
29 <!-- 轮播图的⾯板指示点,因为⾯板指示点不⽀持,所以我们只能通过⾃定义结构的⽅式 -->
30 <view class="indicator">
31 <!-- active 类名:当前被激活的⾯板指示点颜⾊ -->
32 <!-- circle 类名:默认的⾯板指示点颜⾊ -->
33 <text
34 wx:for="{{bannerList.length}}"
35 wx:key="id"
36 class="{{ 'active rectangle' }}"
37 ></text>
38 </view>
39 </view>
40
b:渲染⻚⾯结构
1 // page/index/index.html
2
3 <!-- 轮播图区域 -->
4 <banner bannerList="{{ bannerList }}" />
1 // page/index/banner/banner.wxml
2
3 <!-- 使⽤ block 标签实现通过数组进⾏列表渲染 -->
4 <block wx:for="{{ bannerList }}" wx:key="index">
5 <!-- swiper-item 单个滑块视图容器 -->
6 <swiper-item class="swiper-item">
7 <!-- 通过 navigator 组件跳转的链接 -->
8 <navigator
9 class="navigator"
10 + url="/pages/goods/detail/detail?goodsId={{item.id}}"
11 >
12 + <image class="img" src="{{ item.imageUrl }}"></image>
13 </navigator>
14 </swiper-item>
15 </block>
实现轮播图和指示点的联动
c:代码实现
1 <!--pages/index/banner/banner.wxml-->
2 <!-- 轮播图 -->
3 <view class="swiper-box">
4 <swiper
5 autoplay
6 class="swiper"
7 indicator-active-color="#FF734C"
8 interval="2000"
9 duration="1000"
10 indicator-color="rgba(0, 0, 0, .3)"
11 + bindchange="getSwiperIndex"
12 >
13 <block wx:for="{{ bannerList }}" wx:key="index">
14 <swiper-item class="swiper-item">
15 <navigator
16 class="navigator"
17 url="/pages/goods/detail/detail?goodsId={{ item.id }}"
18 >
19 <image class="img" src="{{ item.imageUrl }}"></image>
20 </navigator>
21 </swiper-item>
22 </block>
23 </swiper>
24
25 <!-- 轮播图的⾯板指示点,因为⾯板指示点不⽀持,所以我们只能通过⾃定义结构的⽅式 -->
26 <view class="indicator">
27 <!-- active 类名:当前被激活的⾯板指示点颜⾊ -->
28 <!-- rectangle 类名:默认的⾯板指示点颜⾊ -->
29 <text
30 wx:for="{{bannerList.length}}"
31 wx:key="id"
32 + class="{{ index === activeIndex ? 'active rectangle' : 'rectangle' }}"
33 ></text>
34 </view>
35 </view>
36
1 // pages/index/banner/banner.js
2
3 Component({
4 /**
5 * 组件的属性列表
6 */
7 properties: {
8 // 轮播图数据
9 bannerList: {
10 type: Array,
11 value: [
12 '../../../assets/banner/banner-1.jpg',
13 '../../../assets/banner/banner-2.jpg',
14 '../../../assets/banner/banner-3.jpg'
15 ]
16 }
17 },
18
19 /**
20 * 组件的初始数据
21 */
22 data: {
23 + activeIndex:0 // 被激活的轮播图索引,默认是0
24 },
25
26 /**
27 * 组件的⽅法列表
28 */
29 methods: {
30 + // 获取被激活的轮播图索引
31 + getSwiperIndex(event){
32
33 + // console.log(event);
34
35 + const { current } = event.detail
36
37 + this.setData({
38 + activeIndex:current
39 })
40 }
41 }
42 })
43
渲染分类导航
1 <!-- 导航分类 -->
2 <entrance cateList="{{ categoryList }}"/>
1 // pages/index/entrance/entrance.html
2
3 <view class="nav-list">
4 <!-- ⼀级分类导航容器 -->
5 <view
6 + wx:for="{{ cateList }}"
7 wx:key="index"
8 class="nav-item {{ index >= 5 ? 'small' : '' }}"
9 >
10 <!-- 导航链接 -->
11 <navigator
12 class="navigator-nav"
13 + url="/pages/goods/list/list?category1Id={{item.id}}"
14 >
15 + <image class="nav-img" src="{{ item.imageUrl }}" />
16 + <text class="nav-text">{{ item.name }}</text>
17 </navigator>
18 </view>
19 </view>
b:导航分类结构样式调整
1 /* pages/index/entrance/entrance.wxss */
2
3 /* 导航分类样式 */
4 .nav-list {
5 display: flex;
6 align-items: center;
7 flex-wrap: wrap;
8 margin: 20rpx 0rpx;
9 border-radius: 18rpx;
10 padding: 10px 0;
11 background-color: #fff;
12
13 .nav-item {
14 flex: 1;
15 min-width: 20%;
16 max-width: 20%;
17
18 &.small {
19 margin-top: 36rpx;
20
21 + .nav-img {
22 + width: 50rpx !important;
23 + height: 50rpx !important;
24 }
25 }
26 }
27 }
渲染活动区域
1 // pages/index/index.html
2
3 <!-- ⼴告区域 -->
4 <view class="adver">
5 <view class="adver-left">
6 + <navigator url="/pages/goods/list/list?category2Id={{
activeList[0].category2Id }}">
7 + <image src="{{ activeList[0].imageUrl }}" mode="widthFix" />
8 + </navigator>
9 </view>
10
11 <view class="adver-right">
12 <view>
13 + <navigator url="/pages/goods/list/list?category2Id={{
activeList[1].category2Id }}">
14 + <image src="{{ activeList[1].imageUrl }}" mode="widthFix" />
15 + </navigator>
16 </view>
17 <view>
18 + <navigator url="/pages/goods/list/list?category2Id={{
activeList[2].category2Id }}">
19 + <image src="{{ activeList[2].imageUrl }}" mode="widthFix" />
20 + </navigator>
21 </view>
22 </view>
23 </view>
24
猜你喜欢+⼈⽓推荐区域渲染
1 // page/index/index.wxml
2
3 <!-- 商品列表 -->
4 <goods-list title="猜你喜欢" list="{{ guessList }}"></goods-list>
5 <goods-list title="⼈⽓推荐" list="{{ hotList }}"></goods-list>
b:接收⾸⻚传递的 list 数据
1 // components/goods-list/good-list.js
2
3 Component({
4 // 组件的属性列表
5 properties: {
6 // 列表标题
7 title: {
8 type: String,
9 value: '',
10 },
11
12 // 传递的列表数据
13 list: {
14 type: Array,
15 value: []
16 }
17 }
18
19 // coding...
20 }
c:遍历 goods-item 组件,并将数据传递给 goods-item
1 // components/goods-list/goods-list.wxml
2
3 <!-- 商品列表组件 -->
4 + <view class="goods_container" wx:if="{{ list.length }}">
5
6 <!-- 标题 -->
7 + <view class="goods_title">{{title}}</view>
8
9 <!-- 列表区域 -->
10 <view class="goods_card_list">
11 + <goods-card wx:for="{{ list }}" wx:key="id" goodItem="{{ item }}"></goodscard>
12 </view>
13
14 <!-- 查看更多 -->
15 <!-- coding -->
16 </view>
d:将数据传递给 goods-item 组件
1 // components/goods-card/goods-card.js
2
3 Component({
4
5 // 组件的属性列表
6 properties: {
7 // 每⼀项商品的数据
8 goodItem: {
9 type: Object,
10 value: {}
11 }
12 }
13
14 // coding...
15 }
e:将数据传递给 goods-item 组件
1 // components/goods-list/goods-item.wxml
2
3 <!-- 列表分类卡⽚ -->
4 <view class="goods_cart_container">
5 <navigator class="navigator_nav" url="/pages/goods/detail/detail?goodsId=
{{goodItem.id}}">
6
7 <!-- 商品图⽚ -->
8 <image class="good_img" src="{{ goodItem.imageUrl }}" mode="widthFix" />
9
10 <!-- 商品详细信息 -->
11 <view class="goods_item_info">
12 <!-- 商品名称 -->
13 <text class="goods_item_info_name">{{ goodItem.name }}</text>
14 <!-- 商品描述 -->
15 <text class="goods_item_info_promo">{{ goodItem.floralLanguage }}</text>
16 <!-- 商品价格 -->
17 <view class="goods_item_info_bottom">
18 <view class="goods_item_info_price">
19 <text class="text">¥</text>{{ goodItem.price }}
20 </view>
21 <view class="goods_item_info_origin_price">
22 <text class="text">¥</text> {{goodItem.marketPrice}}
23 </view>
24 <!-- 加⼊购物⻋图⽚ -->
25 <view class="goods_item_info_btn">
26 <image class="goods_image" src="/static/images/buybtn.png" mode="" />
27 </view>
28 </view>
29 </view>
30 </navigator>
31 </view>
效果展示图

1.不同的请求方式区别(get、post....)
get请求一般用来请求获取数据
post请求一般作为发送数据到后台,传递数据,创建数据;
get请求刷新浏览器或者回退没有影响
post请求则会重新请求一遍;
2.promise的用法:
promise是什么:Promise 是异步编程的一种解决方案,其实是一个构造函数,自己身上有reject、resolve这几个方法,原型上有then、catch等方法
基本语法
const promise = new Promise((resolve, reject) => {});
我们首先使用Promise构造函数实例化一个新的 promise 对象,并向它传递一个回调函数。回调有两个参数,resolve和reject,它们都是函数。我们所有的异步代码都在该回调中。
如果一切运行成功,承诺将通过调用来实现resolve。如果出现错误,则会调用reject。我们可以将值传递给这两种方法,这些方法将在使用代码中可用。
3.Object.assign的用法
Object.assign(target, ...sources)
参数: target--->目标对象
source--->源对象
返回值:target,即目标对象
4.async await的用法
async用于申明function异步,await用于等待一个异步方法执行完成
async函数用于返回一个 Promise 对象
5.baseUrl的使用
配置了 baseURL,之后请求传入的 url 都会和我们的 baseURL 拼接成完整的绝对地址,除非请求传入的 url 已经是绝对地址。
类(Class):用来描述具有相同的属性和方法的对象的集合。它定义了该集合中每个对象所共有的属性和方法。对象是类的实例。
方法:类中定义的函数。
async函数:async用于声明一个函数是异步的。这意味着函数总是返回一个promise。如果函数内部返回的是非promise值,那么这个值会被自动包装成一个已解决(resolved)的promise。
await表达式:await只能在async函数内部使用,它等待一个Promise对象状态变为已解决,然后返回解决的值。如果Promise状态变为拒绝(rejected),await会抛出异常。
Promise.resolve:用于将一个值转换为一个已解决(resolved)的Promise对象。如果传入的值是一个Promise对象,那么直接返回这个Promise对象;如果传入的值不是Promise对象,那么返回一个新的已解决的Promise对象,其值为传入的值。
Promise.reject:用于创建一个已拒绝(rejected)的Promise对象。它接受一个参数作为拒绝的原因。
Promise.all:用于将多个Promise对象包装成一个新的Promise对象。当所有传入的Promise对象都变为已解决状态时,新的Promise对象才会变为已解决状态;如果有任何一个传入的Promise对象变为已拒绝状态,新的Promise对象也会变为已拒绝状态。
loading的状态通常与请求开始和结束时绑定。当异步操作(如AJAX请求、获取Web API数据等)开始时,显示loading状态;当操作完成并返回数据时,隐藏loading状态。
请求拦截器用于在请求被发送之前修改请求配置,例如添加认证信息、设置请求头等。
响应拦截器用于在接收到响应数据之后进行处理,可以对响应数据进行转换、错误处理等操作。
200 OK: 请求成功,这是最常见和期望的状态码。
201 Created: 请求已成功,并因此创建了一个新的资源。
204 No Content: 请求成功,但没有返回任何内容,只是告诉客户端操作成功了。
400 Bad Request: 客户端请求有语法错误,不能被服务器理解。
401 Unauthorized: 表示需要用户认证。
403 Forbidden: 服务器理解请求但拒绝执行它。
404 Not Found: 请求的资源无法在服务器上找到。
500 Internal Server Error: 服务器遇到了一个未知的错误。
502 Bad Gateway: 作为网关或代理角色的服务器从上游服务器收到无效响应。


 860
860

 被折叠的 条评论
为什么被折叠?
被折叠的 条评论
为什么被折叠?
 到【灌水乐园】发言


