


目录
1.6:注册goods-card和goods-list全局组件
2.对get、post、put、delete 请求方式进行快捷封装
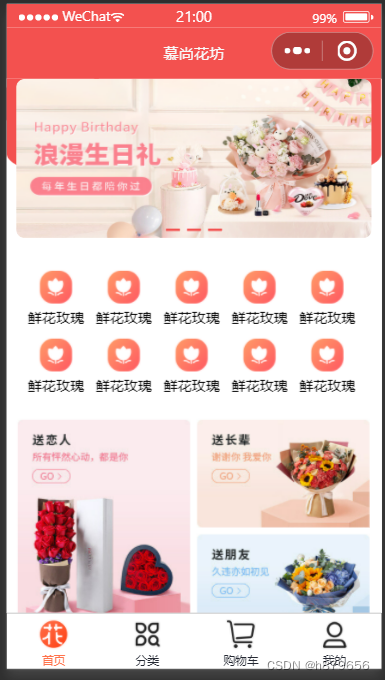
一:⾸⻚
1.1:⾸⻚结构
<!-- index.wxml -->
<view class="index-container">
<!-- 首页背景图 -->
<view class="window-bgc"></view>
<!-- 页面主体区域 -->
<view class="container">
<!-- 轮播图区域 -->
<banner />
<!-- 导航栏区域 -->
<entrance />
<!-- 广告区域 -->
<view class="adver">
<view class="adver-left">
<navigator url="">
<image src="../../assets/images/love.jpg" mode="widthFix" />
</navigator>
</view>
<view class="adver-right">
<navigator url="">
<image src="../../assets/images/elder.jpg" mode="widthFix" />
</navigator>
<view>
<navigator url="">
<image src="../../assets/images/friend.jpg" mode="widthFix" />
</navigator>
</view>
</view>
</view>
<!-- 列表区域 -->
<goods-list/>
</view>
</view>
1.2:⾸⻚背景图
.index-container {
// 首页背景图
.window-bgc {
height: 200rpx;
position: absolute;
width: 100%;
background-color: #f3514f;
border-radius: 0rpx 0rpx 25% 25%;
}
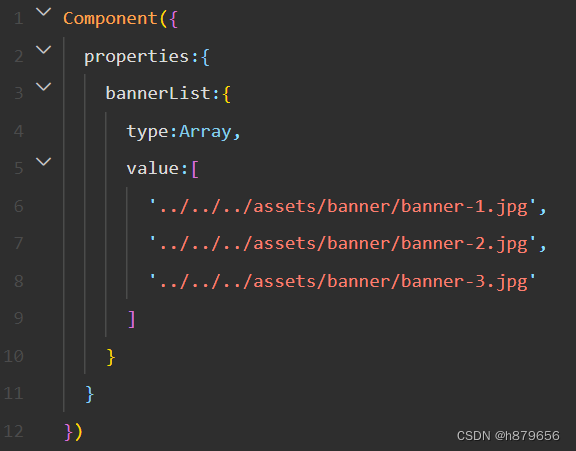
1.3:banner组件
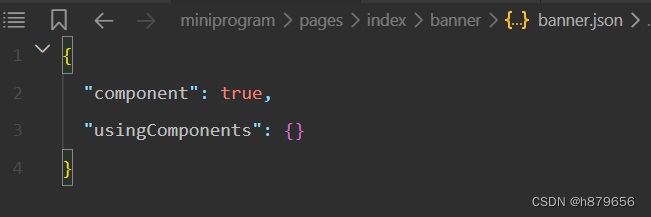
a:新建banner组件
b:构建banner组件结构
![]()
c:完成轮播图组件
<view class="swiper-box">
<swiper autoplay class="swiper" indicator-active-color="#FF734C"
interval="2000" duration="1000" indicator-color="rgba(0,0,0,.3)">
<block wx:for="{{ bannerList }}" wx:key="index">
<swiper-item class="swiper-item">
<image class="img" src="{{ item }}" mode="" />
</swiper-item>
</block>
</swiper>
<view class="indicator">
<text
wx:for="{{bannerList.length}}"
wx:key="id"
class="rectangle"></text>
</view>
</view>
.swiper-box {
position: relative;
.swiper {
height: 320rpx;
// 设置圆角弧度
border-radius: 18rpx;
// 设置溢出隐藏
overflow: hidden;
width: 95%;
// 设置外边距
margin: 0 auto ;
}
.swiper-item {
.img {
width: 100%;
height: 100%;
border-radius: 18rpx;
}
}
.indicator {
display: flex;
justify-content: center;
position: absolute;
bottom: 16rpx;
left: 0;
right: 0;
.rectangle {
width: 30rpx;
height: 6rpx;
background-color: #f3514f;
margin: 0 8rpx;
border-radius: 6rpx;
}
}
}
1.4:entrance组件
<view class="nav-list">
<view wx:for="{{10}}" wx:key="index" class="nav-item">
<navigator url="" class="navigator-nav">
<image src="../../../assets/images/cate-1.png" mode="" class="nav-img" />
<text class="nav-text">鲜花玫瑰</text>
</navigator>
</view>
</view>
.nav-list {
// 设置外边距
margin: 20rpx;
// 设置圆角边框
border-radius: 18rpx;
// 设置内边距
padding: 10px 0px 10px 10px;
background-color: white;
// 设置弹性布局
display: flex;
// 设置换行
flex-wrap: wrap;
.nav-item {
.navigator-nav {
display: flex;
// 设置主轴方向 从横向排列更改为纵向排列
flex-direction: column;
// 设置交叉轴的对齐方式 在交叉轴中间对齐
align-items: center;
// 主轴方向对齐 主轴上居中排列
justify-content: center;
// 右外边距
margin-right: 10px;
// 上外边距
margin-top: 10px;
.nav-text {
// 上外边距
margin-top: 4px;
// 设置字体大小
font-size: 12px;
}
.nav-img {
width: 66rpx;
height: 66rpx;
}
}
}
}
1.5:完成⼴告区域
<view class="adver">
<view class="adver-left">
<navigator url="">
<image src="../../assets/images/love.jpg" mode="widthFix" />
</navigator>
</view>
<view class="adver-right">
<navigator url="">
<image src="../../assets/images/elder.jpg" mode="widthFix" />
</navigator>
<view>
<navigator url="">
<image src="../../assets/images/friend.jpg" mode="widthFix" />
</navigator>
</view>
</view>
</view>
.adver {
display: flex;
width: 96%;
margin: 0 auto;
border-radius: 18rpx;
background-color: white;
.adver-left {
width: 50%;
// 上 右 下 左
padding: 8rpx 8rpx 0rpx 8rpx;
}
.adver-right {
width: 50%;
padding: 8rpx 8rpx 0rpx 8rpx;
// 选中第二张图片
view:last-child{
padding-top: 6rpx;
}
}
image {
width: 100%;
}
}
1.6:注册goods-card和goods-list全局组件

a:完成goods-card组件
{
"component": true,
"usingComponents": {}
}
.goods_cart_container{
width: 350rpx;
margin-top: 18rpx;
background: #fff;
border-radius: 18rpx;
}
.good_img {
width: 100%;
max-height: 360rpx;
border-top-left-radius: 16rpx;
border-top-right-radius: 16rpx;
}
.goods_item_info {
display: flex;
flex-direction: column;
padding: 10rpx 20rpx;
}
.goods_item_info .goods_item_info_name {
font-weight: 600;
font-size: 30rpx;
line-height: 20px;
overflow: hidden;
text-overflow: ellipsis;
white-space: nowrap;
}
.goods_item_info .goods_item_info_promo {
padding-top: 20rpx;
padding-bottom: 3px;
font-size: 12px;
color: #71797f;
overflow: hidden;
text-overflow: ellipsis;
white-space: nowrap;
}
.goods_item_info_bottom {
display: flex;
line-height: 50rpx;
margin-top: 20rpx;
}
.goods_item_info_bottom .goods_image {
width: 48rpx;
height: 48rpx;
}
.goods_item_info_price {
font-size: 30rpx;
font-weight: bold;
color: #f3514f;
}
.goods_item_info_price .text {
font-size: 24rpx;
padding-right: 4rpx;
font-weight: normal;
}
.goods_item_info_origin_price {
flex: 1;
font-size: 20rpx;
color: #71797f;
text-decoration-line: line-through;
margin-left: 6%;
margin-top: 4rpx;
}
.goods_item_info_origin_price .text {
font-size: 20rpx;
}
<view class="goods_cart_conainer">
<!-- 图片 -->
<navigator class="navigator_nav" url="">
<image class="good_img" src="../../assets/images/floor.jpg" mode="widthFix" />
<!-- 详细信息 -->
<view class="goods_item_info">
<!-- 商品名称 -->
<text class="goods_item_info_name">999枝红玫瑰</text>
<!-- 商品描述 -->
<text class="goods_item_info_promo">爱她,就送999枝红玫瑰。</text>
<!-- 商品价钱 -->
<view class="goods_item_info_bottom">
<view class="goods_item_info_price">
<text class="text">¥</text>399
</view>
<view class="goods_item_info_origin_price">
<text class="text">¥</text>599
</view>
<!-- 购物车 -->
<view class="goods_item_info_btn">
<image class="goods_image" src="../../assets/images/buybtn.png" mode="" />
</view>
</view>
</view>
</navigator>
</view>
b:完成goods-list组件
{
"component": true,
"usingComponents": {
"goods-card":"../goods-card/goods-card"
}
}
.goods_title {
text-align: center;
font-size: 40rpx;
line-height: 52rpx;
font-weight: bold;
color: #232628;
padding: 20rpx 0 0rpx 0rpx;
}
.goods_card_list {
display: flex;
flex-wrap: wrap;
justify-content: space-between;
}
.goods_card_list::after {
content: '';
width: 350rpx;
}
.goods_more {
margin: 20rpx 0;
}
.goods_more_btn {
display: block;
margin: 0 auto;
background: #ffffff;
border-radius: 20rpx;
height: 40px;
line-height: 40px;
text-align: center;
font-size: 14px;
color: rgba(35,38,40,0.7);
}
<view class="goods_container">
<!-- 标题 -->
<view class="goods_title">人气推荐</view>
<!-- 列表区域 -->
<view class="goods_card_list">
<block wx:for="{{ 4 }}" wx:key="index">
<goods-card />
</block>
</view>
<!-- 查看更多 -->
<view class="goods_more">
<navigator url="" class="goods_more_btn">
查看更多
</navigator>
</view>
</view>
1.7:完成⾸⻚⻚⾯
<goods-list title="猜你喜欢"></goods-list><goods-list title="⼈⽓推荐"></goods-list>
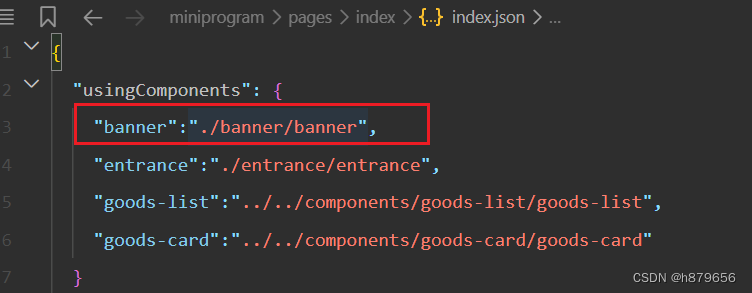
{"usingComponents": {"goods-list": "/components/goods-list/goods-list","entrance": "./entrance/entrance","banner": "./banner/banner"},"navigationBarTitleText": "慕尚花坊"}
二:分类页面
1.1:wxml页面代码
<view>
<view class="category-container">
<!-- 左侧的滚动视图区域 -->
<scroll-view class="category-left-view" scroll-y>
<!-- 一级分类 -->
<view class="left-view-item active">爱礼精选</view>
<view class="left-view-item">鲜花玫瑰</view>
<view class="left-view-item">永生玫瑰</view>
<view class="left-view-item">玫瑰珠宝</view>
</scroll-view>
<!-- 右侧的滚动视图区域 -->
<scroll-view class="category-right-view" scroll-y>
<!-- 二级分类 -->
<view class="test">
<view wx:for="{{10}}" wx:key="index" class="right-view-item">
<navigator
class="navigator"
url="/pages/goods/list/list?category2Id=1"
>
<image class="" src="../../assets/images/cate-1.png" mode=""/>
<text class="goods_item_name">真情告白</text>
</navigator>
</view>
</view>
</scroll-view>
</view>
</view>
1.2:scss页面代码
.category-container {
display: flex;
// 左侧一级分类
.category-left-view {
width: 220rpx;
height: 100vh;
background: #fff !important;
.left-view-item {
line-height: 99rpx;
// 文本的排列方式
text-align: center;
font-size: 26rpx;
}
.active {
background-color: #ffffff;
position: relative;
color: #f3514f;
// &表示当前标签
// ::before是伪元素选择器
// 在指定元素前添加内容
&::before {
content: ' ';
display: block;
width: 6rpx;
height: 66rpx;
background-color: #f3514f;
position: absolute;
left: 0;
top: 50%;
// 沿着Y轴平移
transform: translateY(-50%);
}
}
}
// 右侧二级分类
.category-right-view {
&::before {
content: '';
height: 150vh;
width: 10rpx;
display: block;
background-color: #f3514f;
position: absolute;
transform: translateY(-25%);
}
width: 100%;
height: 100vh;
flex-wrap: wrap;
background: #fff !important;
margin-left: 8rpx;
.right-view-item {
width: 33%;
float: left;
margin-top: 30rpx;
.navigator {
display: flex;
flex-direction: column;
align-items: center;
}
image {
width: 90rpx;
height: 90rpx;
}
text {
font-size: 26rpx;
margin-top: 18rpx;
}
}
}
}

三:购物车页面
1.1:购物车有商品的页面布局
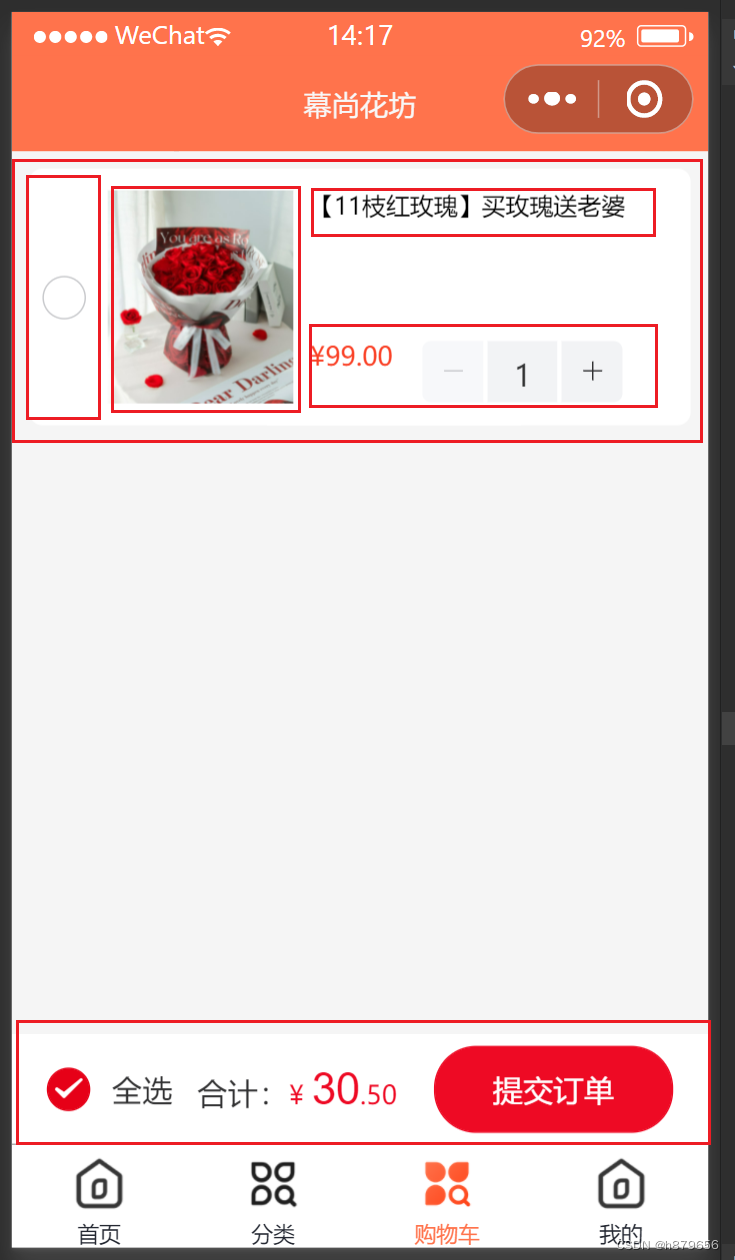
1.2:购物车里有商品的wxml代码
<view class="container">
<!-- 购物车列表区域 -->
<view class="carList-container" wx:if="{{carList.length}}">
<view class="carList-container-cell" wx:for="{{carList}}" wx:key="index">
<van-swipe-cell right-width="{{ 65 }}" left-width="{{ 65 }}">
<view slot="left" class="van-swipe-cell__left">选择</view>
<van-cell-group>
<view class="goods-info">
<view class="left">
<van-checkbox value="{{ false }}" checked-color="#e60017" bind:change="onChange">
</van-checkbox>
</view>
<view class="mid">
<image src="../../assets/images/floor-img.jpg" mode="" />
</view>
<view class="right">
<view class="title">【11枝红玫瑰】买玫瑰送老婆</view>
<view class="buy">
<view class="price">¥99.00</view>
<view class="buy-btn">
<van-stepper value="{{ 1 }}" bind:change="onChange" />
</view>
</view>
</view>
</view>
</van-cell-group>
<view slot="right" class="van-swipe-cell__right">删除</view>
</van-swipe-cell>
</view>
</view>
<!-- 提交订单栏区域 -->
<van-submit-bar price="{{ 3050 }}" button-text="提交订单" bind:submit="onClickButton" tip="{{ true }}">
<van-checkbox value="{{ true }}" checked-color="#e60017" bind:change="onChange">
全选
</van-checkbox>
</van-submit-bar>
</view>
</view>
1.3: 购物车里有商品的scss代码
.container {
background-color: whitesmoke;
height: 100vh;
}
.carList-container {
.carList-container-cell {
.goods-info {
display: flex;
background-color: white;
border-radius: 16rpx;
margin: 20rpx 20rpx 5rpx 20rpx;
padding: 24rpx 16rpx;
.left {
display: flex;
align-items: center;
}
.mid {
width: 200rpx;
height: 230rpx;
image {
width: 100%;
height: 100%;
}
}
.right {
display: flex;
flex-direction: column;
height: 230rpx;
justify-content: space-between;
padding-left: 20rpx;
.title {
font-size: 26rpx;
}
.buy {
display: flex;
justify-content: space-between;
.price {
font-size: 30rpx;
color: #fa4126;
}
}
}
}
}
}
1.4: 购物车里有商品的js代码
注:其中靠carList:[1]来控制商品数量,carList中不写则没有商品
// pages/cart/cart.js
Page({
data: {
carList:[1]
}
})
2.1:购物车无商品的页面布局

2.2:购物车无商品的wxml页面
<!-- 购物车列表为空的情况 -->
<van-empty description="还没有商品,快去添加吧~" wx:else>
<navigator url="">
<van-button round type="danger">去购物</van-button>
</navigator>
<navigator url="">
<van-button round type="danger">去登录</van-button>
</navigator>
</van-empty>
2.3:购物车无商品的scss页面
.van-empty__bottom {
height: 250rpx;
display: flex;
flex-direction: column;
justify-content: space-between;
}
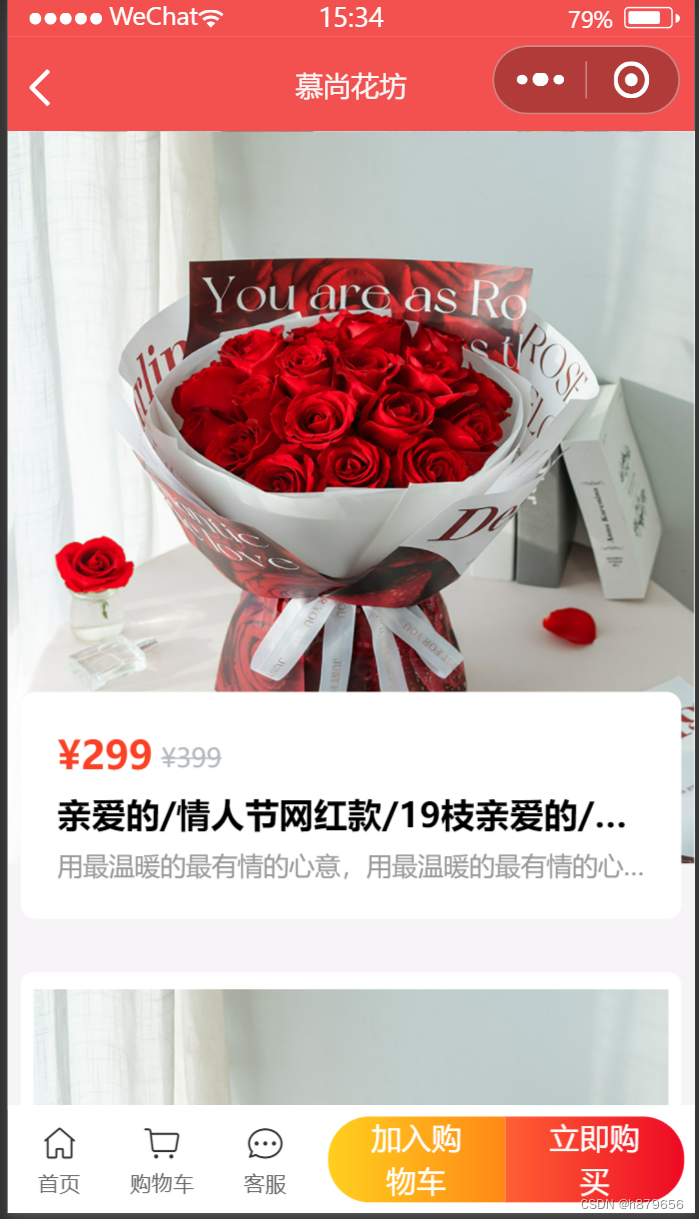
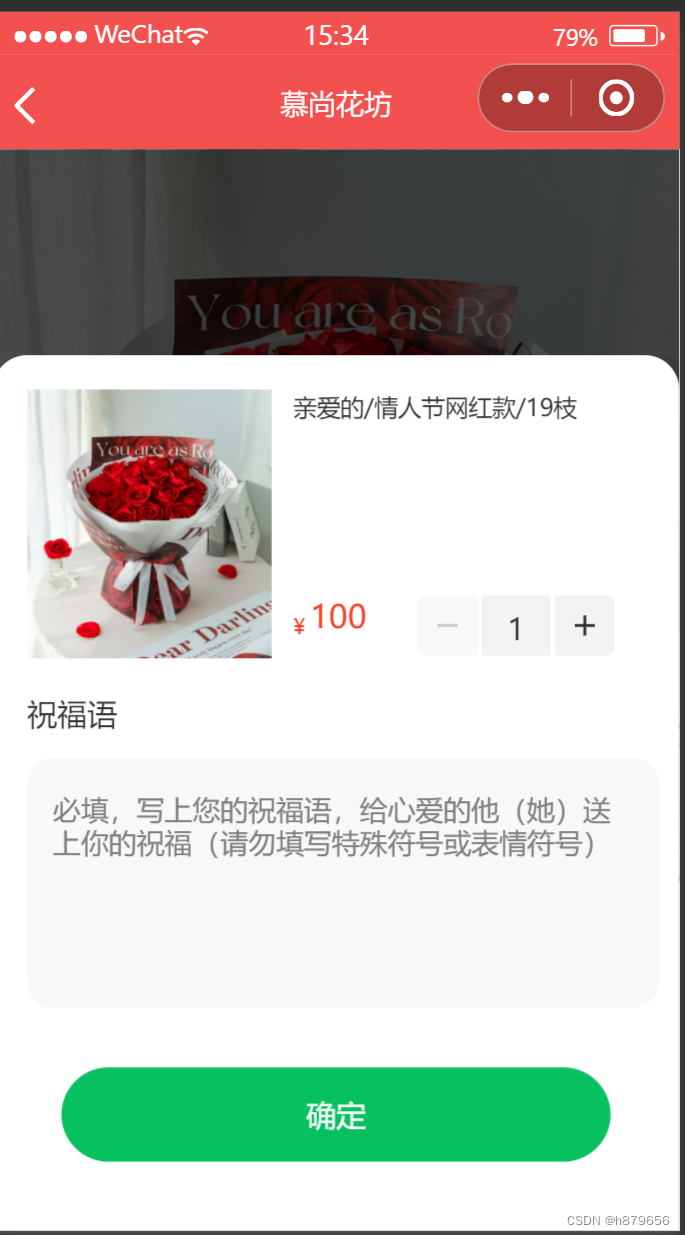
四:商品详情页面
1:detail.js
Page({
data: {
buyName: '', // 订购人姓名
buyPhone: '', // 订购人手机号
deliveryDate: '选择送达日期', // 期望送达日期
blessing: '', // 祝福语
show: false, // 期望送达日期弹框
minDate: new Date().getTime(),
currentDate: new Date().getTime()
},
// 选择期望送达日期
onShowDateTimerPopUp() {
this.setData({
show: true
})
},
// 期望送达日期确定按钮
onConfirmTimerPicker(event) {
this.setData({
show: false
})
},
// 期望送达日期取消按钮 以及 关闭弹框时触发
onCancelTimePicker() {
this.setData({
show: false,
minDate: new Date().getTime(),
currentDate: new Date().getTime()
})
},
// 跳转到收货地址
toAddress() {
wx.navigateTo({
url: '/modules/settingModule/pages/address/list/index'
})
}
})
2:detail.wxml
<!--pages/order/index.wxml-->
<view class="container order">
<view class="address-card">
<!-- 添加收货地址 -->
<!-- <view class="add-address" bindtap="toAddress">
<van-icon size="22px" name="add" />
<view>添加收货地址</view>
</view> -->
<view class="order-address detail-flex">
<view class="address-content">
<view class="title">甘肃省 甘南藏族自治州 碌曲县</view>
<!-- <view class="detail">松日鼎盛大厦0层0号</view> -->
<view class="info detail-flex">
<text>测试</text>
<text>130839991443</text>
</view>
</view>
<view class="select-address">
<navigator
class="navigator"
url="/modules/settingModule/pages/address/list/index"
>
<van-icon color="#bbb" name="arrow" size="22px" />
</navigator>
</view>
</view>
<view class="top-line"></view>
</view>
<view class="order-info">
<van-cell-group class="group">
<!-- 订购人姓名 -->
<van-field
label-class="filed-label"
model:value="{{ buyName }}"
label="订购人姓名:"
placeholder="订购人的姓名"
placeholder-style="color: #969799"
/>
<!-- 订购人手机号 -->
<van-field
label-class="filed-label"
input-class="input-class"
model:value="{{ buyPhone }}"
label="订购人手机号:"
type="number"
maxlength="11"
placeholder="订购人的手机号"
placeholder-style="color: #969799"
/>
<!-- 期望送达日期 -->
<van-cell
label-class="filed-label"
title="期望送达日期:"
is-link
value="{{ deliveryDate }}"
bind:click="onShowDateTimerPopUp"
/>
<van-cell title="订单备注:" border="{{ false }}" use-label-slot>
<textarea
slot="label"
model:value="{{ remarks }}"
class="form-textarea"
placeholder="写上您的祝福语,给心爱的他(她)送上你的祝福(请勿填写特殊符号或表情符号)"
name="textarea"
/>
</van-cell>
</van-cell-group>
</view>
<view class="goods-wraper">
<!-- 商品清单 -->
<view class="goods-list">
<view class="goods-item detail-flex">
<view class="img">
<image src="/assets/images/floor-img.jpg" />
</view>
<view class="content">
<view class="goods-title">[鲜花]韩式花篮/阳光使者</view>
<view class="goods-price">
<view class="price"> ¥ 99.0 </view>
<view>x1</view>
</view>
</view>
</view>
<view class="goods-item detail-flex">
<view class="img">
<image src="/assets/images/floor-img.jpg" />
</view>
<view class="content">
<view class="goods-title">[鲜花]韩式花篮/阳光使者</view>
<view class="goods-price">
<view class="price"> ¥ 99.0 </view>
<view>x1</view>
</view>
</view>
</view>
</view>
</view>
<!-- 支付区域 -->
<view class="footer detail-flex">
<view class="left"> ¥499 </view>
<viwe class="right">提交订单</viwe>
</view>
<van-popup
show="{{ show }}"
round
position="bottom"
custom-style="height: 50%"
bind:close="onCancelTimePicker"
>
<van-datetime-picker
type="date"
min-date="{{ minDate }}"
bind:confirm="onConfirmTimerPicker"
bind:cancel="onCancelTimePicker"
/>
</van-popup>
</view>
3:detail.scss
/* pages/order/index.wxss */
.detail-flex {
display: flex;
}
.order {
padding-bottom: 130rpx;
}
// 收货地址卡片
.address-card {
background-color: #fff;
border-radius: 14rpx;
overflow: hidden;
// 添加收货地址
.add-address {
display: flex;
height: 140rpx;
line-height: 140rpx;
justify-content: center;
view {
padding-left: 14rpx;
}
}
// 收货地址样式
.order-address {
justify-content: space-between;
padding: 24rpx 32rpx;
.title {
display: flex;
align-items: center;
// height: 60rpx;
font-size: 28rpx;
font-weight: normal;
color: #333333;
line-height: 40rpx;
}
.info {
height: 60rpx;
font-size: 28rpx;
font-weight: normal;
color: #333333;
line-height: 40rpx;
margin-top: 20rpx;
text {
&:first-child {
margin-right: 16rpx;
}
}
}
.select-address .navigator {
width: 100%;
height: 100%;
width: 80rpx;
display: flex;
justify-content: center;
align-content: center;
}
}
}
.order-info,
.goods-wraper {
background-color: white;
padding: 24rpx 0rpx;
margin-top: 20rpx;
border-radius: 14rpx;
}
.goods-wraper {
padding: 10rpx 24rpx;
.goods-list {
padding: 12px 0;
.goods-item {
display: flex;
margin-bottom: 14px;
.img {
width: 64px;
height: 69px;
image {
width: 100%;
height: 100%;
}
}
.content {
flex: 1;
margin: 0 8px;
display: flex;
flex-direction: column;
justify-content: space-between;
.goods-title {
font-size: 14px;
color: #333;
}
}
.goods-price {
display: flex;
justify-content: space-between;
font-size: 30rpx;
}
}
}
}
.form-textarea {
border-radius: 12px;
background-color: #f7f8fa;
padding: 16px 12px;
font-size: 13px;
margin-top: 12px;
width: 94%;
height: 84px;
color: #333;
}
// 提交订单面板
.footer {
position: fixed;
left: 0;
bottom: 0;
width: 100%;
background-color: #fff;
height: 112rpx;
justify-content: space-between;
align-items: center;
border-top: 1px solid #ddd;
.left {
color: #fa4126;
font-weight: bold;
font-size: 50rpx;
line-height: 88rpx;
margin-left: 16px;
}
.right {
height: 80rpx;
width: 240rpx;
border-radius: 40rpx;
background-color: #fa4126;
color: #ffffff;
line-height: 80rpx;
font-weight: bold;
font-size: 28rpx;
text-align: center;
margin-right: 16px;
}
}
// 覆盖 Vant 组件的样式
.van-field__control {
text-align: right !important;
color: #333333 !important;
padding-right: 8rpx !important;
}
// 外部样式类
.filed-label {
color: #333333 !important;
width: 400rpx !important;
}
.input-class {
color: #333333 !important;
}
.van-cell__value {
color: #969799 !important;
}
.van-hairline--top-bottom:after {
border: none !important;
}
.van-cell__title {
max-width: none !important;
}
4:效果图
五:小程序知识点
01-css单位
<!DOCTYPE html>
<html lang="en">
<head>
<meta charset="UTF-8">
<meta name="viewport" content="width=device-width, initial-scale=1.0">
<title>Document</title>
<style>
.text1{
font-size: 30px;
}
body{
font-size: 60px;
}
.text2{
font-size: 2em;
}
</style>
</head>
<body>
<!--
px:绝对单位。
em:相对单位。基准点为父节点字体的大小。
rpx:是微信小程序中css的尺寸单位。
1rpx等于屏幕宽度的375分之1
-->
<p class="text1">我是绝对单位</p>
<p class="text2">我是相对单位</p>
<div id="box">
<p class="text3">111</p>
</div>
</body>
</html>
02-flex布局
<!DOCTYPE html>
<html lang="en">
<head>
<meta charset="UTF-8">
<meta name="viewport" content="width=device-width, initial-scale=1.0">
<title>Document</title>
<style>
.demoOne{
width: 800px;
height: 800px;
border: 2px solid blue;
/* 设置弹性盒子布局,将块级元素转化为行内元素。 */
display: flex;
/* flex-direction属性
flex-direction属性用于设置主轴方向,通过设置主轴方向可以规定项目的排列方向。 */
/* row:默认值,主轴为从左到右的水平方向。
row-reverse:主轴为从右到左的水平方向。
column:主轴为从上到下的垂直方向。
column-reverse:主轴为从下到上的垂直方向。 */
/* flex-direction: row; */
/* flex-direction: row-reverse; */
/* flex-direction::column; */
/* flex-direction: column-reverse; */
/* justify-content属性
justify-content属性用于设置项目在主轴方向上的对齐方式。能够分配项目之间及其周围多余的空间。 */
/* flex-start:默认值,表示项目对齐到主轴起点,项目间不留空隙。
flex-end:项目对齐到主轴终点,项目间不留空隙。
center:项目在主轴上居中排列,项目间不留空隙。
主轴上第一个项目离主轴起点的距离等于最后一个项目离主轴终点的距离。
space-between:两端对齐,两端的项目分别靠向容器的两端,其他项目之间的间隔相等space-around:每个项目之间的距离相等,
第一个项目离主轴起点和最后一个项目离终点的距离为中间项目间距的一半。 */
/* justify-content: flex-start; */
/* justify-content: flex-end; */
/* justify-content: center; */
/* justify-content: space-between; */
/* justify-content:space-around; */
/* align-items属性align-items属性用于设置项目在交叉轴上的对齐方式。*/
/* center:项目在交叉轴的中间位置对齐。
flex-start:项目顶部与交叉轴起点对齐,flex-end:项目底部与交叉轴终点对齐。
baseline:项目的第一行文字的基线对齐。 */
/* align-items: center; */
/* align-items: flex-start; */
/* align-items: flex-end; */
/* align-items: baseline; */
/* 若要设置元素水平垂直居中
display: flex;
justify-content: center;
align-items: center;
*/
}
.boxOne{
width: 100px;
height: 100px;
background-color: green;
}
.boxTwo{
width: 200px;
height: 200px;
background-color: red;
}
.boxThree{
width: 300px;
height: 300px;
background-color: yellow;
}
</style>
</head>
<body>
<!-- 块级元素会独占一行 默认的宽度占满父级元素,行内元素不会换行。 -->
<div class="demoOne">
<div class="boxOne">1</div>
<div class="boxTwo">2</div>
<div class="boxThree">3</div>
</div>
</body>
</html>
03-元素定位
<!DOCTYPE html>
<html lang="en">
<head>
<meta charset="UTF-8">
<meta name="viewport" content="width=device-width, initial-scale=1.0">
<title>Document</title>
<style>
body {
height: 2000px
}
.fix {
width: 100%;
height: 200px;
background-color: blue;
position: fixed;
bottom: 0px;
}
.rel-father {
width: 300px;
height: 300px;
background-color: blue;
border: 5px solid black;
margin: 50px auto;
}
.rel-child01,.rel-child02,.rel-child03 {
width: 100px;
height: 50px;
background-color: yellow;
border: 2px solid black;
margin: 10px 0px;
}
.rel-child01 {
position: relative;
top: -10px;
}
.rel-child02 {
position: relative;
left: 198px;
/* top: -74px; */
bottom: 74px;
}
.rel-child03 {
position: relative;
top: 108px;
}
/* 绝对定位 */
.abs-father {
width: 300px;
height: 300px;
background-color: blue;
border: 5px solid black;
position: relative;
}
/* .abs-child {
width: 100px;
height: 100px;
background-color: brown;
position: absolute;
bottom: 0px;
right: 0px;
} */
.abs-child01 {
width: 100px;
height: 100px;
background-color: brown;
position: absolute;
}
.abs-child02{
width: 100px;
height: 100px;
background-color: brown;
position: absolute;
bottom: 0px;
}
.abs-child03{
width: 100px;
height: 100px;
background-color: brown;
position: absolute;
right: 0px;
}
</style>
</head>
<body>
<!--
通过定位属性position可以实现元素的精准定位。
fixed:固定定位。
relative:相对定位,相对于其原文档流的位置进行定位。
absolute:绝对定位。相对于上一个已经定位的父元素进行定位。
static:静态定位。(默认定位方式)
上(top)、下(bottom)、左(left)、右(right)
-->
<!-- 固定定位 -->
<div class="fix"></div>
<!-- 相对定位 -->
<div class="rel-father">
<div class="rel-child01">child01</div>
<div class="rel-child02">child02</div>
<div class="rel-child03">child03</div>
</div>
<!-- 绝对定位 -->
<div class="abs-father">
<!-- <div class="abs-child"></div> -->
<div class="abs-child01">01</div>
<div class="abs-child02">02</div>
<div class="abs-child03">03</div>
</div>
</body>
</html>
04-伪元素选择器
<!DOCTYPE html>
<html lang="en">
<head>
<meta charset="UTF-8">
<meta name="viewport" content="width=device-width, initial-scale=1.0">
<title>Document</title>
<style>
/* 表示选中单数行中的p元素 */
p:nth-of-type(odd)::before {
content: "甲:";
}
/* 表示选中双数行的p元素 */
p:nth-of-type(even)::before {
content: "乙:";
}
</style>
</head>
<body>
<!--
所谓"伪元素",就是在dom结构中本来不存在的,但是通过css创建出来的元素。
::before ::after
用于向指定元素的前面或者后面加入特定的内容。
-->
<h1>《正反话》</h1>
<p>相声是一门语言艺术。</p>
<p>对对对</p>
<p>相声演员讲究说学逗唱。</p>
<p>对对对对对对</p>
</body>
</html>
05-元素的浮动
<!DOCTYPE html>
<html lang="en">
<head>
<meta charset="UTF-8">
<meta name="viewport" content="width=device-width, initial-scale=1.0">
<title>Document</title>
<style>
body {
margin: 15px;
}
.father {
background-color: aqua;
border: 1px solid black;
padding: 5px;
}
.father div {
padding: 10px;
margin: 15px;
border: 1px solid black;
background-color: pink;
}
.father p {
background-color: beige;
border: 1px solid black;
}
.son1 {
float: left;
}
.son2 {
float: left;
}
.son3 {
float: left;
}
p {
float: right;
}
</style>
</head>
<body>
<!--
css中有一个 float属性,默认值是none。
如果将float属性设置为left或right,元素就会向其父元素的右侧或者左侧靠近。
如何解决浮动引起的父元素高度塌陷?
父容器的高度是内部容器撑开的,当子元素元素浮动后,脱离了正常文档流,导致父容器的高度塌陷,高度变为0px。
直接为父级div定义height
-->
<div class="father">
<div class="son1">Box-1</div>
<div class="son2">Box-2</div>
<div class="son3">Box-3</div>
<p>文本文本文本文本文本文本文本文本文本文本</p>
</div>
</body>
</html>
06-swith语句
<!DOCTYPE html>
<html lang="en">
<head>
<meta charset="UTF-8">
<meta name="viewport" content="width=device-width, initial-scale=1.0">
<title>Document</title>
</head>
<body>
<script>
// switch(表达式){
// case 值1:
// 代码段1;
// break;
// case 值2:
// 代码段2;
// break;
// ...
// case 值n:
// 代码段n;
// break;
// }
var number = +prompt('请输入1~3之间的一个数字')
console.log(number);
switch(number){
case 1:
document.write("你选择了数字1");
break;
case 2:
document.write("你选择了数字2");
break;
default:
document.write("你选择了数字3");
}
// break 结束当前循环
</script>
</body>
</html>
六:页面渲染
1:首页页面的渲染
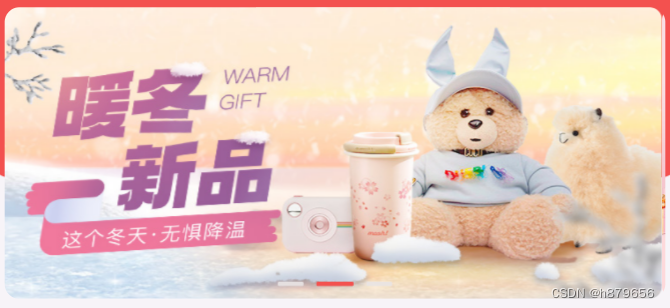
1.1:轮播图的渲染
1.1.1:index.wxml
<!-- 轮播图区域 -->
<banner bannerList = "{{ bannerList }}"/>
1.1.2:banner.wxml
<block wx:for="{{ bannerList }}" wx:key="index">
<swiper-item class="swiper-item">
<navigator
class="navigator"
url="/pages/goods/detail/detail?goodsId={{ item.id }}"
>
<image class="img" src="{{ item.imageUrl }}"></image>
</navigator>
</swiper-item>
</block>
1.1.3:效果图
1.2:分类页面的渲染
1.2.1:index.wxml
<!-- 导航分类 -->
<entrance cateList = "{{ categoryList }}"/>
1.2.2:entrance.wxml
<view class="nav-list">
<!-- 一级分类导航容器 -->
<view
wx:for="{{ cateList }}"
wx:key="index"
class="nav-item {{ index >= 5 ? 'small' : '' }}"
>
<!-- 导航链接 -->
<navigator class="navigator-nav" url="/pages/goods/list/list?category1Id={{ item.id }}">
<image class="nav-img" src="{{ item.imageUrl }}" />
<text class="nav-text">{{ item.name}}</text>
</navigator>
</view>
</view>
1.2.3: entrance.scss
&.small {
margin-top: 36rpx;
.nav-img{
width: 50rpx !important;
height: 50rpx !important;
}
}
1.2.4:效果图

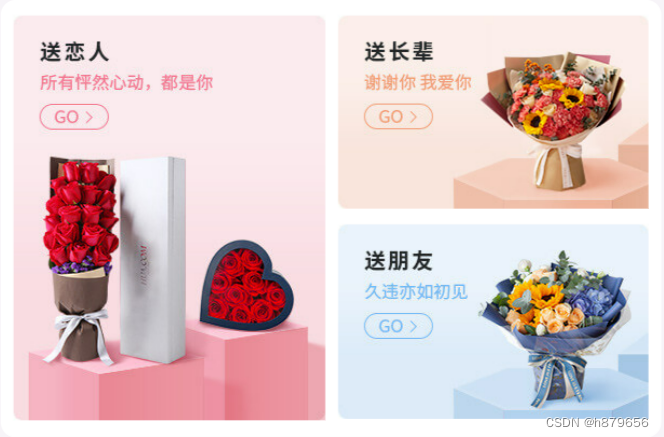
1.3:活动区域的渲染
1.3.1:index.wxml
<!-- 广告区域 -->
<view class="adver">
<view class="adver-left">
<navigator url="/pages/goods/list/list?category2Id={{ activeList[0].category2Id }}">
<image src="{{ activeList[0].imageUrl }}" mode="widthFix" />
</navigator>
</view>
<view class="adver-right">
<view>
<navigator url="/pages/goods/list/list?category2Id={{ activeList[1].category2Id }}">
<image src="{{ activeList[1].imageUrl }}" mode="widthFix" />
</navigator>
</view>
<view>
<navigator url="/pages/goods/list/list?category2Id={{ activeList[2].category2Id }}">
<image src="{{ activeList[2].imageUrl }}" mode="widthFix" />
</navigator>
</view>
</view>
</view>
1.3.2:效果图(效果不明显)
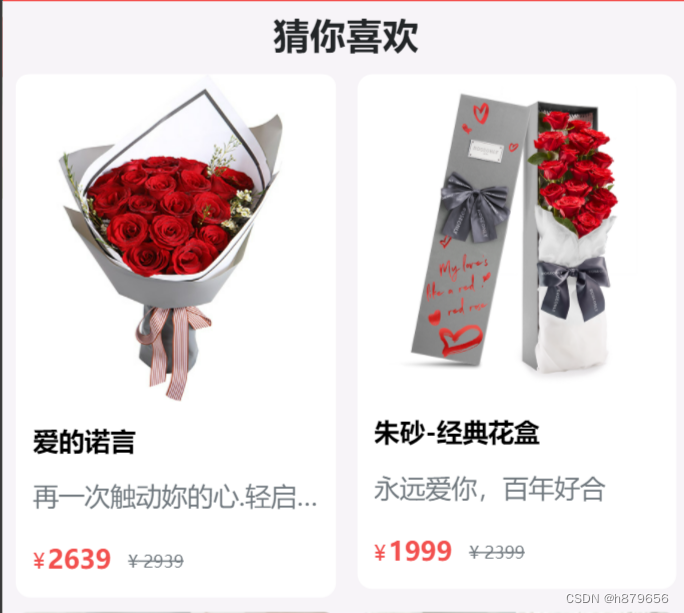
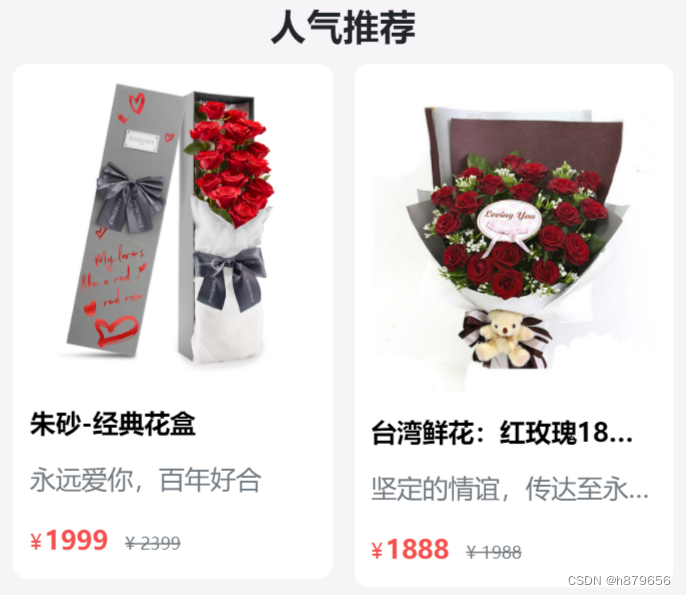
1.4: 猜你喜欢及人气推荐区域的渲染
1.4.1:index.wxml
<!-- 商品列表 -->
<goods-list title="猜你喜欢" list="{{ guessList }}"></goods-list>
<goods-list title="人气推荐" list="{{ hotList }}"></goods-list>
1.4.2:goods-list.js
Component({
/**
* 组件的属性列表
*/
properties: {
// 列表标题
title: {
type: String,
value: ''
},
// 传递的列表数据
list: {
type: Array,
value: []
}
}
})
1.4.3:goods-list.wxml
<!-- 商品列表组件 -->
<view class="goods_container" wx:if="{{ list.length }}">
<!-- 标题 -->
<view class="goods_title">{{title}}</view>
<!-- 列表区域 -->
<view class="goods_card_list">
<goods-card wx:for="{{ list }}" wx:key="index" goodItem="{{ item }}"></goods-card>
</view>
<!-- 查看更多 -->
<view class="goods_more">
<navigator class="goods_more_btn" url="/pages/goods/list/index" hover-class="navigator-hover" open-type="navigate">
查看更多
</navigator>
</view>
</view>
1.4.4:goods-card.js
Component({
/**
* 组件的属性列表
*/
properties: {
// 每一项商品的数据
goodItem: {
type: Object,
value: {}
}
}
})
1.4.5:goods-card.wxml
<!-- 列表分类卡片 -->
<view class="goods_cart_container">
<navigator class="navigator_nav" url="/pages/goods/detail/detail?goodsId={{goodItem.id}}">
<!-- 商品图片 -->
<image class="good_img" src="{{ goodItem.imageUrl }}" mode="widthFix" />
<!-- 商品详细信息 -->
<view class="goods_item_info">
<!-- 商品名称 -->
<text class="goods_item_info_name">{{ goodItem.name }}</text>
<!-- 商品描述 -->
<text class="goods_item_info_promo">{{ goodItem.floralLanguage }}</text>
<!-- 商品价格 -->
<view class="goods_item_info_bottom">
<view class="goods_item_info_price">
<text class="text">¥</text>{{ goodItem.price }}
</view>
<view class="goods_item_info_origin_price">
<text class="text">¥</text> {{goodItem.marketPrice}}
</view>
</view>
</view>
</navigator>
</view>
1.4.4:效果图
七:网络封装
1.request方法封装
1.1:request.js
// 1.使用了微信自带的请求api wx.request
// 2.将wx.request封装到了一个名为request的函数中
// 3.将函数封装到了一个名为WxRequest的类中
// 创建一个WxRequest类
// 通过类的方式进行封装,会让代码更具有复用性
// 也可以方便添加新的属性和方法
class WxRequest {
// 用于创建和初始化类的属性和方法
// params为用户传入的请求配置项
constructor(){}
// request实例方法接受一个对象类型的参数
request(options){
return new Promise((resolve,reject)=> {
wx.request({
// 使用拓展运算符将request函数传来的对象参数展开
...options,
// 当接口调用成功就会触发success回调函数
success:(res) => {
resolve(res)
},
// 当接口调用失败时会触发fail回调函数
fail:(err) => {
reject(err)
}
})
})
}
}
// 对wxRequest进⾏实例化
const instance = new WxRequest()
// 将Wxquest实例进⾏暴露出去,⽅便在其他⽂件中进⾏使⽤
export default instance
1.2:test.wxml
<view class="box">
<!-- 设置一个按钮 并给按钮设置一个名为handler的点击事件 点击按钮则发送事件 -->
<button type="warn" size="mini" plain bindtap="handler">测试发送请求</button>
</view>
1.3:test.scss
/* pages/test/test.wxss */
.box {
display: flex;
// 主轴方向上居中
justify-content: center;
// 副轴方向上居中
align-items: center;
// 将盒子高度设置为页面高度
height: 50vh;
}
1.4:test.js
// pages/test/test.js
// 导入在request页面中封装并暴露的instance实例
import instance from '../../utils/http'
Page({
// 具体阐述按钮点击事件要做什么事情
handler() {
第一种调用方法:通过.then和.catch接受返回的值
instance
.request({
// 请求地址
url:'https://gmall-prod.atguigu.cn/mall-api/index/findBanner',
// 请求方式
method:"GET",
})
.then((res) => {
console.log(res);
})
.catch((err) => {
console.log(err);
})
}
})
1.4:效果图
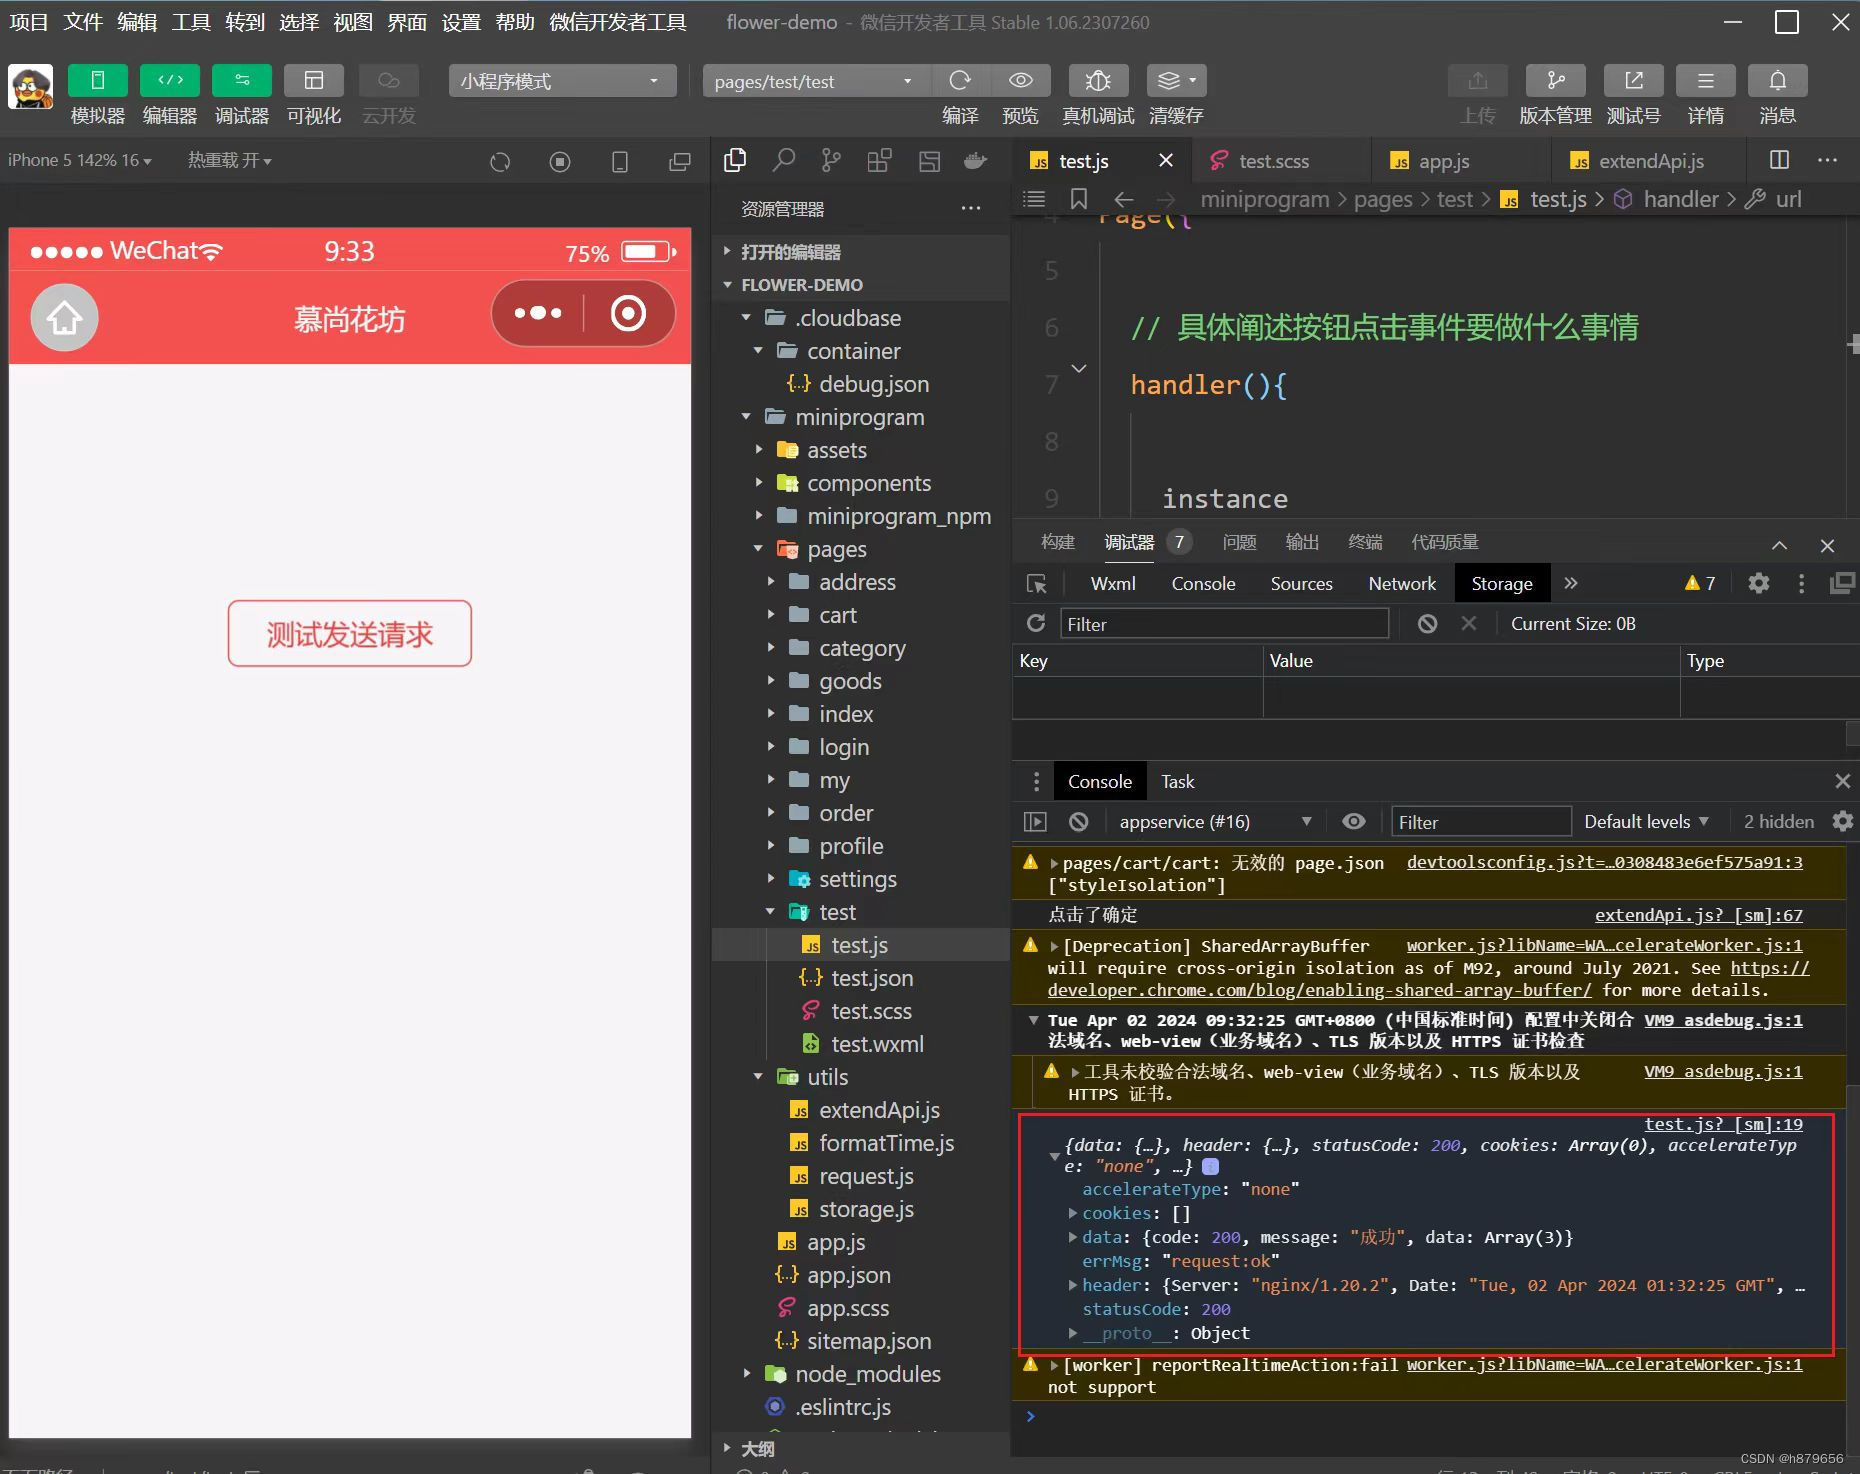
2.对get、post、put、delete 请求方式进行快捷封装
2.1:request.js
// request.js
// 1.使用了微信自带的请求api wx.request
// 2.将wx.request封装到了一个名为request的函数中
// 3.将函数封装到了一个名为WxRequest的类中
// 创建一个WxRequest类
// 通过类的方式进行封装,会让代码更具有复用性
// 也可以方便添加新的属性和方法
class WxRequest {
// 默认参数对象
defaults = {
// 请求基地址
baseURL:'',
// 服务器接口地址
url:'',
// 请求方式
method:'GET',
// 请求参数
data:null,
// 请求头:
header: {
'Content-type': 'application/json' // 设置数据的交互格式
},
// 默认超时时间为一分钟
timeout:100,
}
// 定义拦截对象,包括请求拦截和响应拦截方法,方便在请求或响应之前进行处理。
interceptors = {
// 请求拦截器
request:(config) => config,
// 响应拦截器
response:(response) => response
}
// 用于创建和初始化类的属性和方法
// params为用户传入的请求配置项
constructor(params ={}){
// 使用Object.assign方法合并默认参数以及传递的请求参数
// 需要传入的参数,会覆盖默认的参数,因此传入的参数放在最后
this.defaults = Object.assign({},this.defaults,params)
}
// request实例方法接受一个对象类型的参数
request(options){
// 拼接完整的请求路径
options.url = this.defaults.baseURL + options.url
// 合并请求参数
options = {...this.defaults,...options}
// 发送请求之前添加loading
wx.showLoading({})
// 在发送请求之前调用请求拦截器
options = this.interceptors.request(options)
console.log(options);
return new Promise((resolve,reject)=> {
wx.request({
// 使用拓展运算符将request函数传来的对象参数展开
...options,
// 当接口调用成功就会触发success回调函数
success:(res) => {
// 不管接口成功还是失败,都需要调用响应拦截器
// 响应拦截器需要接受服务器响应的数据,然后对数据进行逻辑处理,处理好后进行返回
// 在给响应拦截器传递参数时,需要将请求参数也一起上传
// 方便进行代码的调试或者其他逻辑处理,所以需要合并参数
// 然后将合并的参数给响应拦截器
// 第一个参数:需要合并的目标对象
// 第二个参数:服务器响应的数据
// 第三个参数:请求配置以及自定义属性
// 不管是请求失败还是请求成功,都会将响应的数据传递给响应拦截器
// 这个时候合并参数时,就需要追加一个属性:isSuccess
// 如果属性值为true,说明执行了success回调函数
const mergetRes = Object.assign({},res,{config:options,isSuccess:true})
// resolve(res)
resolve(this.interceptors.response(mergetRes))
},
// 当接口调用失败时会触发fail回调函数
fail:(err) => {
// 如果属性值为false,说明执行了fail回调函数
const mergetErr = Object.assign({},err,{config:options,
isSuccess:false})
// reject(err)
reject(this.interceptors.response(mergetErr))
},
// 不管promise请求是否成功,
// 都会执行complete里面的内容
complete:()=> {
// 接口调用完成后隐藏loading
wx.hideLoading()
}
})
})
}
// 封装GET实例方法
get(url,data={},config={}){
return this.request(Object.assign({url,data,method:'GET',config}))
}
// 封装POST实例方法
post(url,data={},config={}){
return this.request(Object.assign({url,data,method:'POST',config}))
}
// 封装PUT实例方法
put(url,data={},config={}){
return this.request(Object.assign({url,data,method:'PUT',config}))
}
// 封装DELETE实例方法
delete(url,data={},config={}){
return this.request(Object.assign({url,data,method:'DELETE',config}))
}
// 用来处理并发请求
all(...promise) {
// 通过展开运算符接受传递的参数
// 展开运算符会将传入的参数转为数组
console.log(promise);
return Promise.all(promise)
}
}
export default WxRequest
2.2:test.js
// pages/test/test.js
// 导入在request页面中封装并暴露的instance实例
import instance from '../../utils/http'
Page({
// 具体阐述按钮点击事件要做什么事情
async handler() {
// 第一种调用方法:通过.then和.catch接受返回的值
// instance
// .request({
// // 请求地址
// url:'https://gmall-prod.atguigu.cn/mall-api/index/findBanner',
// // 请求方式
// method:"GET",
// })
// .then((res) => {
// console.log(res);
// })
// .catch((err) => {
// console.log(err);
// })
// 第二种调用方法:通过await和async接受返回的值
// const res = await instance.request({
// url:'/index/findBanner',
// method:"GET",
// })
// 第三种调用方式:通过调用快捷方式接受返回的值
// const res = await instance.get('/index/findBanner')
// 调用并传参
// const res = await instance.get('/index/findBanner')
// 当前请求地址是获取购物车数据,需要token才行
const res = await instance.get('/cart/getCartList')
console.log(res)
}
3:响应拦截器
3.1:http.js
// 导入模块、包提供的类
import WxRequest from 'mina-request'
// 导入封装的本地存储操作模块
import { getStorage, clearStorage } from './storage'
// 导入封装的增强 API
import { toast, modal } from './extendApi'
// 对类进行实例化
const instance = new WxRequest({
baseURL: 'https://gmall-prod.atguigu.cn/mall-api',
timeout: 15000
})
// 添加请求拦截器 (在请求发送之前对请求参数进行新增或者修改)
instance.interceptors.request = (config) => {
// 在实际开发中,有一些接口需要使用访问令牌 token
// 访问令牌 token 通常是存储到本地
// 需要先从本地获取到存储的 token
const token = getStorage('token')
// 如果本地存在 token,这时候就需要在请求头中添加 token 字段
if (token) {
config.header['token'] = token
}
// 在发送请求之前做些什么
return config
}
// 添加响应拦截器 (在服务器响应数据以后,对返回的数据进行逻辑处理)
instance.interceptors.response = async (response) => {
// 从 response 对象中解构两个数据
const { isSuccess, data } = response
// response 服务器响应的数据,只不过数据被 wx.request 进行了一层包装
// console.log(response)
// response.config 封装的包里面提供的 config 属性,是请求的参数信息
// 可以使用请求参数进行代码的调试
// response.data 服务器真正响应的数据
// response.isSuccess 判断代码执行了哪一个回调函数
// isSuccess = true,说明代码执行了 wx.request 方法的 success 回调函数
// isSuccess = false,说明代码执行了 wx.request 方法的 fail 回调函数
// 如果 isSuccess = false,说明网络出现了问题
if (!isSuccess) {
toast({
title: '网络异常请重试',
icon: 'error'
})
return Promise.reject(response)
}
// 如果 isSuccess = true,说明代码执行到了 success 回调函数
// 需要开发者对返回的参数进行逻辑判断
// 需要对后端返回的业务状态码进行判断
// 业务状态码 === 200,接口调用成功,服务器成功返回了数据
// 业务状态码 === 208,没有 token 或者 token 失效,需要让用户重新进行登录
// 业务状态码既不等于 200,也不等于 208,说明出现了其他异常,需要给用户统一进行提示
switch (data.code) {
case 200:
// 接口调用成功,服务器成功返回了数据,只需要将数据简化以后返回即可
return data
case 208:
const res = await modal({
content: '鉴权失败,请重新登录',
showCancel: false
})
if (res) {
// 既然用户需要重新进行登录,就需要把之前用户存储的信息(过期的 token) 进行清除
clearStorage()
wx.navigateTo({
url: '/pages/login/login'
})
}
return Promise.reject(response)
default:
toast({
title: '程序出现异常,请联系客服或稍后重试!'
})
return Promise.reject(response)
}
// return response
}
// 导出实例
export default instance
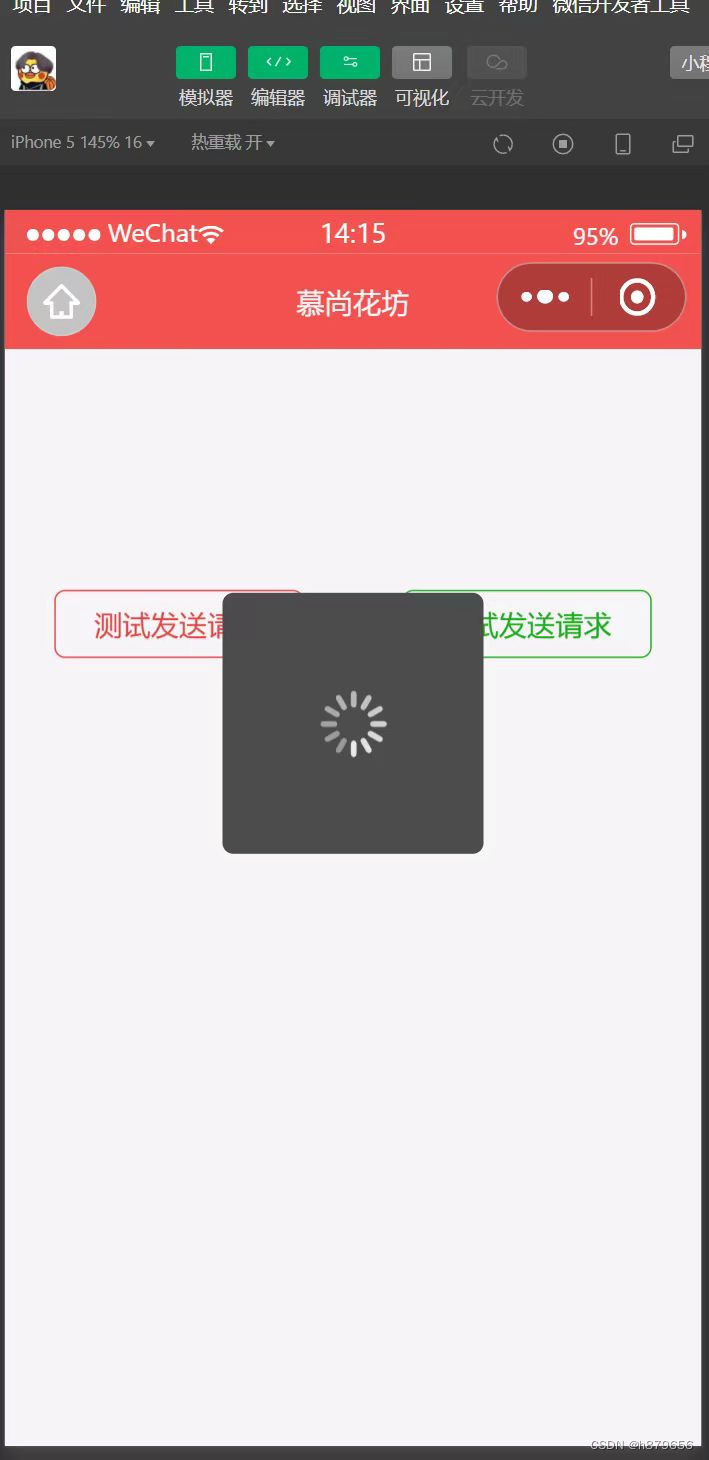
3.2:效果图


 885
885

 被折叠的 条评论
为什么被折叠?
被折叠的 条评论
为什么被折叠?
 到【灌水乐园】发言


