Mapper接口
使用注解执行SQL语句操作和相应的Java抽象类(对于简单的增删改查使用注解)
@Mapper
public interface EmpMapper {
    // 根据id删除员工信息
    @Delete
    ("delete from mybatis.emp where id=#{id}")
    public int EmpDelete(Integer id);


    // 查询所有员工信息
    @Select("select * from emp")
    public List<Emp> EmpSelect();

    //将自动增长的id封装到emp对象的id属性中
    @Options(useGeneratedKeys = true, keyProperty="id")
    //向emp表中插入一条数据
    @Insert("insert into emp(username, name, gender, image, job, entrydate, dept_id, create_time, update_time)" +
            "values (#{username}, #{name}, #{gender}, #{image}, #{job}, #{entrydate}, #{deptId}, #{createTime}, #{updateTime})")
    public void EmpInsert(Emp emp);

    //更新emp表中的数据
    @Update("update emp set username=#{username},name=#{name},gender=#{gender},image = #{image},"+
    "job=#{job},entrydate=#{entrydate},dept_id = #{deptId},update_time=#{updateTime} where id=#{id}")
    public void update(Emp emp);

    //方案一:为字段起别名,让MySQL中的字段和java类中的字段名一致,这样mybatis 就能获取MySQL中相对应的字段数据了
//    @Select("select id, username, password, name, gender, image, job, entrydate, dept_id as deptId, create_time as createTime, " +
//            "update_time as updateTime from emp where id = #{id}")
//    public Emp Search(Integer id);

//    // 方案二:在Results注解中将数据库表中的dept_id列映射到Java对象中的deptId属性
//    @Results({
//                    //MySQL中的字段名和Java类中对应的属性名
//            @Result(column = "dept_id",property = "deptId"),
//            @Result(column = "create_time",property = "createTime"),
//            @Result(column = "update_time",property = "updateTime")
//
//    })
//    @Select("select * from emp where id = #{id}")
//    public Emp Search(Integer id);

    //方案三:在配置文件中开启mybatis的驼峰命名自动映射开关mybatis.camel,无需动原代码自动映射
        // 根据id查询员工信息
        @Select("select * from emp where id = #{id}")
        public Emp Search(Integer id);

        @Select("select * from emp where name like concat('%',#{name},'%') and gender= #{gender} and entrydate between #{begin} and #{end} order by update_time desc")
        //条件查询
        public List<Emp> conditionSearch(String name , Short gender , LocalDate begin , LocalDate end);
}
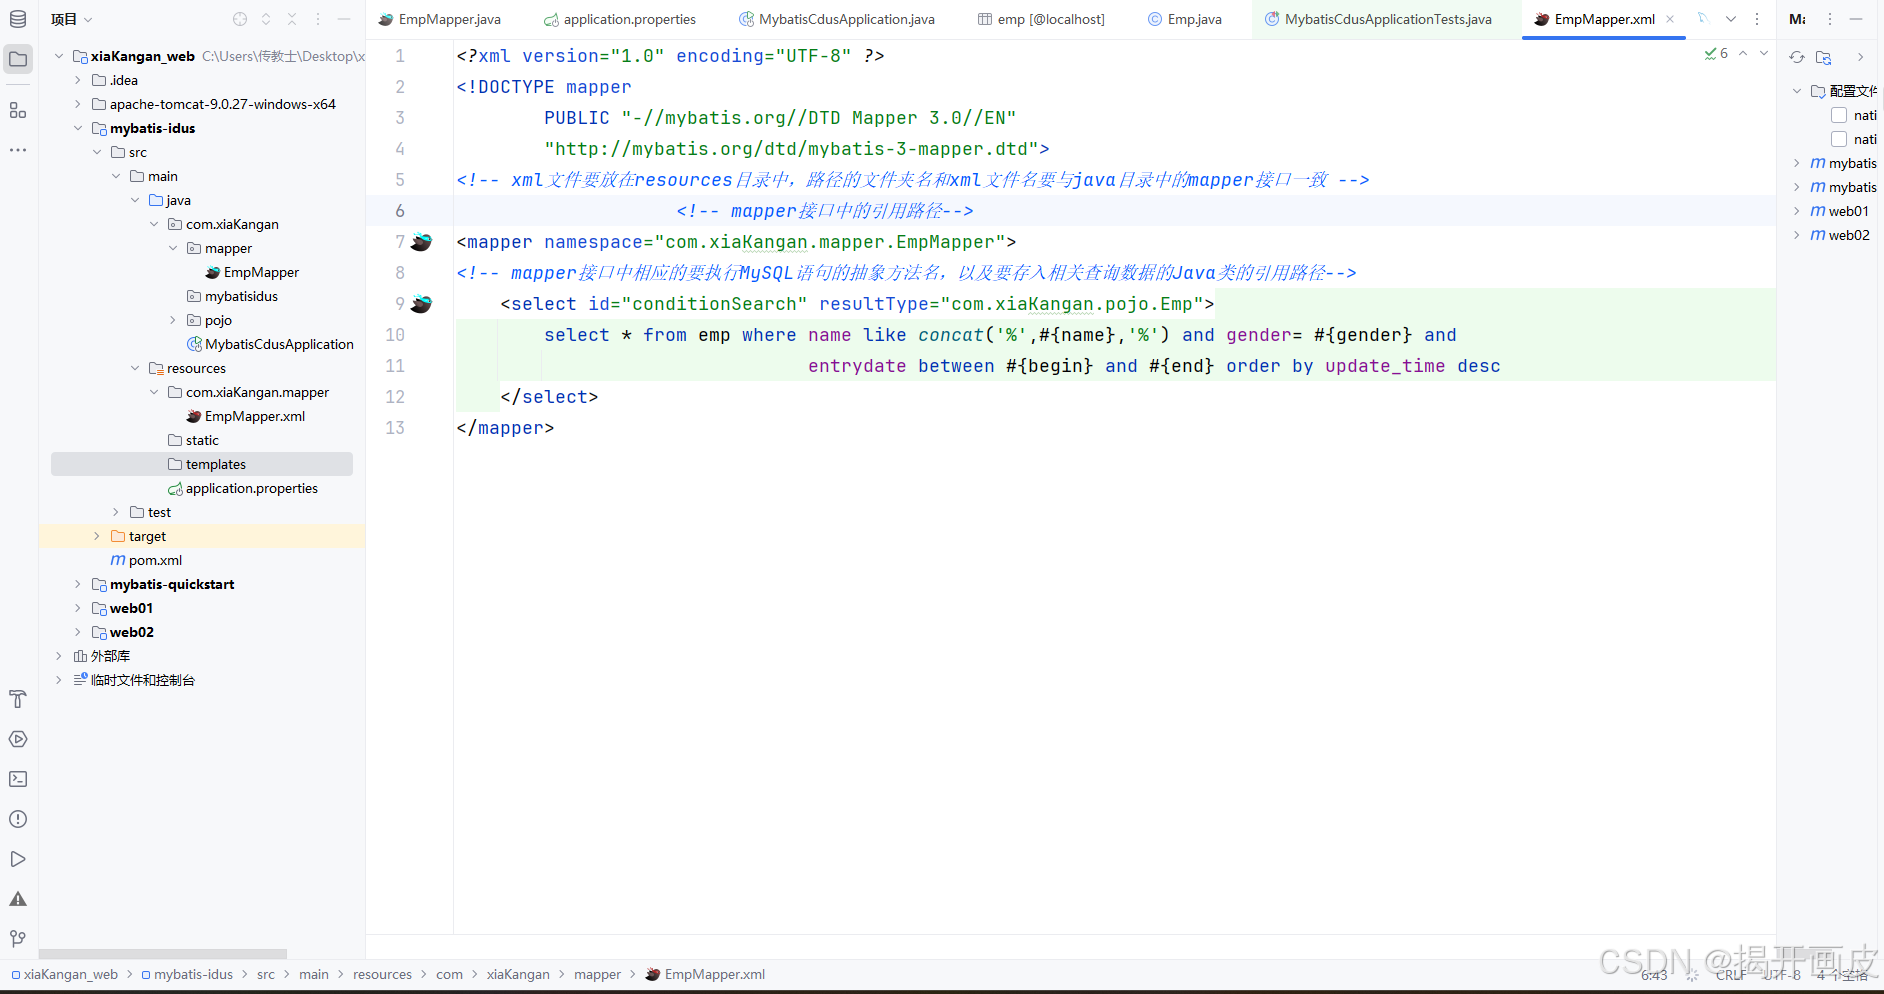
使用xml配置映射语句(对于复杂的SQL语句,建议使用xml配置映射语句)


接收MySQL数据的Java类
@Data
@NoArgsConstructor
@AllArgsConstructor
public class Emp {
    private Integer id;
    private String username;
    private String password;
    private String name;
    private Short gender;
    private String image;
    private Short job;
    private LocalDate entrydate;     //LocalDate类型对应数据表中的date类型
    private Integer deptId;
    private LocalDateTime createTime;//LocalDateTime类型对应数据表中的datetime类型
    private LocalDateTime updateTime;
}
连接数据库和引入mybatis的配置文件
spring.application.name=mybatis-idus
#连接数据库
spring.datasource.driver-class-name=com.mysql.cj.jdbc.Driver
spring.datasource.url=jdbc:mysql://localhost:3306/mybatis
spring.datasource.username=root
spring.datasource.password=root
#配置mybatis.log日志,指定输出到控制台
mybatis.configuration.log-impl=org.apache.ibatis.logging.stdout.StdOutImpl
#开启mybatis的驼峰命名自动映射开关mybatis.camel
mybatis.configuration.map-underscore-to-camel-case=true
执行相关操作的测试类
@SpringBootTest
class MybatisCdusApplicationTests {
    @Autowired
    private EmpMapper emp;
    @Test
    void contextLoads() {


//        //删除id为17的员工
//        int n = emp.EmpDelete(17);
//        System.out.println(n);
//        //创建一个新的员工对象
//        Emp emp2 = new Emp();
//        //设置员工对象的属性
//        emp2.setUsername("Tom3");
//        emp2.setName("汤姆3");
//        emp2.setGender((short)1);
//        emp2.setImage("https://img-home.csdnimg.cn/images/20240218021830.png");
//        emp2.setJob((short)2);
//        emp2.setDeptId(1);
//        emp2.setEntrydate(LocalDate.now());
//        emp2.setCreateTime(LocalDateTime.now());
//        emp2.setUpdateTime(LocalDateTime.now());
//        //插入新的员工对象
//        emp.EmpInsert(emp2);
//        //使用了 @Options(useGeneratedKeys = true, keyProperty="id") 就可以获取主键值了
//        System.out.println(emp2.getId());
//
//        System.out.println(n);
//
//        //创建一个新的员工对象
//        Emp emp3 = new Emp();
//        //设置员工对象的属性
//        emp3.setUsername("Tom4");
//        emp3.setName("汤姆4");
//        emp3.setGender((short)1);
//        emp3.setImage("https://img-home.csdnimg.cn/images/20240218021830.png");
//        emp3.setJob((short)2);
//        emp3.setDeptId(1);
//        emp3.setEntrydate(LocalDate.of(2001,12,12));
//        emp3.setCreateTime(LocalDateTime.now());
//        emp3.setUpdateTime(LocalDateTime.now());
//        emp3.setId(21);
//        //更新员工对象
//        emp.update(emp3);
//
//        //根据id查询员工对象
//        Emp employee = emp.Search(21);
//        System.out.println(employee.toString());

        // 根据姓名、性别、入职日期和当前日期进行条件查询
        emp.conditionSearch("汤", (short) 1, LocalDate.of(2010,1,1),LocalDate.now());

    }

}
MySQL相关数据
create table emp
(
    id          int unsigned auto_increment comment 'ID'
        primary key,
    username    varchar(20)                  not null comment '用户名',
    password    varchar(32) default '123456' null comment '密码',
    name        varchar(10)                  not null comment '姓名',
    gender      tinyint unsigned             not null comment '性别, 说明: 1 男, 2 女',
    image       varchar(300)                 null comment '图像',
    job         tinyint unsigned             null comment '职位, 说明: 1 班主任,2 讲师, 3 学工主管, 4 教研主管, 5 咨询师',
    entrydate   date                         null comment '入职时间',
    dept_id     int unsigned                 null comment '部门ID',
    create_time datetime                     not null comment '创建时间',
    update_time datetime                     not null comment '修改时间',
    constraint username
        unique (username)
)
    comment '员工表';


 804
804

 被折叠的 条评论
为什么被折叠?


