Midjourney + Stable Diffusion 做场景图 (ControlNet Depth)

Midjourney V6 生成的图片细节逼真,堪比真实摄影。它可以解决绝大多数商业上的场景图需求。从此再也不必专门为了场景而去拍摄照片了。

可是,光有场景很难实现商业上的落地。如何把产品很自然地融入其中才是关键!这时候 Stable Diffusion 就派上用场了。

我将通过实际案例演示 Midjourney 如何配合 Stable Diffusion 做出一个非常有场景感的产品图片。

1. Midjourney 生成场景图

在 AI 赋能摄影的时代,我们只需要一张基本的白底产品图即可。下图是一幅薄荷精油的图片,我们将要为它塑造场景。

essential oil white background

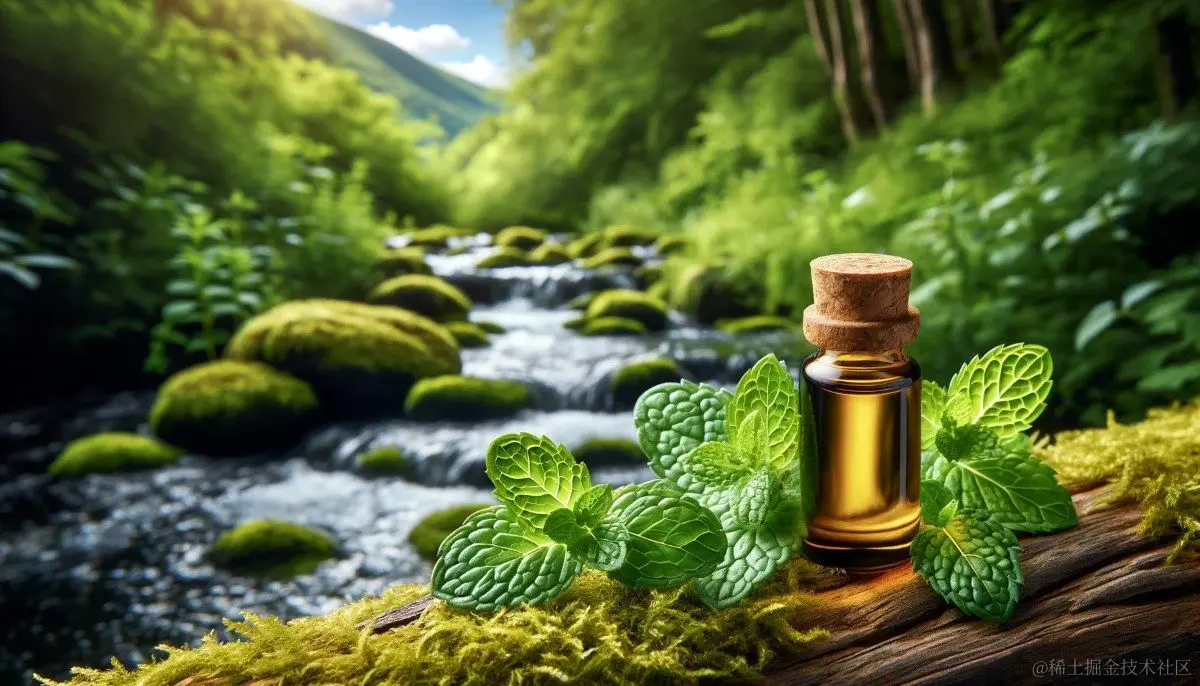
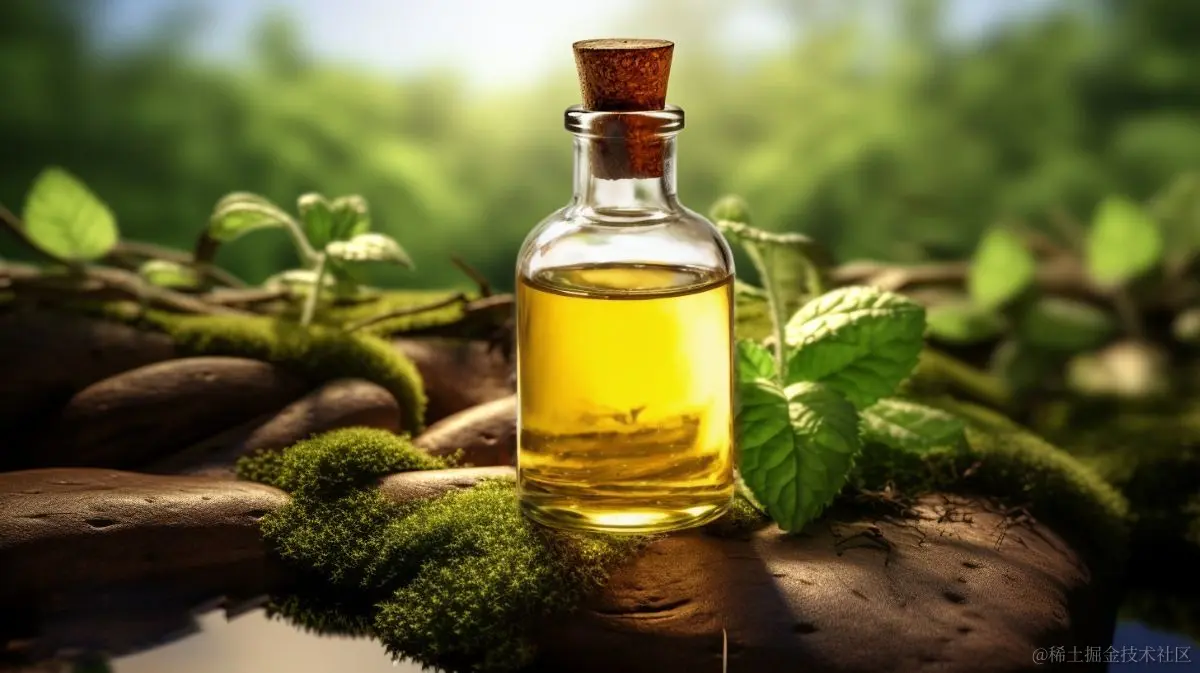
为了展现精油健康,有机的产品形象,我们需要为此设计相关的场景。我用下面的提示词在 Midjourney 中生成了一幅场景图。我把白底的产品图给 Midjourney 做参考,这样它生成的产品和真正的产品会更像。

Prompt: Medium: Photo. Subject: A bottle of peppermint essential oil on a moss-covered log, surrounded by peppermint leaves. Emotion: Serene. Lighting: Natural, clear blue sky. Scene: Bubbling brook in the background, lush greenery. Style: Realistic, vibrant colors

提示词:媒介:照片 主题:一瓶薄荷精油放在长满青苔的原木上,周围环绕着薄荷叶。情感:宁静。光线: 自然、晴朗的蓝天。场景: 背景中潺潺溪流,绿意盎然。风格:写实,色彩鲜艳

esstential oil by midjourney

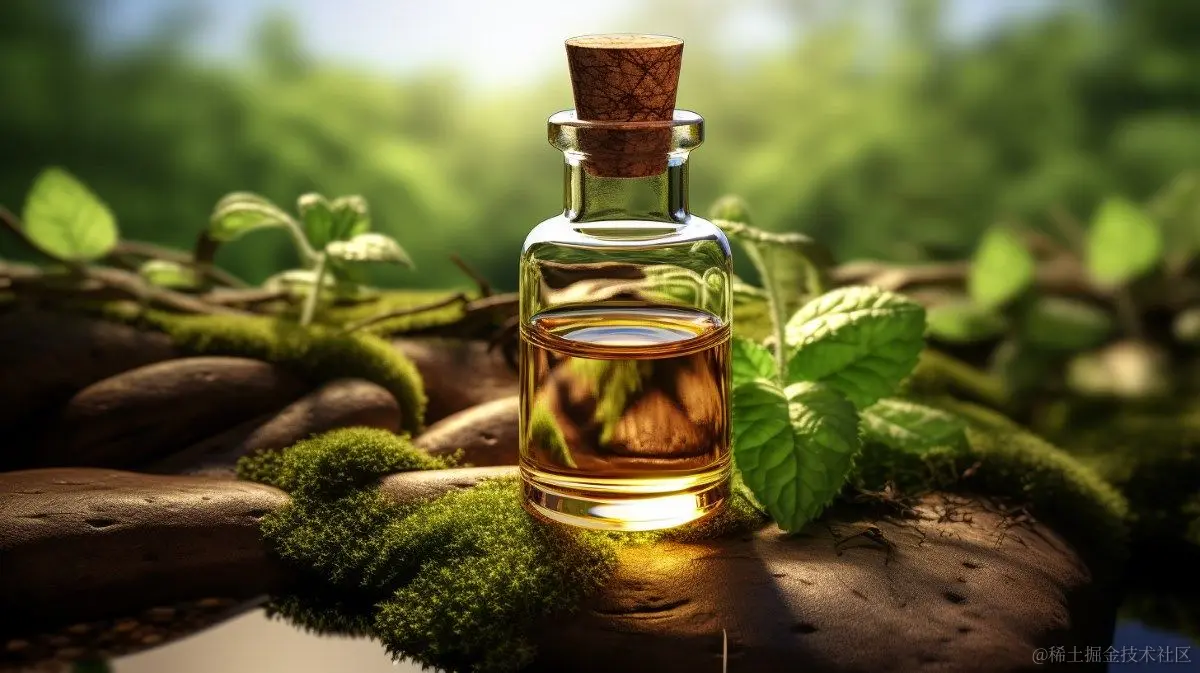
我们之所以还需要产品在图片里,而不是仅仅生成场景图的原因是,我们需要一个放置产品的位置。
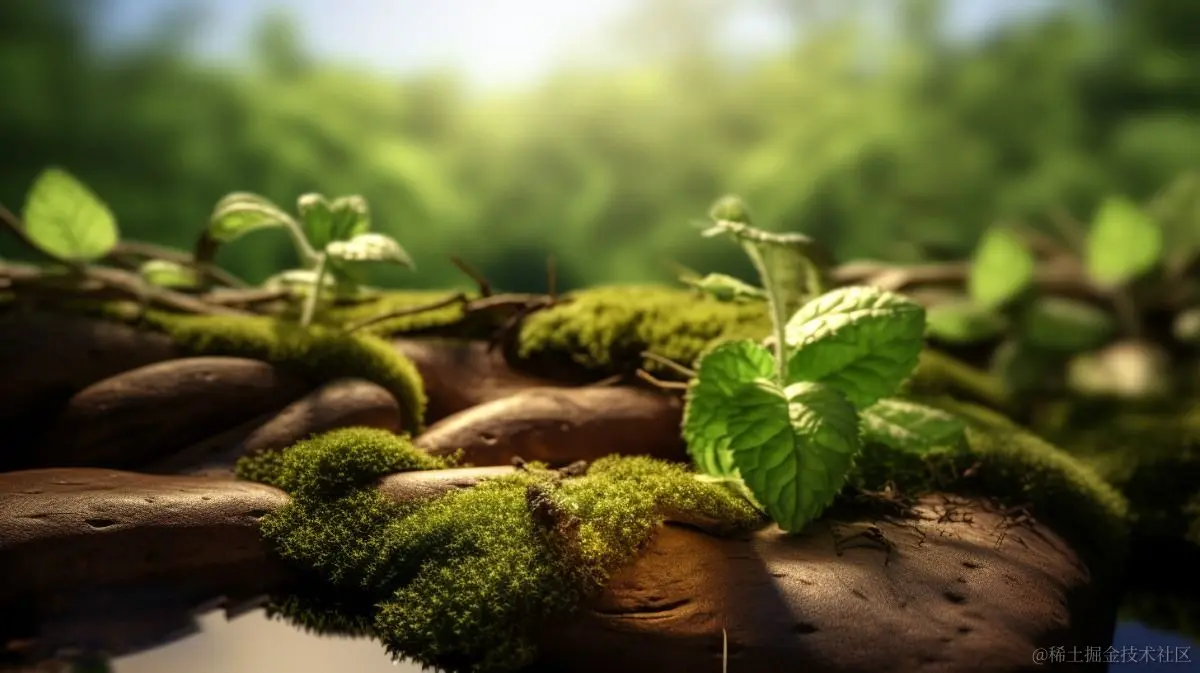
2. 让产品消失

这一步我们需要通过 AI 技术非常自然地让 Midjourney 里的产品消失,以便替换为我们真实的产品。这个工作可以通过 Photoshop 或者 Adobe Firefly 的创成式填充 (Generative Fill) 来完成。

只需要选中 Midjourney 里面的产品,然后不写任何提示词,直接点击 “生成”,Adobe 就会自动利用周围的元素对选中区域进行填充,效果非常自然。

outdoor scence by adobe

3. 把产品放到场景中

下一步就是把产品抠出来,然后摆放到场景中合适的位置。

利用新版的 Photoshop 对象选择工具可以轻松地把产品选择出来。也可以利用 Removebg 或 Clipdrop 等网页版的 AI 工具直接消除背景。

esstential oil by photoshop

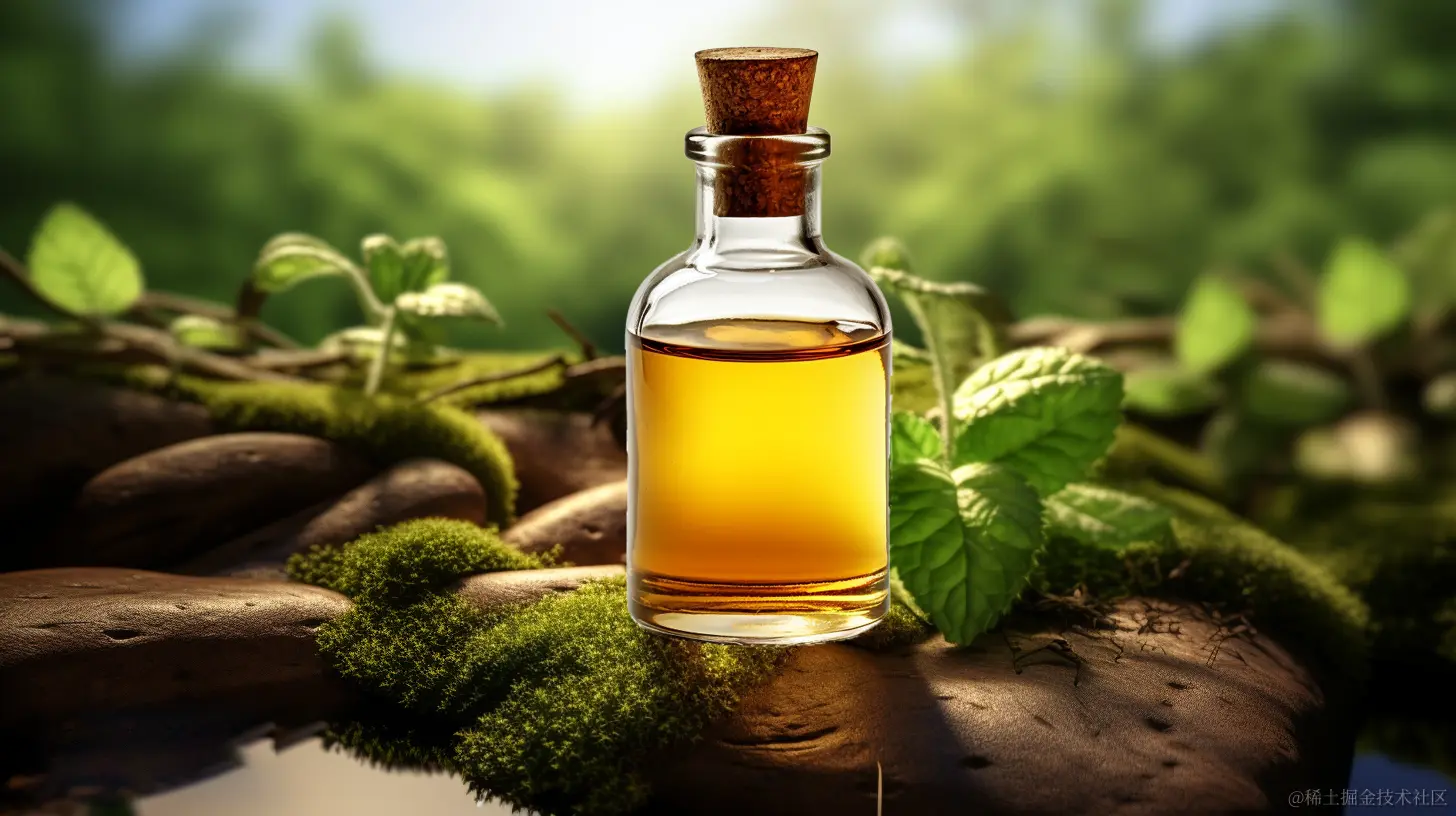
产品不用抠得非常仔细,有点瑕疵也没关系,因为接下去我们会利用 Stable Diffusion 处理。通过 Photoshop 把照片处理得非常自然是很困难的。

尽管精油有些浑浊,但放在自然环境中,还是可以透过玻璃瓶看见背后模糊的景色的。环境光也会给玻璃的表面带来不同的明暗色调。这一切通过 Photoshop 很难还原得非常真实。

comparison

这时候 Stable Diffusion 就派上用场了。

4. SD合成(安装包文末领取)

在 Stable Diffusion 里面选一个模型。最好是 SDXL 的模型,这样质感更好。我这里选的是基于 SD1.5 的 realisticVision。然后填入相关的提示词。

realisticvision prompts

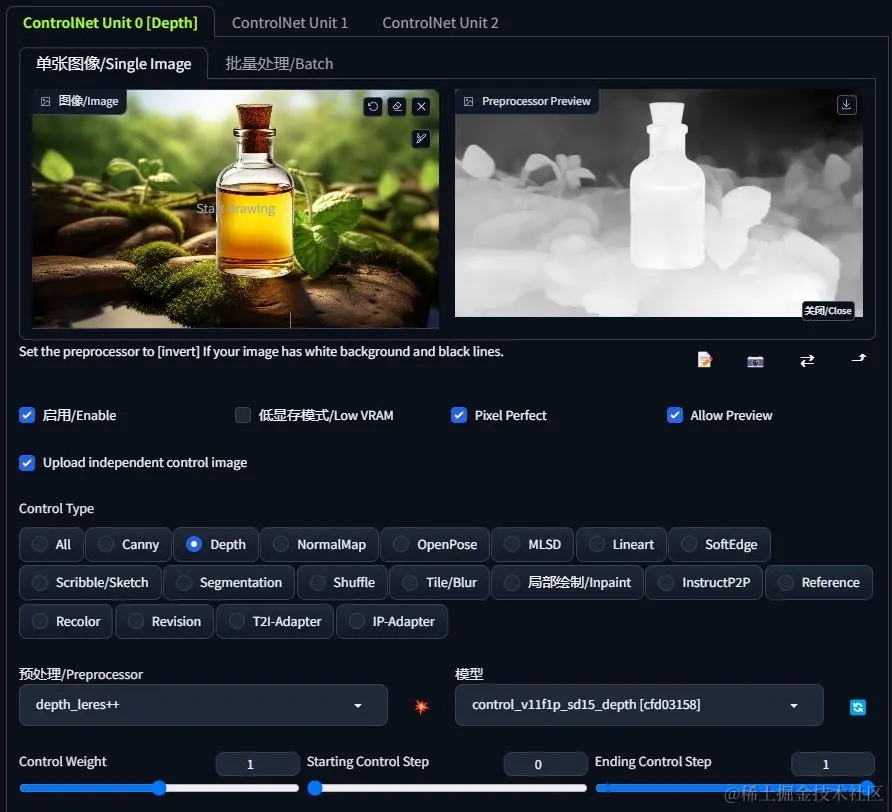
接下去用到的是 ControlNet 里面的 Depth 模型。这一步主要是生成一个深度图,用来控制产品的轮廓,这样跑出来的产品和原先的产品轮廓一致,方便后期把有瑕疵的地方还原成原先的模样。

而且 Depth 可以给 Stable Diffusion 一些发挥空间,让产品融入效果更真实,不像 Canny 或者 Lineart 那样控制得太死。

controlnet depth

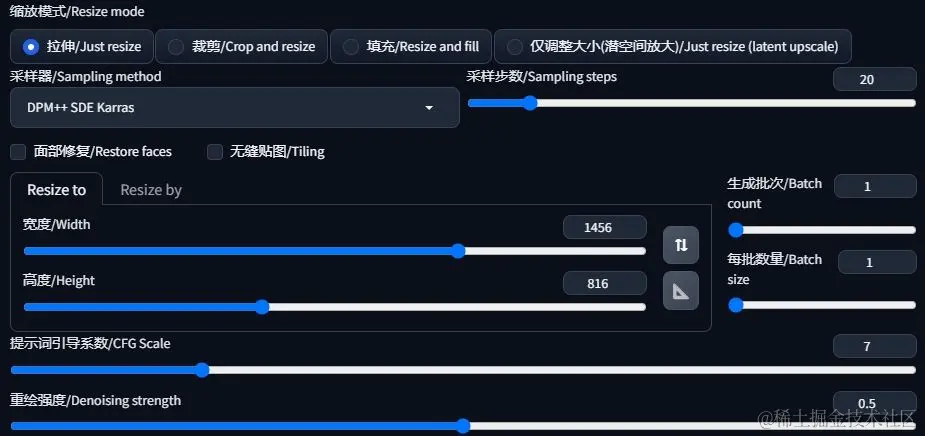
重绘强度 (Denoising Strength) 我设置了一个相对较高的数值。这样 Stable Diffusion 发挥的空间更大,效果更自然一些。

realistvision settings

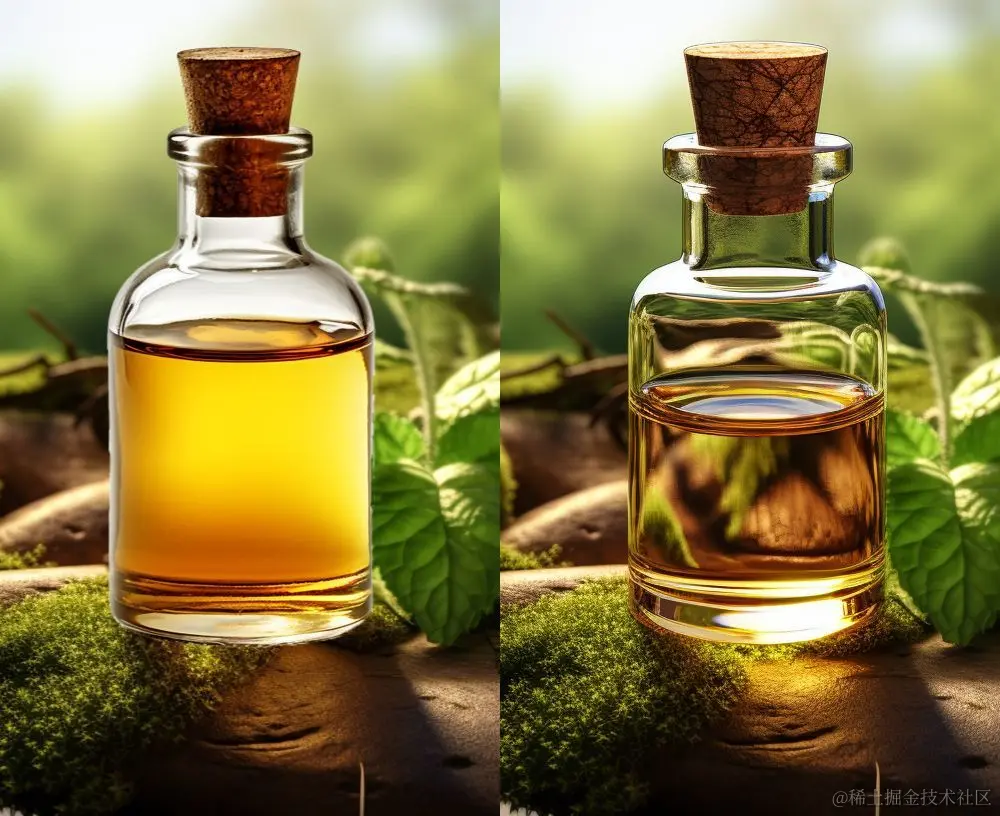
我生成了好几张,从中挑选了一张效果比较满意的。

esstential oil by stable diffusion

可以看到瓶身的部分效果很真实,可以透过玻璃看到后面的一部分景色。

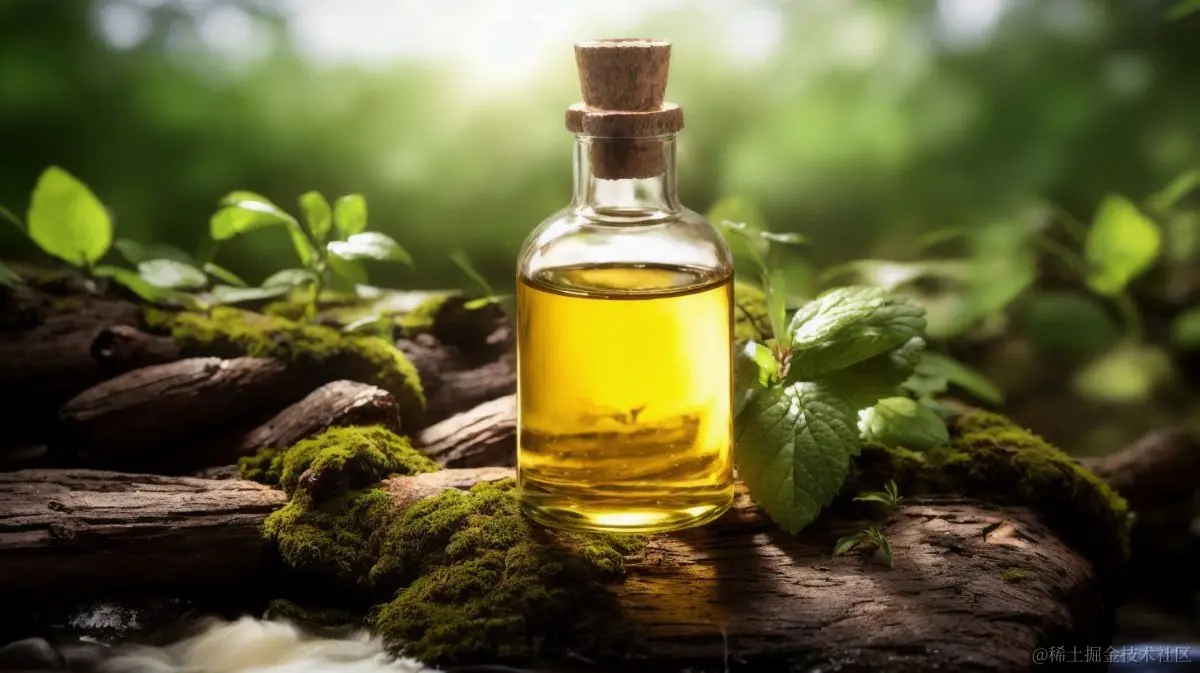
瓶口的部分很不自然,不过没关系,接下去我们可以用 Photoshop 添加蒙版,还原原先产品的瓶口部分,最终效果如下图所示。

essential oil final image

如果用 SDXL 的模型,画面的质感会更好。当然,在 Stable Diffusion 重绘过程中可能会丧失 Midjourney V6 的质感,也可以在蒙版上涂抹进行还原。

总结

AI为设计领域开启了新篇章,引领我们走向无限的可能性。在生产式AI的助力下,摄影师和后期工作者们可以从琐碎且耗时的任务中解脱出来,交由AI来完成。未来,设计师们将更加注重创意与想法,而不再需要熬夜进行机械化的重复操作。

现在AI绘画还是发展初期,大家都在摸索前进。

但新事物就意味着新机会,我们普通人要做的就是抢先进场,先学会技能,这样当真正的机会来了,你才能抓得住。

如果你对AI绘画感兴趣,我可以免费分享我在学习过程中收集的各种教程和资料。添加下方即可免费领取!

学完后,可以毫无问题地应对市场上绝大部分的需求。

这份AI绘画资料包整理了Stable Diffusion入门学习思维导图Stable Diffusion安装包120000+提示词库,800+骨骼姿势图,Stable Diffusion学习书籍手册AI绘画视频教程AIGC实战等等。

【Stable Diffusion学习路线思维导图】

在这里插入图片描述

【Stable Diffusion安装包(含常用插件、模型)】

img

【AI绘画12000+提示词库】

img

【AI绘画800+骨骼姿势图】

img

【AI绘画视频合集】

img

这份完整版的stable diffusion资料我已经打包好,点击下方添加即可免费领取!

### Stable Diffusion ControlNet Model Usage and Implementation #### Overview of ControlNet Integration with Stable Diffusion ControlNet is a plugin designed to enhance the capabilities of generative models like Stable Diffusion by providing additional guidance during image generation. This allows for more controlled outcomes, such as preserving specific structures or styles from input images while generating new content[^2]. #### Installation Requirements To use ControlNet alongside Stable Diffusion, ensure that all necessary dependencies are installed. The environment setup typically involves installing Python packages related to deep learning frameworks (e.g., PyTorch), along with libraries specifically required for handling image data. For instance, one can set up an environment using pip commands similar to those found in Hugging Face's diffusers repository: ```bash pip install torch torchvision torchaudio --extra-index-url https://download.pytorch.org/whl/cu117 pip install transformers accelerate safetensors datasets ``` Additionally, clone the relevant repositories containing both `stable-diffusion` and `controlnet` implementations: ```bash git clone https://github.com/huggingface/diffusers.git cd diffusers/examples/community/ git clone https://github.com/Mikubill/sd-webui-controlnet.git ``` #### Basic Workflow Using ControlNet The workflow generally includes preparing inputs suitable for conditioning purposes within the diffusion process. For example, when working on edge detection tasks, preprocess your source material into formats compatible with what ControlNet expects – often grayscale images representing edges extracted via Canny filters or other methods. Here’s how you might implement this step programmatically: ```python from PIL import Image import numpy as np import cv2 def prepare_canny_edges(image_path): img = cv2.imread(image_path) gray = cv2.cvtColor(img,cv2.COLOR_BGR2GRAY) edges = cv2.Canny(gray, 100, 200) # Convert back to RGB format expected by some pipelines edged_img = cv2.cvtColor(edges, cv2.COLOR_GRAY2RGB) return Image.fromarray(edged_img.astype('uint8'), 'RGB') ``` Afterwards, integrate these processed inputs directly into the pipeline configuration provided by either custom scripts derived from community contributions or official examples available through platforms like GitHub. #### Advanced Customization Options Beyond basic integration, users may explore advanced customization options offered by developers who have extended functionalities beyond initial designs. These enhancements could involve modifying architectures slightly differently than originally proposed or incorporating novel techniques aimed at improving performance metrics across various benchmarks. One notable advancement comes from research efforts focused on depth estimation problems where researchers introduced Depth-Anything—a robust single-view depth prediction framework capable of producing high-quality results under diverse conditions without requiring extensive retraining processes per dataset encountered[^3]. Such advancements indirectly benefit projects involving conditional GANs since better quality auxiliary information leads to improved final outputs. --related questions-- 1. How does integrating multiple types of conditioners affect the output diversity in generated images? 2. What preprocessing steps should be taken before feeding real-world photographs into ControlNet-enhanced models? 3. Can pre-trained weights from different domains improve cross-domain adaptation performances significantly? 4. Are there any limitations associated with current versions of ControlNet regarding supported modalities?
评论
添加红包

请填写红包祝福语或标题

红包个数最小为10个

红包金额最低5元

当前余额3.43前往充值 >
需支付:10.00
成就一亿技术人!
领取后你会自动成为博主和红包主的粉丝 规则
hope_wisdom
发出的红包
实付
使用余额支付
点击重新获取
扫码支付
钱包余额 0

抵扣说明:

1.余额是钱包充值的虚拟货币,按照1:1的比例进行支付金额的抵扣。
2.余额无法直接购买下载,可以购买VIP、付费专栏及课程。

余额充值