


1.1引入依赖
<dependencies>
        <dependency>
            <groupId>org.springframework.boot</groupId>
            <artifactId>spring-boot-starter-web</artifactId>
        </dependency>

        <dependency>
            <groupId>org.projectlombok</groupId>
            <artifactId>lombok</artifactId>
            <optional>true</optional>
        </dependency>
        <dependency>
            <groupId>org.springframework.boot</groupId>
            <artifactId>spring-boot-starter-test</artifactId>
            <scope>test</scope>
        </dependency>
        <!-- Spring Boot 配置处理器 -->
        <dependency>
            <groupId>org.springframework.boot</groupId>
            <artifactId>spring-boot-configuration-processor</artifactId>
            <optional>true</optional>
        </dependency>
    </dependencies>
1.2配置文件
order:
    pay-timeout-seconds: 120 # 订单支付超时时长,单位:秒。
    create-frequency-seconds: 10 # 订单创建频率,单位:秒
1.3OrderProperties读取配置
@Component
@ConfigurationProperties(prefix = "order")
@Data
public class OrderProperties {

    /**
     * 订单支付超时时长,单位:秒。
     */
    private Integer payTimeoutSeconds;

    /**
     * 订单创建频率,单位:秒
     */
    private Integer createFrequencySeconds;
}
- 在类上,添加 @Component 注解,保证该配置类可以作为一个 Bean 被扫描到。
- 在类上,添加 @ConfigurationProperties 注解,并设置 prefix = “order” 属性,这样它就可以读取前缀为 order 配置项,设置到配置类对应的属性上。
1.3.1注意事项
@ConfigurationProperties 注解除了支持添加在类上,也只支持添加在方法上。例如说,我们在 Configuration 配置类上使用。
@Configuration
public class DataSourceConfig {

    @Bean(name = "ordersDataSource")
    @ConfigurationProperties(prefix = "spring.datasource.orders") // 读取 spring.datasource.orders 配置到 HikariDataSource 对象
    public DataSource ordersDataSource() {
        return DruidDataSourceBuilder.create().build();
    }

}
1.4Application启动
@SpringBootApplication
public class Springboot02Application {

    public static void main(String[] args) {
        SpringApplication.run(Springboot02Application.class, args);
    }
    @Component
    public class OrderPropertiesCommandLineRunner implements CommandLineRunner {

        private final Logger logger = LoggerFactory.getLogger(getClass());

        @Autowired
        private OrderProperties orderProperties;

        @Override
        public void run(String... args) {
            logger.info("payTimeoutSeconds:" + orderProperties.getPayTimeoutSeconds());
            logger.info("createFrequencySeconds:" + orderProperties.getCreateFrequencySeconds());
        }

    }

    @Component
    public class ValueCommandLineRunner implements CommandLineRunner {

        private final Logger logger = LoggerFactory.getLogger(getClass());

        @Value("${order.pay-timeout-seconds}")
        private Integer payTimeoutSeconds;

        @Value("${order.create-frequency-seconds}")
        private Integer createFrequencySeconds;

        @Override
        public void run(String... args) {
            logger.info("payTimeoutSeconds:" + payTimeoutSeconds);
            logger.info("createFrequencySeconds:" + createFrequencySeconds);
        }

    }
}
- 在 OrderPropertiesCommandLineRunner 类中,我们测试了使用 @ConfigurationProperties 注解的 OrderProperties 配置类,读取 order 配置项的效果。
- 在 ValueCommandLineRunner 类中,我们测试了使用 @Value 注解,读取 order 配置项的效果。
- 其中,@Value 注解是 Spring 所提供,@ConfigurationProperties 注解是 Spring Boot 所提供。
效果如下:

1.5随机值
- 随机整数
# 指定 int 整数。
my-number=${random.int}
# 指定 long 整数。
my-long-number=${random.long}
# 随机小于 10 的 int 整数。
my-number-2=${random.int(10)}
# 随机大于等于 10 ,小于等于 65536 的 int 整数。
my-number-3=${random.int[1024,65536]}
- 随机字符
# 普通字符串
secret-1=${random.value}
# UUID 字符串
secret-2=${random.uuid}
1.6命令行配置
Spring Boot 支持从命令行参数,读取作为配置。例如说,比较常见的,我们希望修改 SpringMVC 的服务器端口,则会使用 java -jar xxx.jar --server.port=18080 命令,将端口修改为 18080。
通过命令行连续的两个中划线 --,后面接 配置项=配置值 的方式,修改配置文件中对应的配置项为对应的配置值。例如说,–配置项=配置值。如果希望修改多个配置项,则使用多组 – 即可。例如说,–配置项1=配置值1 --配置项2=配置值2。要注意,命令行的配置高于配置文件。
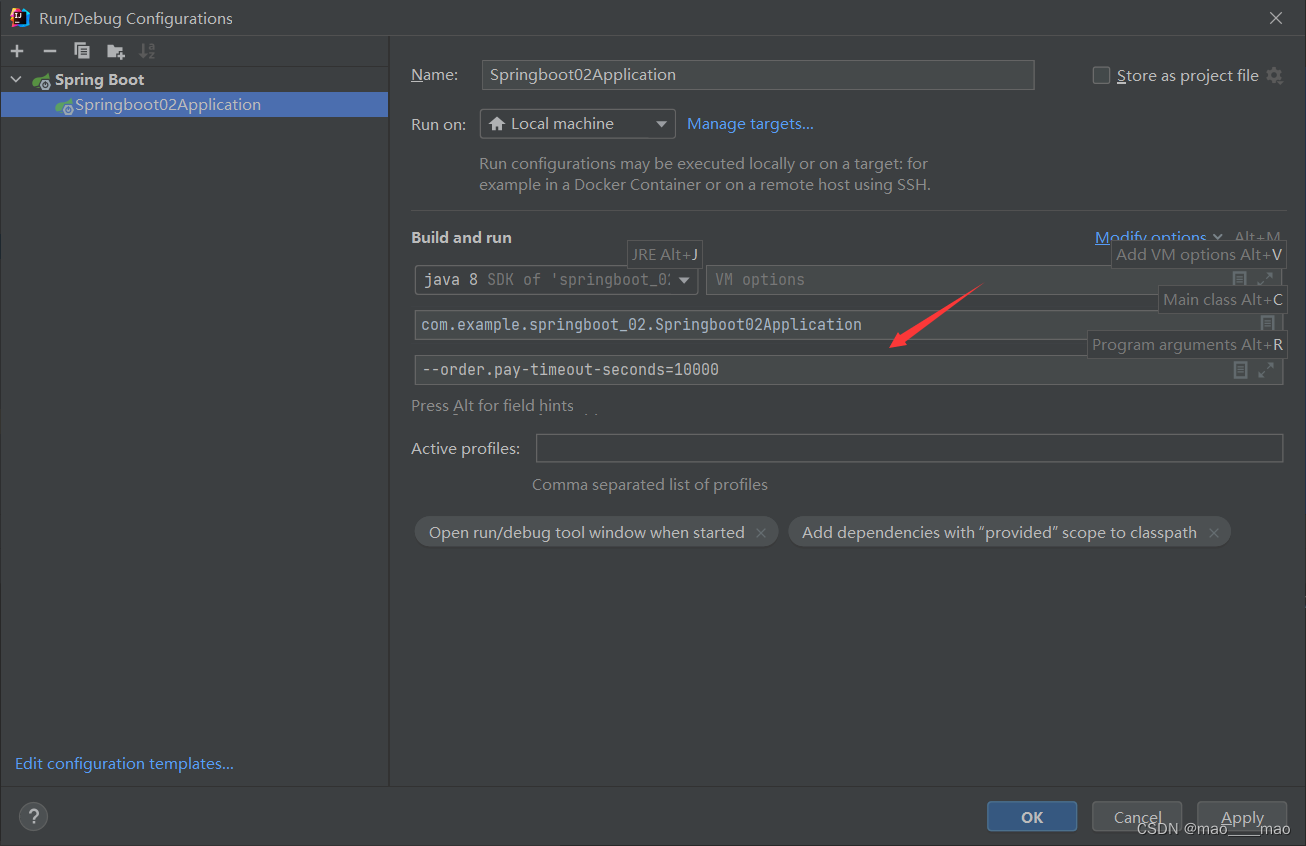
效果如下:

1.7多环境配置
在 Spring Boot 的项目开发中,我们会涉及多个不同的环境。例如说,当前所在的团队,有本地、开发、UAT、预发布、生产五套环境。并且,本地与开发、UAT、预发布与生产,分别对应不同的 MySQL、Redis、MongoDB、ES、RocketMQ 等等不同的服务。因此,我们在部署 Spring Boot 到对应环境时,需要采用不同的配置。
如果只使用一份配置文件,每次部署到不同的环境,就需要重复去修改,显然非常麻烦且容易出错。所以针对多环境场景下,我们会给每个环境创建一个配置文件 application-$ {profile}.yaml。其中,${profile} 为环境名,对应到 Spring Boot 项目生效的 Profile。
例如说:application-dev.yaml 配置文件,对应 dev 开发环境。这样,我们在生产环境的服务器上,使用 java -jar xxx.jar --spring.profiles.active=prod 命令,就可以加载 application-prod.yaml 配置文件,从而连接上配置文件配置的生产环境的 MySQL、Redis 等等服务。
1.7.1配置文件
在 resources 目录下,创建 2 个配置文件,对应不同的环境。如下:
- application-dev.yaml,本地环境。
server:
  port: 10001
order:
  pay-timeout-seconds: 10001 # 订单支付超时时长,单位:秒。
  create-frequency-seconds: 10001 # 订单创建频率,单位:秒
- application-local.yaml,开发环境。
server:
  port: 10002
order:
  pay-timeout-seconds: 10002 # 订单支付超时时长,单位:秒。
  create-frequency-seconds: 10002 # 订单创建频率,单位:秒
测试
使用命令行参数进行 --spring.profiles.active 配置项,实现不同环境,读取不同配置文件。
有两种参数实现:
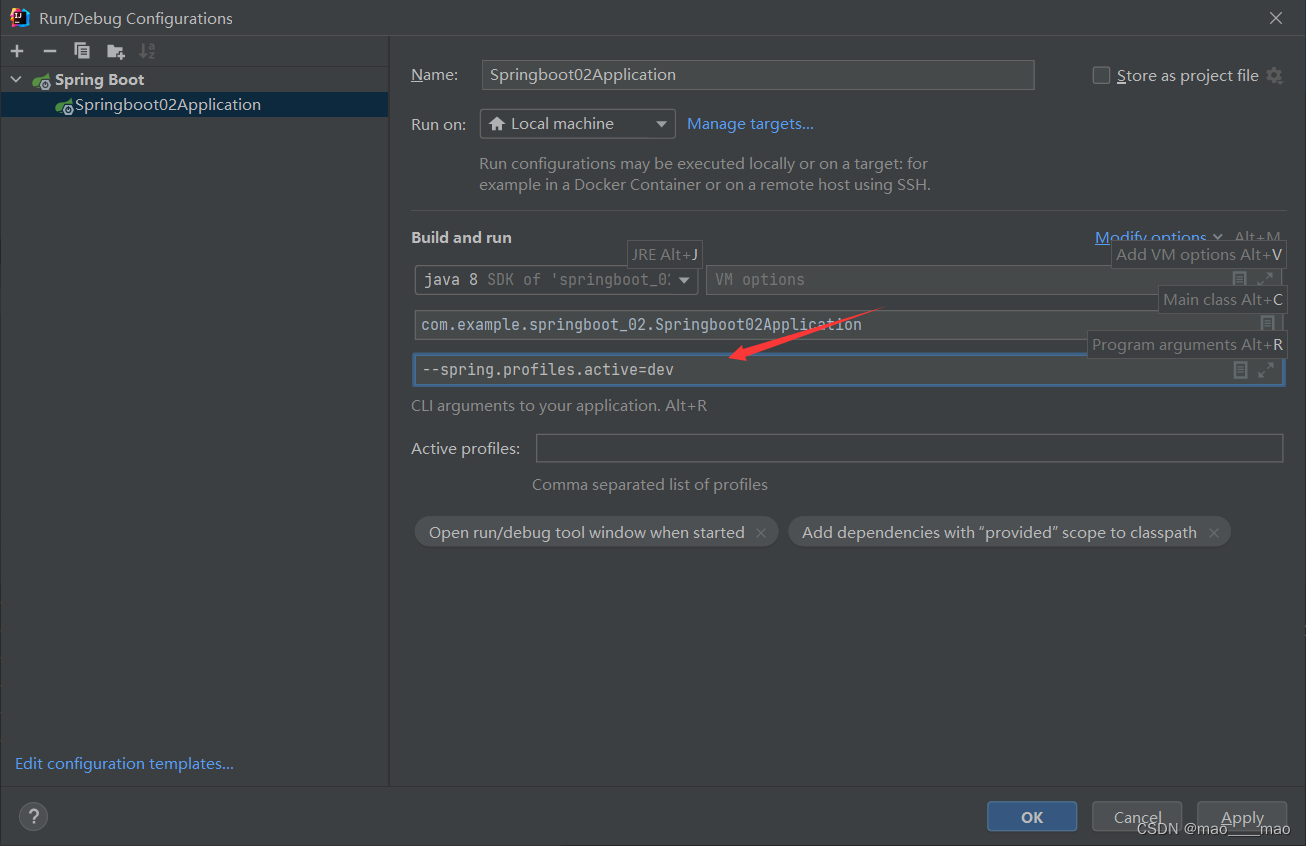
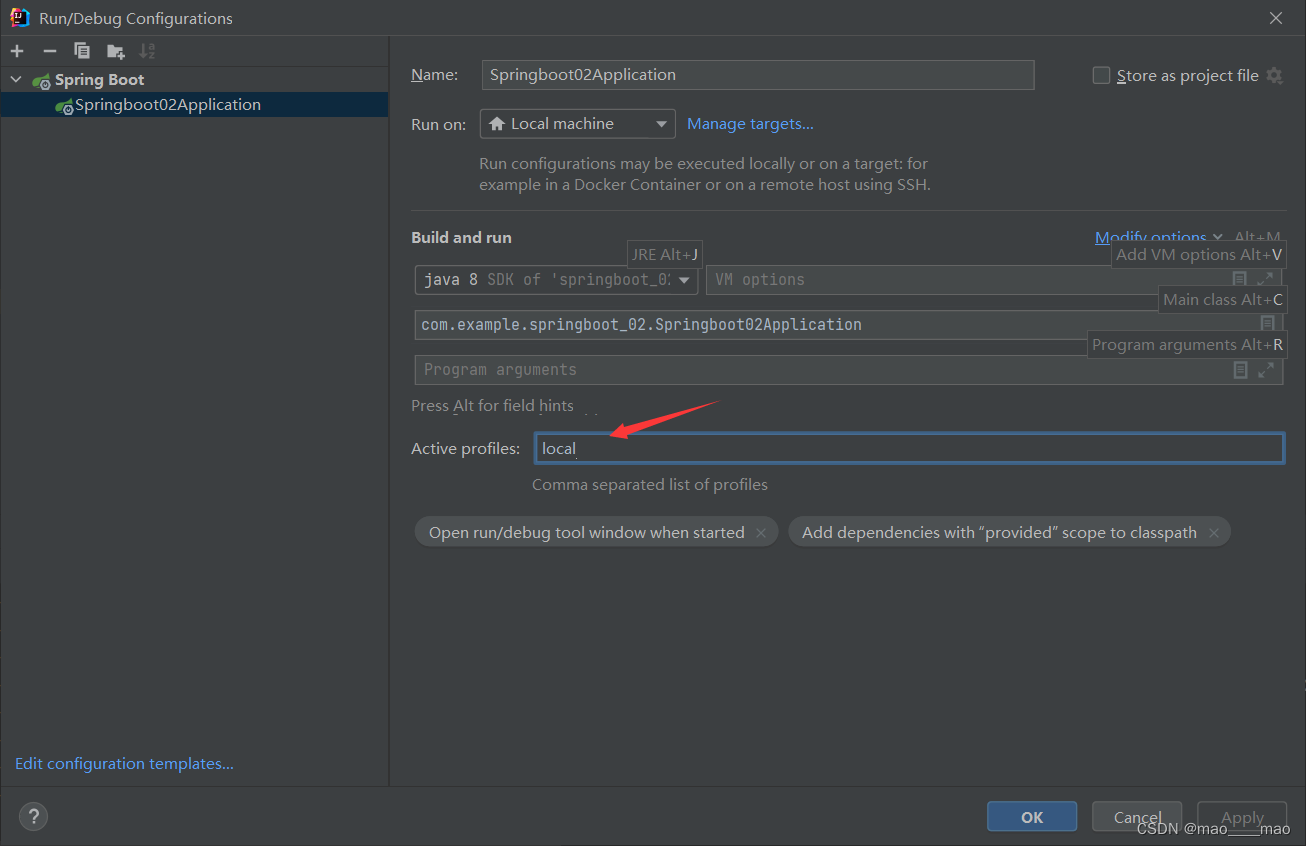
效果如下:

1.8自定义配置文件
Spring Boot 默认读取文件名为 application 的配置文件。例如说,application.yaml 配置文件。同时,Spring Boot 可以通过 spring.config.name 配置项,设置自定义配置文件名。
1.8.1配置文件
在 resources 目录下,创建两个配置文件。如下:
- application-my.yaml 配置内容如下:
application-test: hahaha
server:
  port: 10003
- myapp.yaml 配置内容如下:
rpc-test: yeah
1.8.2Application启动
@SpringBootApplication
public class Springboot02Application {


    /**
     * 设置需要读取的配置文件的名字。
     * 基于 {@link org.springframework.boot.context.config.ConfigFileApplicationListener#CONFIG_NAME_PROPERTY} 实现。
     */
    private static final String CONFIG_NAME_VALUE = "application-my,myapp";

    public static void main(String[] args) {
        // <X> 设置环境变量
        System.setProperty(ConfigFileApplicationListener.CONFIG_NAME_PROPERTY, CONFIG_NAME_VALUE);

        // 启动 Spring Boot 应用
        SpringApplication.run(Springboot02Application.class, args);
    }

    @Component
    public class ValueCommandLineRunner implements CommandLineRunner {

        private final Logger logger = LoggerFactory.getLogger(getClass());

        @Value("${application-test}")
        private String applicationTest;

        @Value("${rpc-test}")
        private String rpcTest;

        @Override
        public void run(String... args) {
            logger.info("applicationTest:" + applicationTest);
            logger.info("rpcTest:" + rpcTest);
        }

    }
}
- 因为 spring.config.name 配置项,必须在读取配置文件之前完成设置,所以我们在 System.setProperty(ConfigFileApplicationListener.CONFIG_NAME_PROPERTY, CONFIG_NAME_VALUE) 处,通过环境变量来设置。
- 在 ValueCommandLineRunner 中,我们打印了两个配置文件的配置项。
注意:记得在命令行中配置–spring.profiles.active=my
效果如下:

1.9配置加密
考虑到安全性,我们可能最好将配置文件中的敏感信息进行加密。例如说,MySQL 的用户名密码、第三方平台的 Token 令牌等等。
配置加密的方案比较多,目前使用比较广泛的是 Jasypt。其介绍如下:
FROM https://www.oschina.net/p/jasypt

Jasypt 这个 Java 类包为开发人员提供一种简单的方式来为项目增加加密功能,包括:密码 Digest认证,文本和对象加密,集成 hibernate,Spring Security(Acegi) 来增强密码管理。

Jasypt 开发团队推出了 Java 加密工具 Jasypt 1.4,它可与 Spring Framework、Hibernate 和 Acegi Security 集成。
参考:
https://www.iocoder.cn/Spring-Boot/config-file/?github
https://www.docs4dev.com/docs/zh/spring-boot/2.1.1.RELEASE/reference/boot-features-external-config.html


 269
269


 被折叠的 条评论
为什么被折叠?
被折叠的 条评论
为什么被折叠?
 到【灌水乐园】发言


