


XFire创建WebService服务端和客户端
感谢这篇博客http://clq9761.iteye.com/blog/1261963的分享。
可能是环境搭建的原因,按照资料有些地方没有成功,于是自己改了一部分,写了下面的demo
1、服务端
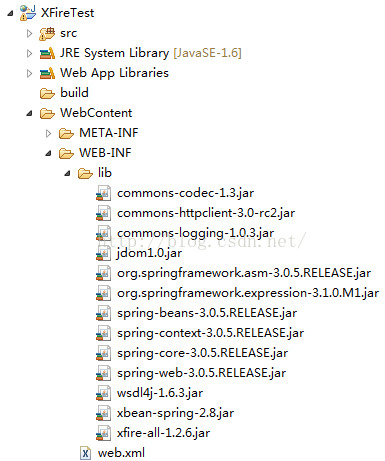
1.1、新建web工程,复制需要的jar包到lib文件夹
1.2、web.xml
<?xml version="1.0" encoding="UTF-8"?>
<web-app xmlns:xsi="http://www.w3.org/2001/XMLSchema-instance" xmlns="http://java.sun.com/xml/ns/javaee" xmlns:web="http://java.sun.com/xml/ns/javaee/web-app_2_5.xsd" xsi:schemaLocation="http://java.sun.com/xml/ns/javaeehttp://java.sun.com/xml/ns/javaee/web-app_3_0.xsd" id="WebApp_ID" version="3.0">
  <display-name>XFireTest</display-name>
  <servlet>
    <servlet-name>XFireServlet</servlet-name>
    <servlet-class>
        org.codehaus.xfire.transport.http.XFireConfigurableServlet
    </servlet-class>
  </servlet>
  <servlet-mapping>
    <servlet-name>XFireServlet</servlet-name>
    <url-pattern>/services/*</url-pattern>
  </servlet-mapping>
</web-app>
1.3、程序结构
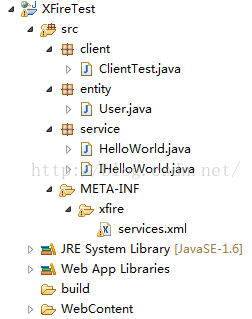
1.3.1、写service接口
package service;

import entity.User;

public interface IHelloWorld {
 public String getHello();
 public User getUser(User user);
}
1.3.2、写实现类
package service;

import entity.User;

public class HelloWorld implements IHelloWorld {

 public String getHello() {
  return "Hello";
 }

 public User getUser(User user) {
  User helloUser = new User();
  helloUser.setName("hello," + user.getName());
  return helloUser;
 }
}
1.3.3、接口中用到了User对象的代码如下
package entity;

public class User {
 private String name;

 public String getName() {
  return name;
 }

 public void setName(String name) {
  this.name = name;
 }

}
1.3.4、写services.xml
services.xml的路径:src/META-INF/xfire/
<?xml version="1.0" encoding="UTF-8"?>
<beans>
 <service xmlns="http://xfire.codehaus.org/config/1.0">
  <!-- 服务名称,客户端调用时需要这个 -->
  <name>HelloWorld</name>
  <!-- 一般是网址,意义不大 -->
  <namespace>http://www.hello.com</namespace>
  <!-- 接口类 -->
  <serviceClass>service.IHelloWorld</serviceClass>
  <!-- 实现类 -->
  <implementationClass>service.HelloWorld</implementationClass>
 </service>
</beans>
服务端程序完成。
1.4、测试服务端
将项目部署到tomcat中,并启动tomcat

在浏览器中输入:
http://localhost:8080/XFireTest/services/HelloWorld?wsdl
看到如下即服务端部署成功

2、写客户端
2.1、客户端和服务端在同一项目中;或者客户端有服务端的接口和实体类,例如:IHelloWorld.java、User.java
路径:/XFireTest/src/client/ClientTest.java
package client;

import java.net.MalformedURLException;

import org.codehaus.xfire.XFireFactory;
import org.codehaus.xfire.client.XFireProxyFactory;
import org.codehaus.xfire.service.Service;
import org.codehaus.xfire.service.binding.ObjectServiceFactory;

import service.IHelloWorld;


import entity.User;

public class ClientTest {
 public static void main(String[] args) throws MalformedURLException {
  Service service = new ObjectServiceFactory().create(IHelloWorld.class);
  XFireProxyFactory factory = new XFireProxyFactory(XFireFactory.newInstance().getXFire());
  String url = "http://localhost:8080/XFireTest/services/HelloWorld";
  IHelloWorld helloWorld = (IHelloWorld)factory.create(service, url);

  //String
  String str = helloWorld.getHello();
  System.out.println(str);

  //User
  User user = new User();
  user.setName("张三");
  String userName = helloWorld.getUser(user).getName();
  System.out.println(userName);
 }

}
运行结果:
Hello
hello,张三
2.2、客户端和服务端不在同一项目中,利用build.xml
2.2.1、新建一个web工程,XFireClientTest,复制需要的jar到lib,除了写服务端用到的jar,还有其他jar包
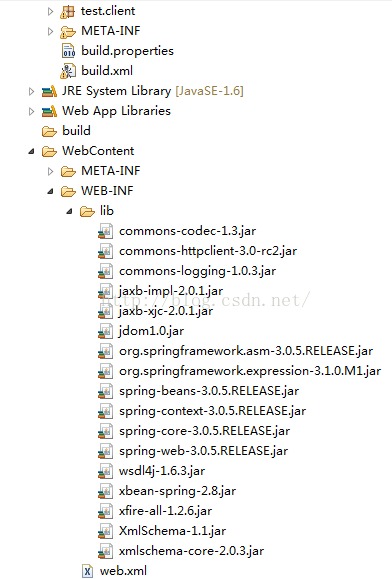
web.xml没有要添加的内容,就是简单的默认配置,例如
<?xml version="1.0" encoding="UTF-8"?>
<web-app xmlns:xsi="http://www.w3.org/2001/XMLSchema-instance" xmlns="http://java.sun.com/xml/ns/javaee" xmlns:web="http://java.sun.com/xml/ns/javaee/web-app_2_5.xsd" xsi:schemaLocation="http://java.sun.com/xml/ns/javaeehttp://java.sun.com/xml/ns/javaee/web-app_3_0.xsd" id="WebApp_ID" version="3.0">
  <display-name>XFireClientTest</display-name>
  <welcome-file-list>
    <welcome-file>index.jsp</welcome-file>
  </welcome-file-list>
</web-app>
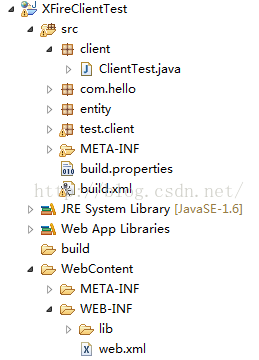
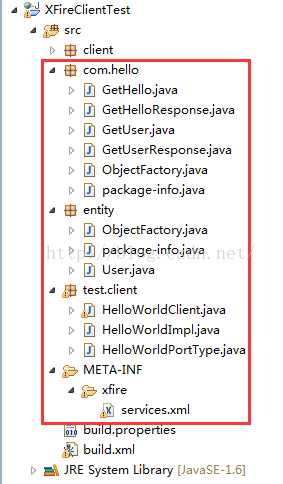
程序结构
2.2.2、写build.properties,路径:/XFireClientTest/src/build.properties
src.dir=E:/workspaceJEE/XFireClientTest/src
lib.dir=E:/workspaceJEE/XFireClientTest/WebContent/WEB-INF/lib
wsdl.dir=http://localhost:8080/XFireTest/services/HelloWorld?wsdl
2.2.3、写build.xml,路径:/XFireClientTest/src/build.xml
<?xml version="1.0" encoding="UTF-8"?>
<project name="WebService" basedir="." default="gen-webservice">
 <property file="build.properties"></property>
 <path id="project-classpath">
  <fileset dir="${lib.dir}">
   <include name="**/*.jar" />
  </fileset>
 </path>
 <target name="gen-webservice">
  <taskdef name="wsgen" classname="org.codehaus.xfire.gen.WsGenTask" classpathref="project-classpath" />
  <wsgen outputDirectory="${src.dir}"  wsdl="${wsdl.dir}" package="test.client" overwrite="true"/>
 </target>
</project>
2.2.4、右击运行build.xml
自动生成了如下代码,这些代码就是写客户端要用到的:
2.2.5、写客户端程序
路径:/XFireClientTest/src/client/ClientTest.java
package client;

import entity.ObjectFactory;
import entity.User;
import test.client.HelloWorldClient;
import test.client.HelloWorldPortType;

public class ClientTest {

 public static void main(String[] args) {
  HelloWorldClient service = new HelloWorldClient();
  HelloWorldPortType portType = service.getHelloWorldHttpPort();

  //String
  String hello = portType.getHello();
  System.out.println(hello);

  //User
  ObjectFactory factory = new ObjectFactory();
  User user = factory.createUser();
  user.setName(factory.createUserName("李四"));
  String userName = portType.getUser(user).getName().getValue();
  System.out.println(userName);
 }

}
运行结果:
Hello
hello,李四
客户端程序完成。
2.3、使用axis写客户端访问XFire的WebService的服务端
不需要方法1中的接口类,也不需要用工具生成客户端代码。
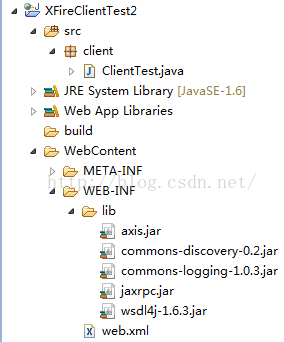
2.3.1、新建一个工程XFireClientTest2,复制jar包到lib中
web.xml按照工程的内容默认即可。
因为没调通不传参数的写法,因此在服务端的接口和实现类中增加了一个方法getResult(String param),服务端其他代码不变。代码如下:
注意是服务端的代码,也就是前面写的XFireTest工程!路径:/XFireTest/src/service/IHelloWorld.java
package service;

import entity.User;

public interface IHelloWorld {
	public String getHello();
	public User getUser(User user);
	public String getResult(String param);
}
注意是服务端的代码,也就是前面写的XFireTest工程!路径:/XFireTest/src/service/HelloWorld.java
package service;

import entity.User;

public class HelloWorld implements IHelloWorld {

	public String getHello() {
		return "Hello";
	}

	public User getUser(User user) {
		User helloUser = new User();
		helloUser.setName("hello," + user.getName());
		return helloUser;
	}

	public String getResult(String param) {
		return "hello," + param;
	}
}
写客户端代码:
package client;
import java.rmi.RemoteException;
import javax.xml.namespace.QName;
import javax.xml.rpc.ServiceException;
import org.apache.axis.client.Call;
import org.apache.axis.client.Service;

public class ClientTest {
	public static void main(String[] args) {
		try {
			Service service = new Service();
			Call call = (Call) service.createCall();
			call.setTargetEndpointAddress("http://localhost:8080/XFireTest/services/HelloWorld");
			call.setOperationName(new QName("http://www.hello.com", "getResult"));
			call.setTimeout(new Integer(6000000));
			call.addParameter("arg0", org.apache.axis.encoding.XMLType.XSD_STRING, javax.xml.rpc.ParameterMode.IN);
			String result = (String) call.invoke(new Object[] {"time"});
			System.out.println(result);
		} catch (ServiceException e) {
			e.printStackTrace();
		} catch (RemoteException e) {
			e.printStackTrace();
		}
	}
}
运行结果:
hello,time
客户端完成。


 2044
2044

 被折叠的 条评论
为什么被折叠?
被折叠的 条评论
为什么被折叠?
 到【灌水乐园】发言


