


项目场景:
作为小白刚入手瑞米派,烧录完镜像,不能连接wifi
问题描述
在烧录官方Ubuntu镜像后,不能打开wifi。使用ifconfig命令不显示wlan0.
//找不到wlan0
//这里使用的是开发板上的调试接口进行串口打印的信息
root@localhost:~# ifconfig
eth0: flags=4163<UP,BROADCAST,RUNNING,MULTICAST>  mtu 1500
        inet 192.168.137.9  netmask 255.255.255.0  broadcast 192.168.137.255
        ether de:64:1f:f0:f3:9a  txqueuelen 1000  (Ethernet)
        RX packets 2426  bytes 315381 (315.3 KB)
        RX errors 0  dropped 0  overruns 0  frame 0
        TX packets 347  bytes 97660 (97.6 KB)
        TX errors 0  dropped 0 overruns 0  carrier 0  collisions 0
        device interrupt 184

lo: flags=73<UP,LOOPBACK,RUNNING>  mtu 65536
        inet 127.0.0.1  netmask 255.0.0.0
        loop  txqueuelen 1000  (Local Loopback)
        RX packets 26172  bytes 2016746 (2.0 MB)
        RX errors 0  dropped 0  overruns 0  frame 0
        TX packets 26172  bytes 2016746 (2.0 MB)
        TX errors 0  dropped 0 overruns 0  carrier 0  collisions 0
原因分析:
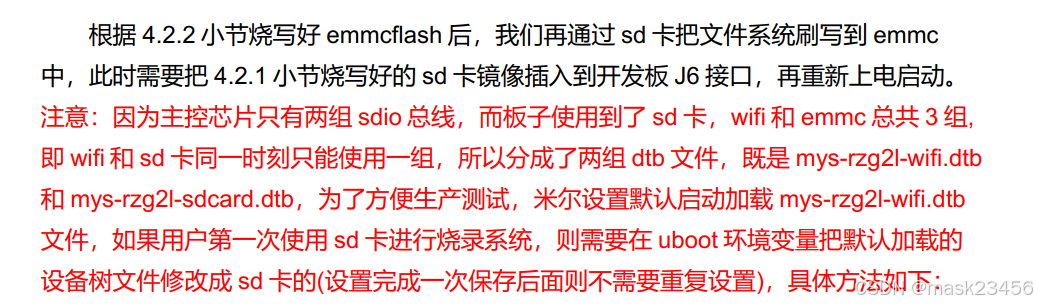
我在进行镜像制作过程中是看到有wifi设备树的,只有一种可能,sdio只有两条,但是我们有EMMC,SD,WIFI这三个设备树文件,所以只能三选二。烧录时使用EMMC和SD,烧录完成后,使用EMMC和WIFI。
解决方案:
一,设备树文件的切换
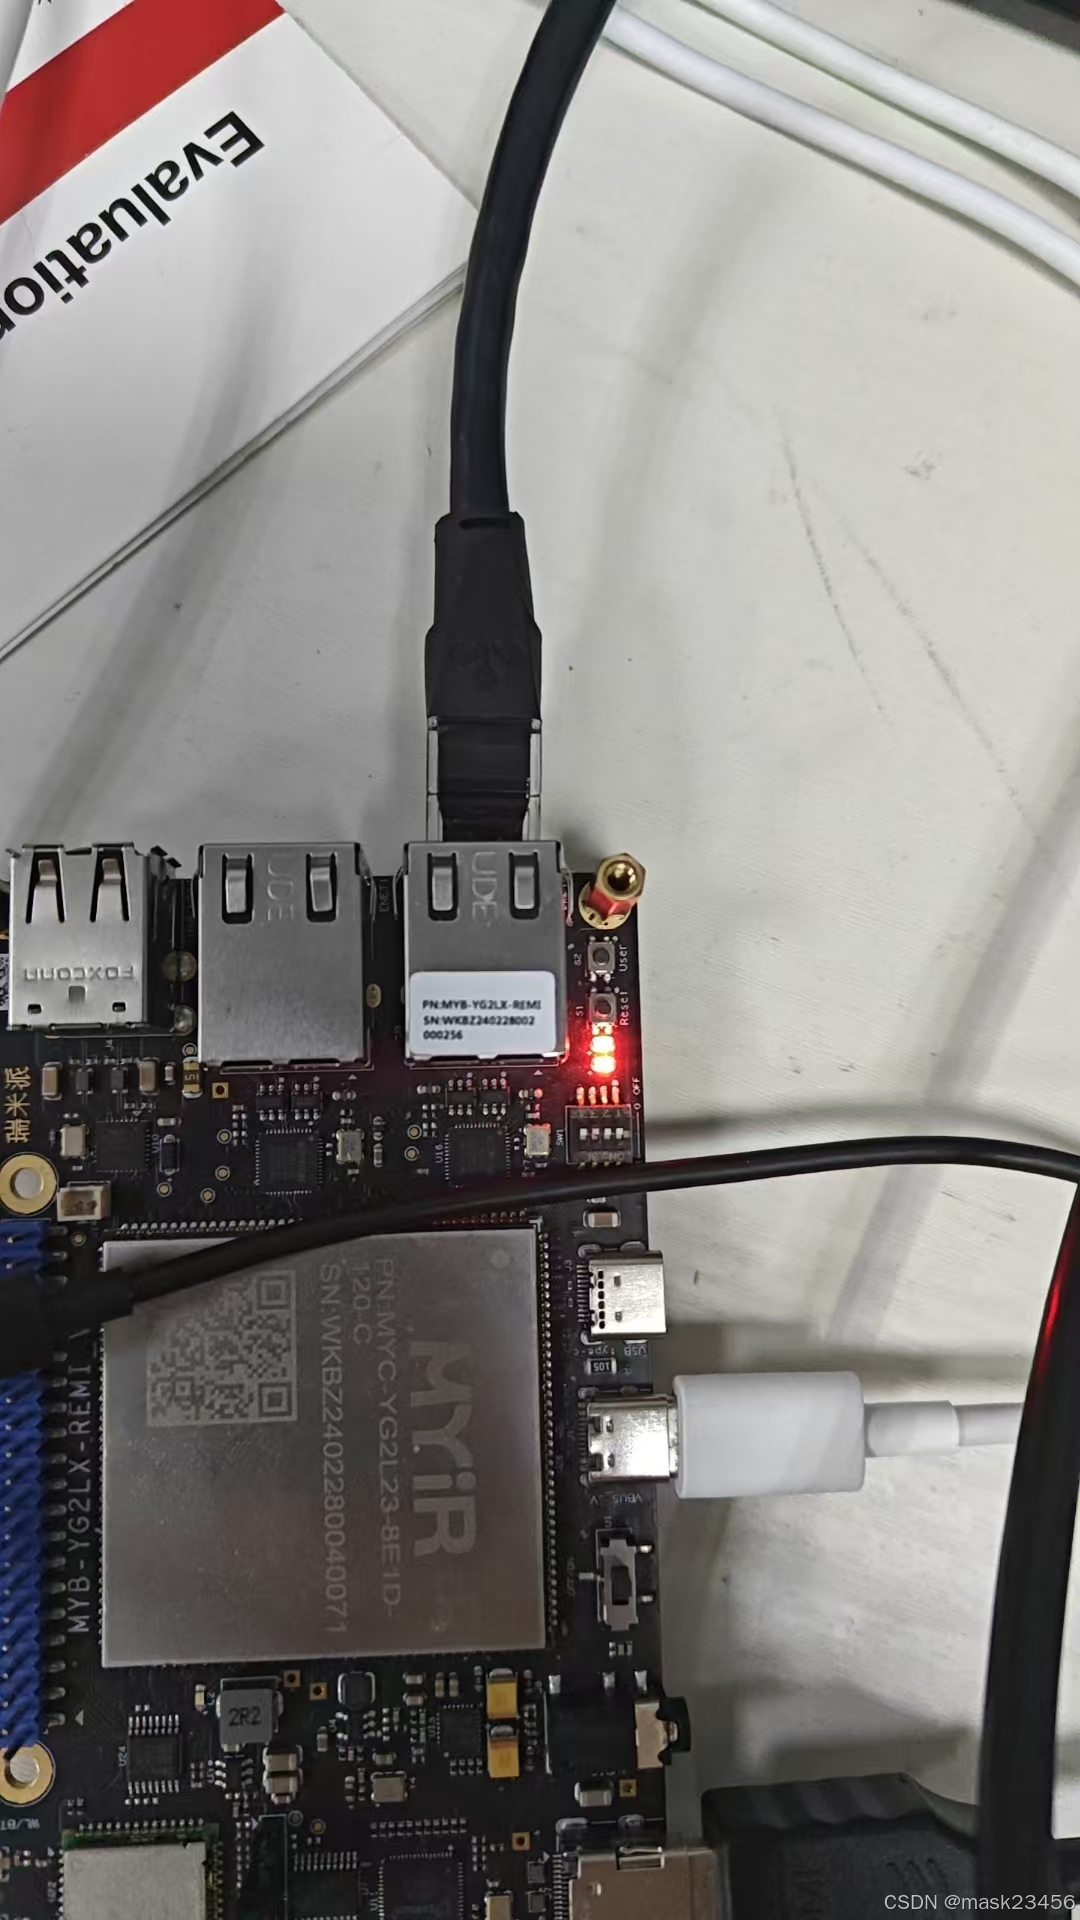
开始敲代码前记得连接好硬件部分
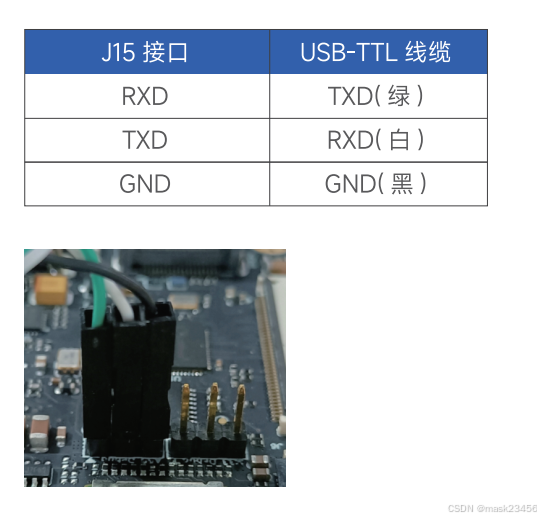
1.调试台连接(使用USB转TTL串口模块)
2.软件配置
这里使用的是mobaXterm,下面是本人的服务器链接,如有需要下载即可
http://47.104.244.97/s/k5h6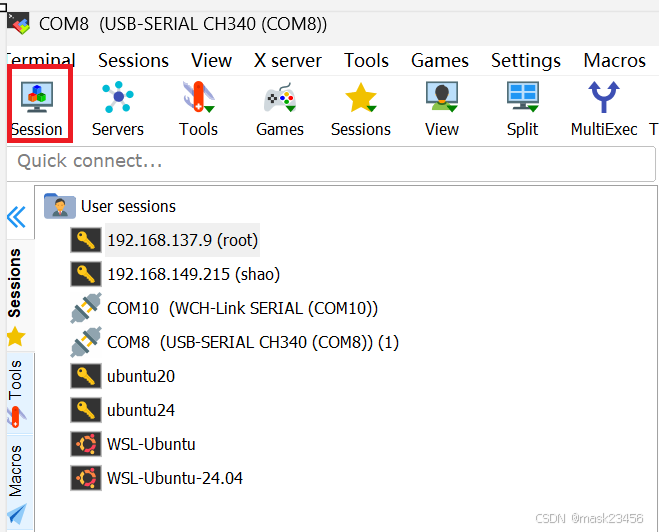
选择串口

配置串口
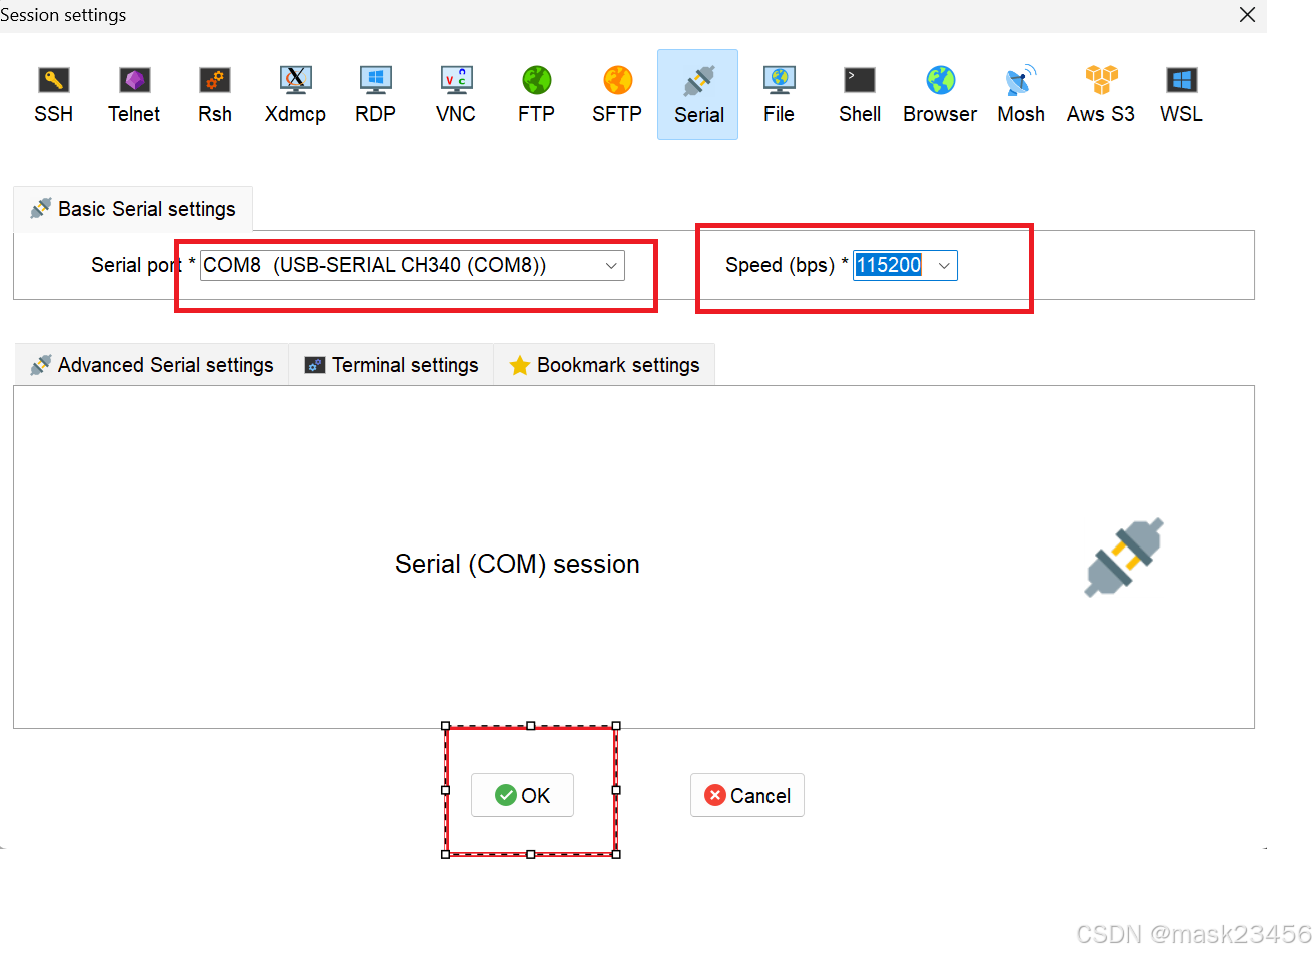
配置完成!
1.SD卡中烧录好镜像后,将SD卡插入开发板,在 ttySC0调试串口下查看启动信息,打开开发板电源后立即按下键盘任意键,进入到boot模式。显示=>就代表进入
U-Boot 2021.10-g75dee8f1 (Feb 20 2024 - 11:40:15 +0800)

CPU:   Renesas Electronics CPU rev 1.0
Model: smarc-rzg2l
DRAM:  896 MiB
NOTICE:  BL2: v2.6(release):V1.0.0_20240125_RC_V2.6_REMI_PI
NOTICE:  BL2: Built : 03:42:54, Feb 20 2024
NOTICE:  BL2: eMMC boot from partition 1
NOTICE:  BL2: Load dst=0x1d740 src=(p:1)0x20000(256) len=0x10(1)
NOTICE:  BL2: eMMC boot from partition 1
NOTICE:  BL2: Load dst=0x1d8a0 src=(p:1)0x20010(256) len=0x28(1)
NOTICE:  BL2: eMMC boot from partition 1
NOTICE:  BL2: Load dst=0x44000000 src=(p:1)0x20090(256) len=0x7069(57)
NOTICE:  BL2: eMMC boot from partition 1
NOTICE:  BL2: Load dst=0x1d740 src=(p:1)0x20000(256) len=0x10(1)
NOTICE:  BL2: eMMC boot from partition 1
NOTICE:  BL2: Load dst=0x1d8a0 src=(p:1)0x20010(256) len=0x28(1)
NOTICE:  BL2: Load dst=0x1d8a0 src=(p:1)0x20038(256) len=0x28(1)
NOTICE:  BL2: eMMC boot from partition 1
NOTICE:  BL2: Load dst=0x50000000 src=(p:1)0x27100(312) len=0xaa068(1361)
NOTICE:  BL2: Booting BL31
NOTICE:  BL31: v2.6(release):V1.0.0_20240125_RC_V2.6_REMI_PI
NOTICE:  BL31: Built : 03:42:54, Feb 20 2024


U-Boot 2021.10-g75dee8f1 (Feb 20 2024 - 11:40:15 +0800)

CPU:   Renesas Electronics CPU rev 1.0
Model: smarc-rzg2l
DRAM:  896 MiB
MMC:   sd@11c00000: 0, sd@11c10000: 1
Loading Environment from MMC... OK
In:    serial@1004b800
Out:   serial@1004b800
Err:   serial@1004b800
Net:
Error: ethernet@11c20000 address not set.
No ethernet found.

Hit any key to stop autoboot:  0
=>
在这里分别输入下面五条U-Boot指令,随后SD卡中的镜像会复制到EMMC中,此时我们使用的是EMMC和SD的设备树文件。
setenv bootcmd "run sdhi_sw ;run bootcmd_check ;run bootimage"
setenv fdt_file mys-rzg2l-sdcard.dtb
setenv sdhi_sw "if test $board_name = MYS-RZG2L ; then switch_sdhi1 sdcard; fi"
saveenv
boot
当出现 root@myir_1g :之后代表已经复制完成
2.断电,拔卡,重新上电,老样子,通过ttySC0调试台,进入到boot模式。输入下面四条指令。
setenv fdt_file mys-rzg2l-wifi.dtb
setenv sdhi_sw "if test $board_name = MYS-RZG2L ; then switch_sdhi1 wifi; fi"
saveenv
boot
3.登录用户myir 密码123456,进入后我们再一次使用ifconfig,可以看到我们已经有了wlan0,此时已经成功一半了。
root@localhost:~# ifconfig
eth0: flags=4163<UP,BROADCAST,RUNNING,MULTICAST>  mtu 1500
        ether ca:57:15:ac:d0:7c  txqueuelen 1000  (Ethernet)
        RX packets 456  bytes 52640 (52.6 KB)
        RX errors 0  dropped 0  overruns 0  frame 0
        TX packets 22  bytes 7590 (7.5 KB)
        TX errors 0  dropped 0 overruns 0  carrier 0  collisions 0
        device interrupt 184

lo: flags=73<UP,LOOPBACK,RUNNING>  mtu 65536
        inet 127.0.0.1  netmask 255.0.0.0
        loop  txqueuelen 1000  (Local Loopback)
        RX packets 1608  bytes 124414 (124.4 KB)
        RX errors 0  dropped 0  overruns 0  frame 0
        TX packets 1608  bytes 124414 (124.4 KB)
        TX errors 0  dropped 0 overruns 0  carrier 0  collisions 0

wlan0: flags=4099<UP,BROADCAST,MULTICAST>  mtu 1500
        ether c8:fe:0f:3d:91:a6  txqueuelen 1000  (Ethernet)
        RX packets 0  bytes 0 (0.0 B)
        RX errors 0  dropped 0  overruns 0  frame 0
        TX packets 0  bytes 0 (0.0 B)
        TX errors 0  dropped 0 overruns 0  carrier 0  collisions 0
我们试试能不能ping通www.baidu.com,结果是报错,因为我们这里还没有连wifi。下面开始讲解连接WiFi
root@localhost:~# ping www.baidu.com
ping: www.baidu.com: Temporary failure in name resolution
二,连接wifi
因为官方给的Ubuntu镜像中本身包含一些网络工具,但是在尝试使用nmcli命令连接wifi时,会出现报错,暂时没办法解决这个问题,所以这里使用了一些其他工具,因为没wifi所以没办法使用apt安装软件。给出两个方案“有线网络配网”,“文件系统制作”。细节将会在下一个博客中展示。这里我直接使用下面两个工具。
需要安装的工具
wpasupplicant
wireless-tools
输入下面三条指令
sudo iw dev wlan0 scan | grep SSID
//查看附近wifi信号
sudo wpa_passphrase "wifi名字" "wifi密码" > /etc/wpa_supplicant/wpa_supplicant.conf
//将WiFi信息添加到联网配置文件
sudo wpa_supplicant -i wlan0 -c /etc/wpa_supplicant/wpa_supplicant.conf
//通过联网配置文件连接无线网
代码实况
root@localhost:~# sudo iw dev wlan0 scan | grep SSID
        SSID: DNUI-CUCC
        SSID: door
        SSID: Neuedu_Guest
        SSID: DIY_CLUB
        SSID: DNUI-CUCC
        SSID: door
        SSID: DIY_CLUB_5G
        SSID: DNUI-CUCC
        SSID: DNUI-CUCC
        SSID: door
        SSID: \x00\x00\x00\x00\x00\x00\x00\x00
        SSID: Neuedu_Guest
root@localhost:~# sudo wpa_passphrase "DIY_CLUB_5G" "DIYCLUB205" > /etc/wpa_supplicant/wpa_supplicant.conf
root@localhost:~# cat /etc/wpa_supplicant/wpa_supplicant.conf
network={
        ssid="DIY_CLUB_5G"
        #psk="DIYCLUB205"
        psk=02adf4b601753d0e40ee16c280962e5f9ce1a757f681e583e6afbec9aa7cff30
}
root@localhost:~# sudo wpa_supplicant -i wlan0 -c /etc/wpa_supplicant/wpa_supplicant.conf
Successfully initialized wpa_supplicant
nl80211: kernel reports: Authentication algorithm number required
nl80211: kernel reports: Match already configured
.....//省略
nl80211: kernel reports: Match already configured
wlan0: Trying to associate with 48:7d:2e:e9:56:3a (SSID='DIY_CLUB_5G' freq=5745 MHz)
nl80211: kernel reports: Authentication algorithm number required
.....//省略
nl80211: kernel reports: Match already configured
wlan0: CTRL-EVENT-STARTED-CHANNEL-SWITCH freq=5745 ht_enabled=1 ch_offset=1 ch_width=80 MHz cf1=5775 cf2=0
wlan0: Associated with 48:7d:2e:e9:56:3a
wlan0: CTRL-EVENT-SUBNET-STATUS-UPDATE status=0
wlan0: WPA: Key negotiation completed with 48:7d:2e:e9:56:3a [PTK=CCMP GTK=CCMP]
wlan0: CTRL-EVENT-CONNECTED - Connection to 48:7d:2e:e9:56:3a completed [id=0 id_str=]
//这里会卡在这
注意程序会在这里卡住,因为一直分配不到IP,所以还需要使用另外一个命令。此时我们需要使用两个终端窗口,假如你的瑞米派是有屏幕和键盘,那你只需要再打开一个终端窗口就行。假如你只有一个串口线,那你可以再使用一根网口线,连接电脑和开发板,目的是为了使用ssh再打开一个终端窗口。我们这里假设你没有屏幕和键盘。
1.连接网线到电脑和开发板上
2.在刚才的串口调试台输入下面命令
sudo ifconfig eth0 192.168.137.9
//给我们的网口添加一个ip地址
查看有没有添加上
ifconfig
eth0: flags=4163<UP,BROADCAST,RUNNING,MULTICAST>  mtu 1500
        inet 192.168.137.9  netmask 255.255.255.0  broadcast 192.168.137.255
        ether de:64:1f:f0:f3:9a  txqueuelen 1000  (Ethernet)
        RX packets 1043  bytes 127263 (127.2 KB)
        RX errors 0  dropped 0  overruns 0  frame 0
        TX packets 86  bytes 27792 (27.7 KB)
        TX errors 0  dropped 0 overruns 0  carrier 0  collisions 0
        device interrupt 184
3.检查开发板是否打开了SSH服务
sudo systemctl status ssh

输出下面的信息代表已经打开

● ssh.service - OpenBSD Secure Shell server
     Loaded: loaded (/lib/systemd/system/ssh.service; enabled; vendor preset: en
abled)
     Active: active (running) since Fri 2066-01-01 08:47:36 CST; 1h 2
如果没打开就重新打开
sudo systemctl start ssh

sudo systemctl enable ssh
4.使用mobaXterm连接
ssh连接
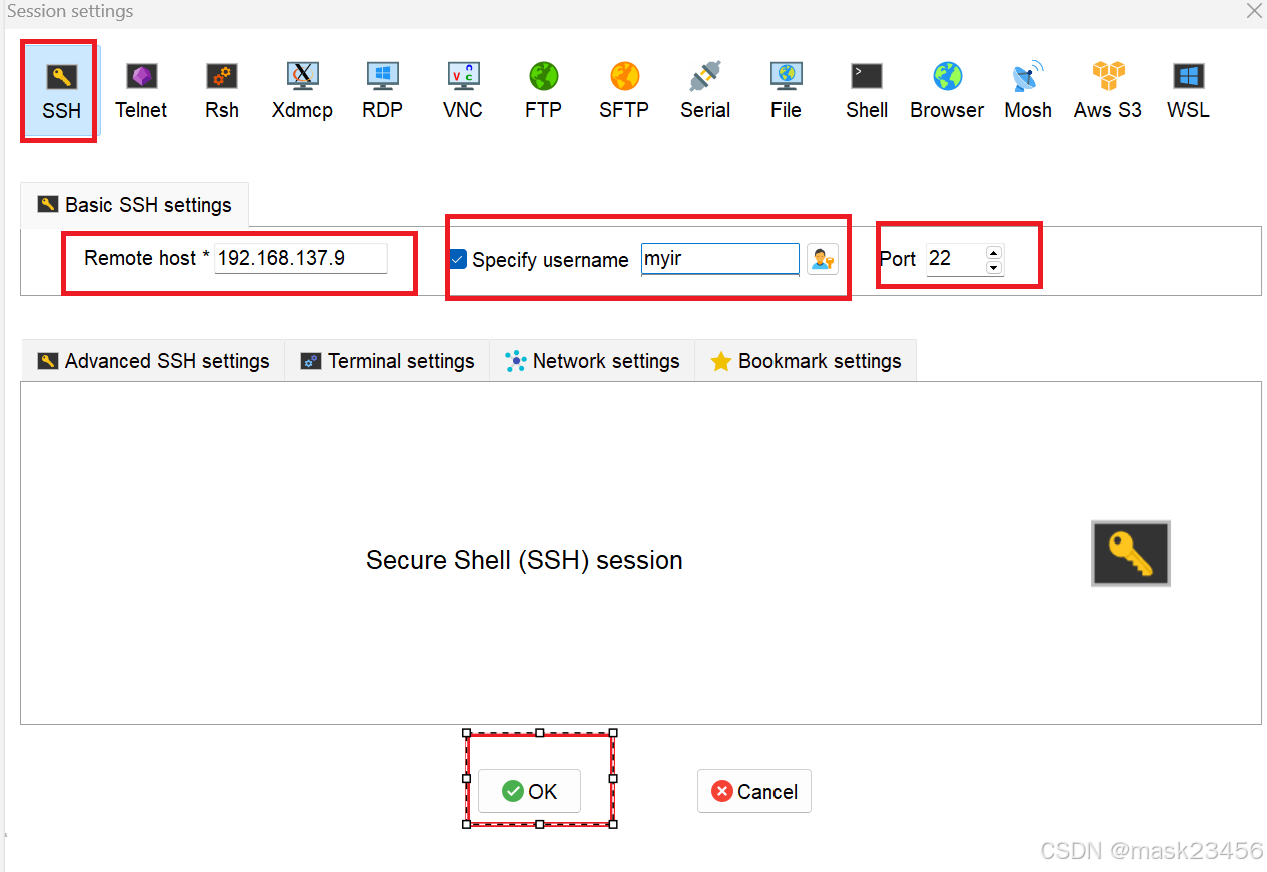
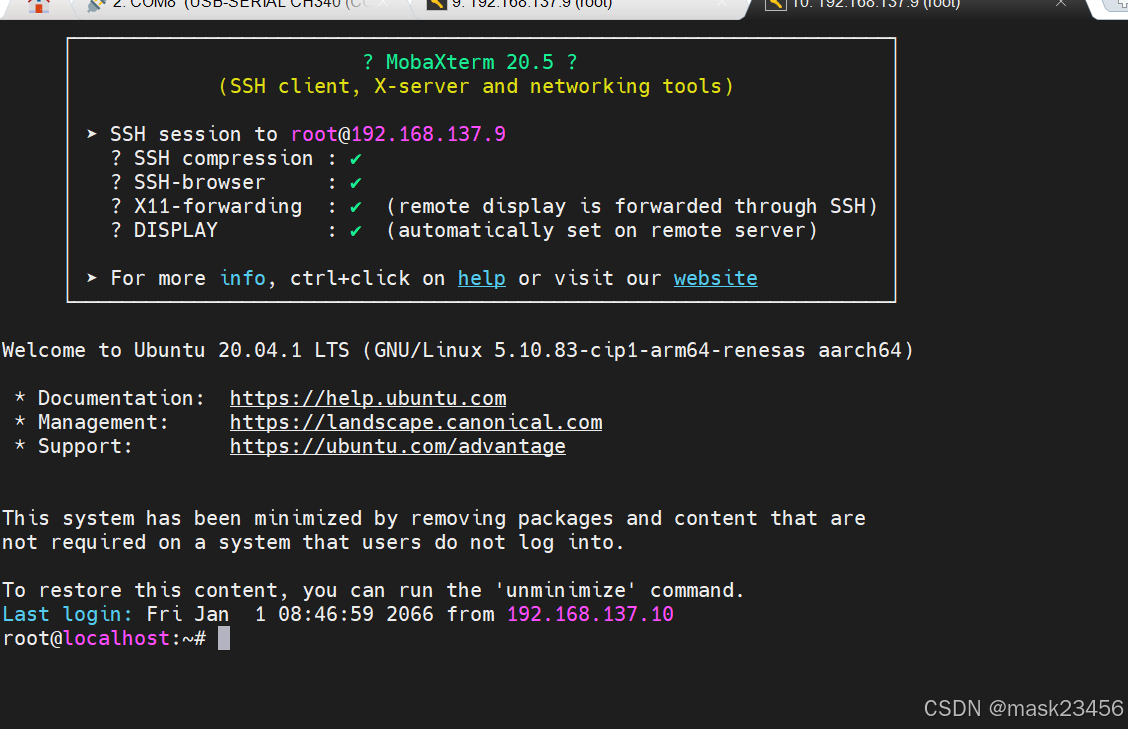
此时就是已经通过ssh打开了一个终端窗口
5.输入获取IP的指令
sudo udhcpc -i wlan0检测wifi连接效果
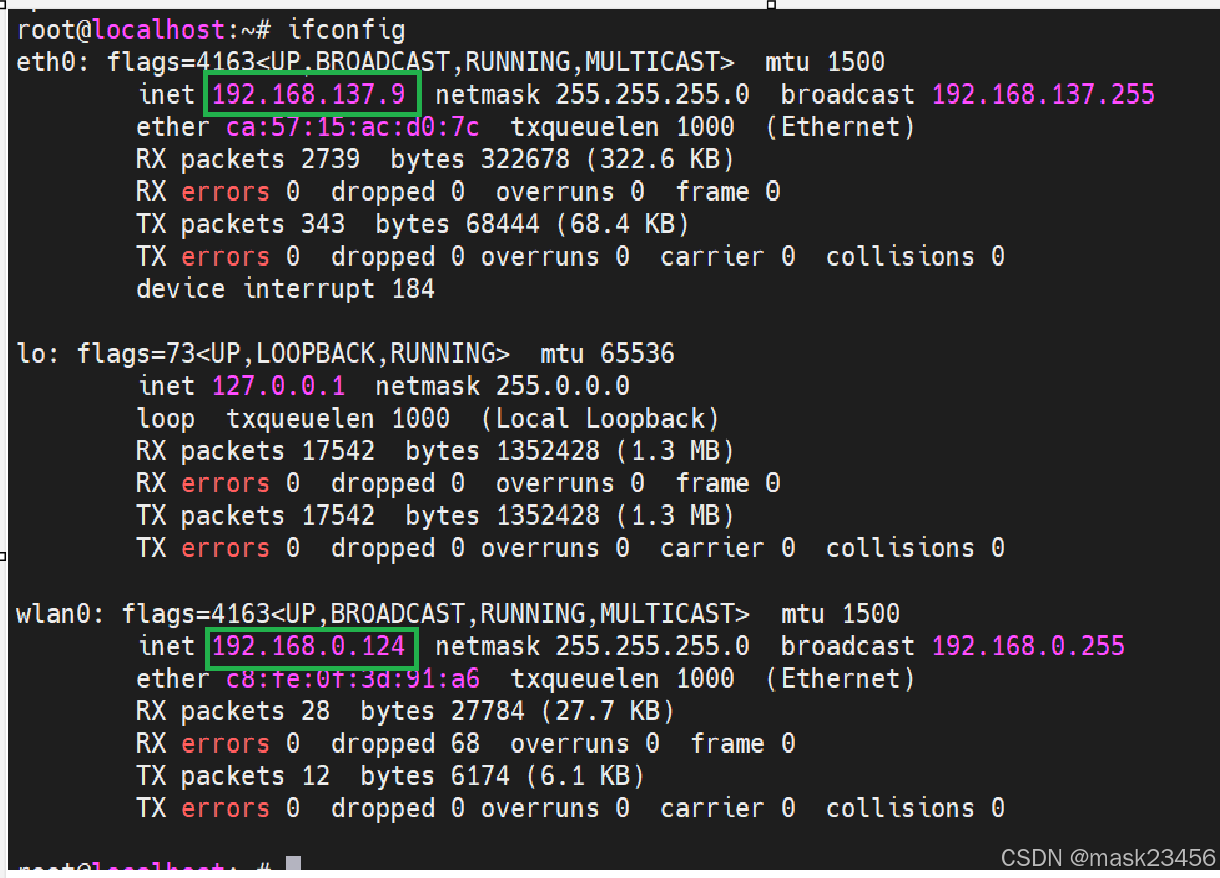
能看到网口和wifi都有了IP
6.ping测试apt测试
ping www.baidu.com

sudo apt-get install

sudo apt install nano
发现无法ping通,查了一大堆百度,发现DNS解析有问题,使用下面命令,改DNS
vi /etc/resolv.conf

//在里面添加下面内容,不要删除已有的内容

nameserver 127.0.0.53
option edns0 trust-ad
再次ping
root@localhost:~# ping www.baidu.com
PING www.a.shifen.com (110.242.69.21) 56(84) bytes of data.
64 bytes from 110.242.69.21 (110.242.69.21): icmp_seq=1 ttl=50 time=23.7 ms
64 bytes from 110.242.69.21 (110.242.69.21): icmp_seq=2 ttl=50 time=21.8 ms
^C
--- www.a.shifen.com ping statistics ---
2 packets transmitted, 2 received, 0% packet loss, time 3122ms
rtt min/avg/max/mdev = 21.755/22.746/23.737/0.991 ms
成功
apt测试
root@localhost:~# apt update
Hit:1 http://ports.ubuntu.com/ubuntu-ports focal InRelease
Get:2 http://ports.ubuntu.com/ubuntu-ports focal-updates InRelease [128 kB]
Get:3 http://ports.ubuntu.com/ubuntu-ports focal-backports InRelease [128 kB]
Get:4 http://ports.ubuntu.com/ubuntu-ports focal-security InRelease [128 kB]
Get:5 http://ports.ubuntu.com/ubuntu-ports focal-updates/main arm64 Packages [2961 kB]
Fetched 3344 kB in 1min 4s (52.4 kB/s)
Reading package lists... Done
Building dependency tree
Reading state information... Done
48 packages can be upgraded. Run 'apt list --upgradable' to see them.


 730
730

 被折叠的 条评论
为什么被折叠?
被折叠的 条评论
为什么被折叠?
 到【灌水乐园】发言


