


 本文介绍了如何在VS2019环境下使用C++与Python进行混合编程,包括Python库的安装、环境变量配置、PythonCAPI的调用步骤,以及无参和有参函数、类的实例化与调用示例。
前言
- 在vs2019下使用C++与Python进行混合编程,在根源上讲,Python 本身就是一个C库,那么这里使用其中最简单的一种方法是把Python的C API来嵌入C++项目中,来实现混合编程。
- 当前的环境是,win10,IDE是vs2019,python版本是3.9,python的环境是使用Anacond安装的。
一、环境配置
1. 安装Python
首先要安装好Python的库,Python可以直接从官网下载,或者直接在conda里面进行安装。
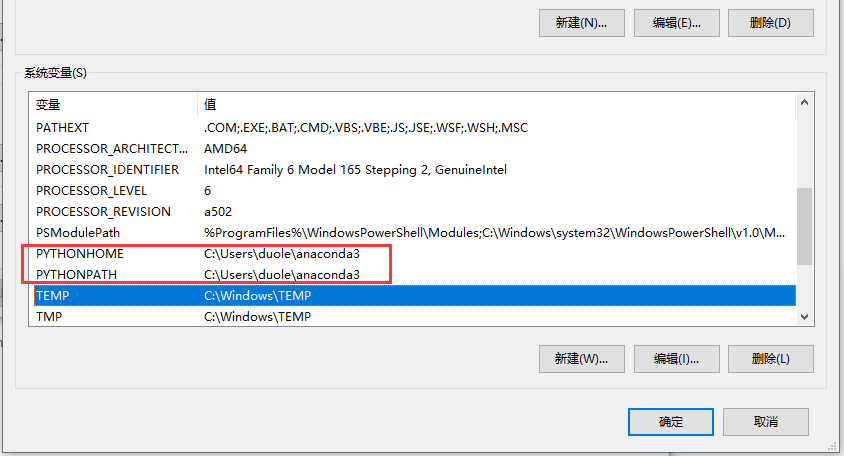
2.添加环境变量
安装完成之后,添加两个系统环境变量,分别是:PYTHONHOME和PYTHONPATH。
如果不添加这两个系统环境变量会报以下的错误:
Python path configuration:
  PYTHONHOME = (not set)
  PYTHONPATH = (not set)
  program name = 'python'
  isolated = 0
  environment = 1
  user site = 1
  import site = 1
  sys._base_executable = 'C:\\code\\cpp\\PDFToDoc\\x64\\Release\\PDFToDoc.exe'
  sys.base_prefix = 'C:\\Users\\duole\\anaconda3'
  sys.base_exec_prefix = 'C:\\Users\\duole\\anaconda3'
  sys.platlibdir = 'lib'
  sys.executable = 'C:\\code\\cpp\\PDFToDoc\\x64\\Release\\PDFToDoc.exe'
  sys.prefix = 'C:\\Users\\duole\\anaconda3'
  sys.exec_prefix = 'C:\\Users\\duole\\anaconda3'
  sys.path = [
    'C:\\Users\\duole\\anaconda3\\python39.zip',
    '.\\DLLs',
    '.\\lib',
    'C:\\code\\cpp\\PDFToDoc\\x64\\Release',
  ]
Fatal Python error: init_fs_encoding: failed to get the Python codec of the filesystem encoding
Python runtime state: core initialized
ModuleNotFoundError: No module named 'encodings'

Current thread 0x000042d4 (most recent call first):
<no Python frame>
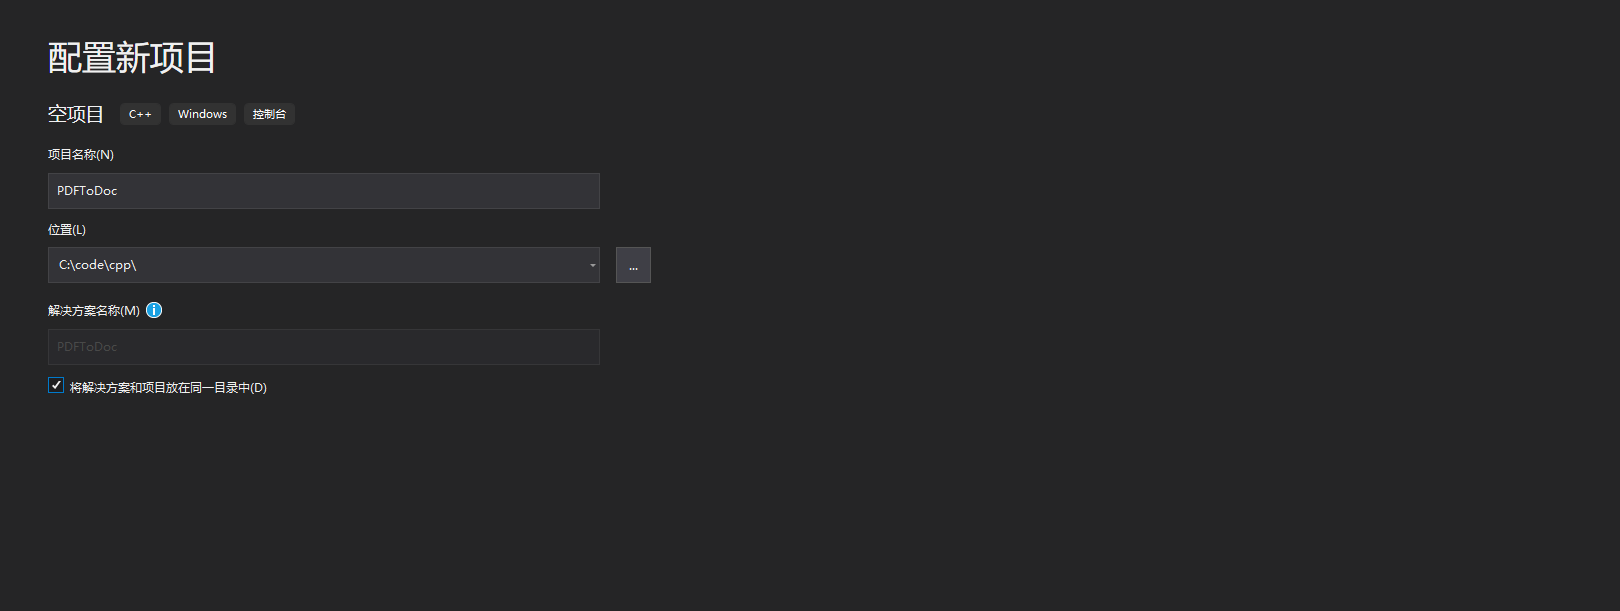
3. 创建项目
打开vs2019,创建一个空的新C++项目:
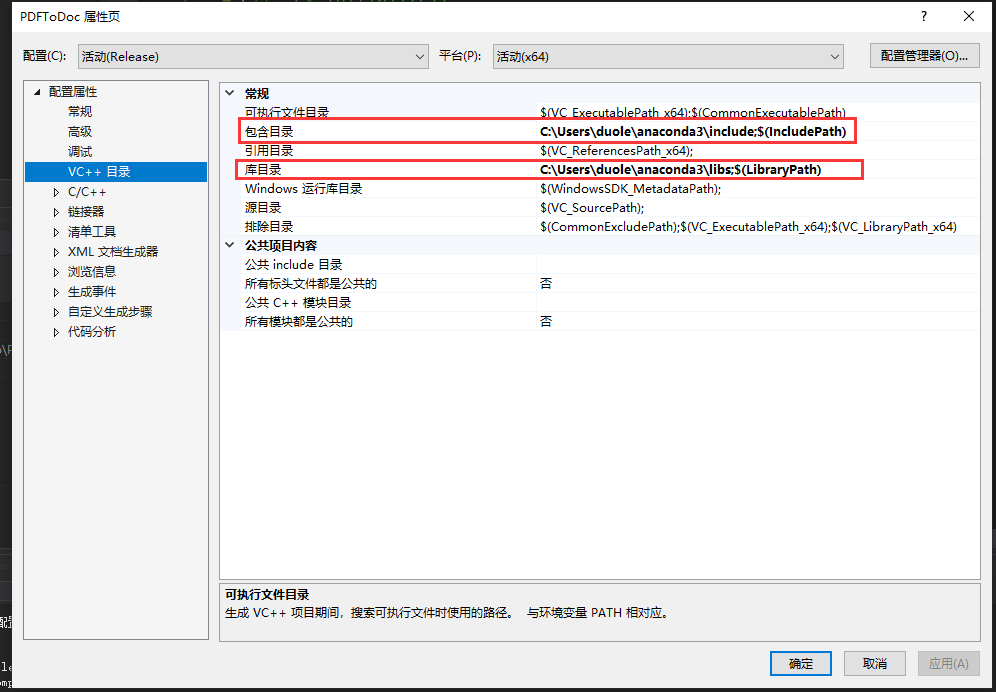
创建完成后打开项目属于配置包含目录与库目录:
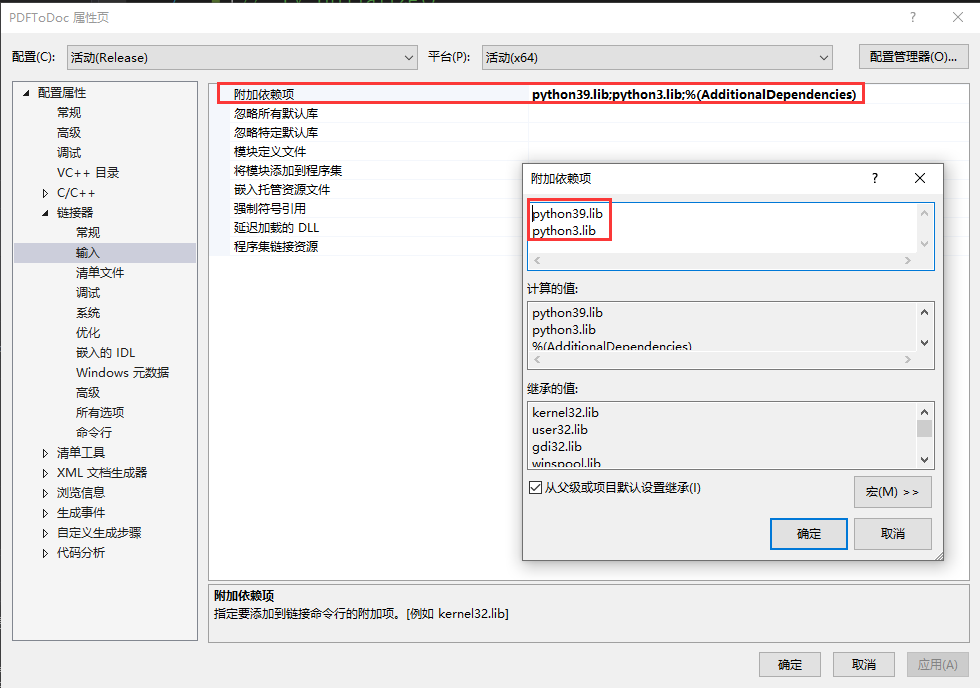
在附加依赖项目里把python的lib库名添加到里面:
4.添加代码
在项目里面新添一个main.cpp

main.cpp里面的代码:
#include <Python.h>

int main()
{

    Py_Initialize();    // 初始化python解释器
    PyRun_SimpleString("print('hello python')");
    Py_Finalize();      // 释放资源
    return 0;
}
然后运行项目
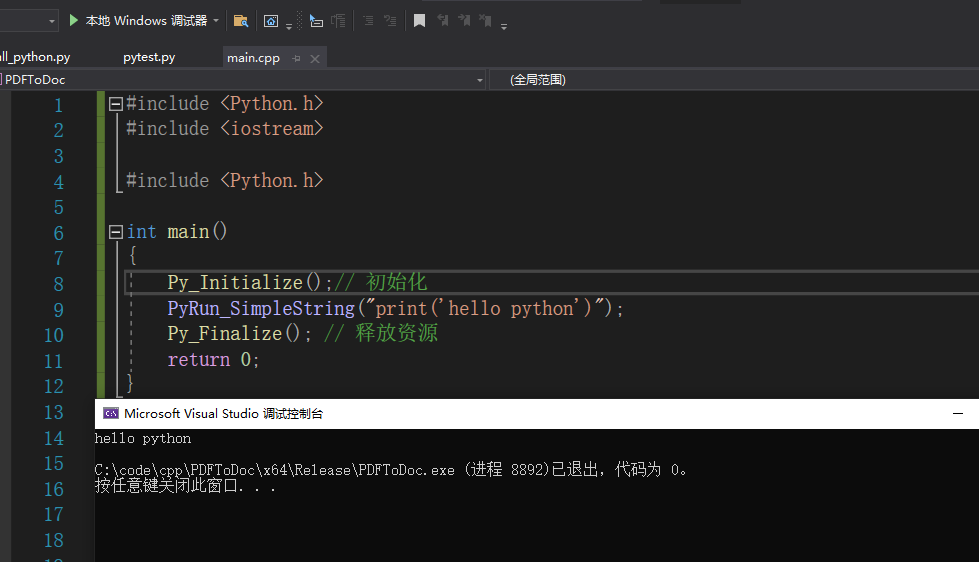
这样配置就算法成功了。
二、Python C API 调用
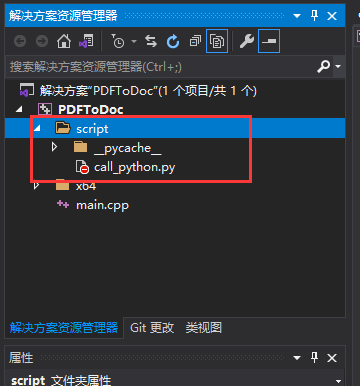
为了方便项目测试,在项目根目录下添加一个script目录,在script目录里面创建一个call_python.py的文件。
2.1 调用Python代码无参函数
C++调用python无参函数流程:
- 初始化python接口(Py_Initialize)
- 导入依赖库 (PyRun_SimpleString)
- 初始化python系统文件路径(PyRun_SimpleString)
- 调用python文件名(PyImport_ImportModule)
- 获取函数对象(PyObject_GetAttrString)
- 调用函数对象(PyObject_CallObject)
- 结束python接口调用,释放资源(Py_Finalize)
在call_python.py里面添加代码:
def test():
    print("hello python to C++")
然后在main.cpp里面进行调用:
int  最低0.47元/天 解锁文章


 1908
1908

 被折叠的 条评论
为什么被折叠?
被折叠的 条评论
为什么被折叠?
 到【灌水乐园】发言


