


 本文介绍了Android中的Service组件,它是一个无界面的Activity,用于后台长时间运行任务。Service可以通过startService()和bindService()启动。startService()启动的Service在onCreate()和onStartCommand()中执行,而bindService()启动的Service只调用onCreate()和onBind()。Service生命周期包括onCreate()、onStartCommand()、onBind()、onUnbind()和onDestroy()。当Service被创建时,onCreate()会被调用,而onDestroy()在Service销毁时调用。Service在主线程运行,执行CPU密集型操作时需要创建新线程。此外,Service可以通过startService()启动后再绑定,或者绑定后再启动,但需要注意生命周期的管理。
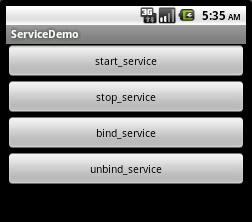
今天我先介绍下Service,Service功能和Activity类似(这个会在后续的文章中详细说明),Service可以说是一个没有试视图的Activity,就是隐藏的activity。
下面是官网给出的:
A Service is an application component representing either an application's desire to perform a longer-running operation while not interacting with the user or to supply functionality for other applications to use. Each service class must have a corresponding <service> declaration in its package's AndroidManifest.xml. Services can be started with Context.startService() and Context.bindService().
Note that services, like other application objects,A service runs in the main thread of its hosting process—the service does not create its own thread and does not run in a separate process (unless you specify otherwise). This means that, if your service is going to do any CPU intensive (such as MP3 playback) or blocking (such as MP3 playback or networking) operations, you should create a new thread within the service to do that work. By using a separate thread, you will reduce the risk of Application Not Responding (ANR) errors and the application's main thread can remain dedicated to user interaction with your activities.
(大概的意思:作为组建之一的Service,他代表是一个应用需要一个比较长时间的操作且用户不交互,或者给另外一个应用使用。而每个service都需要在AndroidManifest.xml中注册。service通过 Context.startService()和Context.bindService()启动。
注意事项:
Service是在主线程中的自己 hosting process中运行,没有创建自己的线程而且没有在另外的进程中(除非自己指定一个)。这就意味着,如果service做与cpu交互频繁(CPU高负荷的操作)或者阻塞的操作,这是就需要在新建一个自己的线程来做这些工作。IntentService继承于service,拥有自己的线程,在线程处理想要的事情。)
)
它可以启动并运行, 直至有人停止了它或它自己停止。在这种方式下,它以调用Context.startService()启动,而以调用Context.stopService()结束。 它可以调用Service.stopSelf() 或 Service.stopSelfResult()来自己停止。不论调用了多少次startService()方法,你只需要调用一次stopService()来停止服务。用于实现应用程序自己的一些耗时任务,比如查询升级信息,并不占用应用程序比如Activity所属线程,而是单开线程后台执行,这样用户体验比较好。
它可以通过自己定义并暴露出来的接口进行程序操作。客户端建立一个到服务对象的连接,并通过那个连接来调用服务。连接以调用Context.bindService()方法建立,以调用 Context.unbindService()关闭。 多个客户端可以绑定至同一个服务。如果服务此时还没有加载,bindService()会先加载它。
可被其他应用程序复用,比如天气预报服务,其他应用程序不需要再写这样的服务,调用已有的即可。
下面会介绍下关于service的内容:
service的生命周期;
Lcoal Service;
Remote Service;
先介绍生命周期(LifeCircile)
系统有两种启动Service的方法。如果调用Context.startService(),那么系统将会得到这个Service(如果必要则创建它并调用它的onCreate()方法),然后使用客户端传递的参数调用它的onStartCommand(Intent,int)方法。Service开始运行直到Context.stopService()或者stopSelf()方法被调用。注意,多次调用Context.startservice()不会嵌套(即oncreate只会被调用一次(service只会被创建一次,如果已经创建则不创建)这时会有相应的onStart()方法被调用),所以无论同一个服务被启动了多少次,一旦调用Context.stopService()或者stopSelf(),他都会被停止。
客户端也可以使用context.bindservice()来得到一个Service的永久链接。这个方法也会在服务没有运行的条件下创建服务(调用onCreate()),但是不调用onStart()。客户端会得到服务的onBind(Intent)方法返回的IBinder对象,用来允许客户端回调服务的方法。只要连接已经建立服务会一直运行下去(无论客户端是否保留服务的IBinder对象的引用)。通常返回的IBinder对象是AIDL中定义的复杂接口。
service还可以在启动的情况下绑定,或者绑定的情况下启动;
简单总结下:
1.通过startservice启动,onCreate->onStartCommand->onStart,(如果service已经创建过了,则就不会在调用onCreate);
2.通过调用onDestroy->stopService,停止service;(调用者自己直接退出,没有调用stopService,那么service一直会在后台运行)
3.通过bindservice启动,只调用onCreate,这个时候会绑定serviceDemo和service;
4.通过调用调用onUnbind->onDestroy,如果与activity绑定,则与activity共存亡;
5 . 混合启动:
/**
* 1.无论绑定和创建service,service只会被创建一次(就是oncreate只会被调用一次)
* 2.如果已经start,则可以bind
* 3.如果已经bind,则可以start
* 4.如果已经start,且bind,则不能使用stopservice,只能用unbind,然后在调用onstop(这个不会调用)
* 5.如果已经bind,且start,则stopservice不起作用,只能用unbind,然后在调用onstop(这个不会调用)
*/
6.启动service,根据onStartCommand的返回值不同,有两个附加的模式:
2. 如果当前service已经被启动(start),拥有它的进程则比那些用户可见的进程优先级低一些,但是比那些不可见的进程更重要,这就意味着service一般不会被killed.
3. 如果客户端已经连接到service (bindService),那么拥有Service的进程则拥有最高的优先级,可以认为service是可见的。
4. 如果service可以使用startForeground(int, Notification)方法来将service设置为前台状态,那么系统就认为是对用户可见的,并不会在内存不足时killed。

这是本地service启动和绑定
上代码:
PotatoService.java
- package com.potato;
- import java.io.FileDescriptor;
- import java.io.PrintWriter;
- import android.app.Notification;
- import android.app.NotificationManager;
- import android.app.PendingIntent;
- import android.app.Service;
- import android.content.Context;
- import android.content.Intent;
- import android.content.res.Configuration;
- import android.os.Binder;
- import android.os.IBinder;
- import android.util.Log;
- public class PotatoService extends Service {
- private final static String TAG = "PotatoService";
- private NotificationManager mNotificationManger;
- // This is the object that receives interactions from clients. See
- // RemoteService for a more complete example.
- private final IBinder mBinder = new LocalBinder();
- @Override
- public IBinder onBind(Intent arg0) {
- // TODO Auto-generated method stub
- Log.d(TAG, "onBind");
- return mBinder;
- }
- @Override
- protected void dump(FileDescriptor fd, PrintWriter writer, String[] args) {
- // TODO Auto-generated method stub
- super.dump(fd, writer, args);
- }
- @Override
- protected void finalize() throws Throwable {
- // TODO Auto-generated method stub
- super.finalize();
- }
- @Override
- public void onConfigurationChanged(Configuration newConfig) {
- // TODO Auto-generated method stub
- super.onConfigurationChanged(newConfig);
- }
- @Override
 最低0.47元/天 解锁文章


 2万+
2万+

 被折叠的 条评论
为什么被折叠?
被折叠的 条评论
为什么被折叠?
 到【灌水乐园】发言


