


一、zabbix部署
涉及的虚拟主机:
| 主机名 | ip地址 |
|---|---|
| server1 | 192.168.112.60 |
| server2 | 192.168.112.50 |
1、安装zabbix服务端
-
准备yum源,安装服务的组件
[root@server1 ~]# rpm -Uvh https://repo.zabbix.com/zabbix/4.0/rhel/7/x86_64/zabbix-release-4.0-2.el7.noarch.rpm
[root@server1 ~]# yum install zabbix-server-mysql zabbix-web-mysql  -y
-
关闭selinux、防火墙
[root@server1 ~]# setenforce 0
setenforce: SELinux is disabled
[root@server1 ~]# systemctl stop firewalld
2、准备数据库(mariadb简单点)
-
安装数据库
[root@server1 ~]# yum install -y mariadb-server [root@server1 ~]# systemctl start mariadb [root@server1 ~]# systemctl enable mariadb Created symlink from /etc/systemd/system/multi-user.target.wants/mariadb.service to /usr/lib/systemd/system/mariadb.service. -
创建zabbix用户
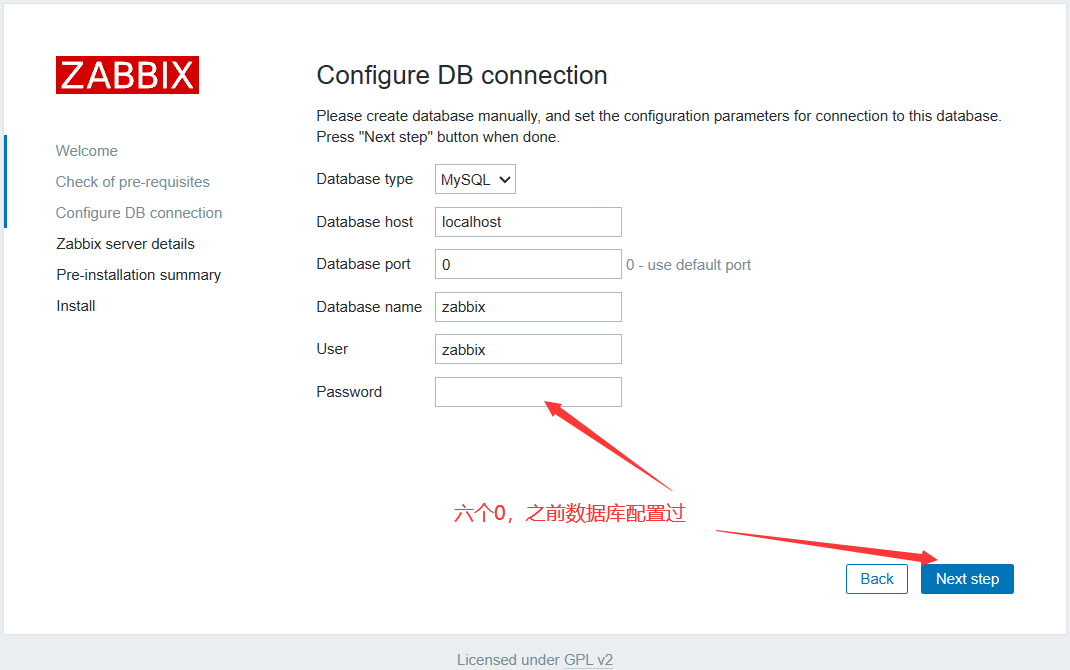
[root@server1 ~]# mysql -uroot
MariaDB [(none)]> create database zabbix character set utf8 collate utf8_bin;
MariaDB [(none)]> create user zabbix@localhost identified by '000000';
MariaDB [(none)]> grant all privileges on zabbix.* to zabbix@localhost;
MariaDB [(none)]> \q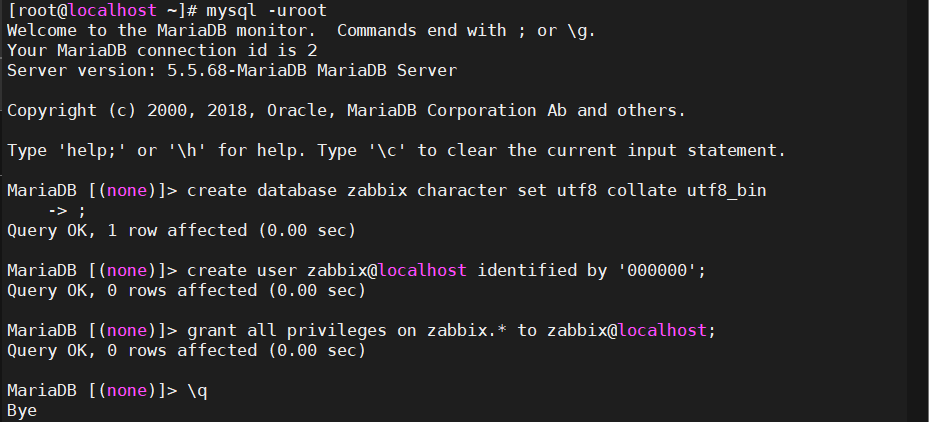
3、修改服务的配置
-
导入初始架构数据
[root@server1 ~]# zcat /usr/share/doc/zabbix-server-mysql-4.0.50/create.sql.gz | mysql -uzabbix -D zabbix -p000000 -
为zabbix配置数据库
sed -i '/^# DBPassword=/a DBPassword=000000' /etc/zabbix/zabbix_server.conf -
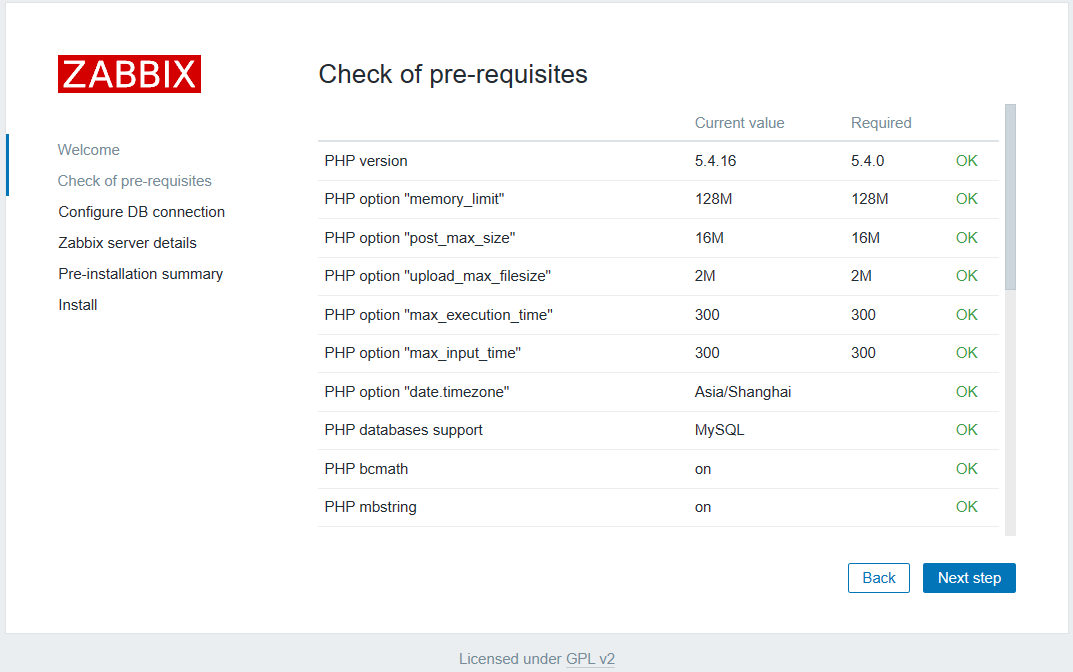
编辑前端php配置
sed -i '/php_value always_populate_raw_post_data -1/a\php_value date.timezone Asia/Shanghai' /etc/httpd/conf.d/zabbix.conf -
启动服务
[root@server1 ~]# systemctl restart zabbix-server httpd
[root@server1 ~]# systemctl enable zabbix-server httpd
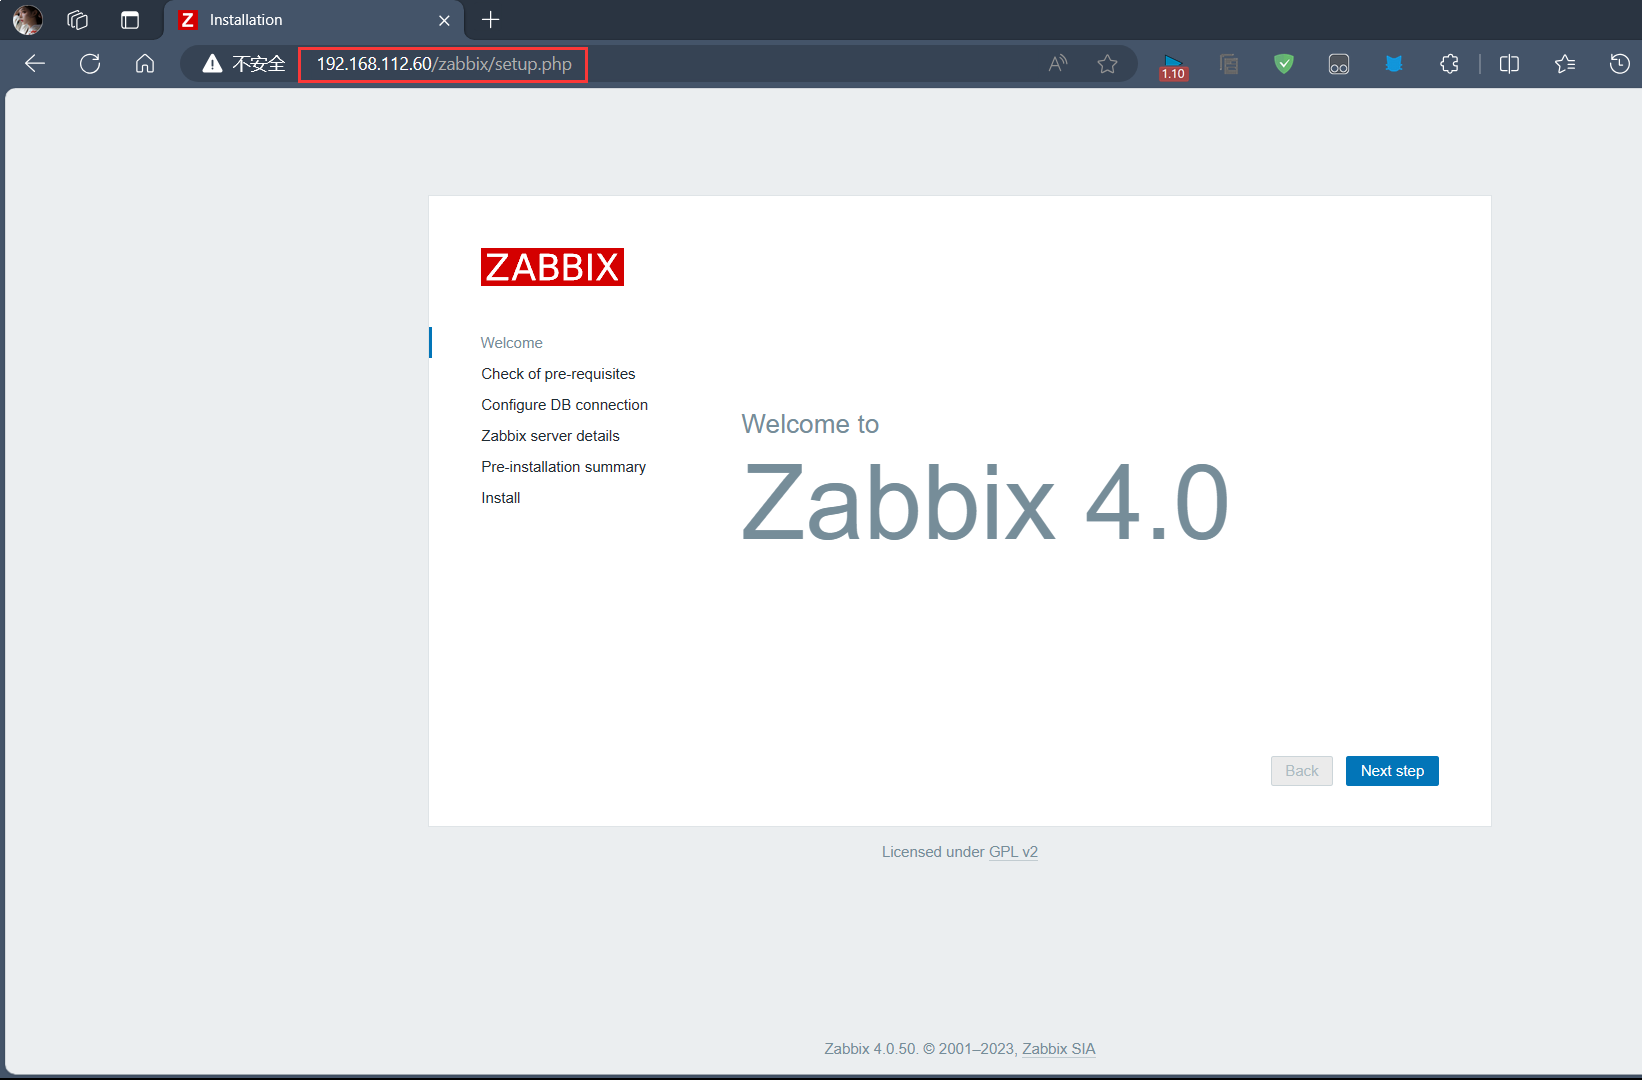
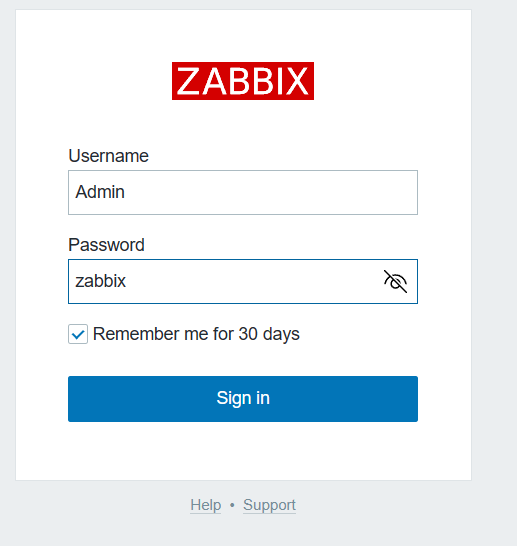
zabbix服务端部署完成,可以通过
http://ip地址/zabbix访问,初始化完成之后使用用户Admin 密码zabbix登录
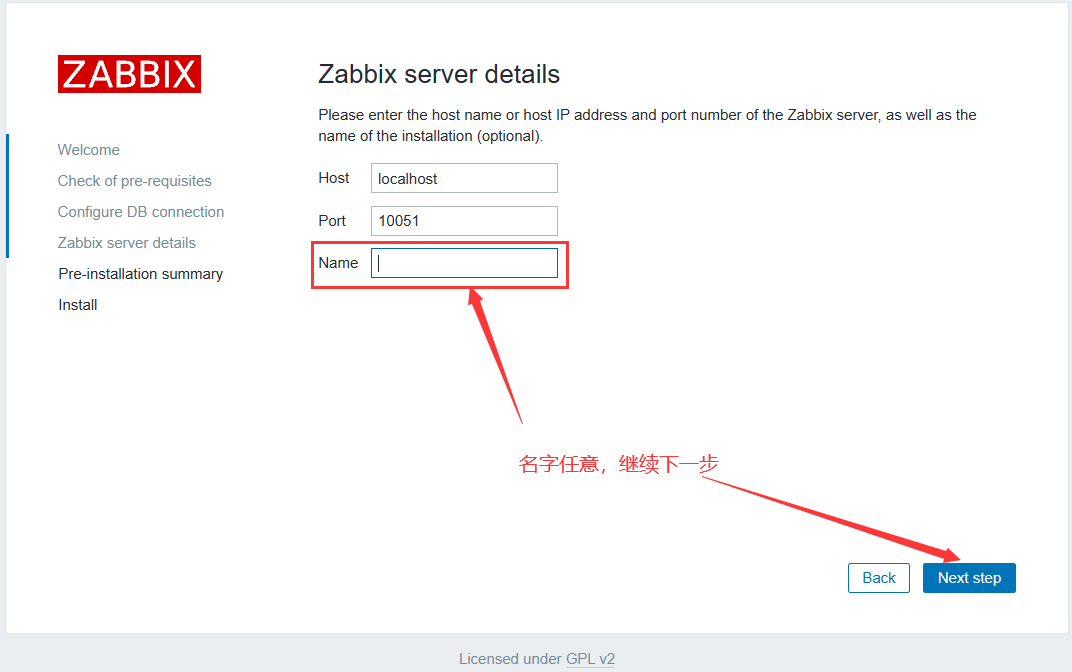
二、登录zabbix
Next step
Next step
Next step
Next step
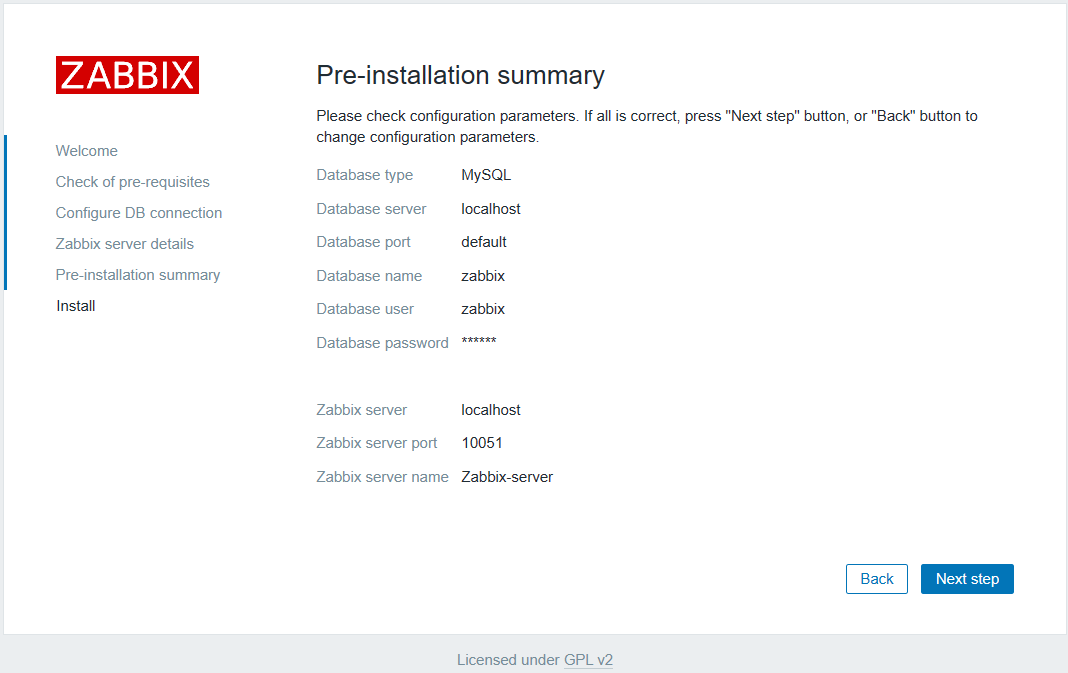
Next step
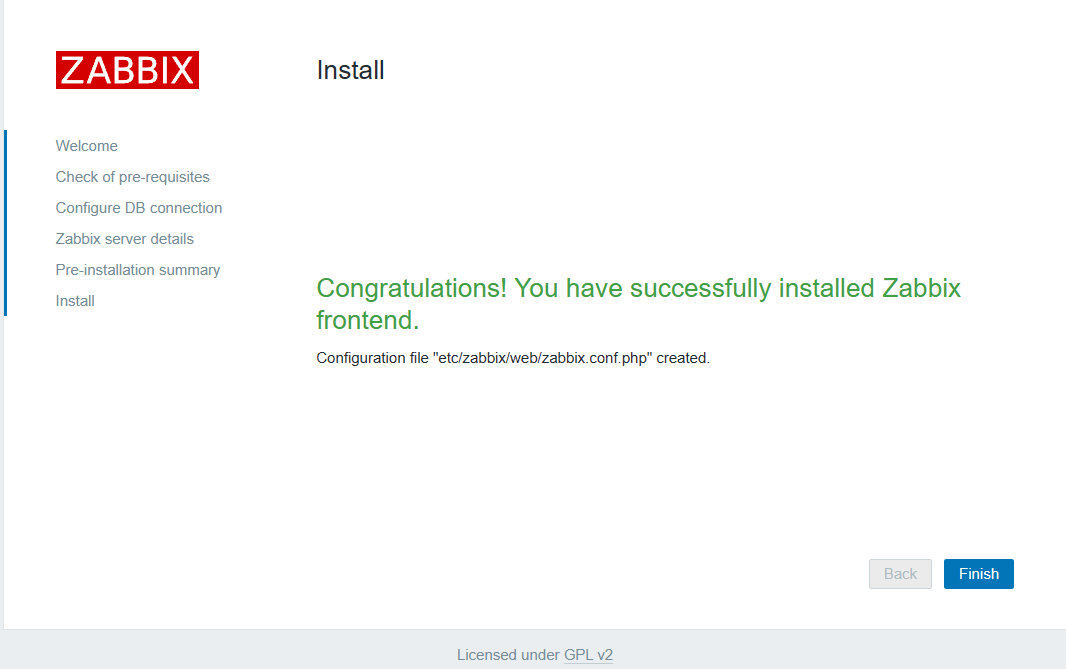
完成,登录
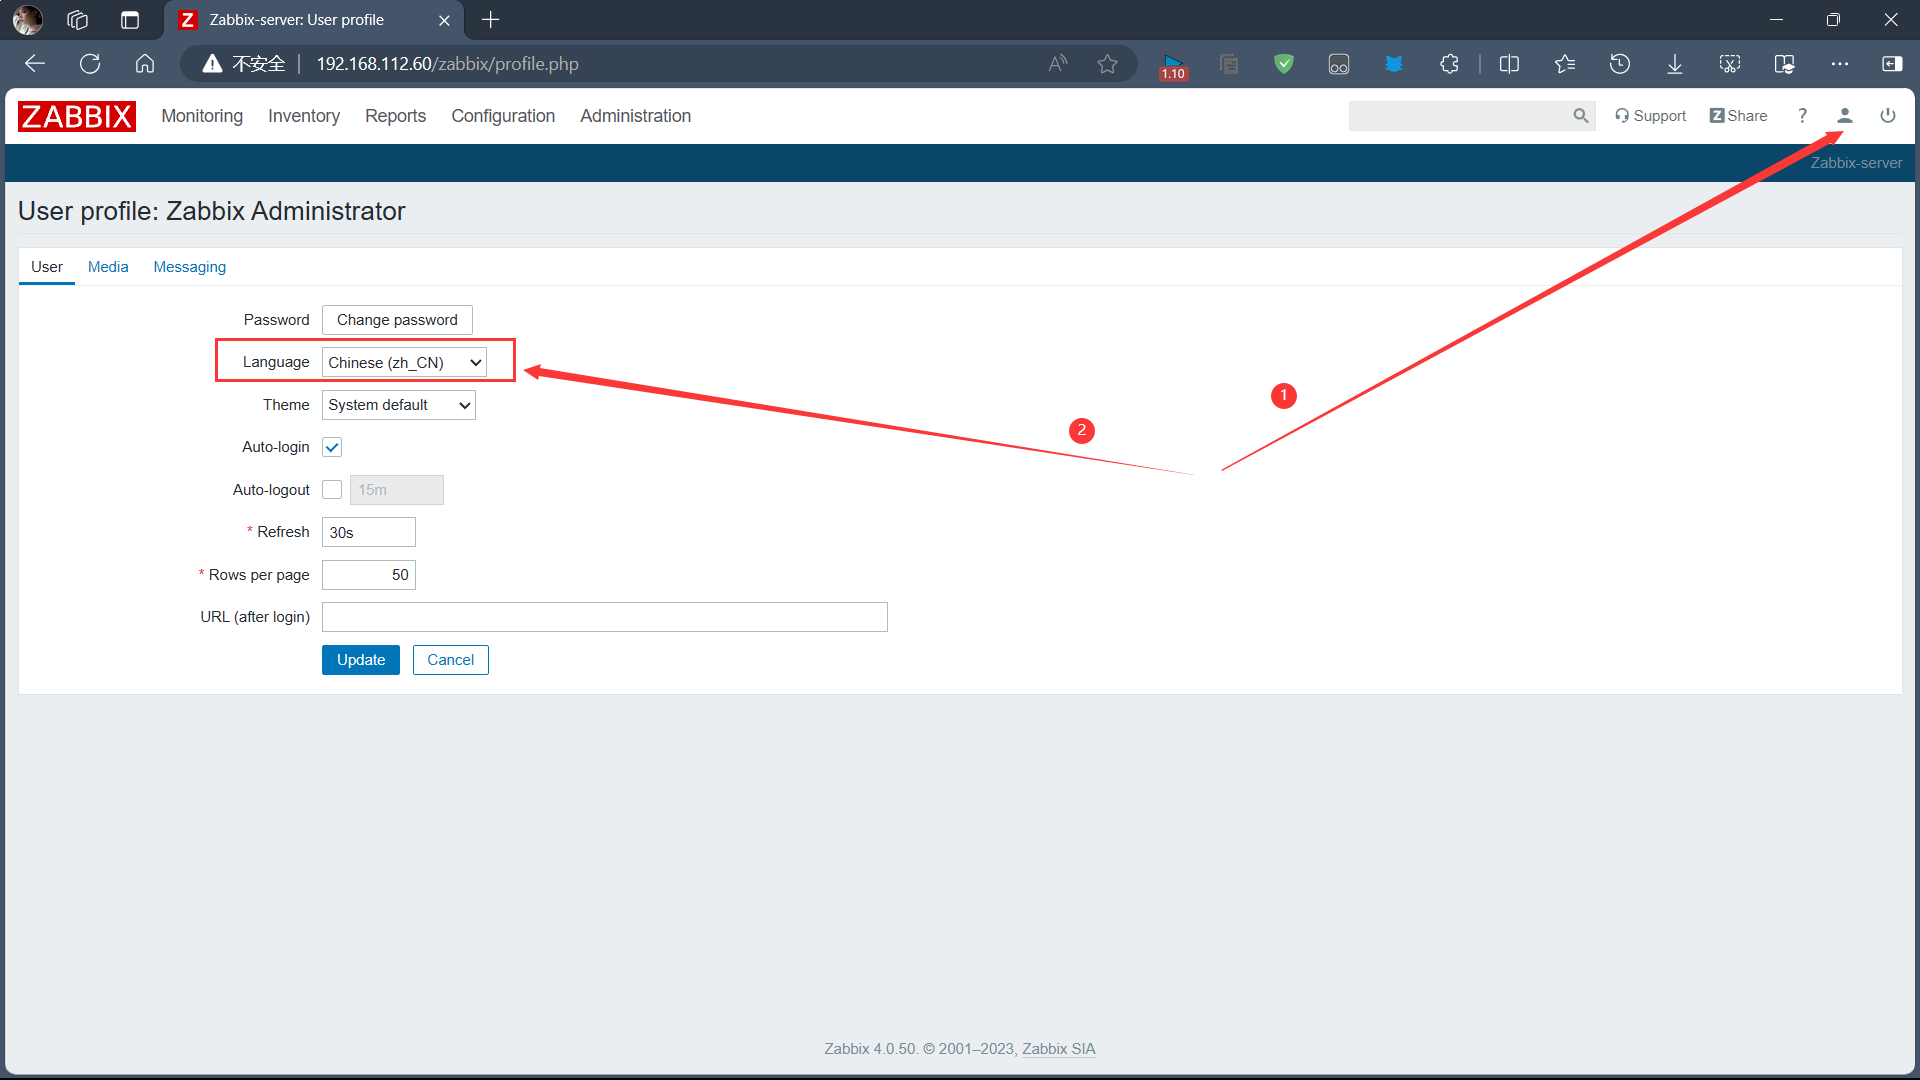
简单汉化一下
三、客户端配置
1、安装软件包
[root@server1 ~]# rpm -Uvh https://repo.zabbix.com/zabbix/4.0/rhel/7/x86_64/zabbix-release-4.0-2.el7.noarch.rpm
[root@server1 ~]# yum install -y zabbix-agent
2、修改配置文件
[root@server1 ~]# vim /etc/zabbix/zabbix_agentd.conf
#主要修改以下三个参数
Server=192.168.112.60
ServerActive=192.168.112.60
Hostname=server1
3、启动客户端服务
[root@server1 ~]# systemctl start zabbix-agent.service
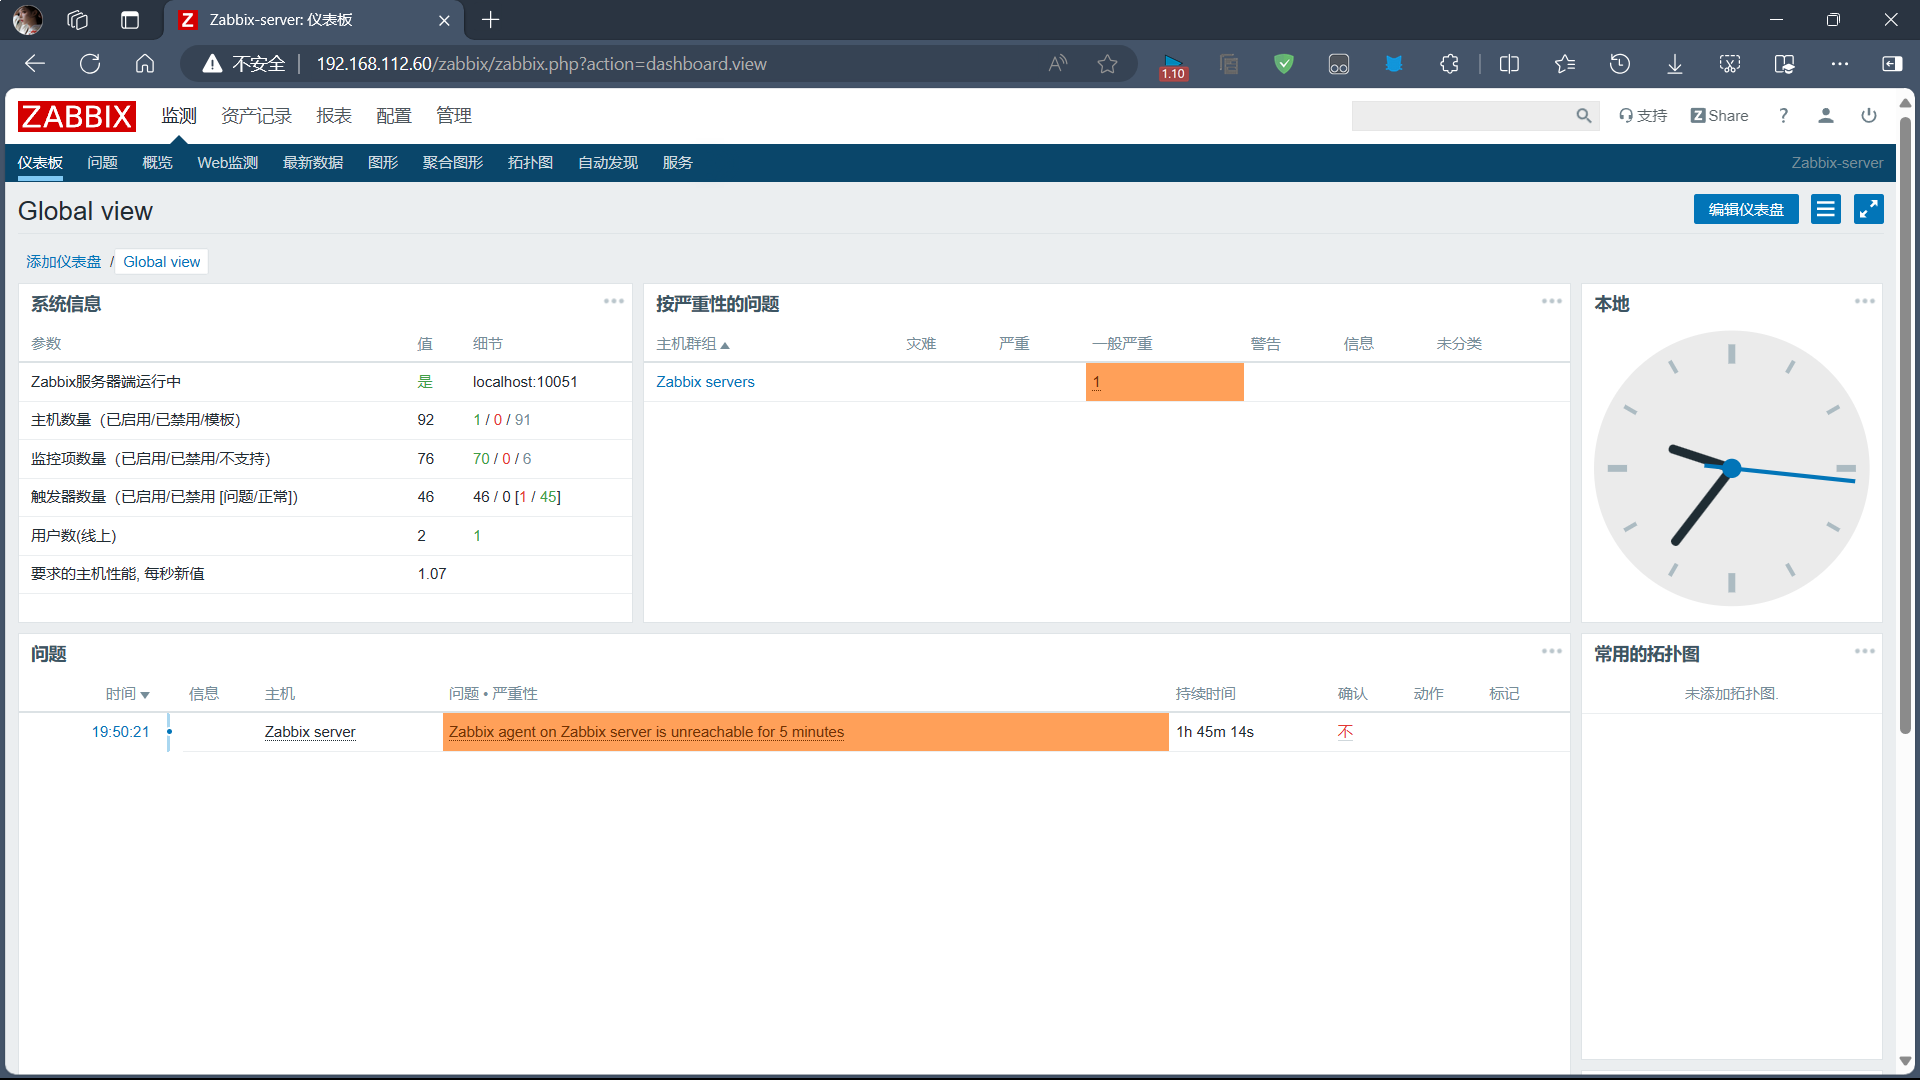
四、报错解决
配置->主机->替换IP地址->更新
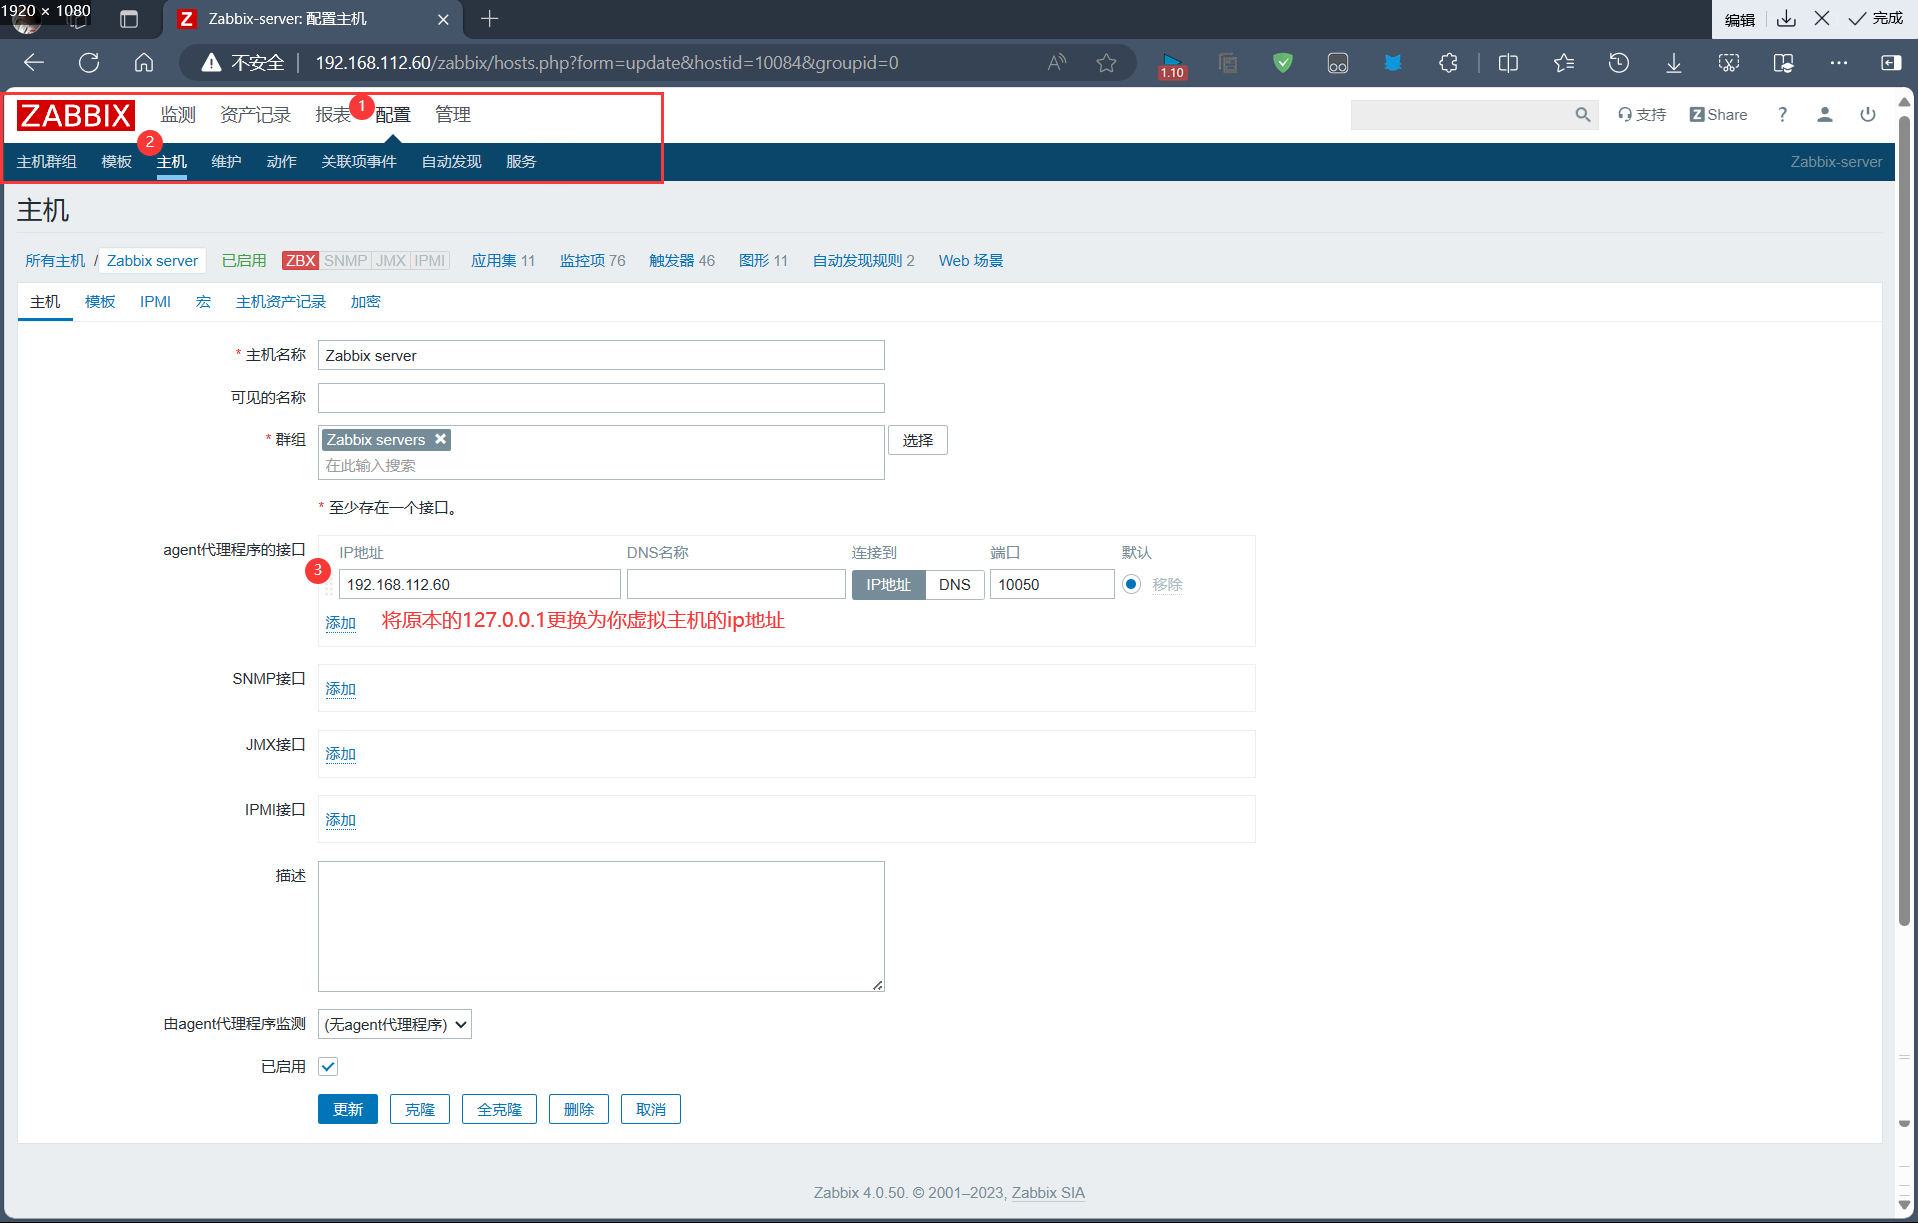
[root@server1 ~]# systemctl restart zabbix-server
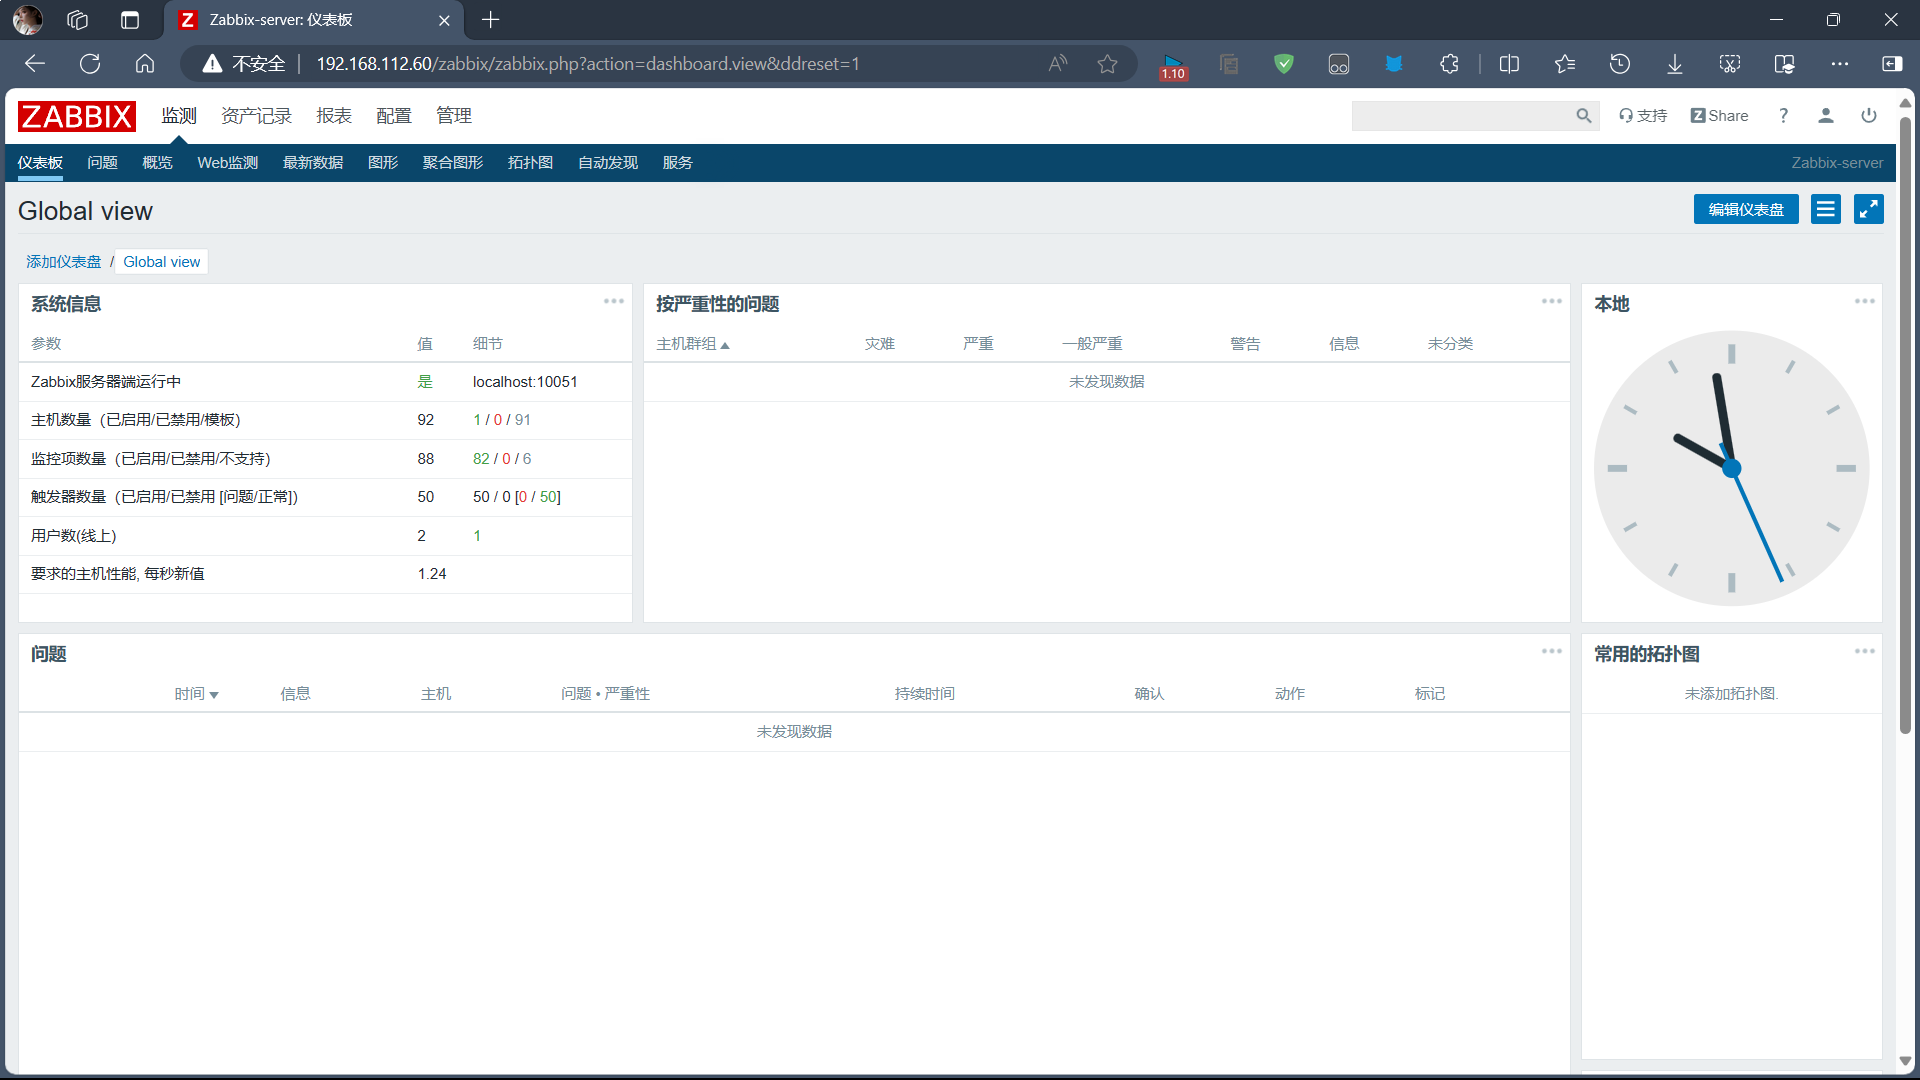
大概会等十分钟
五、添加监控主机
1、安装软件包
[root@server2 ~]# rpm -Uvh https://repo.zabbix.com/zabbix/4.0/rhel/7/x86_64/zabbix-release-4.0-2.el7.noarch.rpm
[root@server2 ~]# yum install -y zabbix-agent
2、修改配置文件
[root@server2 ~]# vim /etc/zabbix/zabbix_agentd.conf

# 主要修改以下三个参数
Server=192.168.112.60	#上报给服务端
ServerActive=192.168.112.60		#服务端
Hostname=server2	#和server1不一样即可
3、启动客户端服务
[root@server2 ~]# systemctl restart zabbix-agent
[root@server2 ~]# ss -tnl		#看到端口10050起来了就行
State       Recv-Q Send-Q Local Address:Port               Peer Address:Port
LISTEN      0      128              *:22                           *:*
LISTEN      0      100      127.0.0.1:25                           *:*
LISTEN      0      128              *:10050                        *:*
LISTEN      0      128           [::]:22                        [::]:*
LISTEN      0      100          [::1]:25                        [::]:*
LISTEN      0      128           [::]:10050                     [::]:*
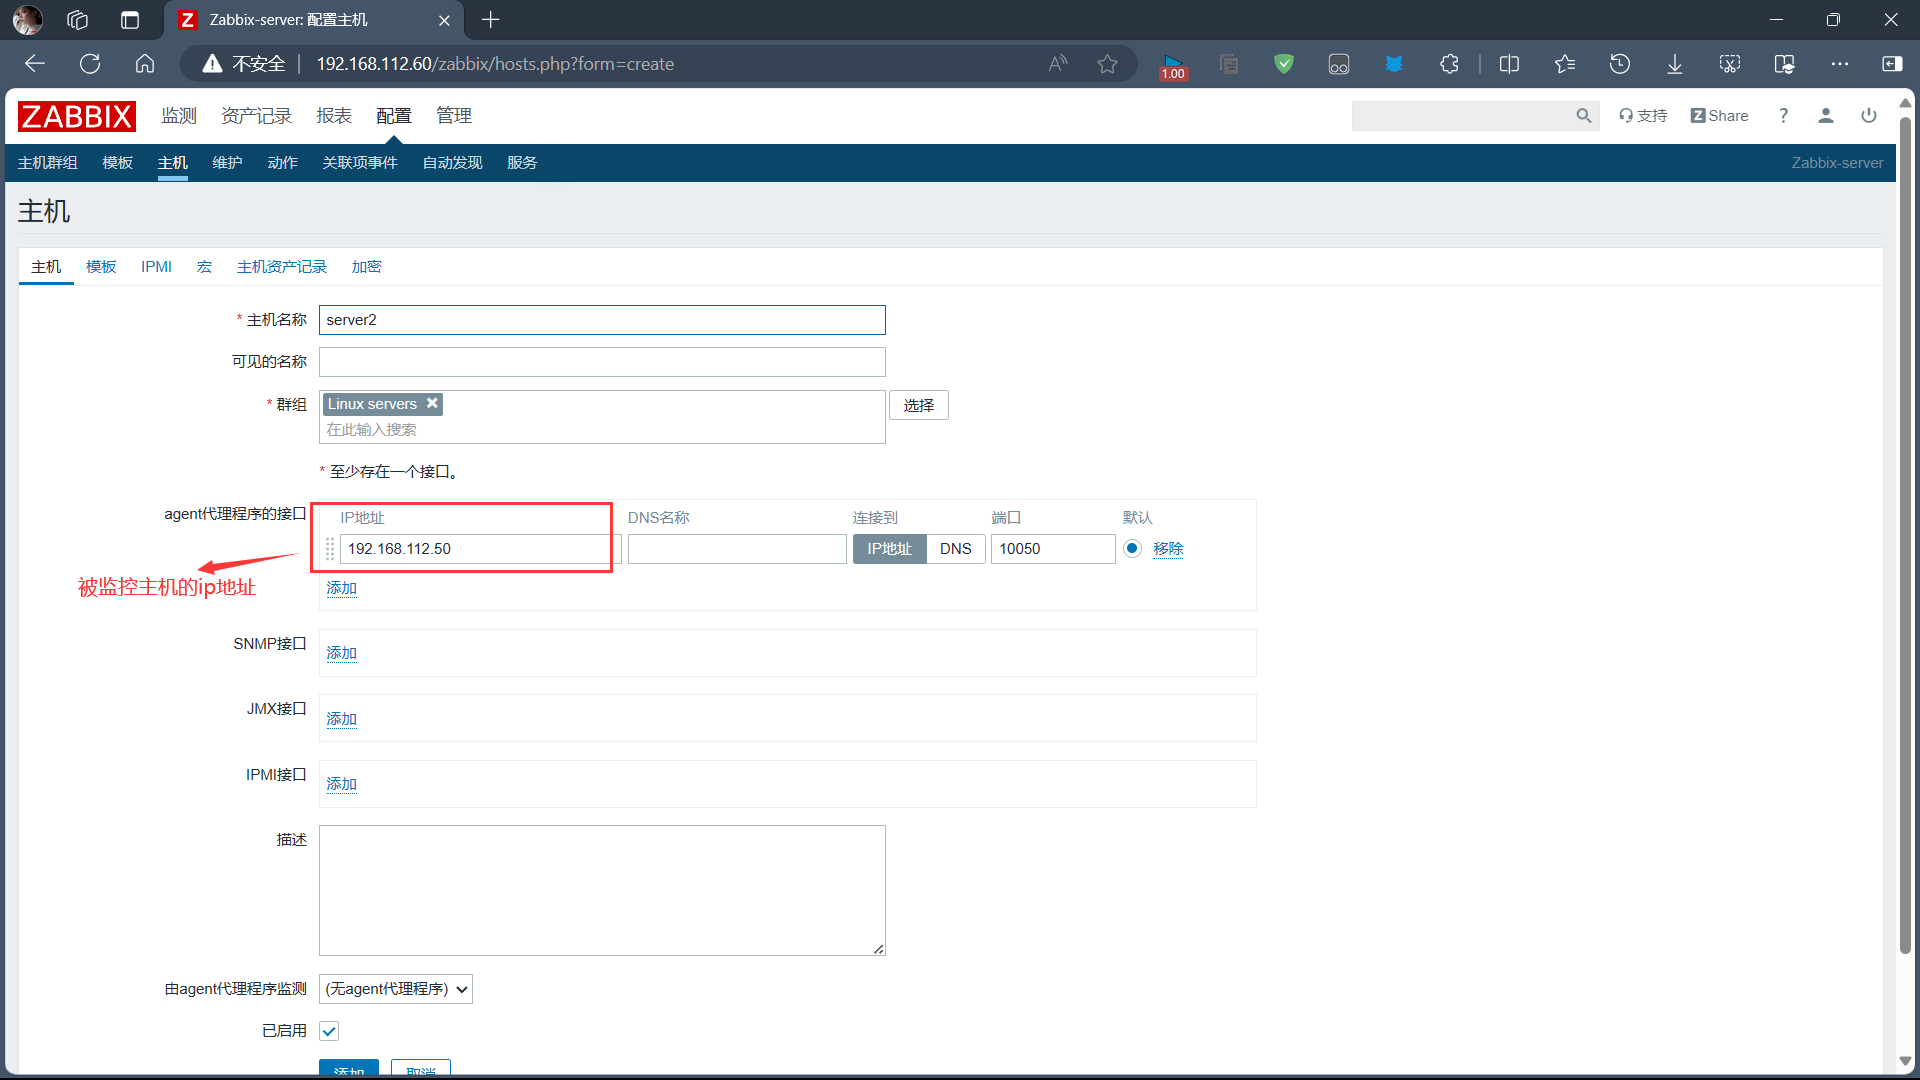
4、回到zabbix添加主机
配置->主机->创建主机
5、添加模板
配置->主机->server2->模板添加->更新
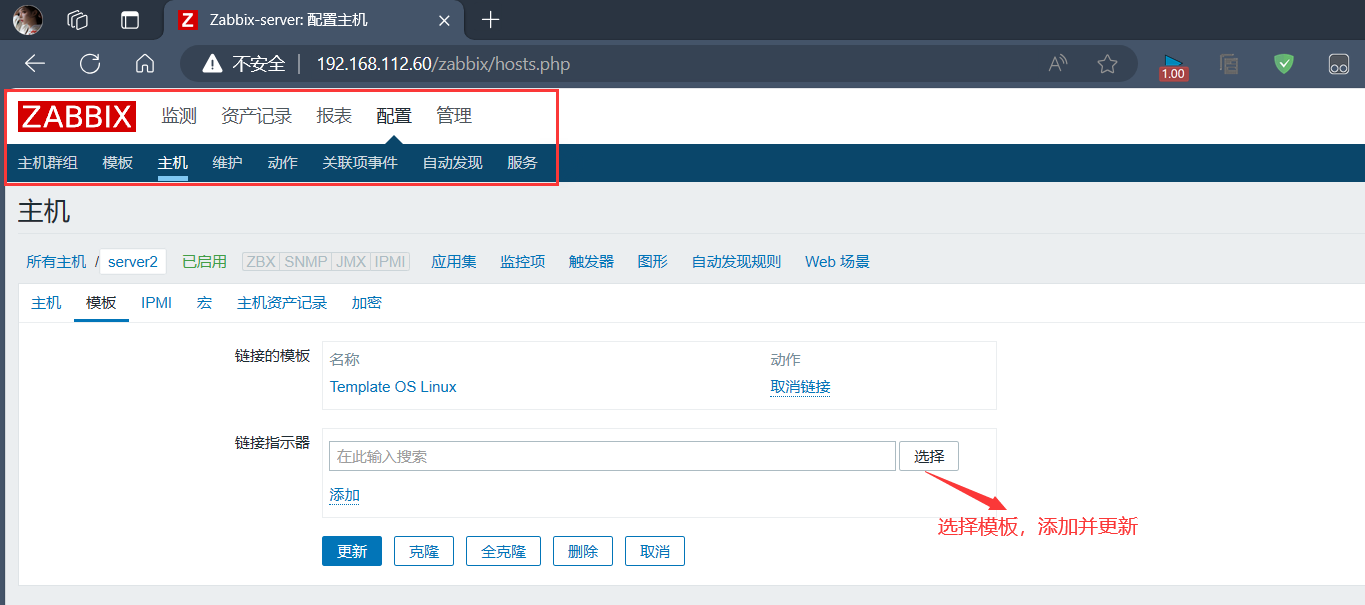
正常到这一步主机已经变为绿色,并且模板自动添加了应用集与监控项

六、添加mysql自定义监控项
1、被监控主机上安装mariadb做测试
[root@server2 ~]# yum install -y mariadb-server
[root@server2 ~]# systemctl start mariadb
2、编写客户端监控项配置文件
[root@server2 ~]# vim /etc/zabbix/zabbix_agentd.d/userparameter_mysql.conf
UserParameter=mariadb_status,mysqladmin ping 2>/dev/null|grep -c alive	#判断mariadb状态
UserParameter=mariadb_connections,mysql -e "show processlist;" 2>/dev/null | sed -n '2,$'p | wc -l			#mariadb连接数
UserParameter=mariadb_max_connections,mysql -e 'show variables like "%max_connections%"' 2>/dev/null|tail -1|awk '{print $2}'
	#mariadb最大连接数

[root@server2 ~]# systemctl restart zabbix-agent.service
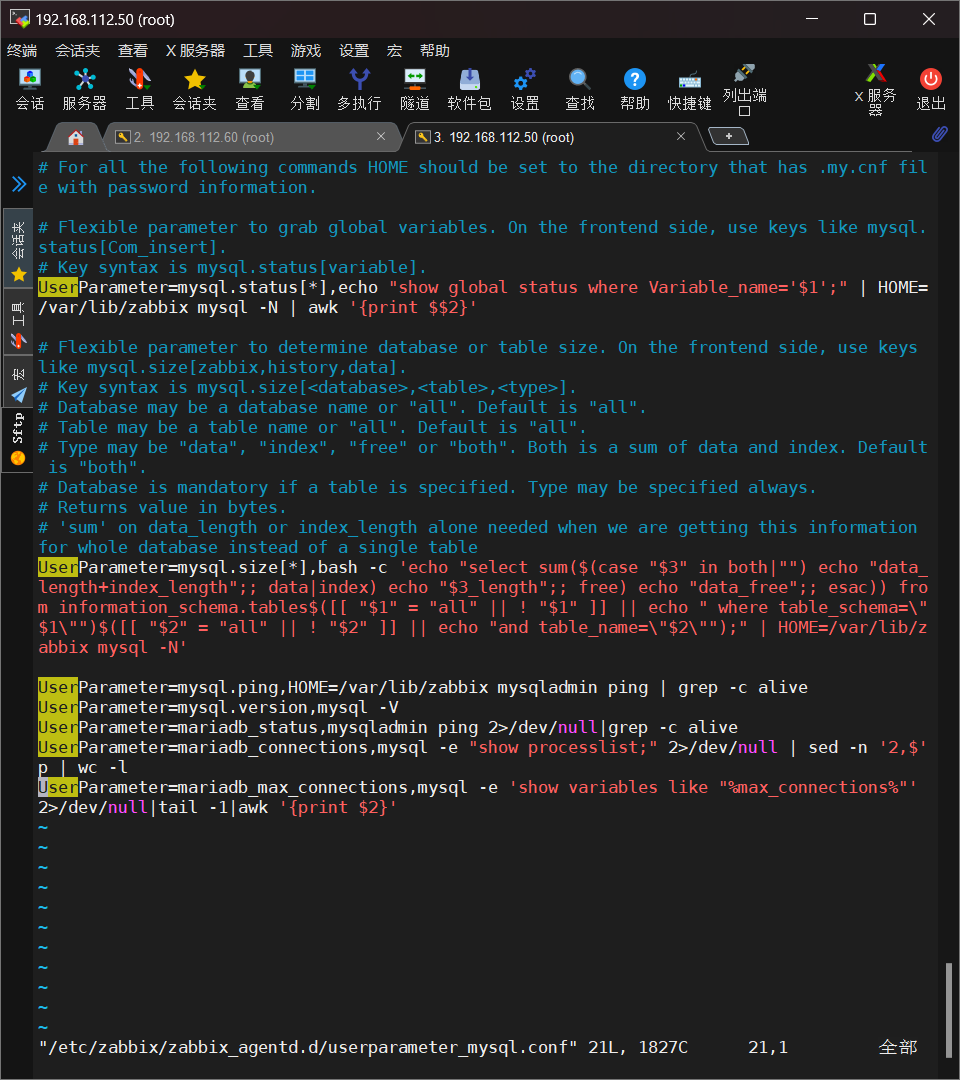
注意,添加到监控项配置文件里的命令需结合自身情况合理编写
3、验证自定义的监控项是否生效
[root@server1 zabbix]#  yum install zabbix-get.x86_64 -y
[root@server1 zabbix]# zabbix_get -s 192.168.112.50 -k mariadb_status
1
[root@server1 zabbix]# zabbix_get -s 192.168.112.50 -k mariadb_max_connections
151
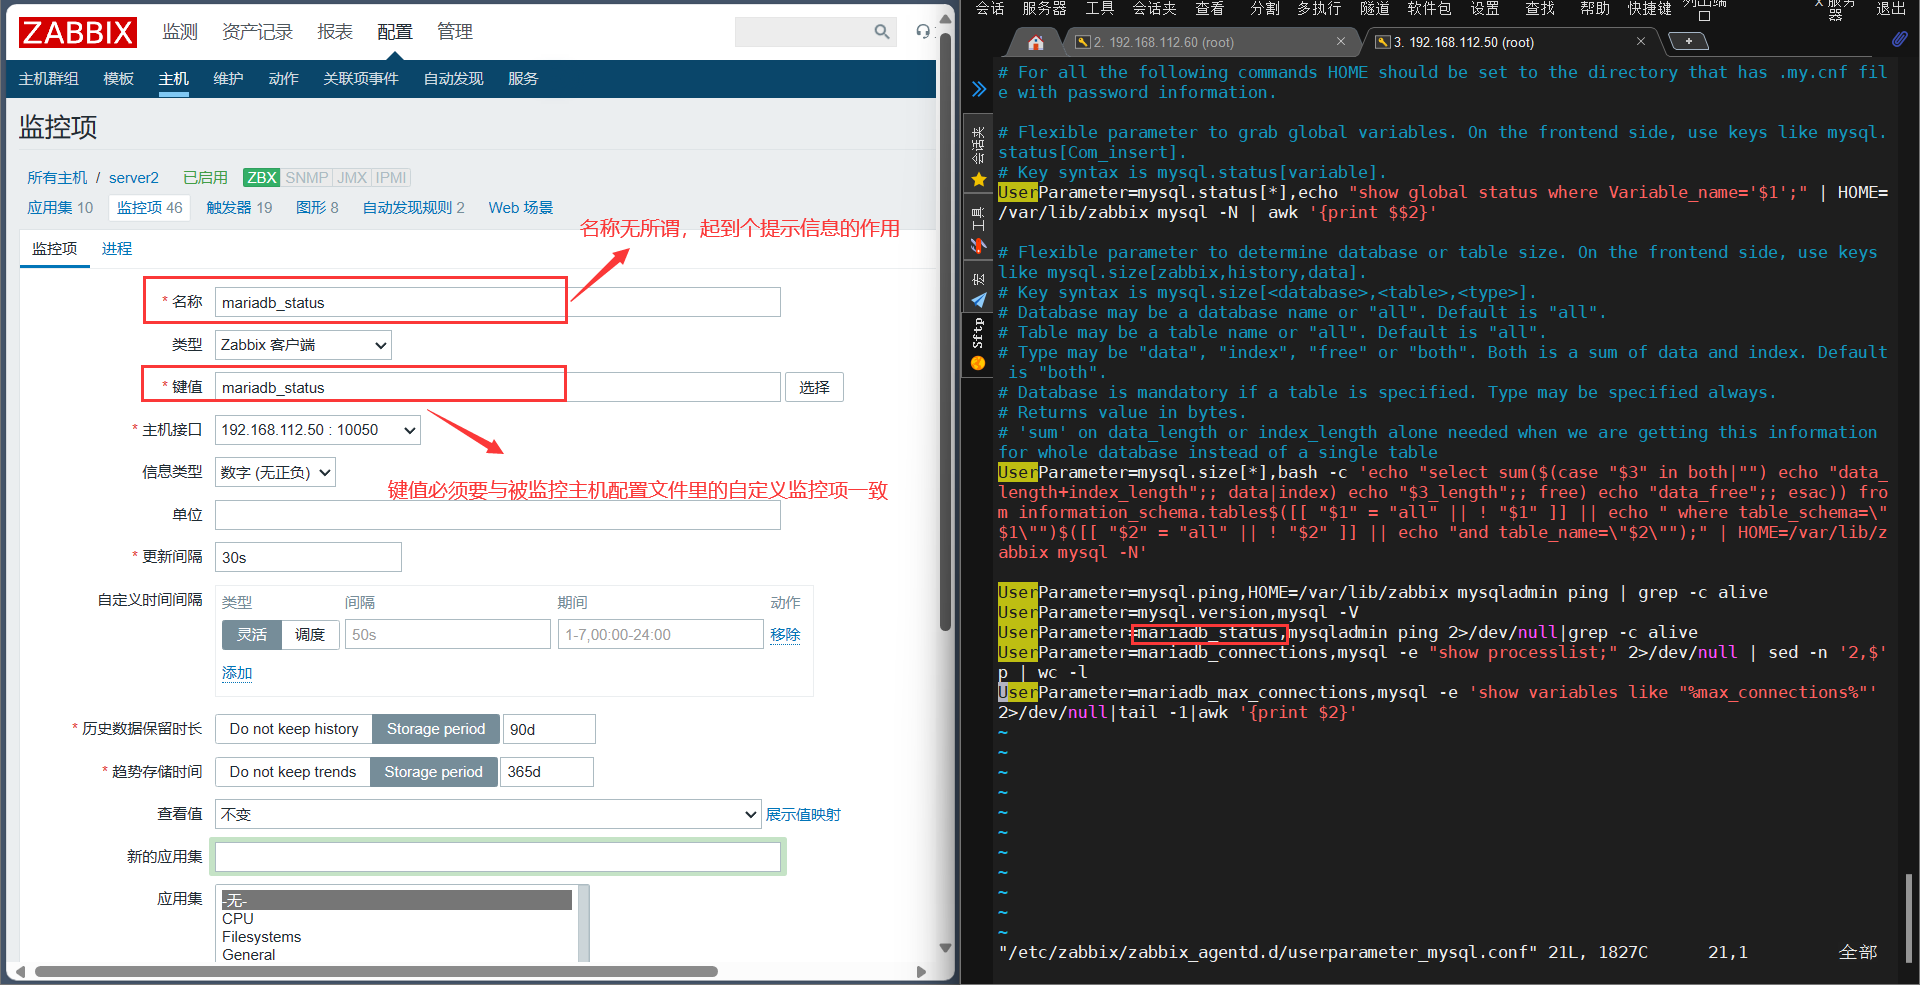
4、web端添加监控项对应键值
配置->主机->server2->监控项->创建监控项
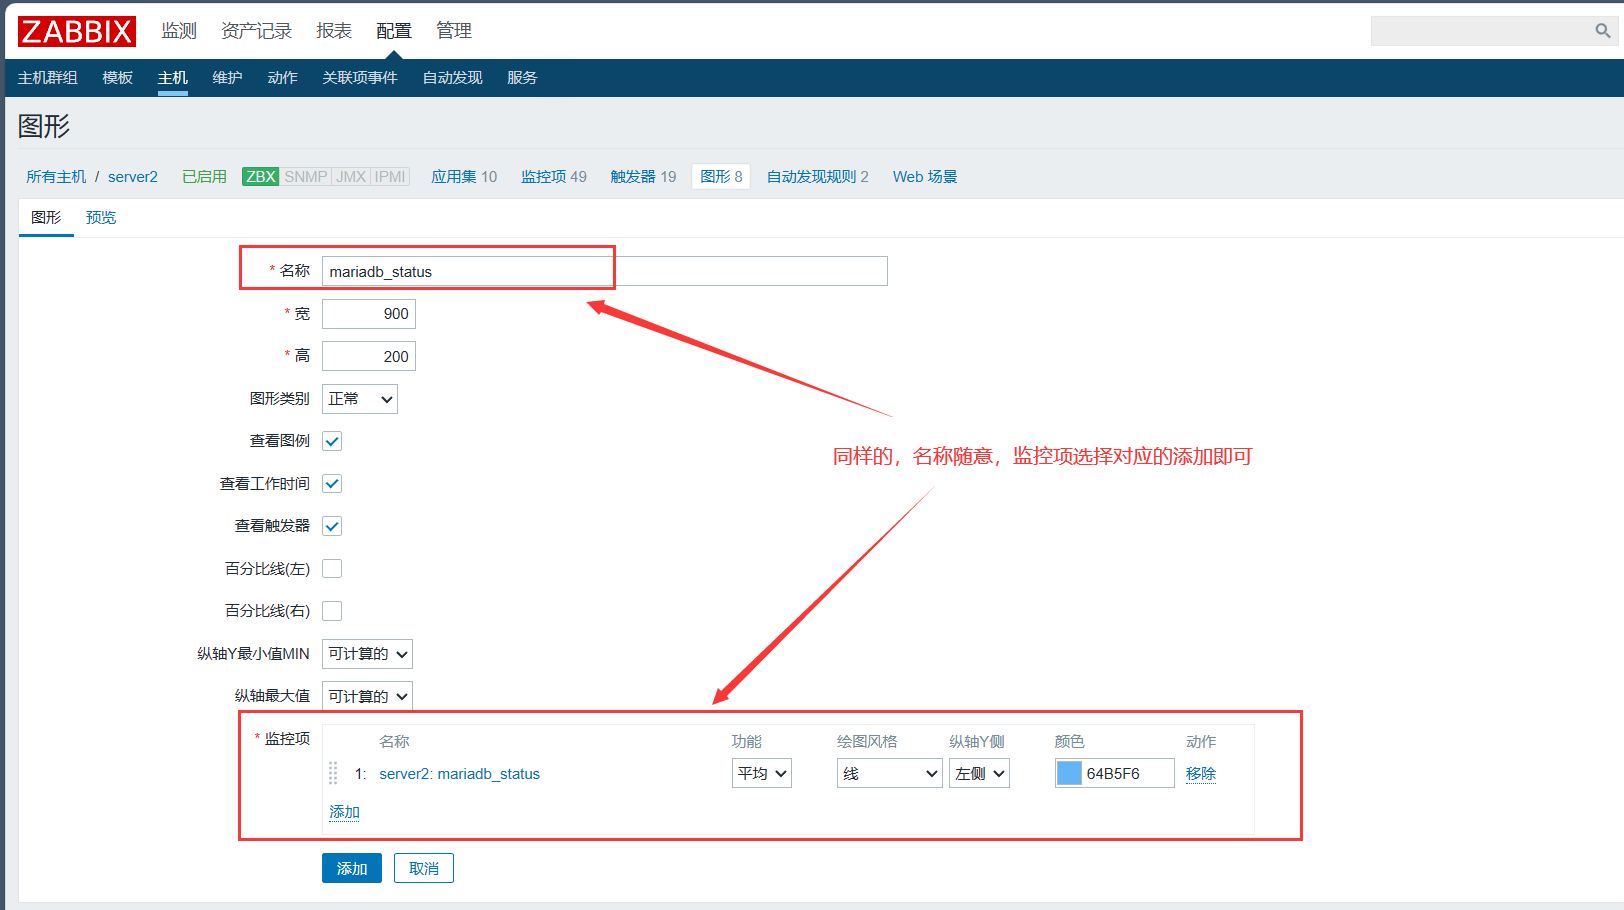
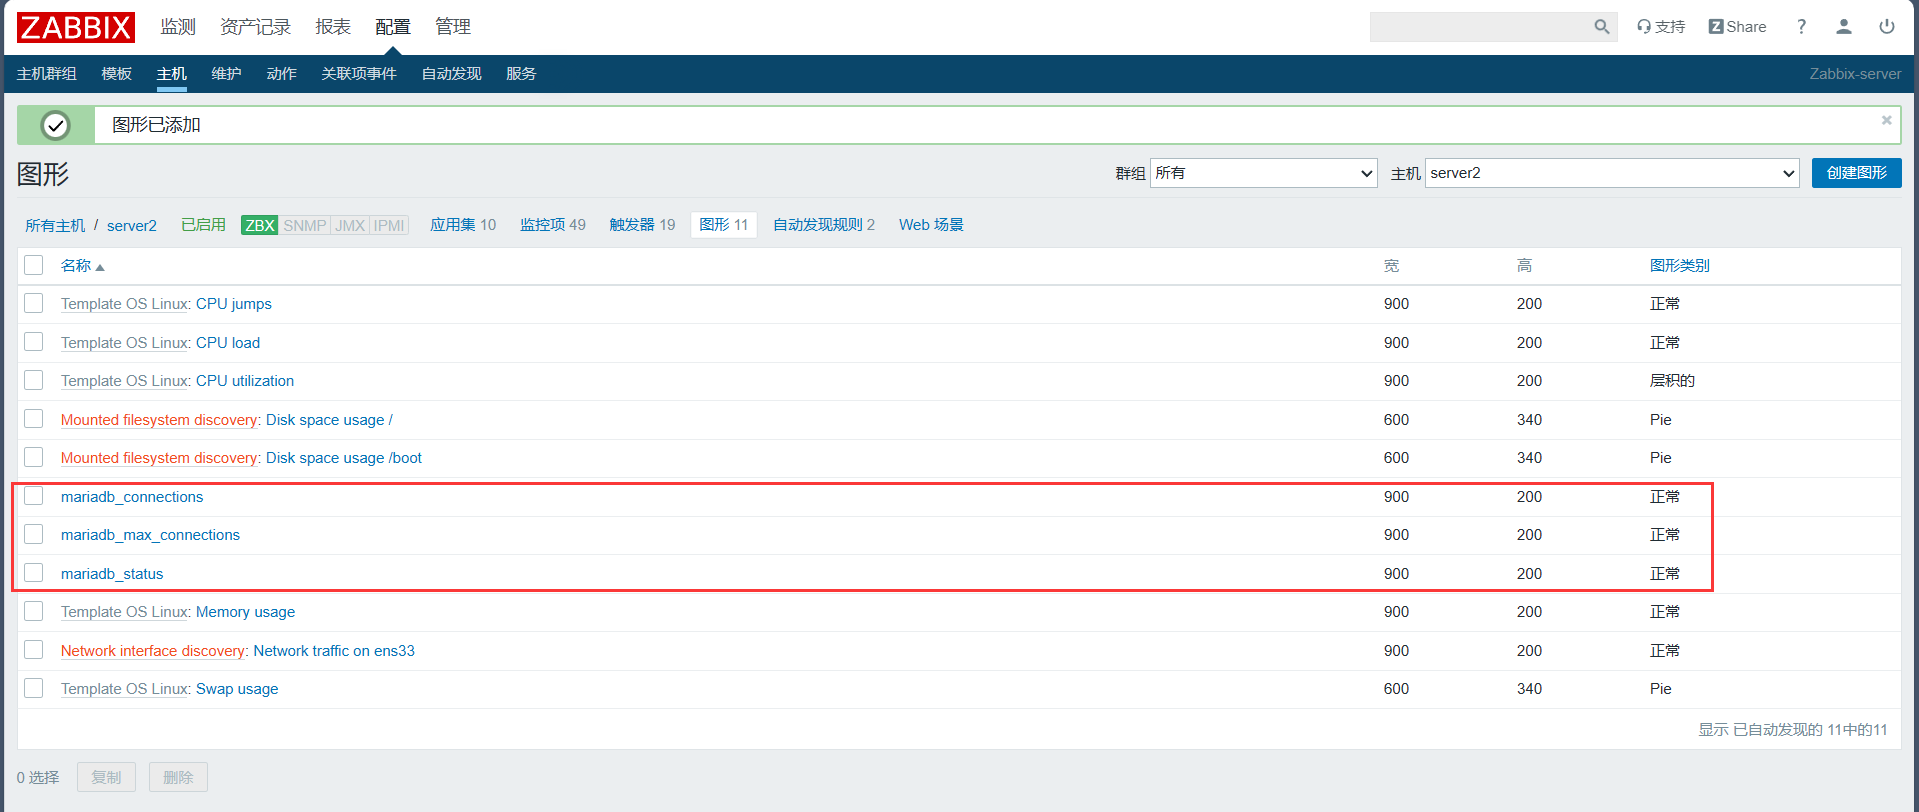
5、添加图形可视化(选做)
配置->主机->server2->图形->创建图形
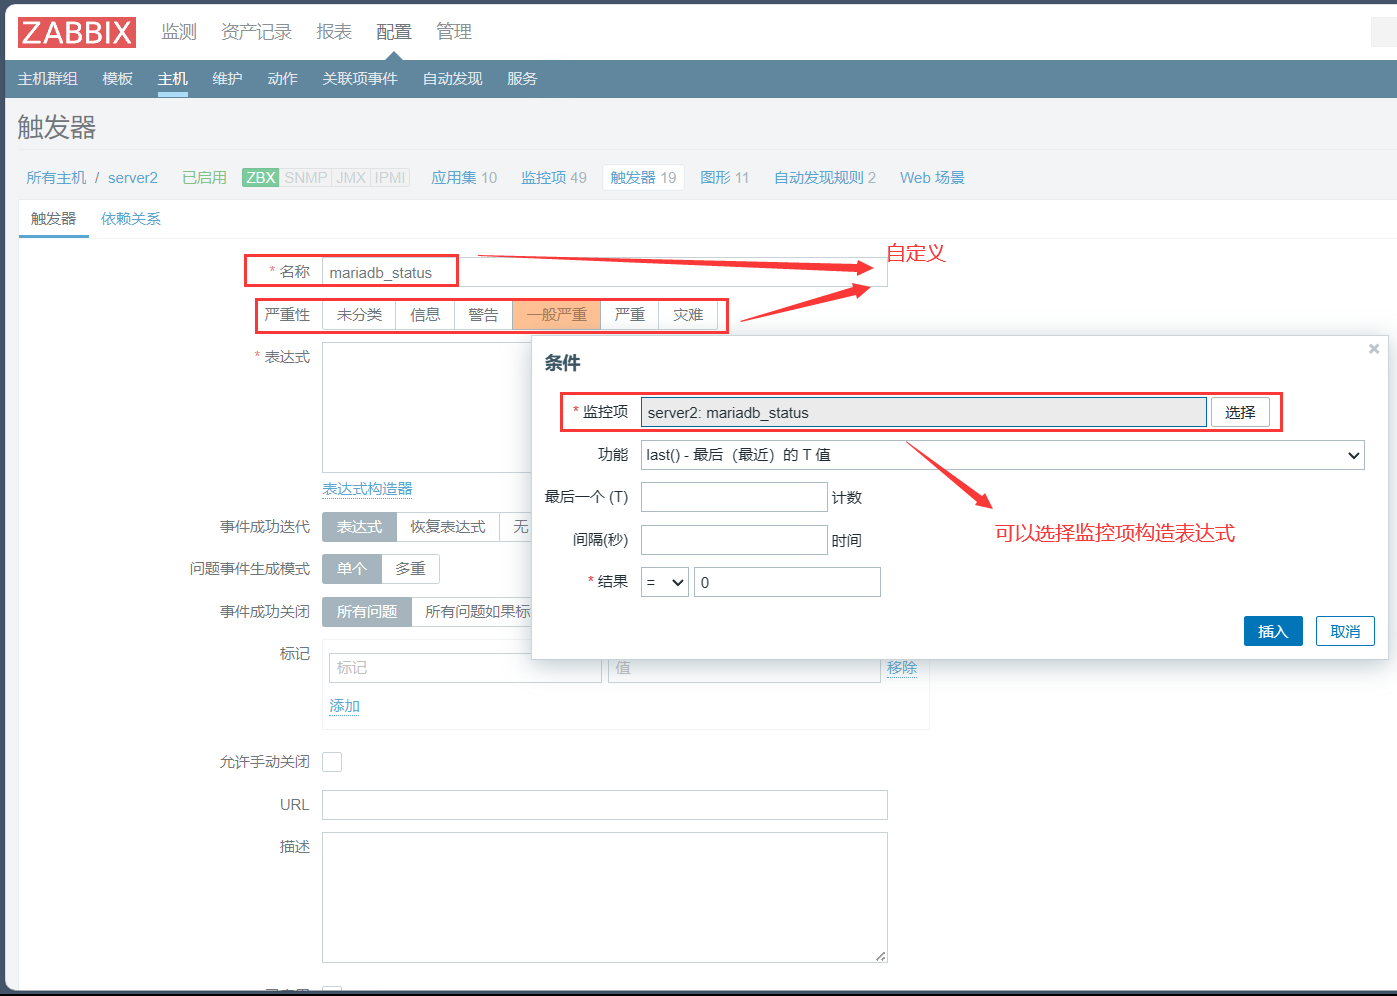
6、添加对应的触发器
配置->主机->server2->创建触发器

7、小问题

如果出现了这个警告问题不大,毕竟我们刚才安装了mariadb数据库,自然在/etc/passwd上添加了用户

七、zabbix实现邮件告警
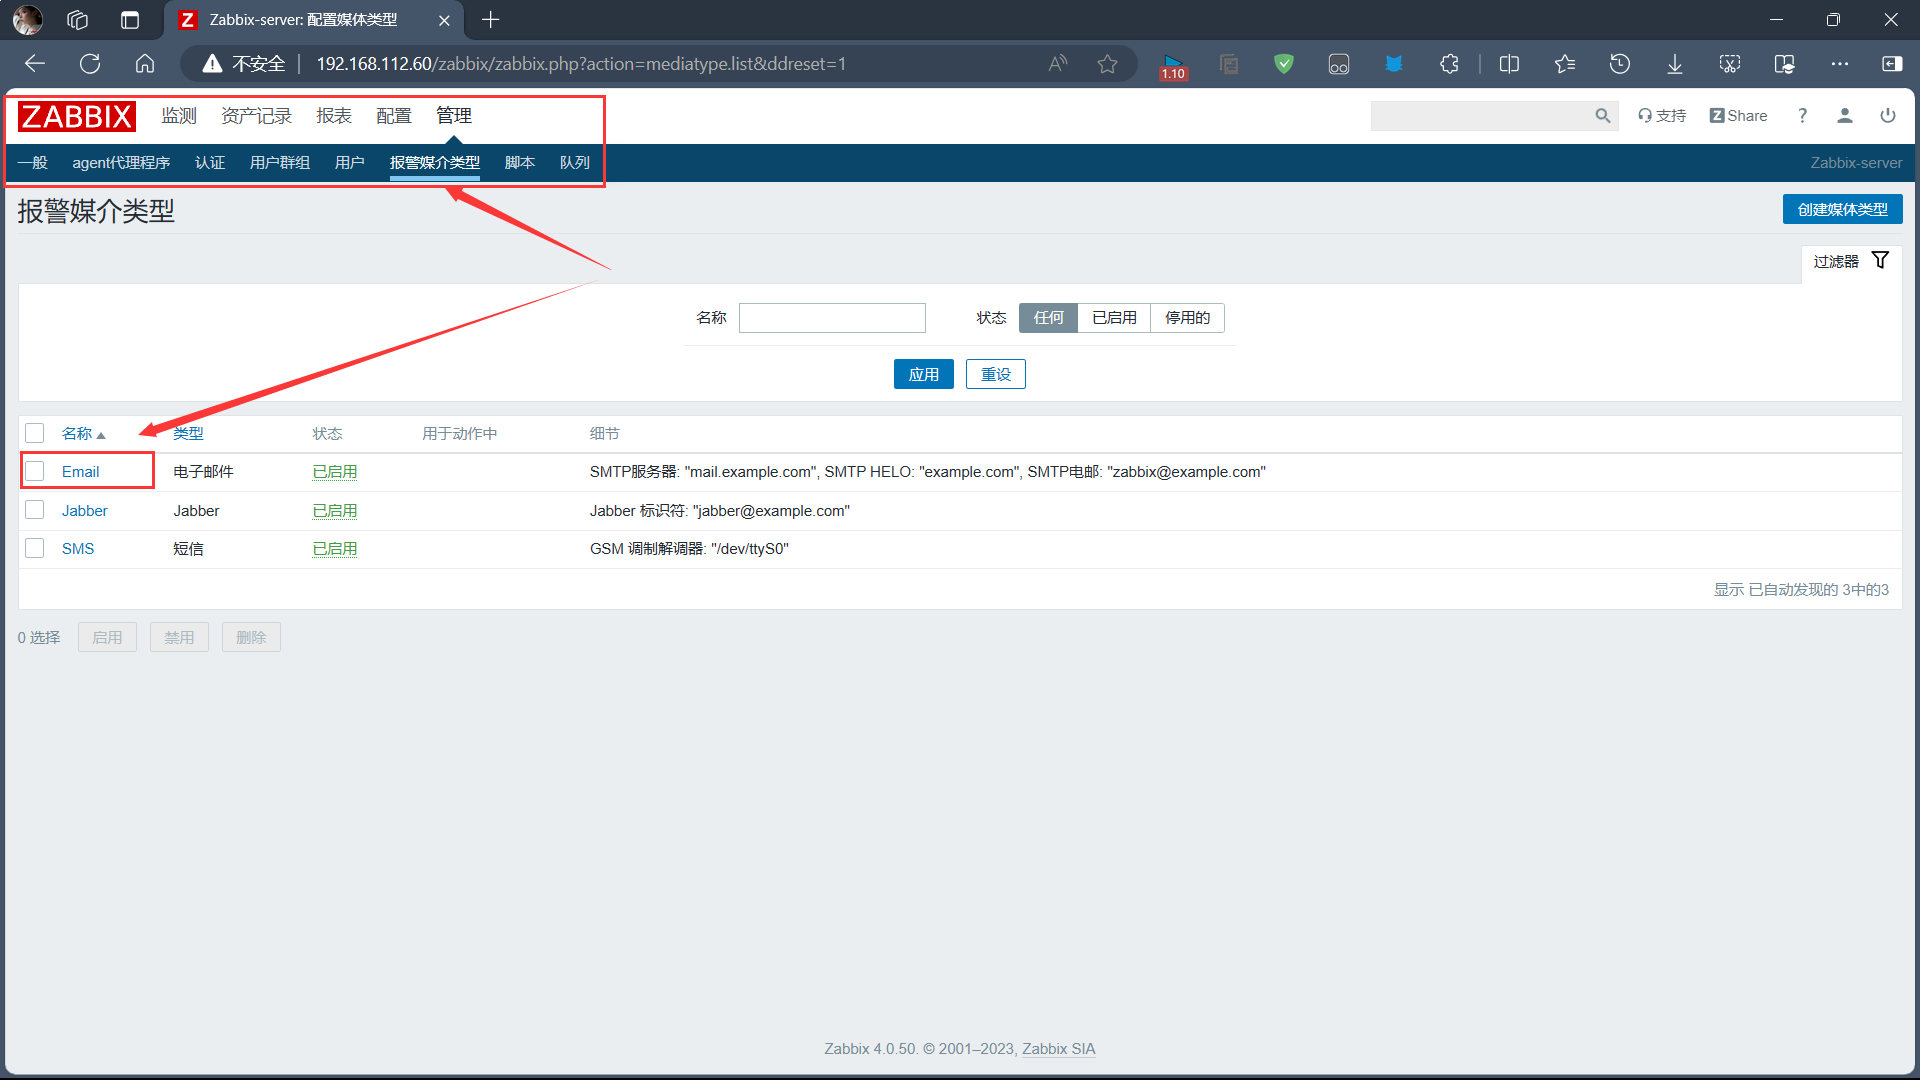
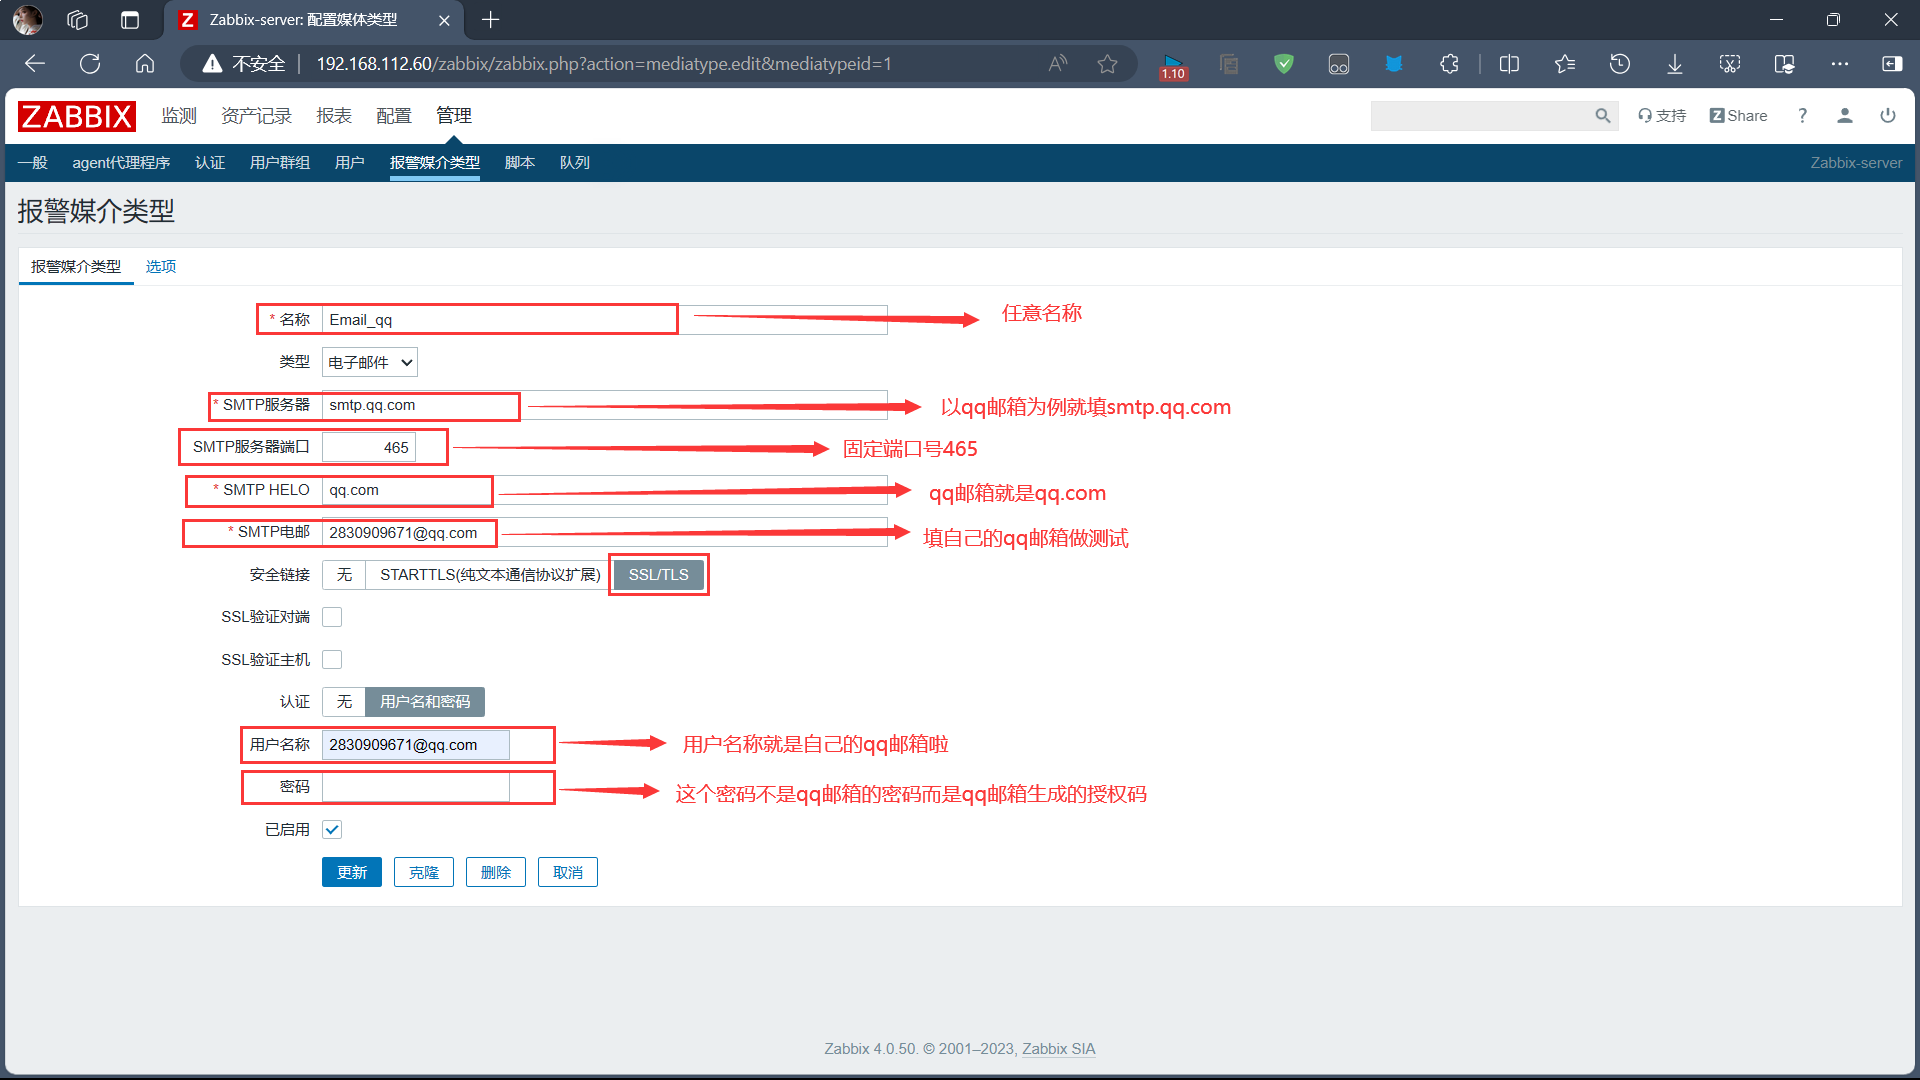
1、配置告警媒介
管理->报警媒介类型->Email
2、获取qq邮箱授权码
登录qq邮箱->设置->账号->POP3/IMAP/SMTP/Exchange/CardDAV/CalDAV服务->
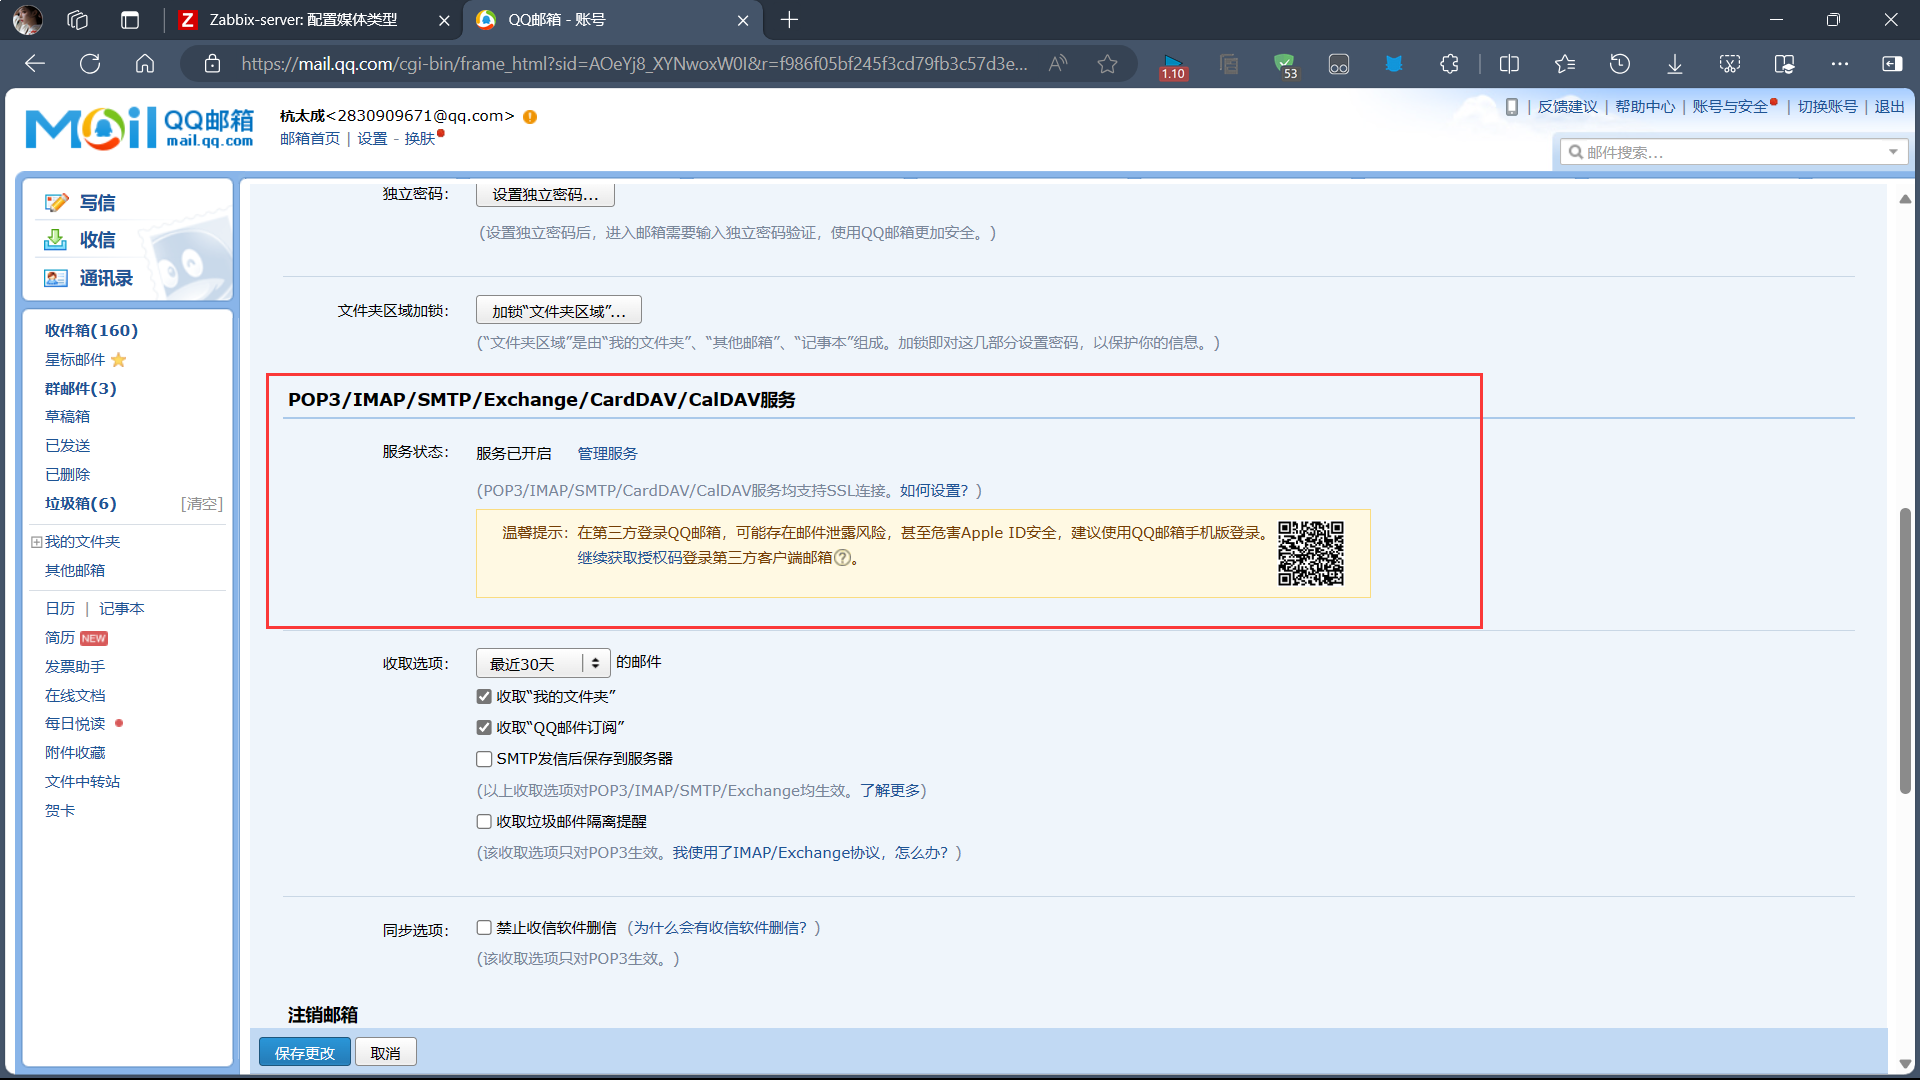
短信验证

将生成好的授权码作为密码填入

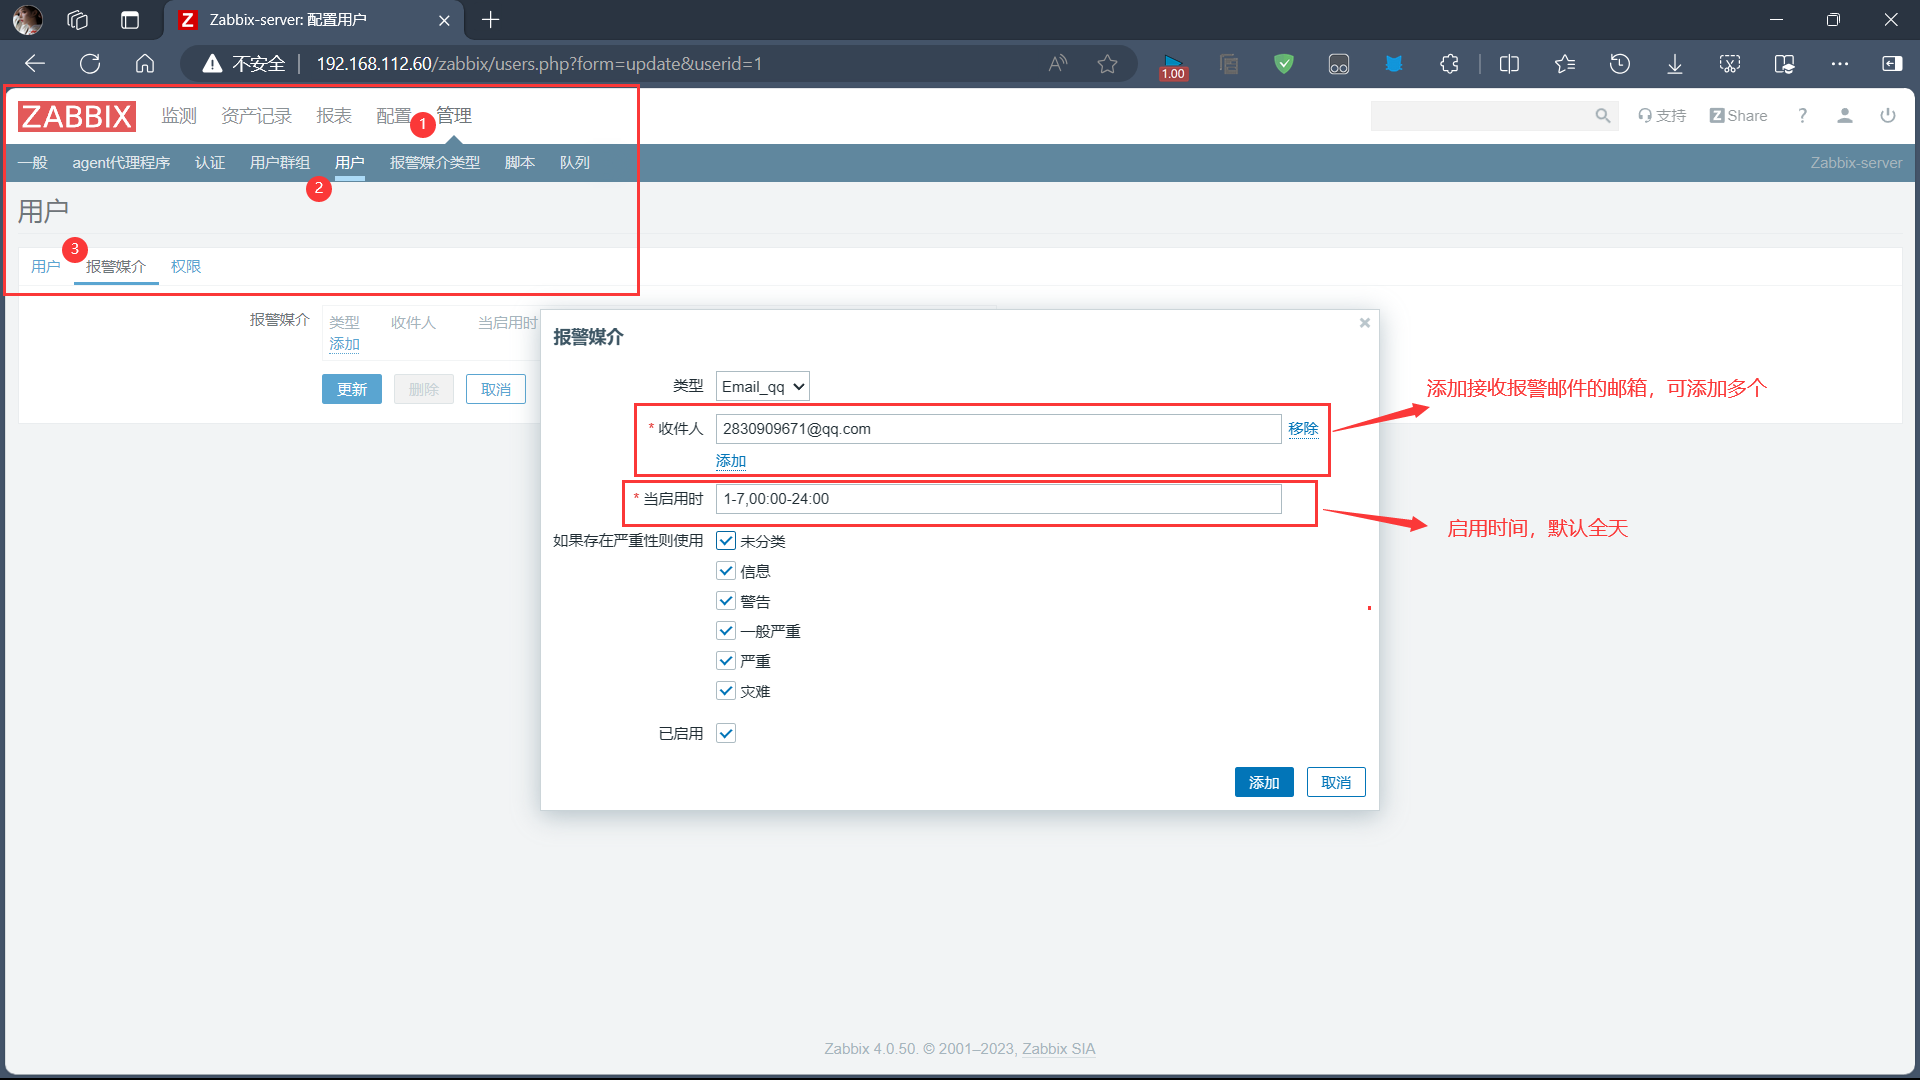
3、添加接收报警邮件的邮箱
管理->用户->Admin->添加报警媒介->更新
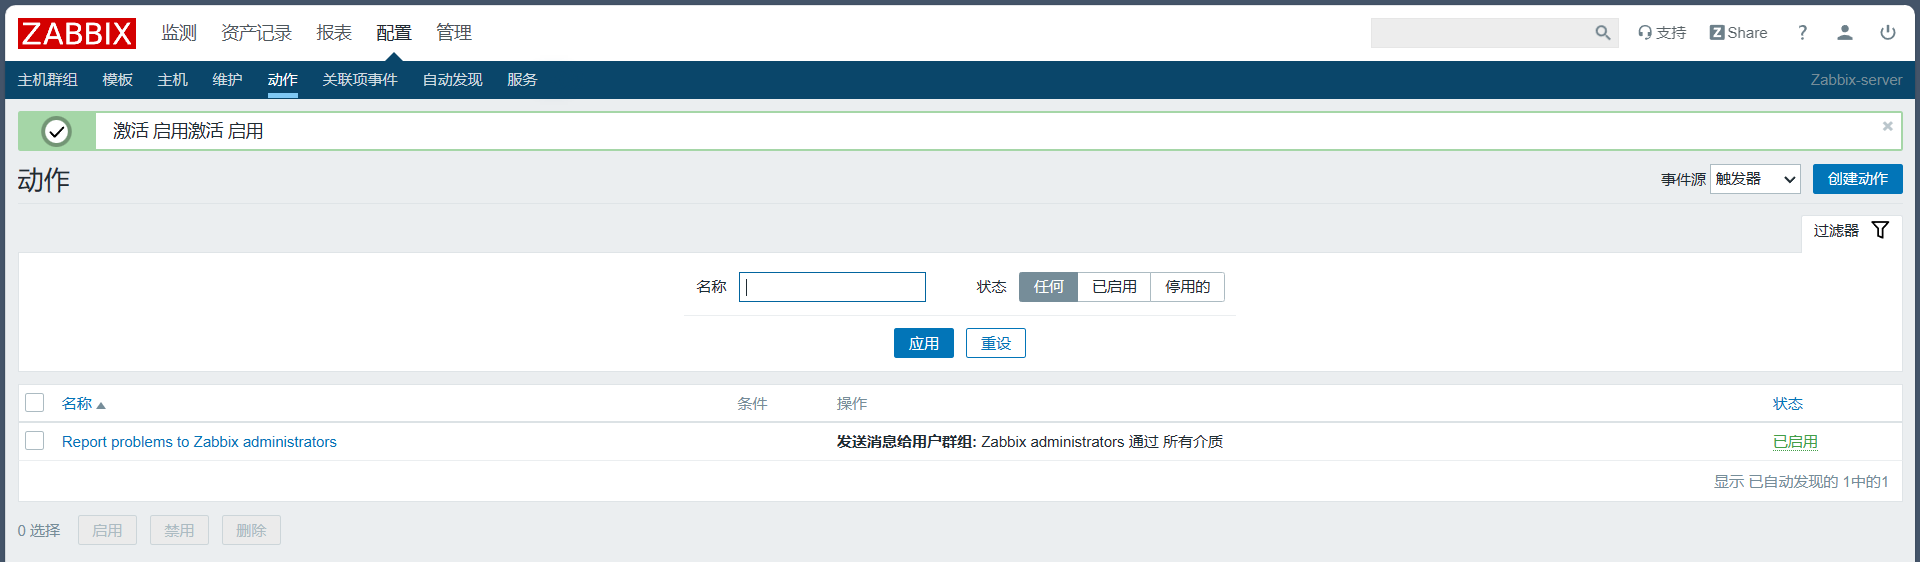
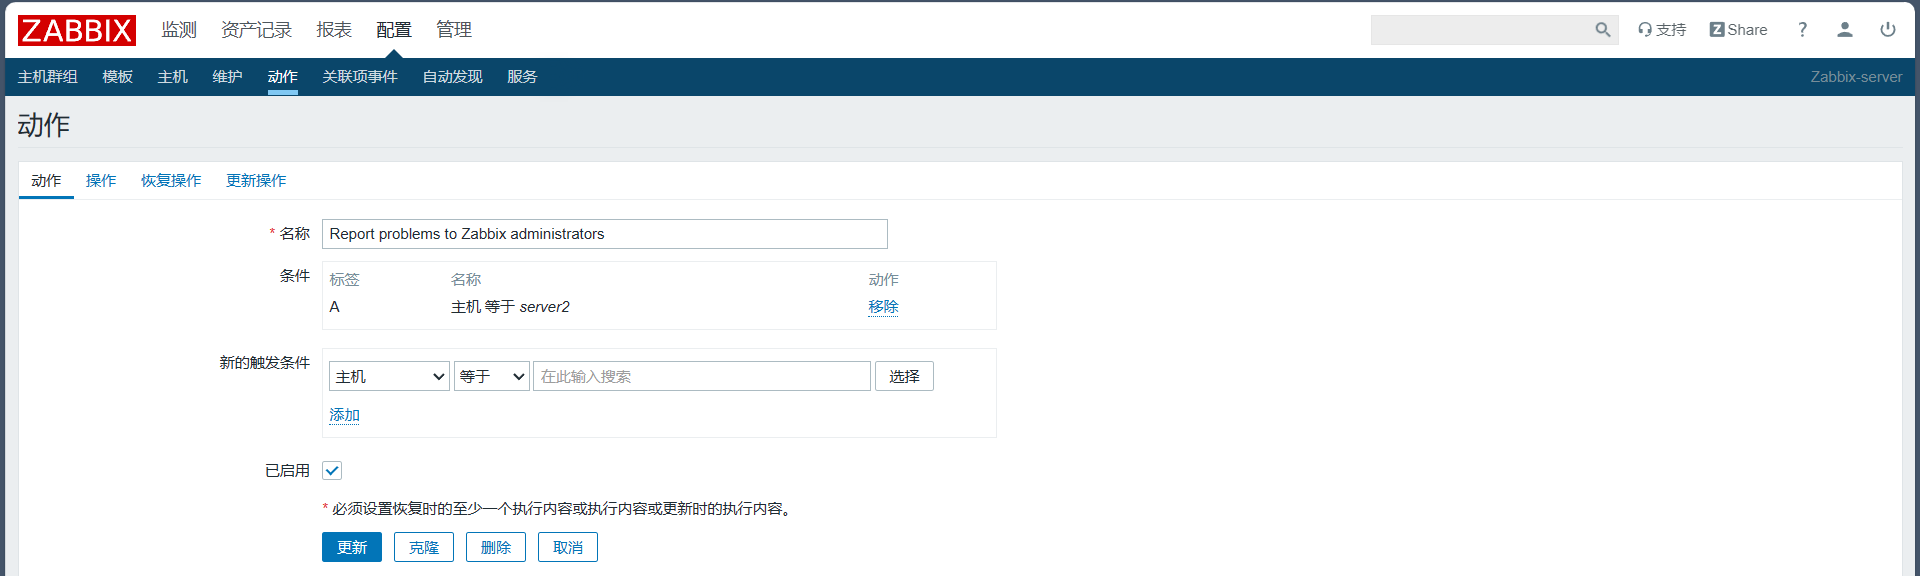
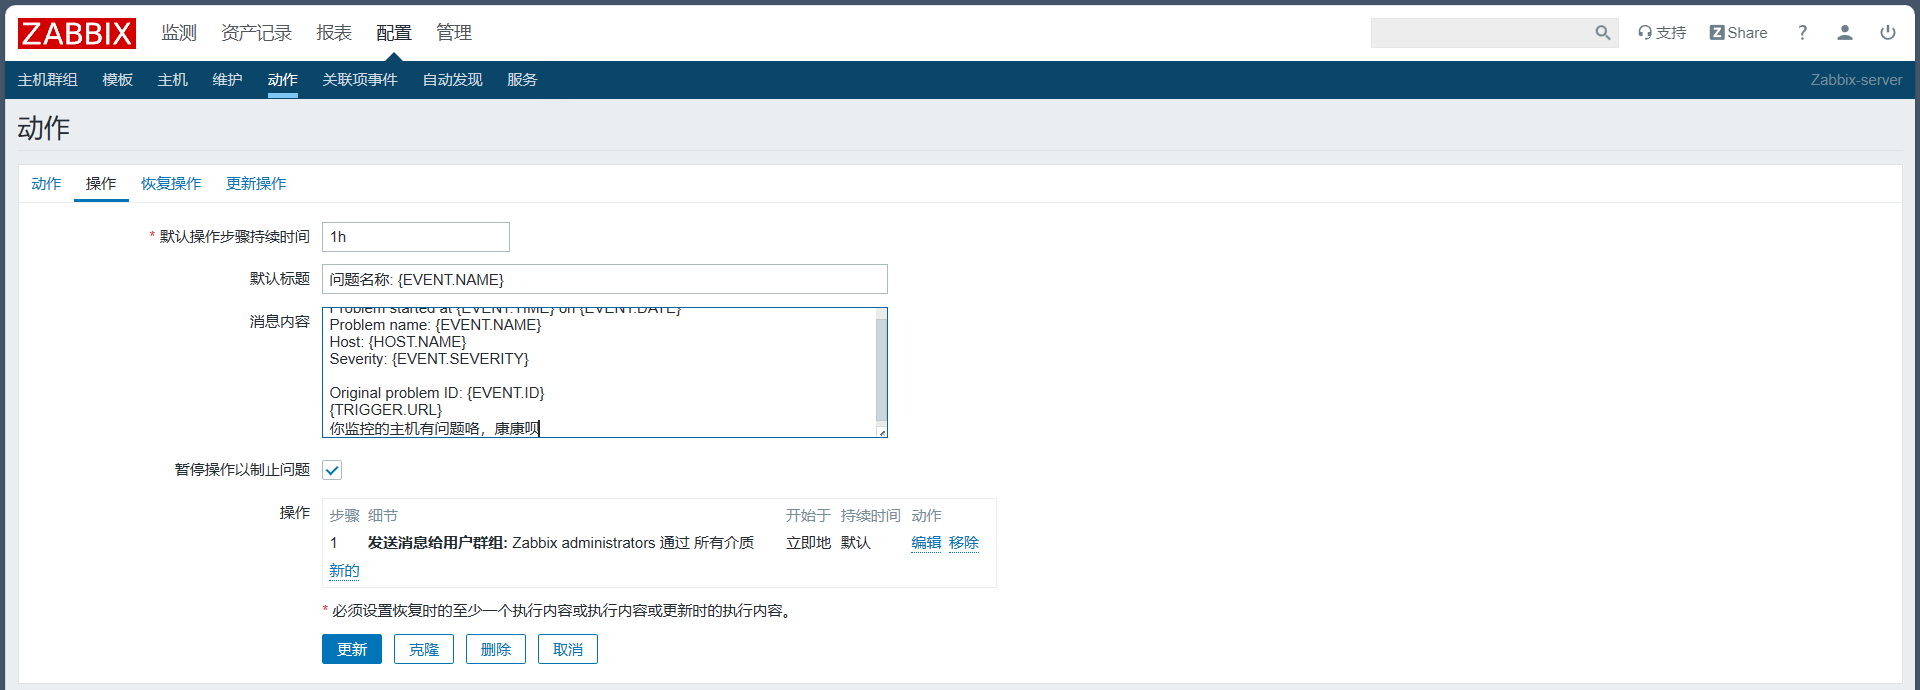
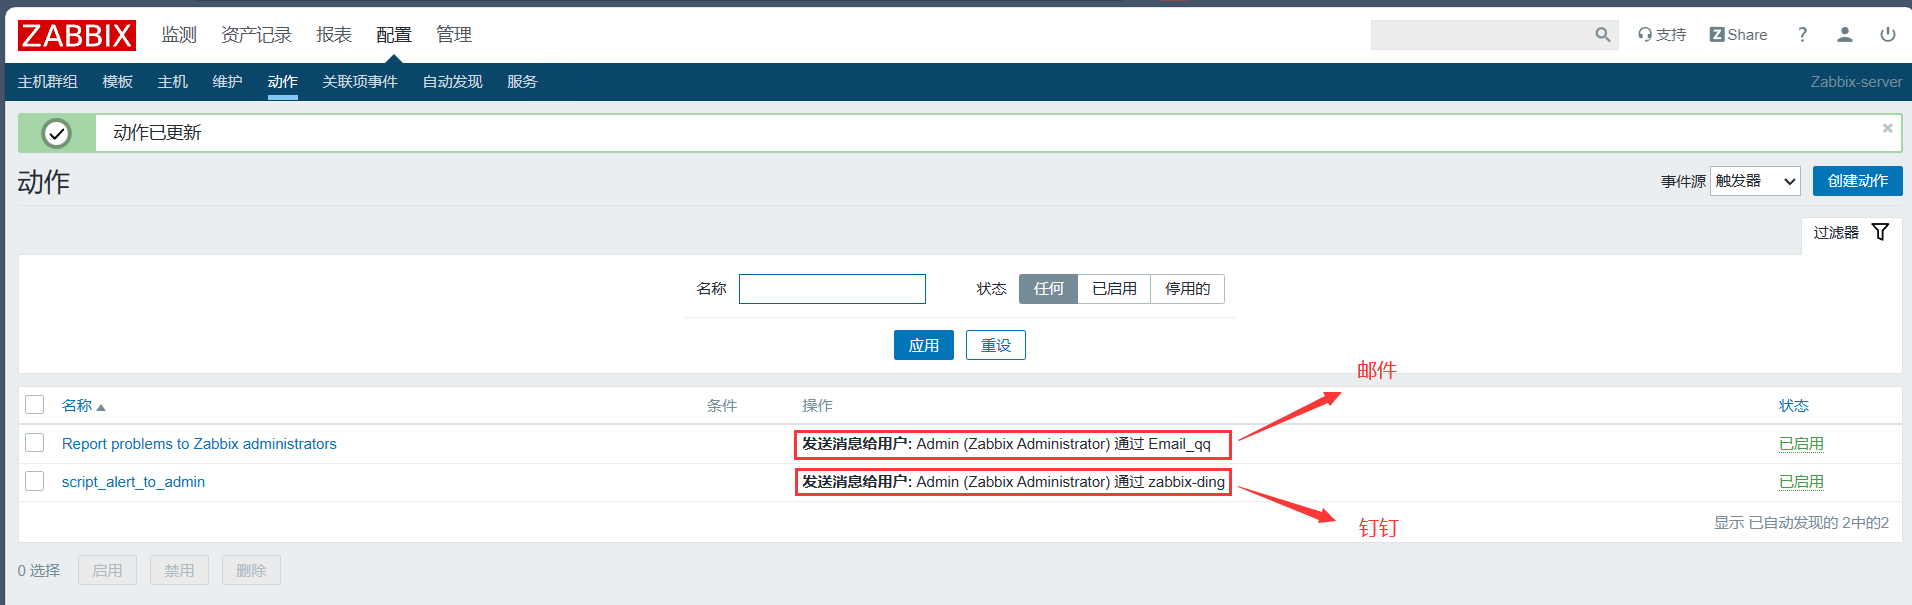
4、配置动作发送给用户群组
配置->动作->启用->Report problems to Zabbix administrators
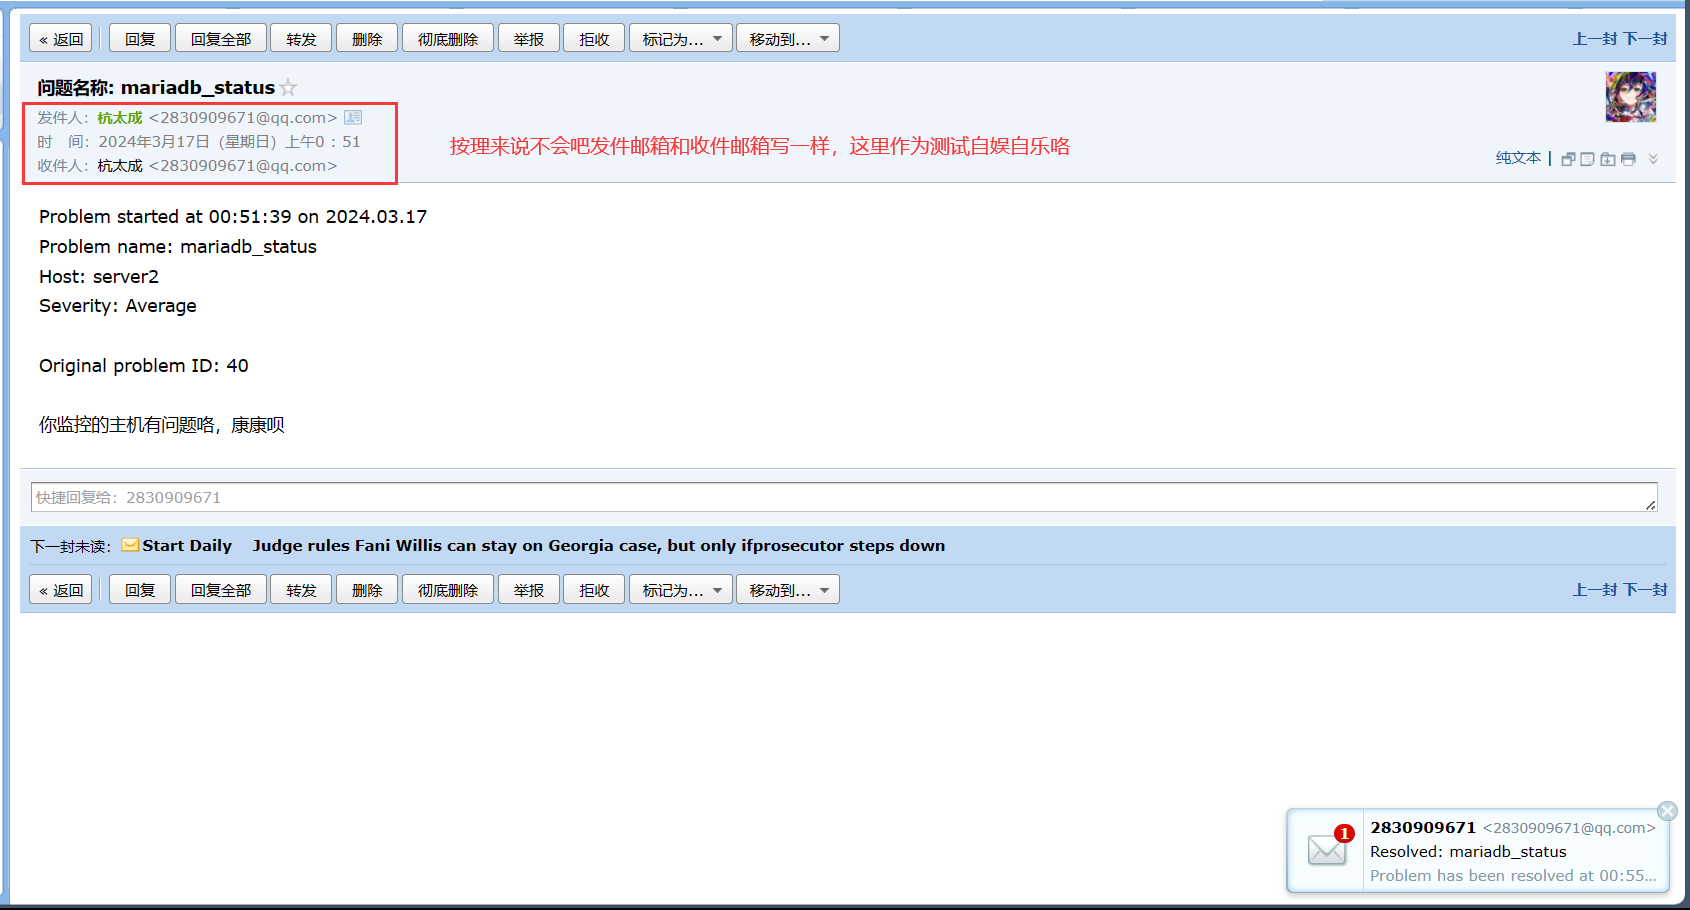
5、测试(关闭被监测主机mariadb)
[root@server2 ~]# ss -tnl
State       Recv-Q Send-Q Local Address:Port               Peer Address:Port
LISTEN      0      128              *:22                           *:*
LISTEN      0      100      127.0.0.1:25                           *:*
LISTEN      0      128              *:10050                        *:*
LISTEN      0      50               *:3306                         *:*
LISTEN      0      128           [::]:22                        [::]:*
LISTEN      0      100          [::1]:25                        [::]:*
LISTEN      0      128           [::]:10050                     [::]:*
[root@server2 ~]# systemctl stop mariadb
八、zabbix通过钉钉/企业微信告警
1、钉钉群聊
手机端直接拉个普通群,PC端 不好操作

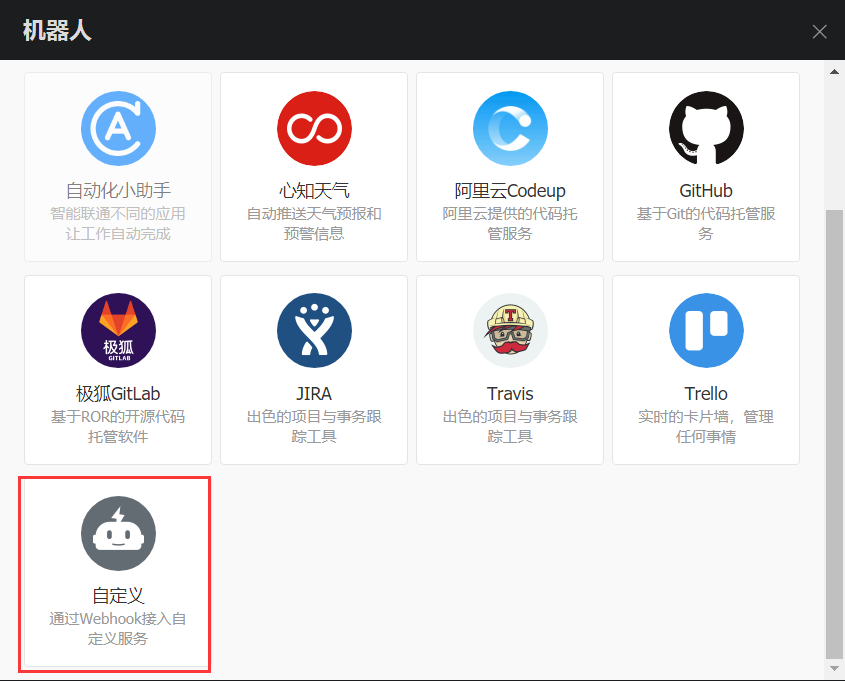
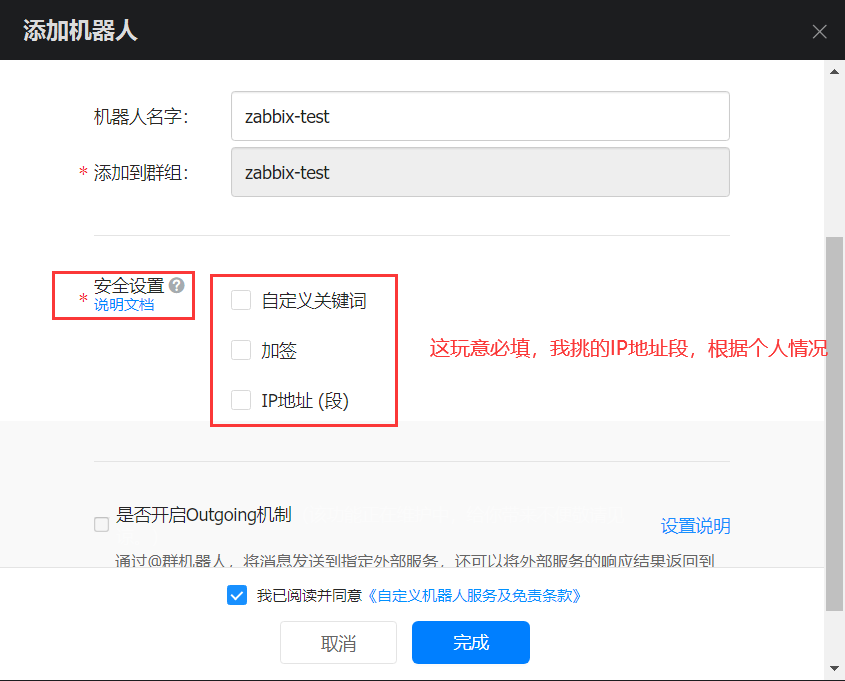
2、添加群机器人(PC端创建)
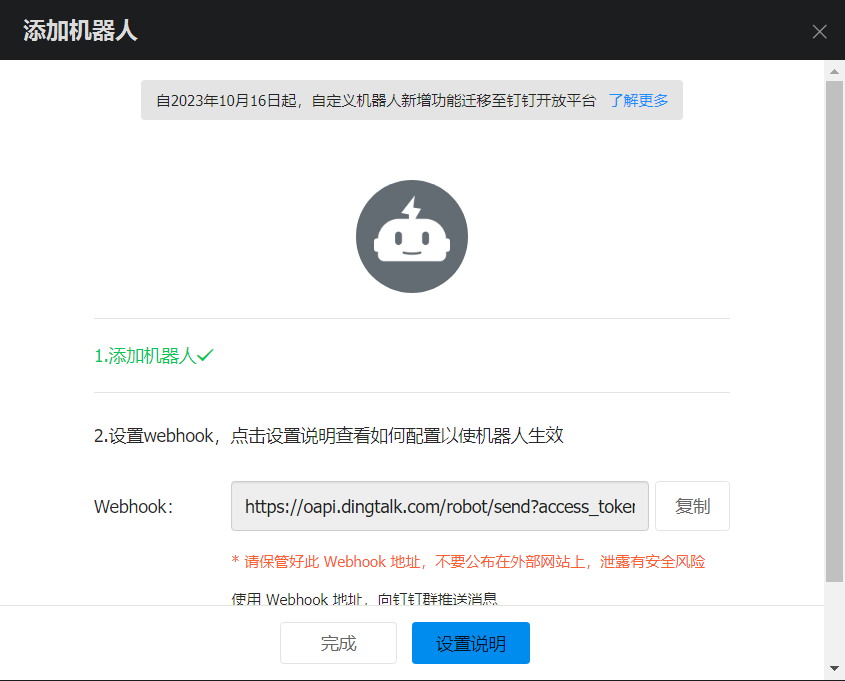
群设置->机器人->添加机器人->自定义机器人->保管好Webhook
3、到服务端/usr/lib/zabbix/alertscripts下准备python脚本
[root@server1 alertscripts]# pwd
/usr/lib/zabbix/alertscripts
[root@server1 alertscripts]# yum install -y python-requests		#下载requests模块
#!/usr/bin/python
# -*- coding: utf-8 -*-
# Author: xxxxxxxx
import requests
import json
import sys
import os

headers = {'Content-Type': 'application/json;charset=utf-8'}
api_url = "https://oapi.dingtalk.com/robot/send?access_token=7b7f9820e221a6a6ecca0944622275ab9c53394cc66145e58156e95e319fc30e"	#写自己的Webhook
def msg(text):
    json_text= {
    "msgtype": "text",
    "at": {
        "atMobiles": [
            "13333333333"
        ],
            "isAtAll": True
     },
     "text": {
        "content": text
     }
    }
    print requests.post(api_url,json.dumps(json_text),headers=headers).content

if __name__ == '__main__':
     text = "zabbix-test"	#测试一下文本
     #text = sys.argv[1]
     msg(text)
4、测试脚本
[root@server1 alertscripts]# chmod a+x zabbix-ding.py
[root@server1 alertscripts]# ./zabbix-ding.py
{"errcode":0,"errmsg":"ok"}

没问题回到代码进行修改
[root@server1 alertscripts]# vim zabbix-ding.py
#!/usr/bin/python
# -*- coding: utf-8 -*-
# Author: xxxxxxxx
import requests
import json
import sys
import os

headers = {'Content-Type': 'application/json;charset=utf-8'}
api_url = "https://oapi.dingtalk.com/robot/send?access_token=7b7f9820e221a6a6ecca0944622275ab9c53394cc66145e58156e95e319fc30e"
def msg(text):
    json_text= {
    "msgtype": "text",
    "at": {
        "atMobiles": [
            "13333333333"
        ],
            "isAtAll": True
     },
     "text": {
        "content": text
     }
    }
    print requests.post(api_url,json.dumps(json_text),headers=headers).content

if __name__ == '__main__':
     #text = "zabbix-test"
     text = sys.argv[1]
     msg(text)
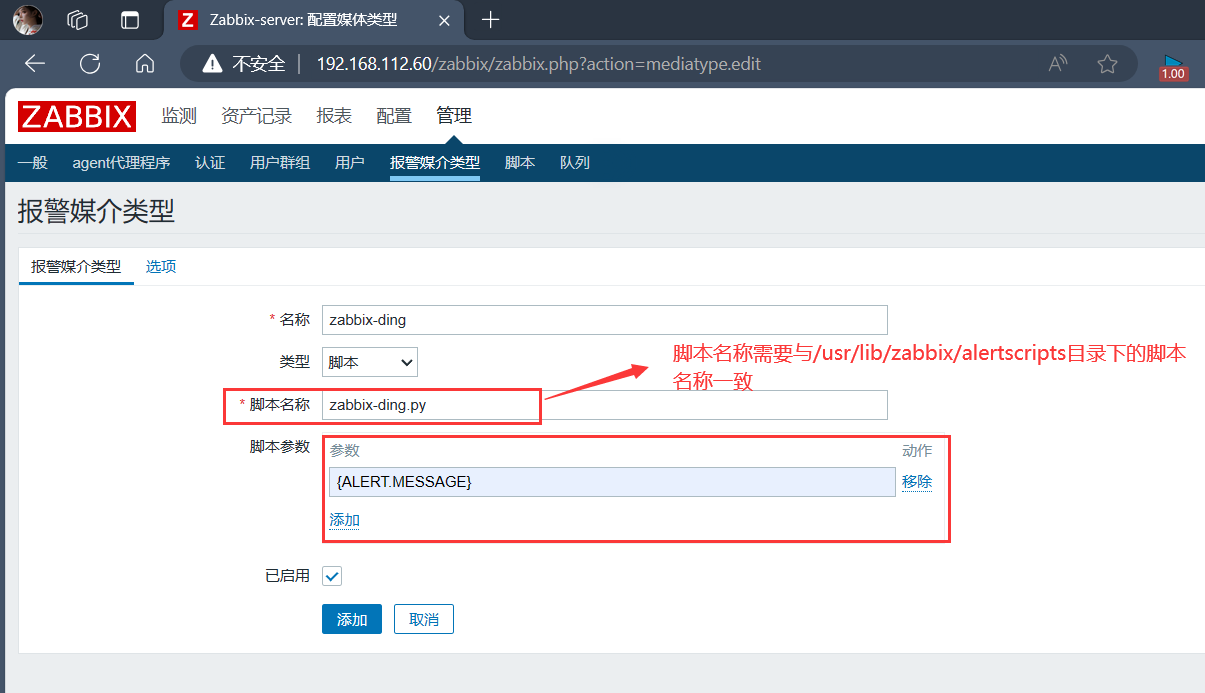
5、添加告警媒介
管理->报警媒介类型->创建媒体类型->添加名称,脚本名称,脚本参数{ALERT.MESSAGE}
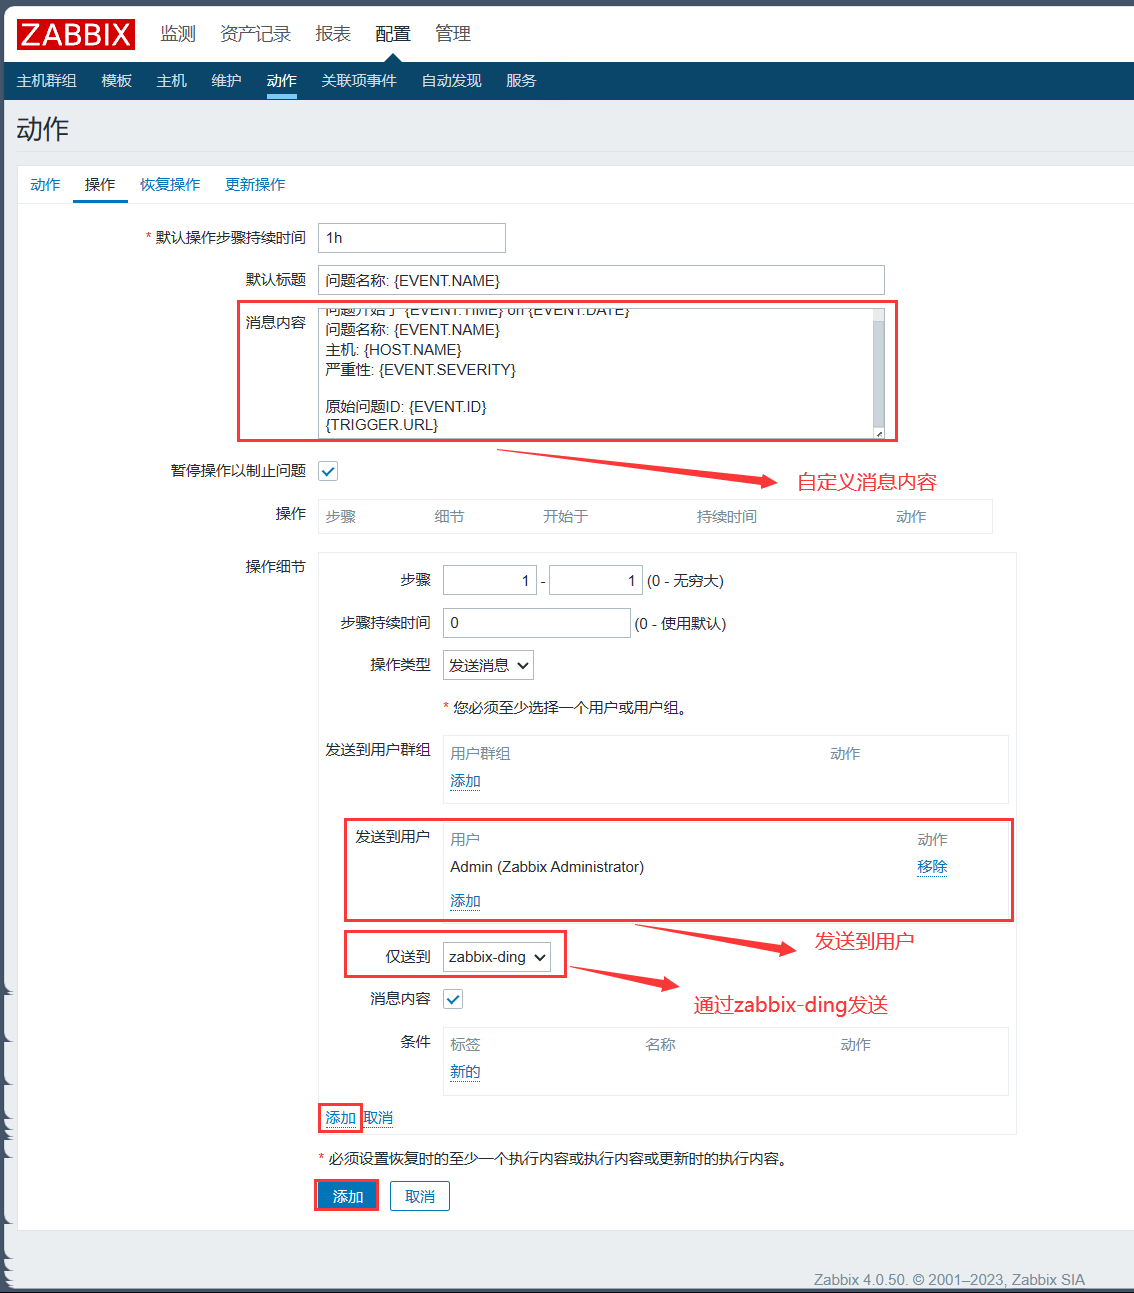
6、添加动作
配置->动作->创建动作

7、绑定用户,用户收件人写电话号码
管理->用户->Admin->报警媒介->添加报警媒介->更新

8、手动测试(关闭mariadb)
[root@server2 ~]# systemctl stop mariadb
[root@server2 ~]# ss -tnl
State       Recv-Q Send-Q Local Address:Port               Peer Address:Port
LISTEN      0      128              *:10050                        *:*
LISTEN      0      128              *:22                           *:*
LISTEN      0      100      127.0.0.1:25                           *:*
LISTEN      0      128           [::]:10050                     [::]:*
LISTEN      0      128           [::]:22                        [::]:*
LISTEN      0      100          [::1]:25                        [::]:*
效果呈现:


 2107
2107


 被折叠的 条评论
为什么被折叠?
被折叠的 条评论
为什么被折叠?
 到【灌水乐园】发言


