apisix 开发公共对外接口
1 背景
公司网关改造,使用 Apisix 替换原有的 Springcloud Gateway,原来网关上自带了一个接口
逻辑比较简单,配置文件中有一个开关:
- 值为 true,则返回
{
    "status": 200,
    "message": "分享登录开关打开",
    "data": true,
    "rel": true
}
- 值为 false,则返回
{
    "status": 200,
    "message": "分享登录开关关闭",
    "data": false,
    "rel": true
}
希望保留原有逻辑,将该接口编写在 Apisix 中(当然,可以随便找个服务,补充这个接口,然后路由到上面,但是这里不想破坏原有逻辑)
2 资料分析
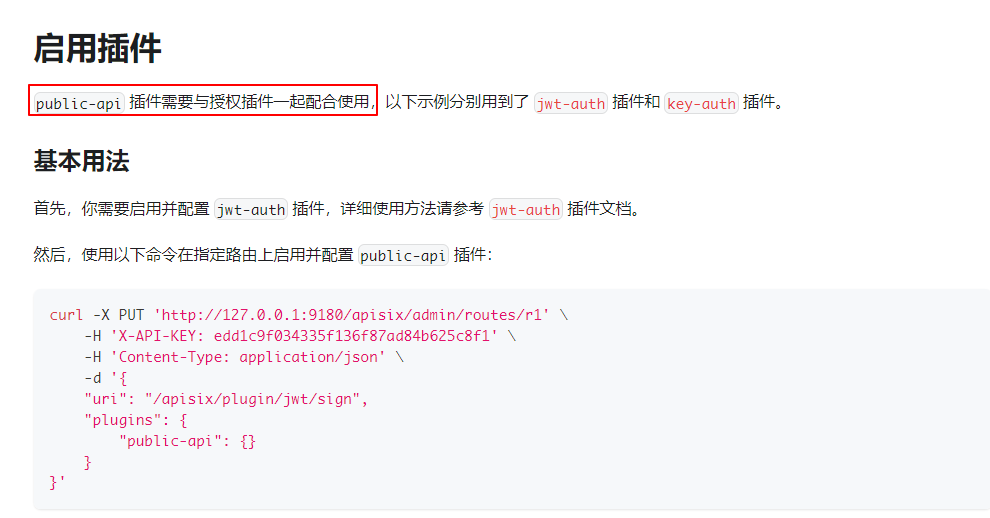
查看官网资料可以看到,Apisix 可以通过 public-api 插件对外暴露接口
但是开启插件必须要与授权插件一起使用,orz___

只能通过自己的方式绕过它了
3 插件开发
这里开发一个 名为 api-test 的插件,用于对外公开一个接口
local ngx = ngx
local core = require("apisix.core")
local consumer_mod = require("apisix.consumer")


local schema = {
  type = "object",
  properties = {
  },
}

local consumer_schema = {
  type = "object",
  properties = {
    key = { type = "string" },
    switch = {
      type = "boolean",
      default = false
    },
  },
  required = {"key"},
}

local plugin_name = "api-test"

local _M = {
  version = 0.1,
  priority = 35,
  type = 'auth',
  name = plugin_name,
  schema = schema,
  consumer_schema = consumer_schema
}


function _M.check_schema(conf)
  if schema_type == core.schema.TYPE_CONSUMER then
    return core.schema.check(consumer_schema, conf)
  else
    return core.schema.check(schema, conf)
  end
end

local function getSwitch()
  local consumer_conf = consumer_mod.plugin(plugin_name)
  if not consumer_conf then
      return core.response.exit(404)
  end
  local consumers = consumer_mod.consumers_kv(plugin_name, consumer_conf, "key")
  local consumer = consumers[plugin_name]
  if not consumer then
    return core.response.exit(401, "Consumer Key Should Be Equal To Plugin Name")
  end
  local switch_flag = consumer.auth_conf.switch
  core.log.warn("consumer_conf: ", switch_flag)
  local tbl = { status = 200 , rel = true }
  if switch_flag then
    tbl["message"] = "分享登录开关打开"
    tbl["data"] = true
  else
    tbl["message"] = "分享登录开关关闭"
    tbl["data"] = false
  end
  return core.response.exit(200, core.json.encode(tbl))
end

function _M.api()
  return {
      {
        methods = {"GET"},
        uri = "/switch/getSwitch",
        handler = getSwitch,
      }
  }
end

return _M
核心代码,这里需要保证 consumer 的名称与插件名称相同即可通过校验
local consumer = consumers[plugin_name]
4 部署与测试
添加自定义插件可以参考:apisix 开发自定义插件
- 添加 消费者
curl http://127.0.0.1:9180/apisix/admin/consumers \
-H 'X-API-KEY: <your-key>' -X PUT -d '
{
    "username": "api-test",
    "plugins": {
        "api-test": {
            "key": "api-test",
            "switch": true
        }
    }
}'
- 添加路由
curl -X PUT 'http://127.0.0.1:9180/apisix/admin/routes/r1' \
    -H 'X-API-KEY: <your-key>' \
    -H 'Content-Type: application/json' \
    -d '{
    "uri": "/switch/getSwitch",
    "plugins": {
        "public-api": {}
    }
}'
- 插件重载
如果需要改动 lua 脚本,可以通过以下指令 热加载
curl http://127.0.0.1:9180/apisix/admin/plugins/reload -H 'X-API-KEY: edd1c9f034335f136f87ad84b625c8f1' -X PUT
然后就可以测试接口了
curl 'http://127.0.0.1:9080/switch/getSwitch'
返回结果
{
	"status": 200,
	"message": "分享登录开关打开",
	"rel": true,
	"data": true
}


 6202
6202

 被折叠的 条评论
为什么被折叠?


