


在Android开发中,自定义View是一个比较重要的知识点。因为Android系统提供的原生控件有时候并不能满足我们的开发需求,所以自定义View也就是必须的了。下面就来介绍一下如何实现一个自定义View。
自定义View的基本步骤:
-定义自定义View的属性
-在自定义View的构造方法中获取定义的属性
-重写onMeasure方法(不是必须的,大多数情况下是要重写的)
-重写onDraw方法
下面我们就按照上面的步骤来实现一个自定义View:
1.在res/values下新建一个attrs.xml文件,在里面定义View的属性
<resources>
    <attr name="text" format="string"></attr>
    <attr name="textSize" format="dimension"></attr>
    <attr name="textColor" format="color"></attr>

    <declare-styleable name="CustomView">
        <attr name="text"></attr>
        <attr name="textSize"></attr>
        <attr name="textColor"></attr>
    </declare-styleable>
</resources>
这里我为自定义View定义了三个属性,text(文本内容),textSize(文本字体大小),textColor(文本字体颜色)。
定义属性的规范是这样的:name是属性的名字,format是属性的取值类型。format有:string,color,dimension,integer,enum,references,float,boolean,fraction,flag这些类型。
2.创建一个类CustomView继承自View,添加构造方法,然后在有三个参数的构造方法中获取定义的属性。
public class CustomView extends View {
    private String mText="";
    private int mTextSize=16;
    private int mTextColor=Color.BLACK;
    private Paint mPaint;

    public CustomView(Context context) {
        this(context, null);
    }

    public CustomView(Context context, AttributeSet attrs) {
        this(context, attrs, 0);
    }

    public CustomView(Context context, AttributeSet attrs, int defStyleAttr) {
        super(context, attrs, defStyleAttr);
        TypedArray typedArray = context.getTheme().obtainStyledAttributes(attrs, R.styleable.CustomView, defStyleAttr, 0);
        int n = typedArray.getIndexCount();
        for (int i = 0; i < n; i++) {
            int index = typedArray.getIndex(i);
            switch (index) {
                case R.styleable.CustomView_text:
                    mText = typedArray.getString(index);
                    break;
                case R.styleable.CustomView_textSize:
                    mTextSize = typedArray.getDimensionPixelSize(index, (int) TypedValue.applyDimension(
                            TypedValue.COMPLEX_UNIT_SP, 16, getResources().getDisplayMetrics()));
                    break;
                case R.styleable.CustomView_textColor:
                    mTextColor = typedArray.getColor(index, Color.BLACK);
                    break;
            }
        }
        typedArray.recycle();
        mPaint = new Paint();
        mPaint.setTextSize(mTextSize);
    }
3.重写onMeasure方法
    @Override
    protected void onMeasure(int widthMeasureSpec, int heightMeasureSpec) {
        int widthMode = MeasureSpec.getMode(widthMeasureSpec);
        int widthSize = MeasureSpec.getSize(widthMeasureSpec);
        int heightMode = MeasureSpec.getMode(heightMeasureSpec);
        int heightSize = MeasureSpec.getSize(heightMeasureSpec);
        int width;
        int height;
        if (widthMode == MeasureSpec.EXACTLY) {
            width = widthSize;
        } else {
            mPaint.setTextSize(mTextSize);
            float textWidth = mPaint.measureText(mText);
            int desired = (int) (getPaddingLeft() + textWidth + getPaddingRight());
            width = desired;
        }

        if (heightMode == MeasureSpec.EXACTLY) {
            height = heightSize;
        } else {
            mPaint.setTextSize(mTextSize);
            Paint.FontMetrics fontMetrics = mPaint.getFontMetrics();
            float textHeight = fontMetrics.bottom - fontMetrics.top;
            int desired = (int) (getPaddingTop() + textHeight + getPaddingBottom());
            height = desired;
        }
        setMeasuredDimension(width, height);
    }
4.重写onDraw方法
@Override
protected void onDraw(Canvas canvas) {
mPaint.setColor(Color.YELLOW);
canvas.drawRect(0, 0, getMeasuredWidth(), getMeasuredHeight(), mPaint);
mPaint.setColor(mTextColor);
float x = getWidth() / 2 - mPaint.measureText(mText) / 2;
Paint.FontMetrics fontMetrics = mPaint.getFontMetrics();
float y = getHeight() / 2 - fontMetrics.bottom+ (fontMetrics.bottom- fontMetrics.top) / 2;
canvas.drawText(mText, x, y, mPaint);
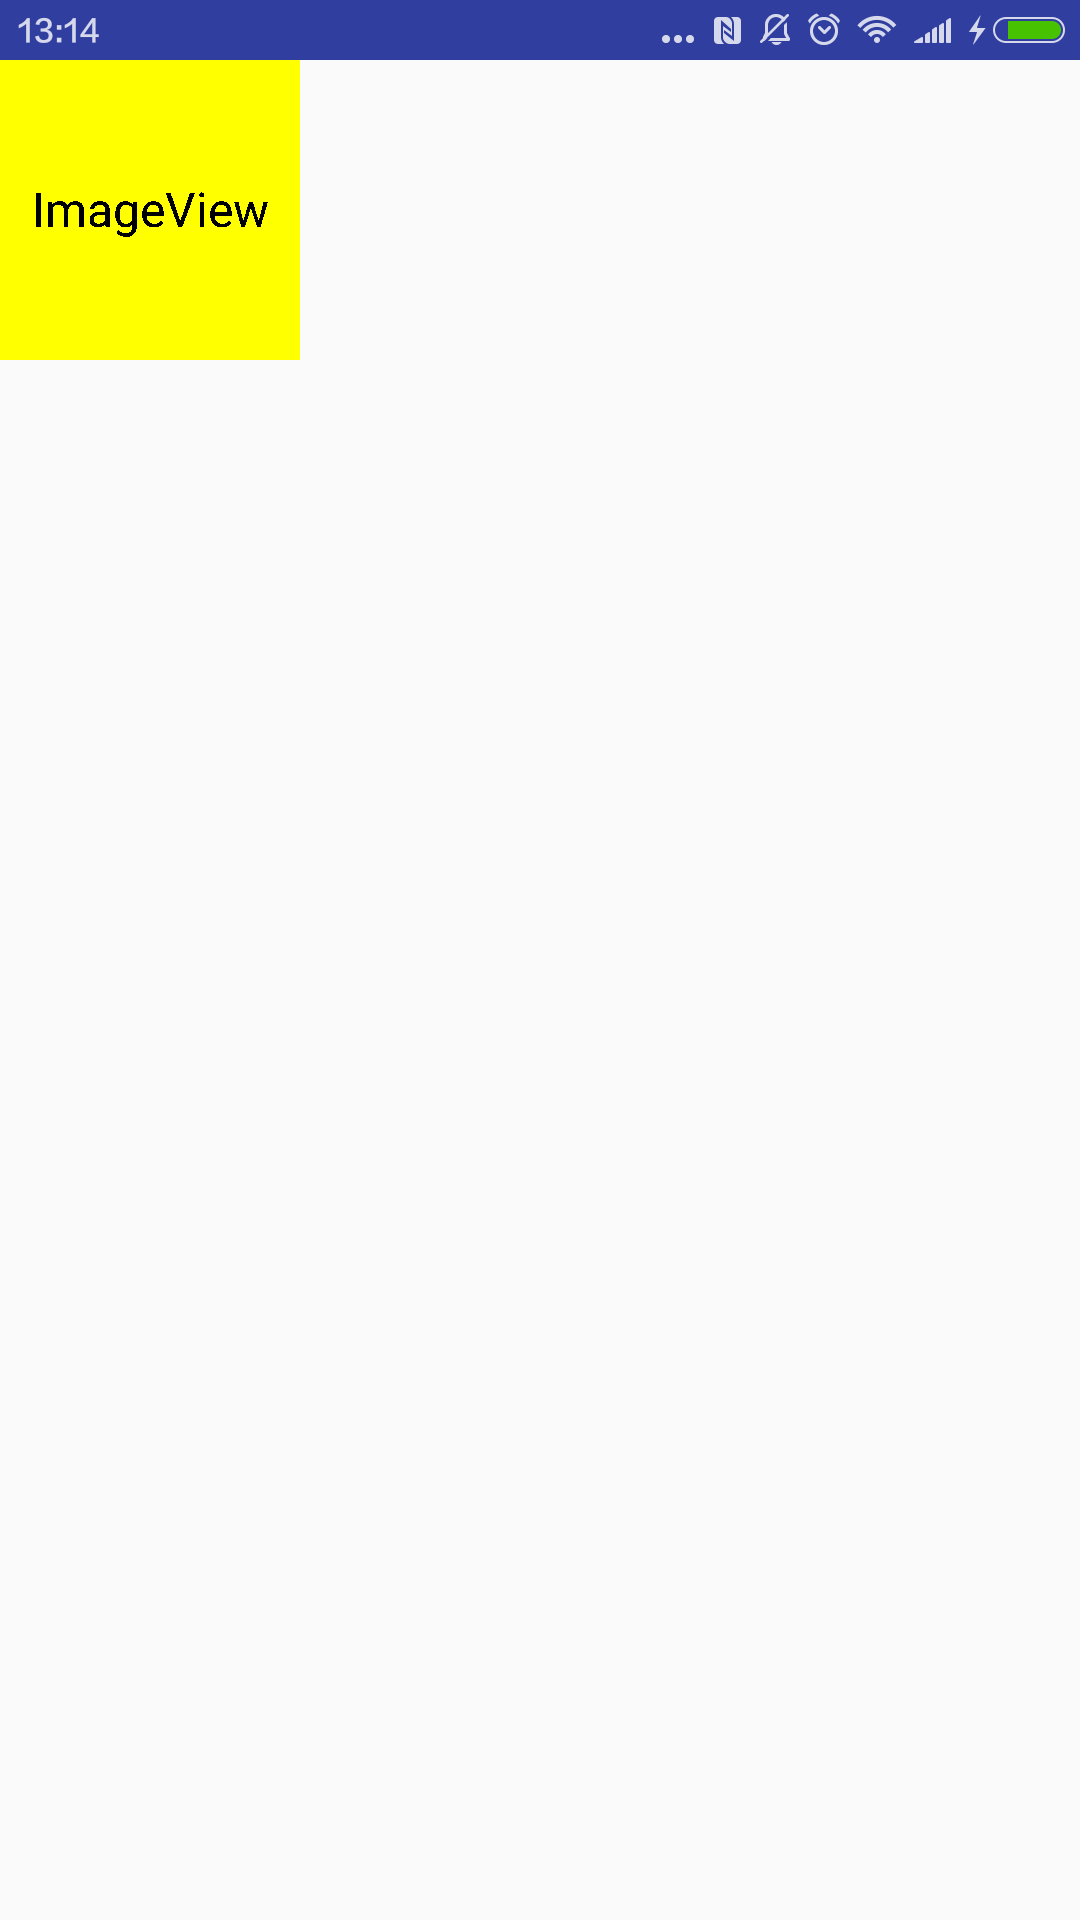
}这样一个自定义View就完成了,下面我们可以在布局文件中去使用这个自定义View
<RelativeLayout xmlns:android="http://schemas.android.com/apk/res/android"
    xmlns:app="http://schemas.android.com/apk/res-auto"
    android:layout_width="match_parent"
    android:layout_height="match_parent"
    >

    <maqing.customviewdemo.CustomView
        android:id="@+id/customView"
        android:layout_width="wrap_content"
        android:layout_height="wrap_content"
        app:text="ImageView"
        app:textColor="#000000"
        app:textSize="16sp" />

    </RelativeLayout>
这里要注意的就是使用自定义View的的属性的时候的命名空间:
app:text
app:textColor
app:textSize
在AndroidStudio中自定义属性的命名空间的定义就是:
xmlns:app=”http://schemas.android.com/apk/res-auto”,
是在根布局标签里定义的。
自定义View的效果如下:


 5972
5972

 被折叠的 条评论
为什么被折叠?
被折叠的 条评论
为什么被折叠?
 到【灌水乐园】发言


