


 本文详细介绍了MongoDB的特点和局限性,演示了如何在Spring Boot项目中引入MongoDB依赖,配置数据库,并通过示例代码展示了实体层、DAO层和服务层的实现,最后提供了测试MongoDB的方法。
目录
MongoDB的介绍
(1)
MongoDB是一个高性能的、开源的、无模式的nosql数据库之一,跟Redis的key-value存储类型相比,它是一种文档型的数据库。其将数据存储为一个文档,文件存储格式为BSON(类似于json数据),其字段值可以包含其他文档、数组或者文档数组。
(2)
MongoDB的特性:
1)面向集合存储,易于存储对象类型的数据。
2)支持动态查询。
3)支持赋值和故障恢复。
4)文件存储格式为BSON(一种JSON数据的扩展)
(3)
MongoDB的缺陷:
1)不能建立实体关系。
2)没有事务管理机制。
pom.xml文件中引入依赖
<dependency>
    <groupId>org.springframework.boot</groupId>
    <artifactId>spring-boot-starter-data-mongodb</artifactId>
</dependency>
application.yml配置文件
spring:
  data:
#   mongodb数据库配置
    mongodb:
#    MongoDB的host地址
      host: 127.0.0.1
#    MongoDB数据库默认端口27017
      port: 27017
#    连接MongoDB数据库的数据库名
项目中使用MongoDB
(1)实体层
package com.example.demo.entity;

public class Attachment {

    private Integer id;

    private Integer userId;

    private String fileName;

    public Attachment() {
    }

    public Attachment(Integer id, Integer userId, String fileName) {
        this.id = id;
        this.userId = userId;
        this.fileName = fileName;
    }

    public Integer getId() {
        return id;
    }

    public void setId(Integer id) {
        this.id = id;
    }

    public Integer getUserId() {
        return userId;
    }

    public void setUserId(Integer userId) {
        this.userId = userId;
    }

    public String getFileName() {
        return fileName;
    }

    public void setFileName(String fileName) {
        this.fileName = fileName;
    }
}
(2)dao层
package com.example.demo.dao;

import com.example.demo.entity.Attachment;
import org.springframework.data.mongodb.repository.MongoRepository;

public interface AttachmentRepository extends MongoRepository<Attachment,String> {

}
(3)service层及service的实现层
1)
package com.example.demo.service;

import com.example.demo.entity.Attachment;

public interface AttachmentService {

    Attachment saveAttachment(Attachment attachmentment);
}
2)
package com.example.demo.service.impl;

import com.example.demo.dao.AttachmentRepository;
import com.example.demo.entity.Attachment;
import com.example.demo.service.AttachmentService;
import org.springframework.stereotype.Service;

import javax.annotation.Resource;

@Service
public class AttachementServiceImpl implements AttachmentService {
    @Resource
    private AttachmentRepository attachmentRepository;

    @Override
    public Attachment saveAttachment(Attachment attachmentment) {
        return attachmentRepository.save(attachmentment);
    }
}
测试MongoDB
package com.example.demo;
import com.example.demo.entity.Attachment;
import com.example.demo.service.AttachmentService;
import org.junit.jupiter.api.Test;
import org.springframework.boot.test.context.SpringBootTest;
import javax.annotation.Resource;
@SpringBootTest
class DemoApplicationTests {
@Resource
private AttachmentService attachmentService;
@Test
public void testMongodb(){
Attachment attachment = new Attachment(1,1,"测试文件.doc");
attachmentService.saveAttachment(attachment);
}
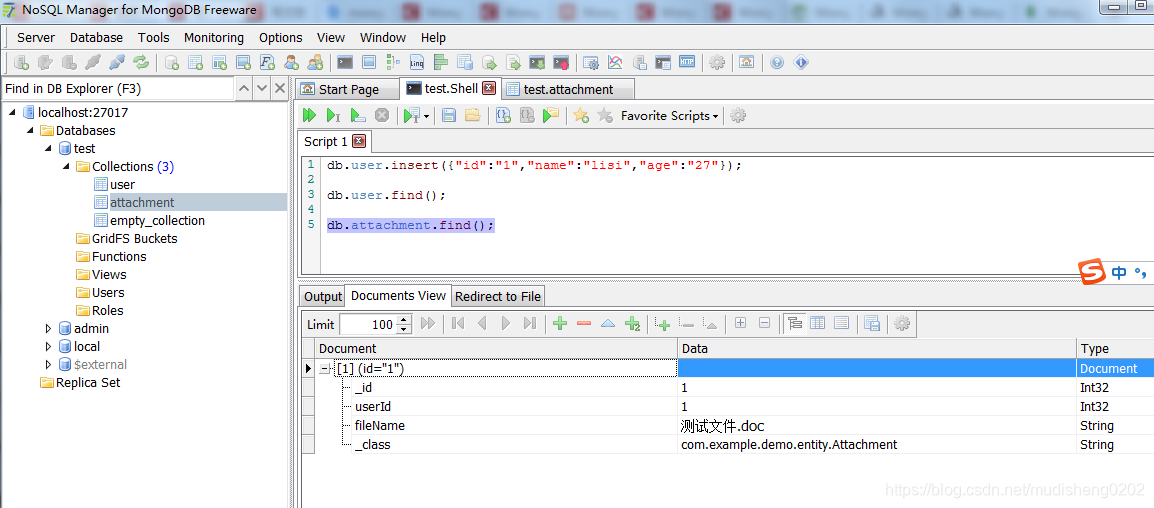
}在springboot的测试类中运行testMongodb方法,然后在NOSQL Manager for MongoDB Freeware下找到数据库test,然后在shell中运行“db.attachment.find()”,即可查找到刚才插入的数据,具体可见下图。


 4054
4054

 被折叠的 条评论
为什么被折叠?
被折叠的 条评论
为什么被折叠?
 到【灌水乐园】发言


