


 文章讲述了在Ubuntu-18.04系统上使用deepspeed进行模型训练时遇到的CUDA_HOME错误,通过安装CUDAToolkit和配置环境变量解决了问题。此外,还提到当使用超过2张GPU时,由于BIOS的PCI访问控制服务导致卡死,通过设置NCCL_P2P_DISABLE环境变量解决了此问题。最后,文章提到了安装cudnn的步骤。
踩坑1:服务器只装了 CUDA Driver 没装 CUDA Toolkit
系统:Ubuntu-18.04
用 deepspeed 跑百亿模型训练时,报关于 CUDA_HOME 的错误。
AssertionError: CUDA_HOME does not exist, unable to compile CUDA op(s)
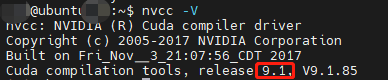
执行 echo $CUDA_HOME 和 nvcc -V 发现没装 cuda(只装了显卡驱动因此 nvidia-smi 执行没问题,而 torch.cuda.is_available() 返回 True 是因为 pip install 环境时,cudatoolkit 之类的已经装到了 python 环境里)。
于是按提示执行 sudo apt install nvidia-cuda-toolkit,这个命令不会给你把 cuda 装到 /usr/local/cuda,而是分散到很多地方,而且装的是 9.1 版本,跟 deepspeed 环境支持版本不兼容:
因此找运维看看能不能给装个 cuda 11.3,于是运维甩来 nvidia 官网的安装命令(来自这个链接):
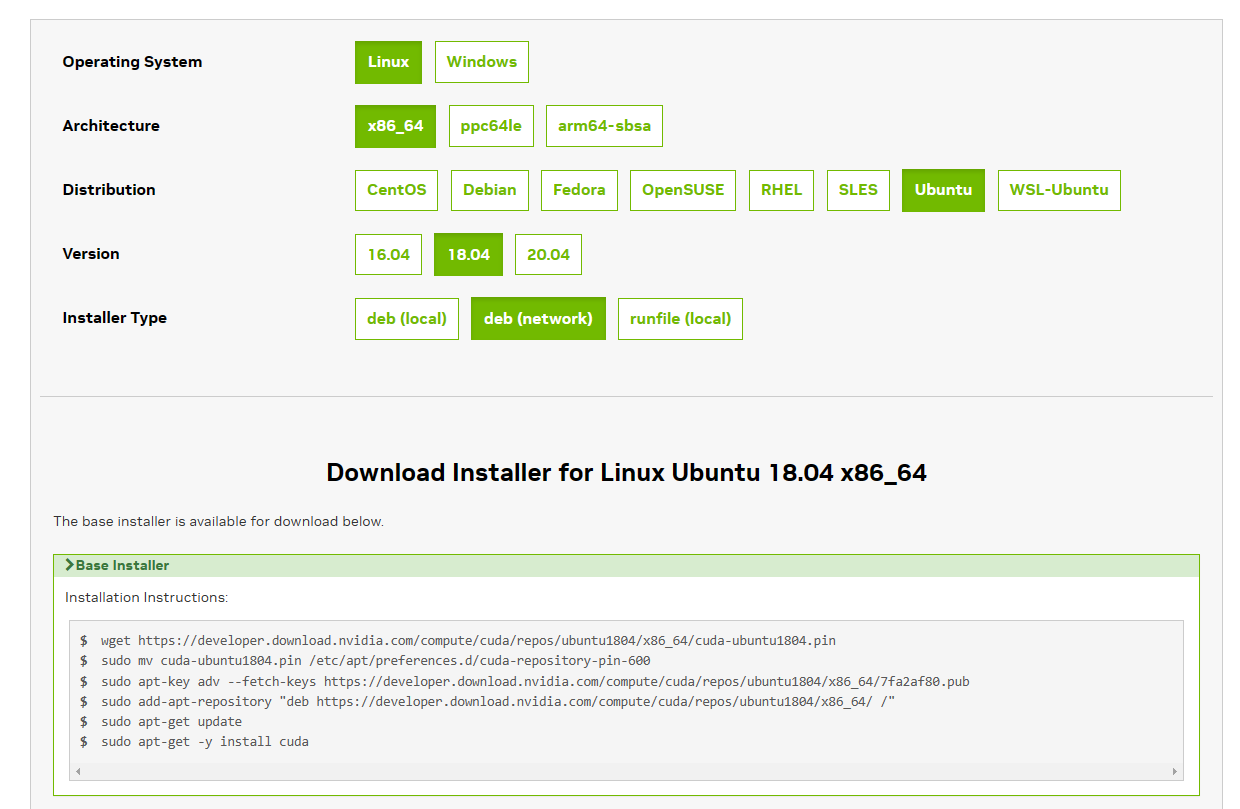
然而,前两种安装方式(deb)都遇到问题(要么是 apt-key 那步公钥问题,要么最后一步报错)
$ sudo apt-get -y install cuda

Reading package lists... Done
Building dependency tree
Reading state information... Done
Some packages could not be installed. This may mean that you have
requested an impossible situation or if you are using the unstable
distribution that some required packages have not yet been created
or been moved out of Incoming.
The following information may help to resolve the situation:

The following packages have unmet dependencies:
 cuda : Depends: cuda-12-1 (>= 12.1.1) but it is not going to be installed
E: Unable to correct problems, you have held broken packages.
于是用runfile方式本地安装成功!执行:
$ wget https://developer.download.nvidia.com/compute/cuda/11.3.0/local_installers/cuda_11.3.0_465.19.01_linux.run
$ # wget https://developer.download.nvidia.com/compute/cuda/11.4.0/local_installers/cuda_11.4.0_470.42.01_linux.run
$ sudo sh cuda_11.3.0_465.19.01_linux.run
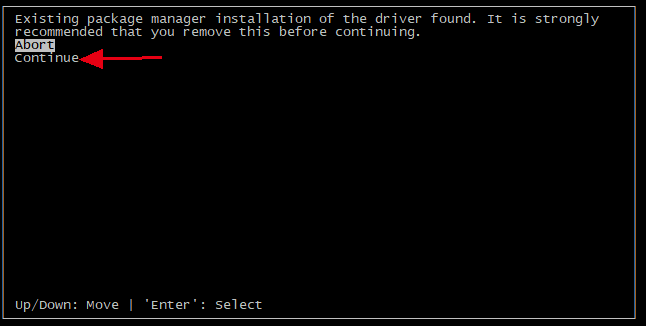
安装时提示检测到装了驱动,直接选continue,在下一步取消选择 driver 那项,只选 cuda toolkit 的相关那些进行安装(参考资料)
安装完后,输出如下:
===========
= Summary =
===========
Driver: Not Selected
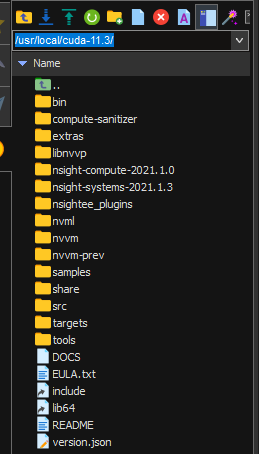
Toolkit: Installed in /usr/local/cuda-11.3/
Samples: Installed in /u01/isi/, but missing recommended libraries
Please make sure that
- PATH includes /usr/local/cuda-11.3/bin
- LD_LIBRARY_PATH includes /usr/local/cuda-11.3/lib64, or, add /usr/local/cuda-11.3/lib64 to /etc/ld.so.conf and run ldconfig as root
To uninstall the CUDA Toolkit, run cuda-uninstaller in /usr/local/cuda-11.3/bin
***WARNING: Incomplete installation! This installation did not install the CUDA Driver. A driver of version at least 465.00 is required for CUDA 11.3 functionality to work.
To install the driver using this installer, run the following command, replacing <CudaInstaller> with the name of this run file:
sudo <CudaInstaller>.run --silent --driver
Logfile is /var/log/cuda-installer.log
此时,/usr/local/cuda-11.3/ 成功出现。
最后按提示配环境变量(没用sudo用户配,配的个人用户)。在 ~/.bashrc 中追加( :$PATH 的含义是追加到环境变量 $PATH 的末尾,最后 LD_LIBRARY_PATH 那行非必要,我是因为不加的话 deepspeed 报错才加上):
export PATH=/usr/local/cuda-11.3/bin:$PATH
export LD_LIBRARY_PATH=/usr/local/cuda-11.3/lib64:$LD_LIBRARY_PATH
export CUDA_HOME=/usr/local/cuda-11.3
export LD_LIBRARY_PATH=/u01/xxxxxxx/miniconda3/envs/xxxx/lib/python3.8/site-packages/nvidia/cublas/lib/:$LD_LIBRARY_PATH
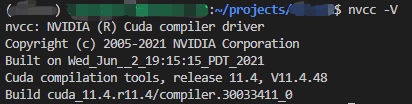
此时执行 nvcc -V 就正常了!(其实后面又换了个11.4的版本,步骤一样)
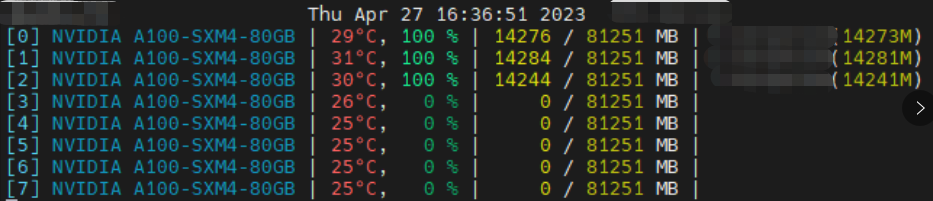
踩坑2:超过2张卡就直接卡住不动 且显存占用100%
不管是跑 deepspeed 还是只用 python -m torch.distributed.launch --nproc_per_node 4 train.py 跑数据并行,单卡或者两卡都没事,只要大于3卡,直接卡死,而且显存占用一直100%。
折磨了大半天,一篇知乎文章拯救了我。根据文章,是由于BIOS里IO虚拟化默认启动了PCI访问控制服务(ACS)导致GPU间无法直接通过P2P方式通信。最快的方案,执行之前添加环境变量:
export NCCL_P2P_DISABLE=1
执行命令训练百亿模型实验,成功。
export TOKENIZERS_PARALLELISM=false
export NCCL_P2P_DISABLE=1
deepspeed --num_gpus=8 \
    --module training.trainer \
    --data-path data/train_20230426.json \
    --input-model checkpoints/xxx \
    --deepspeed config/stage2.json \
    --epochs 3 \
    --local-output-dir results \
    --per-device-train-batch-size 2 \
    --per-device-eval-batch-size 2 \
    --logging-steps 5 \
    --save-steps 100 \
    --save-total-limit 10 \
    --eval-steps 100 \
    --warmup-steps 100 \
    --test-size 500 \
    --lr 2e-5 \
    --seed 515
踩坑3:安装cudnn
发现cudnn也没装,从官网登陆下载后执行:
sudo dpkg -i cudnn-local-repo-ubuntu1804-8.4.0.27_1.0-1_amd64.deb


 4万+
4万+

 被折叠的 条评论
为什么被折叠?
被折叠的 条评论
为什么被折叠?
 到【灌水乐园】发言


