


目录
一、了解ArkTS以及华为Serverless服务
ArkTS 是华为发布的最新的HarmonyOS 系统的主力开发语言(框架)。
它提供了声明式UI、状态管理等相应的能力,配合ArkUI组件库,你可以更简洁,高效的开发出
HarmonyOS APP。
在语言上,TypeScript是JavaScript的超集,ArkTS则是TypeScript的超集,所以ArkTs也是
一种静态类型绑定语言,所有数据的类型都必须在编译时确定。如果你之前学过JavaScript或者
TypeScript,那么在语法上,你可以很容易的过度到ArkTS。[参考指南]
Serverless 是华为推出的云开发服务,帮助开发者统一构建和管理后端服务与云资源。
Serverless提供的服务有云认证服务、云数据库、云存储等。
较传统App开发,我们不再需要开发后端服务接口。例如认证服务,借助Serverless SDK,
我们只需要编写很少的代码就可以实现认证功能(注册,登陆,登出,注销),而不必关心Serverless背后是如何实现的。[参考指南]
本系列带来了最新的ArkTS结合华为Serverless服务实现用户注册,登陆,登出功能。
二、功能介绍
1.Serverless配置
2.用户注册
Serverless认证服务支持Email验证码(密码)注册登陆,手机号验证码(密码)注册登陆,匿名
登陆,第三方登陆(微信、QQ、微博等) ,自定义登陆等等。这里我们使用Email验证码(密码)来
实现注册功能。
Email验证码发送功能,点击验证码发送按钮,会自动调用邮件服务器向填写的Email地址发
送一份注册认证邮件,其中包括6位验证码,通过此验证码可以完成注册功能。
验证码发送按钮点击时的动画效果。
用户注册功能。
3 用户登陆
根据Email和注册时填写的密码登陆。
4 页面展示用户信息
登陆后在页面显示用户UUID或者名字
5 用户登出
清除认证信息并登出。
6 其他功能
正则表达式验证Email格式以及密码长度。
Email地址,用户密码,验证码输入错误时红色标注提醒,并禁用注册或登录按钮。
三、功能实现
1.开发之前的Serverless配置
# 选择平台,选择 APP(HarmonyOS),是否元服务,选择是。
# 注意创建应用时包名上架后无法更改,请确认与发布软件包的包名一致,可以是唯一域名
反转,比如cc.myspring2.serverless
1)创建Serverless项目与应用。[参考指南]
2)开通认证服务,这里只需要启用邮箱地址和匿名帐号。[参考指南]
3)获取agconnect-services.json文件。[参考指南]
Tip:agconnect-services.json文件用来标识开发者身份。
# 使用DevEco-Studio创建项目时,Bundle name要与创建应用时包名一致。
4)集成SDK。[参考指南]
Tip:EntryAbility 用来管理UIAbility的生命周期,包括:创建时onCreate(),切换到前台触发onForeground(),切换到前台触发onBackground(),以及销毁onDestroy()。
2.用户注册
1)用户注册页面

UI组件布局
build() {
    // 容器列,每列间隔10虚拟像素
    Column({space:10}) {
      // 插入一行
      Row(){
        Text("用户注册")
          .fontSize(28)
      }
      // 插入一行
      Row(){
        // Email输入框
        TextInput({placeholder:'请输入Email'})
          .type(InputType.Email)
          .width('60%')
          .borderRadius(0)
          .border({width:1,color:'#F5F5F5'})
          .backgroundColor('#FFFFFF')
          .maxLength(36)
      }
      // 插入一行 密码输入
      Row(){
        TextInput({placeholder:'密码不少于5位'})
          .type(InputType.Password)
          .width('60%')
          .borderRadius(0)
          .border({width:1,color:'#F5F5F5'})
          .backgroundColor('#FFFFFF')
          .maxLength(20)
      }
      // 插入一行 再次输入密码
      Row(){
        TextInput({placeholder:'请再次输入密码'})
          .type(InputType.Password)
          .width('60%')
          .borderRadius(0)
          .border({width:1,color:'#F5F5F5'})
          .backgroundColor('#FFFFFF')
          .maxLength(20)
      }
      // 插入一行
      Row(){
        // 行内插入一列,输入验证码
        Column(){
          TextInput({ placeholder: '验证码'})
            .type(InputType.Normal)
            .width('50%')
            .borderRadius(0)
            .border({width:1,color:'#F5F5F5'})
            .backgroundColor('#FFFFFF')
            .maxLength(6)
        }
        // 行内插入一列,点击发送验证码按钮
        Column(){
          // 正则表达式验证email合法性
          Button('发送验证码')
            .type(ButtonType.Normal)
            .width('50%')
            .fontColor('#FF7F00')
            .backgroundColor('#FFFFFF')
            .border({width:1,color:'#FF7F00'})
        }
      }.width('60%')
      // 插入一行,注册按钮
      Row({space:10}){
        Button("注册")
          .type(ButtonType.Normal)
          .backgroundColor('#FF7F00')
      }
    }
    .height('100%')
    .width('100%')
    // 对齐方式
    .justifyContent(FlexAlign.Center)
  }
2)Email验证码发送功能
a)增加@State状态来保存验证码功能相关状态。
  // 定时器
  @State intervalId: number = -123456;
  // 定时倒计时
  @State timer: number = 60;
  // 验证码
  @State verificationCode: string = ''
  // email
  @State email: string = ''
b)修改验证码输入框UI组件代码,绑定状态变量,并增加onChange监听。
     // 行内插入一列,输入验证码
     Column(){
        TextInput({ placeholder: '验证码', text: this.verificationCode })
          .type(InputType.Normal)
          .width('50%')
          .borderRadius(0)
          .border({width:1,color:'#F5F5F5'})
          .backgroundColor('#FFFFFF')
          .maxLength(6)
          .onChange(value=>{
            this.verificationCode = value
          })
      }
c)修改验证码发送按钮UI组件代码,绑定状态变量,并增加onClick监听。
      // 行内插入一列,点击发送验证码按钮
      Column(){
        // 如果timer倒计时结束,显示'发送验证码',否则显示倒计时
        Button(this.timer === 60 ? '发送验证码' : this.timer.toString())
          .type(ButtonType.Normal)
          .width('50%')
          .fontColor('#FF7F00')
          .backgroundColor('#FFFFFF')
          .border({width:1,color:'#FF7F00'})
            // 可以封装成方法调用
            // 发送验证码
          .onClick(()=>{
            // 这里怎么触发email框提示?
            this.onGetCodeButtonClicked()
          })
      }
d)处理逻辑代码。
  /**
   * 发送验证码按钮点击事件
   */
  async onGetCodeButtonClicked() {
    // timer === 60 表示上一次发送验证码倒计时结束
    if (this.timer === 60) {
      // 倒计时动画
      this.startTimer();
      // 调用ServerSDK发送验证码
      cloud.auth().requestVerifyCode({
        // 动作类型
        action: VerifyCodeAction.REGISTER_LOGIN,
        // 语言
        lang: 'zh_CN',
        // 发送间隔
        sendInterval: 60,
        // email发送目标地址以及类型为email验证
        verifyCodeType: {
          email: this.email,
          kind: "email",
        }
      }).then(verifyCodeResult => {
        //验证码申请成功
        console.log( '-----发送验证码成功!-----');
      }).catch(error => {
        //验证码申请失败
        console.log(  '-----发送验证码失败!-----');
        AlertDialog.show({
          title: '异常',
          message: '发送验证码失败!',
          autoCancel: true
        })
      });
    }else{
      // 调用弹出框组件
      AlertDialog.show({
        title: '异常',
        message: '请输入正确的email',
        autoCancel: true
      })
    }
  }
// 定义定时间隔触发器
startTimer(): void {
this.timer = 60;
this.intervalId = setInterval(() => {
console.log(this.timer.toString())
this.timer--;
if (this.timer === 0) {
clearInterval(this.intervalId);
this.timer = 60;
}
}, 1000);
}点击发送验证码按钮后,邮件服务器会发送一封验证邮件到指定邮件地址,包括6位验证码。
3)用户注册功能
a)增加@State状态来保存密码功能相关状态。
  // 密码输入
  @State password: string = ''
  // 再次输入密码
  @State rePassword: string = ''
b)修改密码输入UI组件代码,绑定状态变量,并增加注册按钮onClick监听。
      // 插入一行 密码输入
      Row(){
        TextInput({placeholder:'密码不少于5位'})
          .type(InputType.Password)
          .width('60%')
          .borderRadius(0)
          .border({width:1,color:'#F5F5F5'})
          .backgroundColor('#FFFFFF')
          .maxLength(20)
          .onChange((value)=>{
            this.password = value;
          })
      }
      // 插入一行 再次输入密码
      Row(){
        TextInput({placeholder:'请再次输入密码'})
          .type(InputType.Password)
          .width('60%')
          .borderRadius(0)
          .border({width:1,color:'#F5F5F5'})
          .backgroundColor('#FFFFFF')
          .maxLength(20)
          .onChange((value)=>{
            this.rePassword = value;
          })
      }
// 插入一行,注册按钮
Row({space:10}){
Button("注册")
.type(ButtonType.Normal)
.backgroundColor('#FF7F00')
.onClick(()=>{
this.onAuthButtonClicked()
})
}c)处理逻辑代码。
/**
   * 点击注册
   */
  onAuthButtonClicked() {
    // 调用自定义emailRegister函数
    this.emailRegister(this.email, this.rePassword, this.verificationCode).then(user => {
      // 使用AppStorage存储用户认证数据以便后续使用(应用级状态共享)
      AppStorage.Set<AgUser>('user', user);
      console.log( "Logged in succesfully.");
      // 注册成功后跳转至主页
      router.pushUrl({
        url:"pages/Index"
      })
    }).catch((err) => {
      console.log("Logged in failed " + JSON.stringify(err));
      AlertDialog.show({
        title: '异常',
        message: '注册错误!',
      });
    });
  }
/**
* email用户注册
* @param email
* @param password
* @param verifyCode
* @returns
*/
public async emailRegister(email: string, password: string, verifyCode: string): Promise<AgUser> {
return new Promise((resolve, reject) => {
// 创建email用户
cloud.auth().createUser({
kind: 'email',
email: email,
password: password,//可以给用户设置初始密码。后续可以用密码来登录
verifyCode: verifyCode
}).then(async (ret) => {
//创建帐号成功后,默认已登录
console.log("用户创建完毕并登陆..");
// @ts-ignore
let user = ret.getUser();
// 用户认证扩展信息
let userExtra = await ret.getUser().getUserExtra();
// 创建认证用户实体
let loginRes = new AgUser(
// uuid
user.getUid(),
user.getPhotoUrl(),
user.getPhone(),
user.getEmail(),
// 用户名称
user.getDisplayName(),
userExtra.getCreateTime(),
userExtra.getLastSignInTime())
console.log( '---'+user.getUid()+'---@');
// 返回认证用户
resolve(loginRes);
}).catch(error => {
//创建用户失败
console.log( "Error: ", error);
reject(error);
})
})
}d)AgUser认证实体类定义
export class AgUser {
  uid: String;
  photoUrl: String;
  phone: String;
  email: String;
  displayName: String;
  registerDate: String;
  lastLogin: String;

  constructor(uid: String ="", photoUrl: String = "", phone: String= "", email: String= "", displayName: String="", registerDate: String="", lastLogin: String="") {
    this.uid = uid;
    this.photoUrl = photoUrl;
    this.phone = phone;
    this.email = email;
    this.displayName = displayName;
    this.registerDate = registerDate;
    this.lastLogin = lastLogin;
  }

  getUid(): String {
    return this.uid;
  }

  getPhone(): String {
    return this.phone;
  }

  getEmail(): String {
    return this.email;
  }

  getDisplayName(): String {
    return this.displayName;
  }

  getPhotoUrl(): String {
    return this.photoUrl;
  }

  getRegisterDate(): String {
    return this.registerDate;
  }

  getLastLogin(): String {
    return this.lastLogin;
  }
}
用户注册页面完整代码
/**
 * 邮箱注册 Serverless 认证功能
 */

// 导入路由器组件
import router from '@ohos.router'
// 导入serverless认证组件
import cloud, { VerifyCodeAction } from '@hw-agconnect/cloud';
// email正则验证以及密码验证
import { isEmail,isRightPassword} from '../../common/auth/EmailReg'
// 导入用户认证信息类
import { AgUser } from '../../services/Auth';
// 导入日志组件
import { Log } from '../../common/Log';

const TAG = "[AGCAuth]";

@Entry
@Component
struct RegisterByEmail {
  // 定时器
  @State intervalId: number = -123456;
  // email输入
  @State email: string = ''
  // 密码输入
  @State password: string = ''
  // 再次输入密码
  @State rePassword: string = ''
  // 验证码
  @State verificationCode: string = ''
  // 定时倒计时
  @State timer: number = 60;
  // 是否可以登陆
  @State canLogin: boolean = true;

  // email校验
  @State emailTipColor: string = '#F5F5F5'
  @State emailRightColor: string = '#F5F5F5'
  @State emailWrongColor: string = '#FF7F00'

  // 输入密码校验
  @State passwordTipColor: string = '#F5F5F5'
  @State passwordRightColor: string = '#F5F5F5'
  @State passwordWrongColor: string = '#FF7F00'

  // 再次输入密码校验
  @State rPasswordTipColor: string = '#F5F5F5'
  @State rPasswordRightColor: string = '#F5F5F5'
  @State rPasswordWrongColor: string = '#FF7F00'

  // 定时间隔
  startTimer(): void {
    this.timer = 60;
    this.intervalId = setInterval(() => {
      console.log(this.timer.toString())
      this.timer--;
      if (this.timer === 0) {
        clearInterval(this.intervalId);
        this.timer = 60;
      }
    }, 1000);
  }

  /**
   * 发送验证码
   */
  async onGetCodeButtonClicked() {
    if (isEmail(this.email) && this.timer === 60) {
      this.startTimer();
      // 调用ServerSDK发送验证码
      cloud.auth().requestVerifyCode({
        // 动作类型
        action: VerifyCodeAction.REGISTER_LOGIN,
        // 语言
        lang: 'zh_CN',
        // 发送间隔
        sendInterval: 60,
        // email发送目标地址以及类型为email验证
        verifyCodeType: {
          email: this.email,
          kind: "email",
        }
      }).then(verifyCodeResult => {
        //验证码申请成功
        Log.info(TAG, '-----发送验证码成功!-----');
      }).catch(error => {
        //验证码申请失败
        Log.info(TAG, '-----发送验证码失败!-----');
        AlertDialog.show({
          title: '异常',
          message: '发送验证码失败!',
          autoCancel: true
        })
      });
    }else{
      // 调用弹出框组件
      AlertDialog.show({
        title: '异常',
        message: '请输入正确的email',
        autoCancel: true
      })
    }
  }

  /**
   * 是否可以点击注册
   * @returns
   */
  canAuthorize(): boolean {
    // 正则表达式验证邮箱和密码是否合法
    return isEmail(this.email) && isRightPassword(this.password,this.rePassword)
    && this.verificationCode !== '';
  }

  /**
   * 点击注册
   */
  onAuthButtonClicked() {
    // 登陆认证
    this.canLogin = false;
    // 调用自定义emailRegister函数
    this.emailRegister(this.email, this.rePassword, this.verificationCode).then(user => {
      // 使用AppStorage存储用户数据 应用级状态共享
      AppStorage.Set<AgUser>('user', user);
      Log.info(TAG, "Logged in succesfully.");
      this.canLogin = true;
      // this.controller?.close(); ?
      // 注册成功后跳转至主页
      router.pushUrl({
        url:"pages/Index"
      })
    }).catch((err) => {
      this.canLogin = true;
      Log.error(TAG, "Logged in failed " + JSON.stringify(err));
      AlertDialog.show({
        title: '异常',
        message: '注册错误!',
      });
    });
  }

  /**
   * email用户注册
   * @param email
   * @param password
   * @param verifyCode
   * @returns
   */
  public async emailRegister(email: string, password: string, verifyCode: string): Promise<AgUser> {
    return new Promise((resolve, reject) => {
      // 创建email用户
      cloud.auth().createUser({
        kind: 'email',
        email: email,
        password: password,//可以给用户设置初始密码。后续可以用密码来登录
        verifyCode: verifyCode
      }).then(async (ret) => { //理解async关键字作用
        //创建帐号成功后,默认已登录
        Log.info(TAG, "用户创建完毕并登陆..");
        // @ts-ignore
        let user = ret.getUser();
        // 用户认证扩展信息
        let userExtra = await ret.getUser().getUserExtra();

        // 创建认证用户实体
        let loginRes = new AgUser(
          // uuid
          user.getUid(),
          user.getPhotoUrl(),
          user.getPhone(),
          user.getEmail(),
          // 用户名称
          user.getDisplayName(),
          userExtra.getCreateTime(),
          userExtra.getLastSignInTime())

          Log.info(TAG, '---'+user.getUid()+'---@');

          resolve(loginRes);
      }).catch(error => {
        //创建用户失败
        Log.error(TAG, "Error: ", error);
        reject(error);
      })

    })
  }

  build() {
    // 容器列,每列间隔10虚拟像素
    Column({space:10}) {
      // 插入一行
      Row(){
        Text("用户注册")
          .fontSize(28)
      }
      // 插入一行
      Row(){
        // Email输入框
        TextInput({placeholder:'请输入Email'})
          .type(InputType.Email)
          .width('60%')
          .borderRadius(0)
          .border({width:1,color:this.emailTipColor})
          .backgroundColor('#FFFFFF')
          .maxLength(36)
          .onChange((value)=>{
            this.email = value;
            if(isEmail(this.email)){
              this.emailTipColor = this.emailRightColor
            }
          })
            // 失去焦点时错误提示
          .onBlur(()=>{
            if(isEmail(this.email)){
              this.emailTipColor = this.emailRightColor
            }else{
              this.emailTipColor = this.emailWrongColor
            }
          })
      }
      // 插入一行 密码输入
      Row(){
        TextInput({placeholder:'密码不少于5位'})
          .type(InputType.Password)
          .width('60%')
          .borderRadius(0)
          .border({width:1,color:this.passwordTipColor})
          .backgroundColor('#FFFFFF')
          .maxLength(20)
          .onChange((value)=>{
            this.password = value;
            if(this.password.length>=5){
              this.passwordTipColor = this.passwordRightColor
            }
          })
            // 失去焦点时错误提示
          .onBlur(()=>{
            if(this.password.length<5){
              this.passwordTipColor = this.passwordWrongColor
            }else{
              this.passwordTipColor = this.passwordRightColor
            }
          })
      }
      // 插入一行 再次输入密码
      Row(){
        TextInput({placeholder:'请再次输入密码'})
          .type(InputType.Password)
          .width('60%')
          .borderRadius(0)
          .border({width:1,color:this.rPasswordTipColor})
          .backgroundColor('#FFFFFF')
          .maxLength(20)
          .onChange((value)=>{
            this.rePassword = value;
            if(this.rePassword===this.password){
              this.rPasswordTipColor = this.rPasswordRightColor
            }
          })
          // 失去焦点时错误提示
          .onBlur(()=>{
            if(this.rePassword!=this.password){
              this.rPasswordTipColor = this.rPasswordWrongColor
            }else{
              this.rPasswordTipColor = this.rPasswordRightColor
            }
        })
      }
      // 插入一行
      Row(){
        // 行内插入一列,输入验证码
        Column(){
          TextInput({ placeholder: '验证码', text: this.verificationCode })
            .type(InputType.Normal)
            .width('50%')
            .borderRadius(0)
            .border({width:1,color:'#F5F5F5'})
            .backgroundColor('#FFFFFF')
            .maxLength(6)
            .onChange(value=>{
              this.verificationCode = value
            })
        }
        // 行内插入一列,点击发送验证码按钮
        Column(){
          // 正则表达式验证email合法性
          Button(this.timer === 60 ? '发送验证码' : this.timer.toString())
            .type(ButtonType.Normal)
            .width('50%')
            .fontColor('#FF7F00')
            .backgroundColor('#FFFFFF')
            .border({width:1,color:'#FF7F00'})
            // 可以封装成方法调用
            // 发送验证码
            .onClick(()=>{
              // 这里怎么触发email框提示?
              this.onGetCodeButtonClicked()
            })
        }
      }.width('60%')
      // 插入一行,注册按钮
      Row({space:10}){
        Button("注册")
          .type(ButtonType.Normal)
          .backgroundColor('#FF7F00')
          // 透明度?
          .opacity(this.canLogin ? 1 : 0.5)
            // 正则表达式验证email合法性
          .enabled(this.canAuthorize()&&this.verificationCode.length>5&& this.canLogin)
          .onClick(()=>{
            // console.log("表单输入-----")
            // console.log(this.email)
            // console.log(this.verificationCode)
            // console.log("-----")
            this.onAuthButtonClicked()
          })
      }
    }
    .height('100%')
    .width('100%')
    .justifyContent(FlexAlign.Center)
  }
}
3.用户登陆
1)用户登录页面

UI组件布局
  build() {
    Column({space:10}) {

      Row(){
        Text("Email登陆")
          .fontSize(28)
      }
      Row(){
        TextInput({placeholder:'请输入Email'})
          .type(InputType.Email)
          .width('60%')
          .borderRadius(0)
          .border({width:1,color:'#F5F5F5'})
          .backgroundColor('#FFFFFF')
          .maxLength(36)
      }
      Row(){
        TextInput({placeholder:'请输入密码'})
          .type(InputType.Password)
          .width('60%')
          .borderRadius(0)
          .border({width:1,color:'#F5F5F5'})
          .backgroundColor('#FFFFFF')
          .maxLength(20)
      }
      Row({space:10}){
        Button("登陆")
          .type(ButtonType.Normal)
          .backgroundColor('#FF7F00')

        Button("注册")
          .type(ButtonType.Normal)
          .backgroundColor('#336699')
      }
      Row(){
        Button("匿名登陆")
          .type(ButtonType.Normal)
          .border({width:1,color:'#F5F5F5'})
          .backgroundColor('#FFFFFF')
          .fontColor('#000000')
      }
    }
    .height('100%')
    .width('100%')
    .justifyContent(FlexAlign.Center)
  }
2)用户登录功能
a)增加@State状态来保存密码功能相关状态。
@State email: string = ''
@State password: string = ''
b)修改登录按钮代码,并增加onClick监听。
Row({space:10}) {
        Button("登陆")
          .type(ButtonType.Normal)
          .backgroundColor('#FF7F00')
          .onClick(() => {
            this.onLoginButtonClicked()
          })
      }
c)处理逻辑代码。
/**
   * 点击登陆
   */
  onLoginButtonClicked() {
    // 登陆认证
    this.emailLogin(this.email, this.password).then(user => {
      // 使用AppStorage存储用户认证数据以便后续使用(应用级状态共享)
      AppStorage.Set<AgUser>('user', user);
      console.log("Logged in succesfully.");
      router.pushUrl({
        url:"pages/Index"
      })
    }).catch((err) => {
      console.log("Logged in failed " + JSON.stringify(err));
      AlertDialog.show({
        title: '异常',
        message: '登陆失败!',
      });
    });
  }
public async emailLogin(email: string, password: string): Promise<AgUser> {
return new Promise((resolve, reject) => {
// 登陆email用户
cloud.auth().signIn({
autoCreateUser: false,
credentialInfo: {
kind: 'email',
password: this.password,
email: this.email
}
}).then(async (ret) => { // ret <==> user
//登录成功
console.log("用户登陆成功..");
// @ts-ignore
let user = ret.getUser();
let userExtra = await ret.getUser().getUserExtra();
// 创建认证用户实体
let loginRes = new AgUser(
user.getUid(),
user.getPhotoUrl(),
user.getPhone(),
user.getEmail(),
user.getDisplayName(),
userExtra.getCreateTime(),
userExtra.getLastSignInTime())
console.log('---'+user.getUid()+'---l@');
// 返回认证用户
resolve(loginRes);
}).catch(error => {
//登录失败
console.log("Error: ", error);
reject(error);
});
})
}用户登陆页面完整代码
/**
* 登陆 Serverless 认证功能
*/
import router from '@ohos.router'
import cloud from '@hw-agconnect/cloud';
import { isEmail} from '../../common/auth/EmailReg'
import { Log } from '../../common/Log';
import { AgUser } from '../../services/Auth';
const TAG = "[AGCAuth]";
@Entry
@Component
struct LoginByEmail {
// 是否可以登陆
@State canLogin: boolean = true;
@State email: string = ''
@State password: string = ''
// email校验
@State emailTipColor: string = '#F5F5F5'
@State emailRightColor: string = '#F5F5F5'
@State emailWrongColor: string = '#FF7F00'
// 输入密码校验
@State passwordTipColor: string = '#F5F5F5'
@State passwordRightColor: string = '#F5F5F5'
@State passwordWrongColor: string = '#FF7F00'
/**
* 是否可以点击登陆
* @returns
*/
canLoginEmail(): boolean {
return isEmail(this.email) && this.password.length>4
}
public async emailLogin(email: string, password: string): Promise<AgUser> {
return new Promise((resolve, reject) => {
// 登陆email用户
cloud.auth().signIn({
autoCreateUser: false,
credentialInfo: {
kind: 'email',
password: this.password,
email: this.email
}
}).then(async (ret) => { // ret <==> user
//登录成功
Log.info(TAG, "用户登陆成功..");
// @ts-ignore
let user = ret.getUser();
let userExtra = await ret.getUser().getUserExtra();
let loginRes = new AgUser(
user.getUid(),
user.getPhotoUrl(),
user.getPhone(),
user.getEmail(),
user.getDisplayName(),
userExtra.getCreateTime(),
userExtra.getLastSignInTime())
Log.info(TAG, '---'+user.getUid()+'---l@');
resolve(loginRes);
}).catch(error => {
//登录失败
Log.error(TAG, "Error: ", error);
reject(error);
});
})
}
/**
* 点击登陆
*/
onLoginButtonClicked() {
// 登陆认证
this.canLogin = false;
this.emailLogin(this.email, this.password).then(user => {
AppStorage.Set<AgUser>('user', user);
Log.info(TAG, "Logged in succesfully.");
this.canLogin = true;
// this.controller?.close(); ?
router.pushUrl({
url:"pages/Index"
})
}).catch((err) => {
this.canLogin = true;
Log.error(TAG, "Logged in failed " + JSON.stringify(err));
AlertDialog.show({
title: '异常',
message: '登陆失败!',
});
});
}
build() {
Column({space:10}) {
Row(){
Text("Email登陆")
.fontSize(28)
}
Row(){
TextInput({placeholder:'请输入Email'})
.type(InputType.Email)
.width('60%')
.borderRadius(0)
.border({width:1,color:this.emailTipColor})
.backgroundColor('#FFFFFF')
.maxLength(36)
.onChange((value)=>{
this.email = value;
if(isEmail(this.email)){
this.emailTipColor = this.emailRightColor
}
})
.onBlur(()=>{
if(isEmail(this.email)){
this.emailTipColor = this.emailRightColor
}else{
this.emailTipColor = this.emailWrongColor
}
})
}
Row(){
TextInput({placeholder:'请输入密码'})
.type(InputType.Password)
.width('60%')
.borderRadius(0)
.border({width:1,color:this.passwordTipColor})
.backgroundColor('#FFFFFF')
.maxLength(20)
.onChange((value)=>{
this.password = value;
})
}
Row({space:10}){
Button("登陆")
.type(ButtonType.Normal)
.backgroundColor('#FF7F00')
.enabled(this.canLoginEmail())
.onClick(()=>{
this.onLoginButtonClicked()
})
Button("注册")
.type(ButtonType.Normal)
.backgroundColor('#336699')
.onClick(()=>{
router.pushUrl({
url:"pages/auth/RegisterByEmail"
})
})
}
Row(){
Button("匿名登陆")
.type(ButtonType.Normal)
.border({width:1,color:'#F5F5F5'})
.backgroundColor('#FFFFFF')
.fontColor('#000000')
.onClick(()=>{
cloud.auth().signInAnonymously().then(user => {
//匿名登录成功
console.log("匿名登陆成功-----")
console.log(user.getUser().getUid())
console.log(user.getUser().getDisplayName())
console.log("-----")
router.pushUrl({
url:"pages/auth/anonymous/Anonymous",
params:{
src:user.getUser().getUid()
}
})
}).catch(error => {
//匿名登录失败
console.log("匿名登陆失败-----")
console.log("-----")
});
})
}
}
.height('100%')
.width('100%')
.justifyContent(FlexAlign.Center)
}
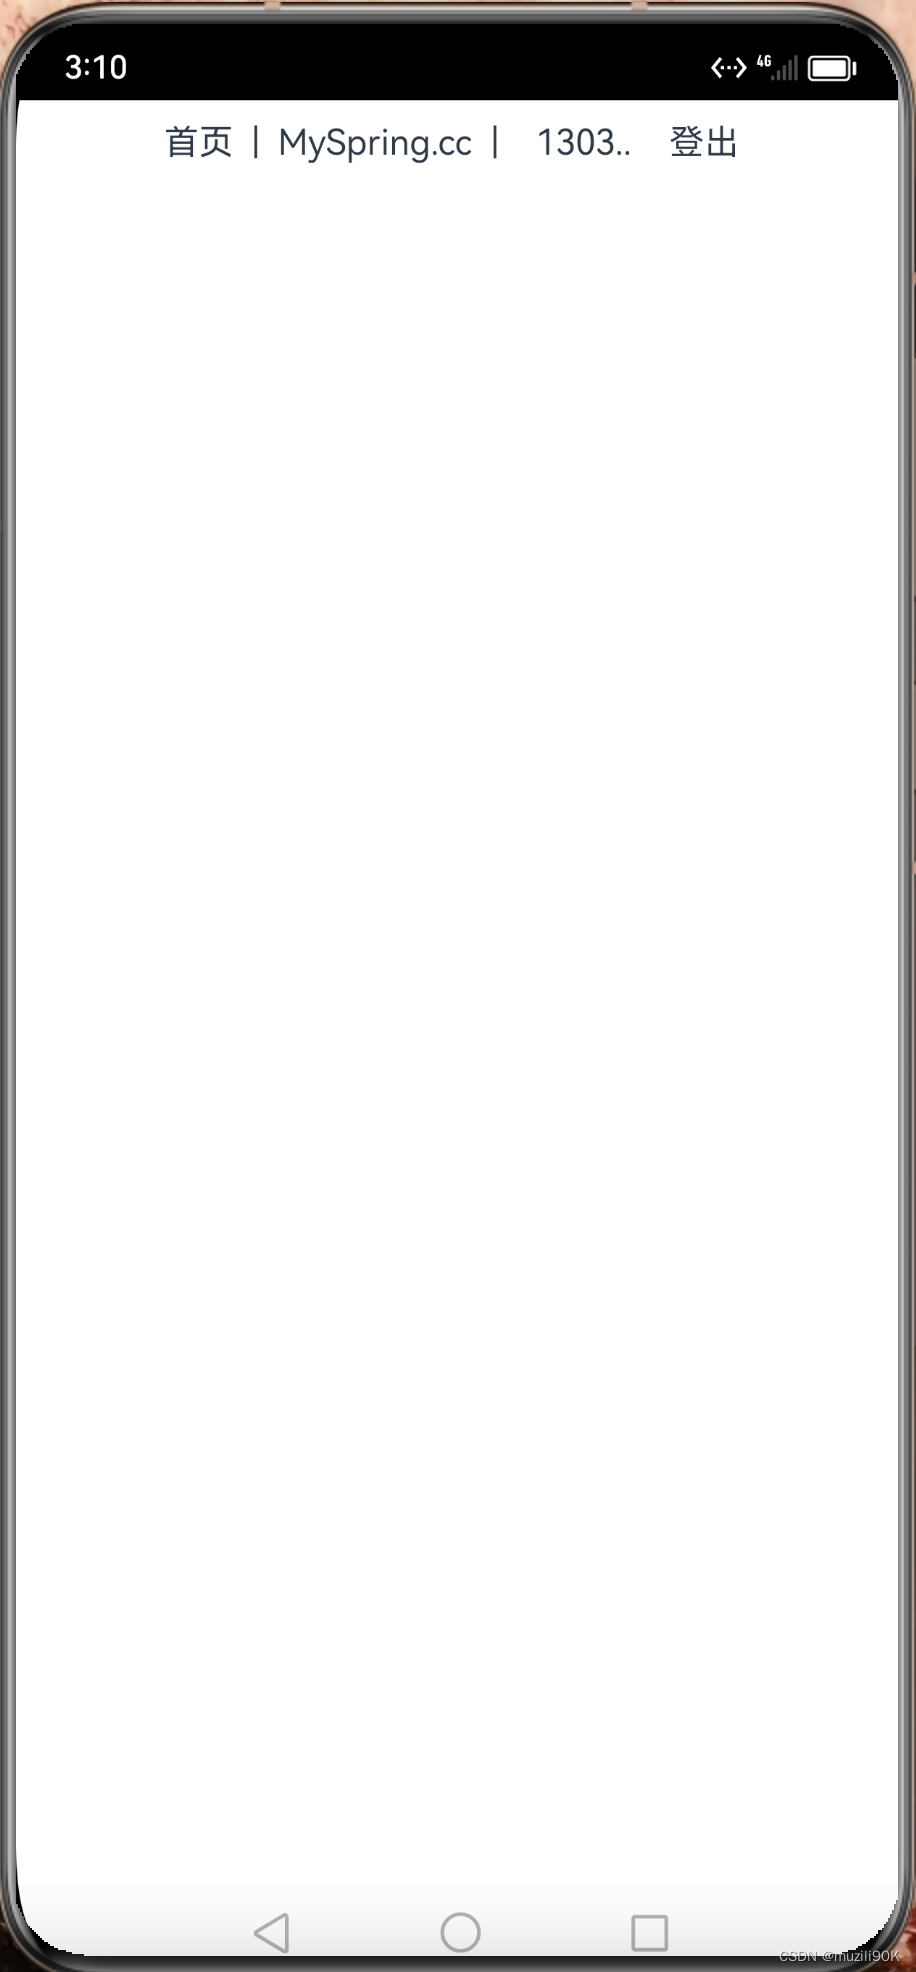
}4.首页展示用户信息
1)首页

UI组件布局
build() {
    Column() {
      Row(){
        Text('首页')
        Text('  |  ')
        Text('MySpring.cc')
        Text('  |  ')
        Text('  登陆  ')
      }.padding(10)
      .width('100%')
      .justifyContent(FlexAlign.Center)
    }
    .height('100%')
  }
2)定义user来接受用户登陆/注册的认证信息
// 状态共享 用户登陆后的认证信息保存在这里
  @StorageLink('user')
  user:AgUser = null
3)如果是登陆/注册成功跳转到首页展示用户信息和登出
  build() {
    Column() {
      Row(){
        Text('首页')
        Text('  |  ')
        Text('MySpring.cc')
        Text('  |  ')
        // 登陆后显示用户名字或者uuid
        if(this.user){
          // 如果有用户名称展示用户名称
          if(this.user.getDisplayName()){
            Text(this.user.getDisplayName()+'')
          // 否则如果有用户uuid展示用户名称
          }else if(this.user.getUid()){
            Text(this.user.getUid()+'')
          // 如果没有登陆用户,显示'登陆'
          }else{
            Text('  登陆  ')
              .onClick(()=>{
                router.pushUrl({
                  url:"pages/auth/LoginByEmail"
                })
              })
          }
        //如果user为空
        }else{
          Text('  登陆  ')
            .onClick(()=>{
              router.pushUrl({
                url:"pages/auth/LoginByEmail"
              })
            })
        }

        // 如果user认证通过
        if(this.user){
          if(this.user.getUid()){
            Text('  登出  ')
          }
        }

      }.padding(10)
      .width('100%')
      .justifyContent(FlexAlign.Center)
    }
    .height('100%')
  }
5.用户登出
a)登出按钮增加onClick监听
    if(this.user){
          if(this.user.getUid()){
            Text('  登出  ')
              .onClick(()=>{
                this.onLogoutButtonClicked()
              })
          }
        }
b)处理逻辑代码
  // 点击登出
  async onLogoutButtonClicked() {
    await this.logout().then((res) => {
      if (res) {
        // 检查是否登出 测试
        cloud.auth().getCurrentUser().then((user)=>{
          if(user){
            console.log("Logout after."+user.getUid());
          }else{
            console.log("Logout after...");
          }
        })
        // 重置user(相当于清除)
        AppStorage.Set<AgUser>('user', new AgUser());
        // AppStorage.Set<AgUser>('user',null) // 这了不能仅仅设置为null
        router.pushUrl({
          url:"pages/Index"
        })
      }
    })
  }
// 登出
public async logout(): Promise<boolean> {
return new Promise<boolean>((resolve, reject) => {
// 认证登出
cloud.auth().signOut().then(() => {
resolve(true);
}).catch((error) => {
console.log("error", error);
reject(error);
});
});
}首页完整代码
import router from '@ohos.router'
import cloud from '@hw-agconnect/cloud';
import { AgUser } from '../services/Auth';
import { Log } from '../common/Log';

const TAG = "[AGCAuth]";

@Entry
@Component
struct Index {
  @State message: string = 'Hello World'

  // 是否可以登出
  @State canLogOut: boolean = true;

  // 状态共享 用户登陆后的认证信息保存在这里
  @StorageLink('user')
  user:AgUser = null

  // 如果名字太长,截取前部分字符串
  minNameOrUUID(nameOrId:String):String{
    if(nameOrId.length<6){
      return nameOrId
    }else{
      return nameOrId.substring(0,4)+'..'
    }
  }

  // 登出
  public async logout(): Promise<boolean> {
    return new Promise<boolean>((resolve, reject) => {
      // 认证登出
      cloud.auth().signOut().then(() => {
        resolve(true);
      }).catch((error) => {
        Log.error(TAG, "error", error);
        reject(error);
      });
    });
  }

  // 点击登出
  async onLogoutButtonClicked() {
    this.canLogOut = false
    await this.logout().then((res) => {
      if (res) {
        // 检查是否登出 测试
        cloud.auth().getCurrentUser().then((user)=>{
            if(user){
              Log.info(TAG, "Logout after."+user.getUid());
            }else{
              Log.info(TAG, "Logout after...");
            }
        })
        // 重置user
        AppStorage.Set<AgUser>('user', new AgUser());
        // AppStorage.Set<AgUser>('user',null) // 无法设置为null
        this.canLogOut = true
        router.pushUrl({
          url:"pages/Index"
        })
      }
    })
  }

  build() {
    Column() {
      Row(){
        Text('首页')
          .onClick(()=>{
            // 测试
            router.pushUrl({
              url:"pages/auth/ThreePage"
            })
          })
        Text('  |  ')
        Text('MySpring.cc')
        Text('  |  ')

        // 登陆后显示用户名字或者uuid
        if(this.user){
          if(this.user.getDisplayName()){
            Text('  '+this.minNameOrUUID(this.user.getDisplayName())+'  ')
          }else if(this.user.getUid()){
            Text('  '+this.minNameOrUUID(this.user.getUid())+'  ')
          }else{ // 如果没有登陆用户,显示'登陆'
            Text('  登陆  ')
              .onClick(()=>{
                router.pushUrl({
                  url:"pages/auth/LoginByEmail"
                })
              })
          }
        }else{
          Text('  登陆  ')
            .onClick(()=>{
              router.pushUrl({
                url:"pages/auth/LoginByEmail"
              })
            })
        }

        if(this.user){
          if(this.user.getUid()){
            Text('  登出  ')
              .enabled(this.canLogOut)
              .onClick(()=>{
                this.onLogoutButtonClicked()
              })
          }
        }
      }.padding(10)
      .width('100%')
      .justifyContent(FlexAlign.Center)

    }
    .height('100%')
  }
}


 11万+
11万+


 被折叠的 条评论
为什么被折叠?
被折叠的 条评论
为什么被折叠?
 到【灌水乐园】发言


