


概述
Ultralytics提供了一系列的解决方案,利用YOLO11解决现实世界的问题,包括物体计数、模糊处理、热力图、安防系统、速度估计、物体追踪等多个方面的应用。
TrackZone 用来监控指定区域内的目标,而不是整个画面,它基于 Ultralytics YOLO11,专门在视频和实时摄像机传输的区域内集成了目标检测和跟踪功能。YOLO11 TrackZone 的先进算法和深度学习技术使其成为实时应用的完美选择,可在人群监控和安防等应用中提供精确、高效的目标跟踪。
Ultralytics提供了CLI和Python例子,展示如何使用区域追踪解决方案。
CLI:
# Run a trackzone example
yolo solutions trackzone show=True

# Pass a source video
yolo solutions trackzone show=True source="path/to/video.mp4"

# Pass region coordinates
yolo solutions trackzone show=True region="[(150, 150), (1130, 150), (1130, 570), (150, 570)]"
Python代码:
import cv2

from ultralytics import solutions

cap = cv2.VideoCapture("path/to/video.mp4")
assert cap.isOpened(), "Error reading video file"
w, h, fps = (int(cap.get(x)) for x in (cv2.CAP_PROP_FRAME_WIDTH, cv2.CAP_PROP_FRAME_HEIGHT, cv2.CAP_PROP_FPS))

# Define region points
region_points = [(150, 150), (1130, 150), (1130, 570), (150, 570)]

# Video writer
video_writer = cv2.VideoWriter("object_counting_output.avi", cv2.VideoWriter_fourcc(*"mp4v"), fps, (w, h))

# Init trackzone (object tracking in zones, not complete frame)
trackzone = solutions.TrackZone(
    show=True,  # display the output
    region=region_points,  # pass region points
    model="yolo11n.pt",
)

# Process video
while cap.isOpened():
    success, im0 = cap.read()
    if not success:
        print("Video frame is empty or video processing has been successfully completed.")
        break
    results = trackzone(im0)
    video_writer.write(results.plot_im)

cap.release()
video_writer.release()
cv2.destroyAllWindows()
TrackZone参数
基本参数
| 参数 | 类型 | 默认值 | 说明 |
|---|---|---|---|
model | str | None | Ultralytics YOLO 模型文件的路径。 |
region | list | [(20, 400), (1260, 400)] | 定义追踪区域。 |
track参数
| 参数 | 类型 | 默认值 | 说明 |
|---|---|---|---|
tracker | str | 'botsort.yaml' | 指定要使用的跟踪算法, bytetrack.yaml 或 botsort.yaml. |
conf | float | 0.3 | 设置检测的置信度阈值;数值越低,跟踪的物体越多,但可能会出现误报。 |
iou | float | 0.5 | 设置交叉重叠 (IoU) 阈值,用于过滤重叠检测。 |
classes | list | None | 按类别索引筛选结果。例如 classes=[0, 2, 3] 只跟踪指定的类别(class在COCO数据集定义)。 |
verbose | bool | True | 控制跟踪结果的显示,提供被跟踪物体的可视化输出。 |
device | str | None | 指定用于推理的设备(例如: cpu, cuda:0 或 0). 允许用户选择CPU 、特定GPU 或其他计算设备运行模型。 |
可视化参数:
| 参数 | 类型 | 默认值 | 说明 |
|---|---|---|---|
show | bool | False | 如果 True在一个窗口中显示注释的图像或视频。有助于在开发或测试过程中提供即时视觉反馈。 |
line_width | None or int | None | 指定边界框的线宽。如果 None则根据图像大小自动调整线宽,使图像更加清晰。 |
show_conf | bool | True | 在标签旁显示每次检测的置信度得分。让人了解模型对每次检测的确定性。 |
show_labels | bool | True | 在可视输出中显示每次检测的标签。让用户立即了解检测到的物体。 |
GUI演示程序代码
本演示程序定义了两个类:VideoProcessorApp类和VideoProcessor类。
VideoProcessorApp类
class VideoProcessorApp:
    def __init__(self, root):
        self.root = root
        self.root.title("视频处理应用演示")
        self.root.geometry("900x700")

        # 设置中文字体
        self.font = ('SimHei', 10)

        # 视频和图像处理相关变量
        self.cap = None
        self.video_path = ""
        self.original_frame = None
        self.current_frame = None
        self.processed_frames = []
        self.is_playing = False
        self.is_processing = False
        self.is_paused = False
        self.draw_mode = None  # 'line' 或 'rectangle'
        self.start_point = None
        self.end_point = None
        self.drawing = False
        self.output_file = ""
        self.rect_angle = 0  # 矩形旋转角度
        self.rect_center = None  # 矩形中心点
        self.rect_points = None  # 矩形四个顶点
        self.pause_event = threading.Event()
        self.video_processor = None
        self._dt_buffer = []
        self._last_time = time.perf_counter()
        self.count = 0
        self.count_read  = 0
        self.frame_reading_done = False  # 标志位
        self.object_count = {}

        # 多线程相关
        self.frame_queue = Queue(maxsize=60)
        self.result_queue = Queue(maxsize=60)
        self.writer_queue = Queue(maxsize=60)
        self.stop_threads = False

        # 创建界面组件
        self.create_menu()
        self.create_widgets()

        # 绑定鼠标事件
        self.canvas.bind("<Button-1>", self.on_mouse_click)
        self.canvas.bind("<B1-Motion>", self.on_mouse_drag)
        self.canvas.bind("<ButtonRelease-1>", self.on_mouse_release)
        self.canvas.bind("<Button-3>", self.on_right_click)
        self.canvas.bind("<B3-Motion>", self.on_right_drag)
        self.canvas.bind("<ButtonRelease-3>", self.on_right_release)
VideoProcessor类
VideoProcessor类专门处理视频帧,其中调用了solutions.TrackZone类:
class VideoProcessor:
    """视频处理器类,负责处理视频帧"""
    def __init__(self, coords=None):
        self.coords = coords  # 存储矩形的坐标
        pts = coords['points']

        # 初始化
        self.trackzone = solutions.TrackZone(
            show=False,
            model="yolo11n.pt",
            region=pts,
            classes=[0,2,5,7],
            verbose = False
        )

        dummy_frame = np.zeros((640, 640, 3), dtype=np.uint8)
        for _ in range(3):  # 连续运行几次来触发所有内部初始化
            self.trackzone(dummy_frame)

    def process_frame(self, frame):
        """处理单帧图像"""
        if not self.coords:
            return frame

        results = self.trackzone(frame)

        return results.plot_im
多线程处理
由于读写视频文件和进行神经网络推理均需要较大的计算量,本演示代码使用多线程分别处理读、写、显示和推理,以最大化利用计算机资源,提高处理速度。
def start_processing(self):
        if self.cap is None or not self.cap.isOpened():
            messagebox.showerror("错误", "请先打开视频文件")
            return

        if self.video_processor is None:
            messagebox.showerror("错误", "请先绘制线条或矩形")
            return

        if self.is_processing:
            messagebox.showinfo("提示", "正在处理视频,请等待")
            return

        self.processed_frames.clear()
        self.is_processing = True
        self.is_playing = True
        self.is_paused = False
        self.stop_threads = False
        self.process_button.config(state=tk.DISABLED)
        self.pause_button.config(state=tk.NORMAL)
        self.stop_button.config(state=tk.NORMAL)
        self.pause_event.set()

        # 启动多线程
        self.reader_thread = threading.Thread(target=self.frame_reader)
        self.processor_thread = threading.Thread(target=self.frame_processor)
        self.display_thread = threading.Thread(target=self.result_display)
        self.writer_thread = threading.Thread(target=self.video_writer_worker)

        # 设置线程优先级
        try:
            self.reader_thread.priority = 'ABOVE_NORMAL'
            self.processor_thread.priority = 'HIGH'
            self.writer_thread.priority = 'ABOVE_NORMAL'
        except:
            pass

        # 启动线程
        self.reader_thread.start()
        self.processor_thread.start()
        self.display_thread.start()
        self.writer_thread.start()
其中的推理线程代码如下:
 def frame_processor(self):
        """专用模型推理线程"""
        while not self.stop_threads:
            if self.is_paused:
                time.sleep(0.01)
                continue
            try:
                start_time = time.time()

                frame = self.frame_queue.get(timeout=0.1)

                processed, self.object_count = self.video_processor.process_frame(frame)
                self.count += 1

                if not self.stop_threads:
                    self.result_queue.put(processed, timeout=0.1)
            except Empty:
                continue
            except Exception as e:
                print(f"Frame processor error: {str(e)}")
                break
GUI演示
从文件菜单打开一个mp4文件,显示第一帧图像,在图像上画框。
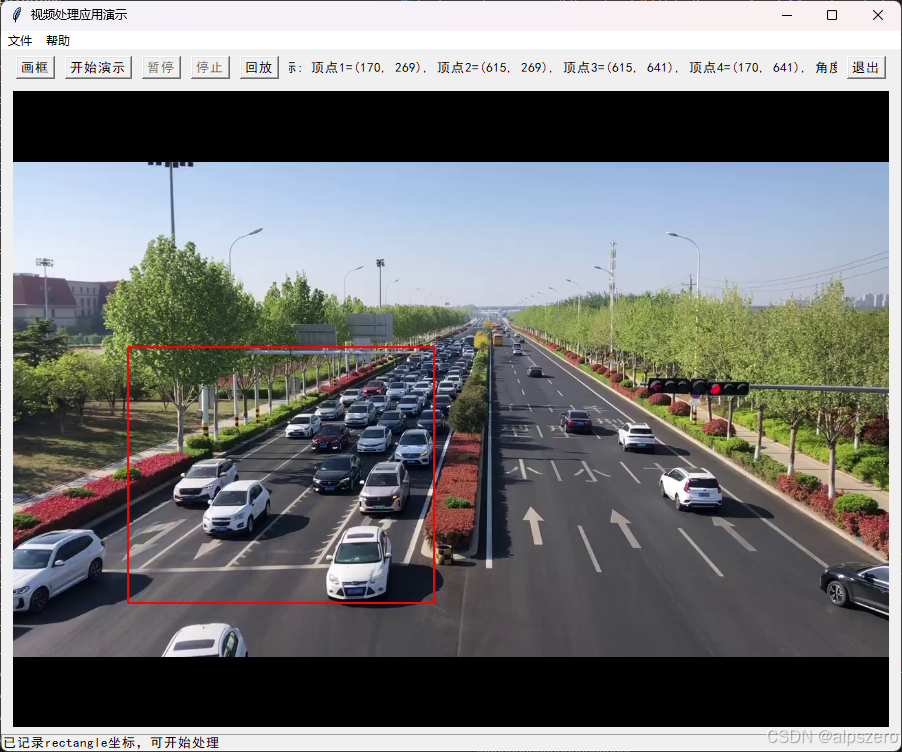
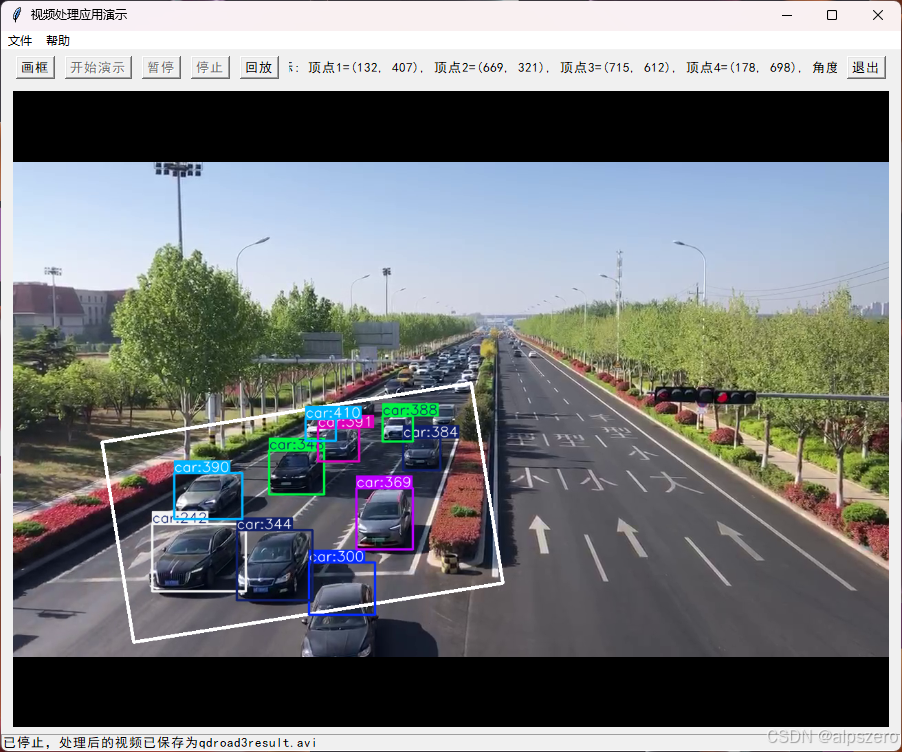
矩形绘制完成后,可以使用鼠标右键拖动改变角度。
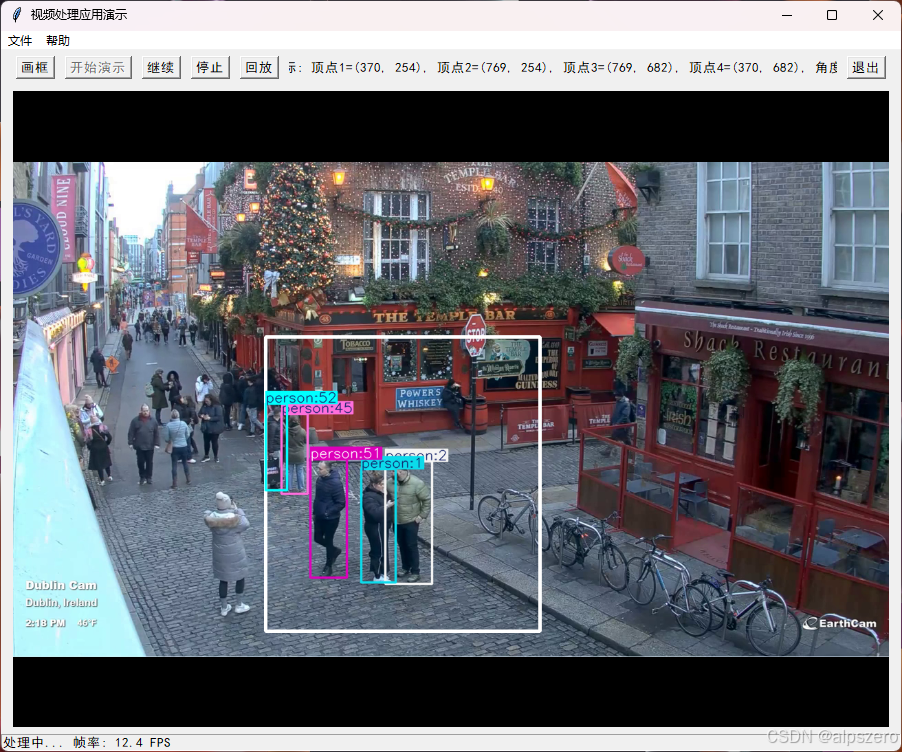
然后“开始演示”,图像中每个被追踪的目标都标注了类名称和ID号。
应用
- **有针对性的分析:**跟踪特定区域内的目标可以获得更有针对性的效果,从而对入口点或禁区等感兴趣的区域进行精确监控和分析。
- **提高效率:**TrackZone 通过将跟踪范围缩小到定义的区域,减少了计算开销,确保了更快的处理速度和更好性能。
- **增强安全性:**分区跟踪通过监控关键区域来改进监控,有助于及早发现异常活动或安全漏洞。
- **可扩展的解决方案:**专注于特定区域的能力使 TrackZone 能够适应从零售空间到工业环境的各种场景,确保无缝集成和可扩展性。


 被折叠的 条评论
为什么被折叠?
被折叠的 条评论
为什么被折叠?
 到【灌水乐园】发言


